Hey all!
I have had such a fun, fun week. My family has been in town and we have been running all day seeing the North Dakota Practically Canada sights.
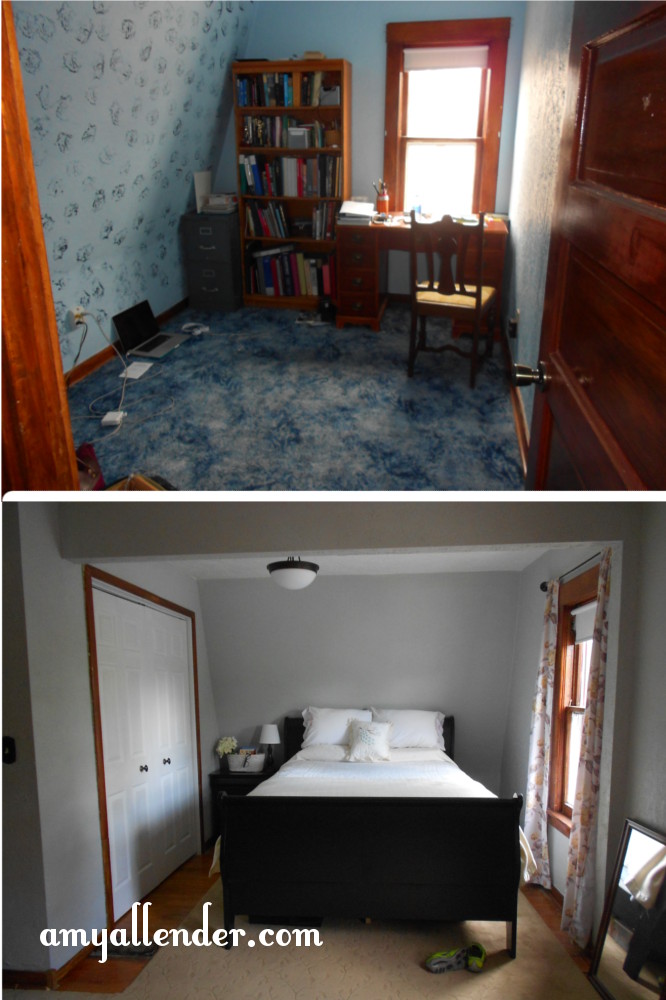
Highlights from our visit will be up here on the blog soon…but in the meantime, I want to give you a full project breakdown! Today we’ll be looking at my whole bedroom redo from start to finish. I’m going to give you all the details {even cost} on what I did to achieve this B&A.
Okay, so I don’t know how projects work at your house…but around here I like to keep costs down. Even if that means it takes a little more time to finish and I do a good chunk of work myself.
As most projects do, this one started with a little vision. When Derek and I first moved in we knew we wanted to do a little surgery on our bedroom. After spending nearly a year working on the first floor of our home {the part that is most visible}, we knew that this spring would be a perfect time to rehab the master bedroom. So even when we found out he’d be gone…I decided to move forward with our project timeline.
Step One of turning vision to reality was finding a contractor. I didn’t know anyone in town who was in that line of work, so I started asking around town. I really wanted someone who could recommend a trustworthy contractor. Especially since I’m a poor little girl home without her husband. The last thing I wanted was a lame contractor who’d come in and take advantage of my situation.
I started by asking around at all my regular spots: my group classes at the gym, my favorite coffee shop, the paint-your-own-pottery place I frequent, church…I got several names and compared their price and services. I invited them over to look at the bedroom/office and what I wanted done. In the end, Darrell–the contractor I chose–was my choice.
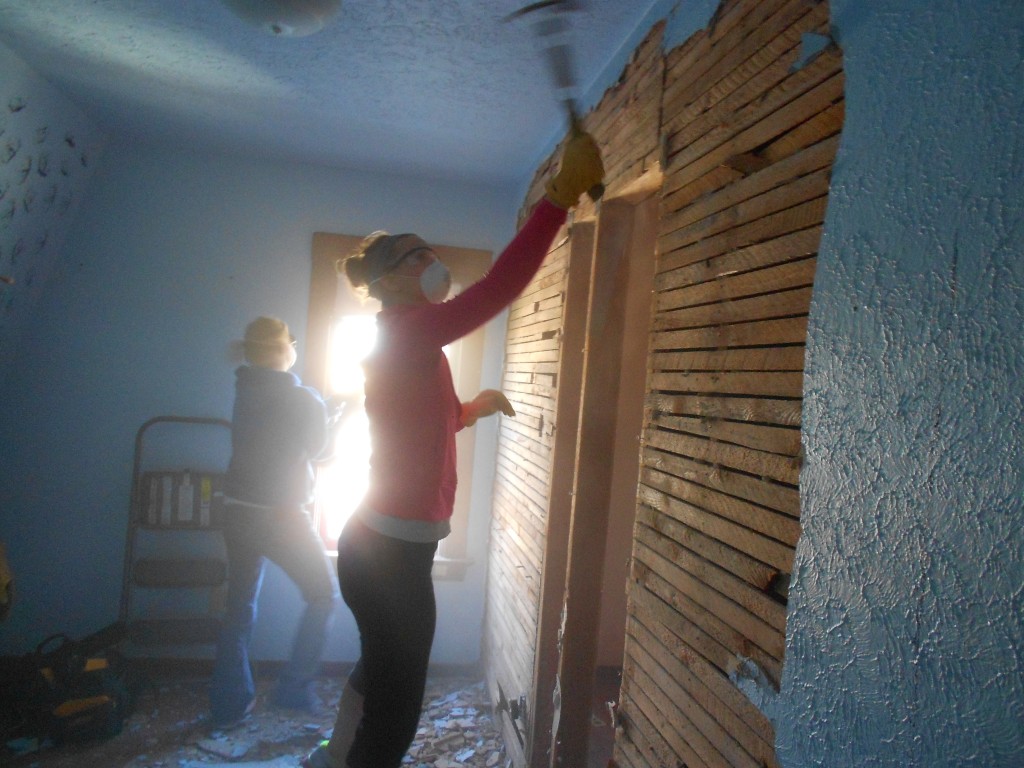
The biggest factor in my decision was that Darrell told me I could invite my friends over to be the “crew” on demolition day. I’d only be paying him…instead of a crew of people for the job. He let me do all the tasks I knew how to do, he charged by the hour, and had a dump trailer for the mess we made.
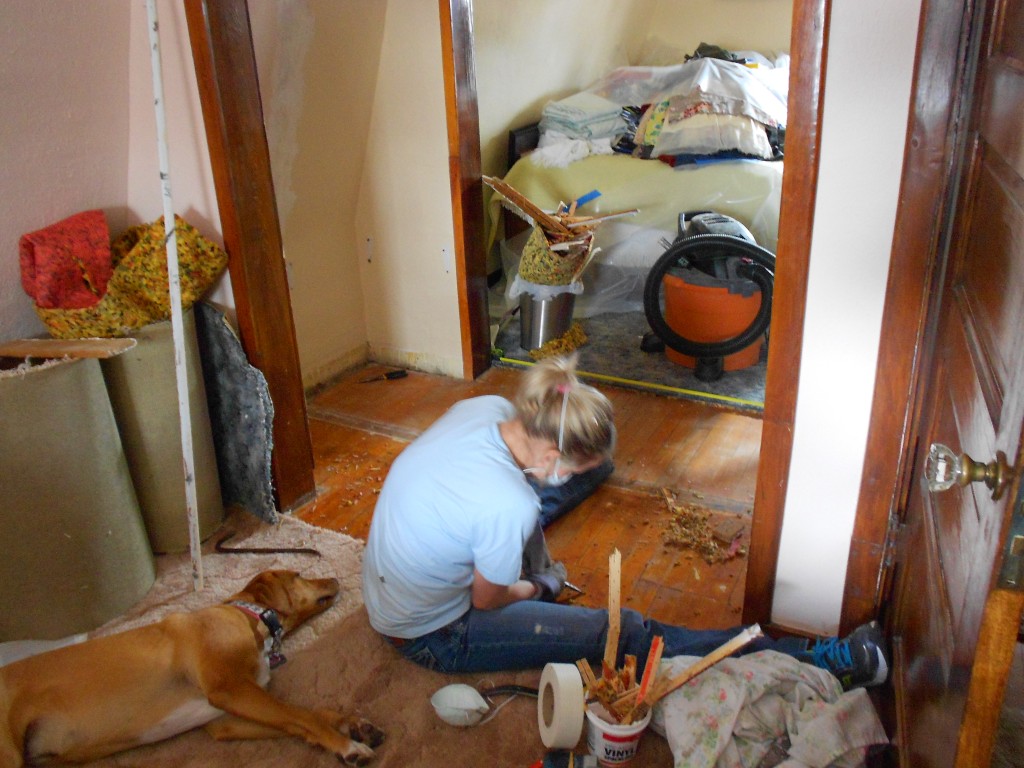
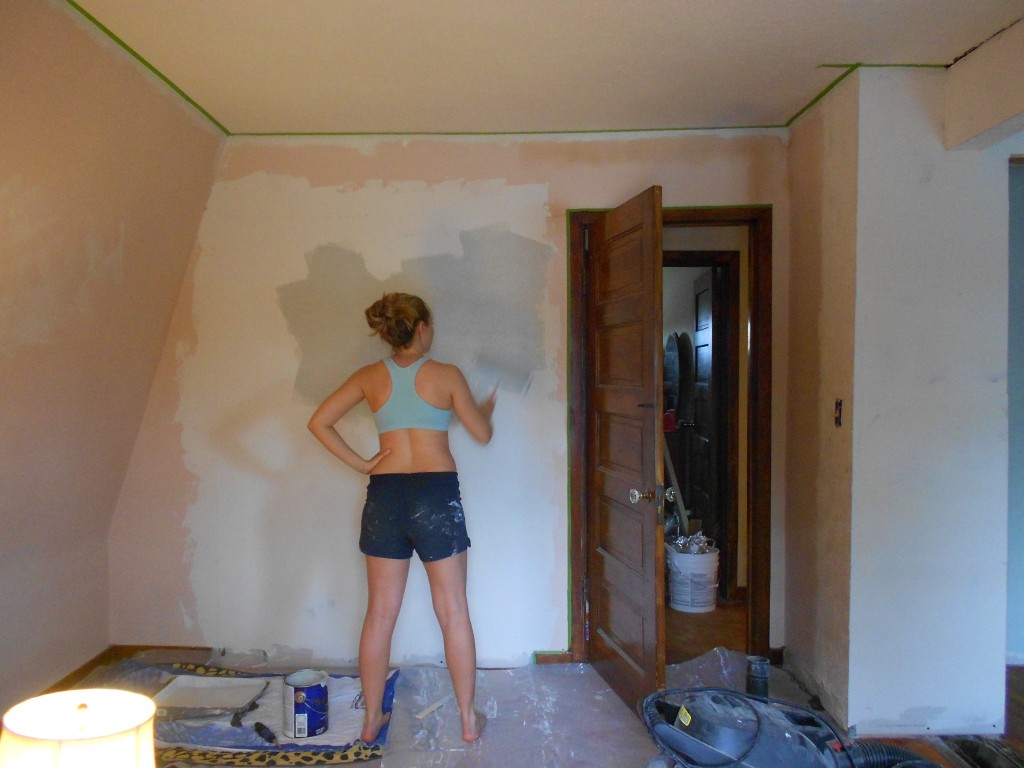
Step Two was getting my rooms prepped for the project. Look here to see the before photos. And here to see the preparation. Before we could tear down the wall, I needed to get all the furniture out, carpet ripped up and baseboards removed from places that would be knocked down. I saved all the baseboards and trim and reused it in the finished room. Lucky for me I had an awesome friend who volunteered to come over and help with this part.
Cost so far: $0
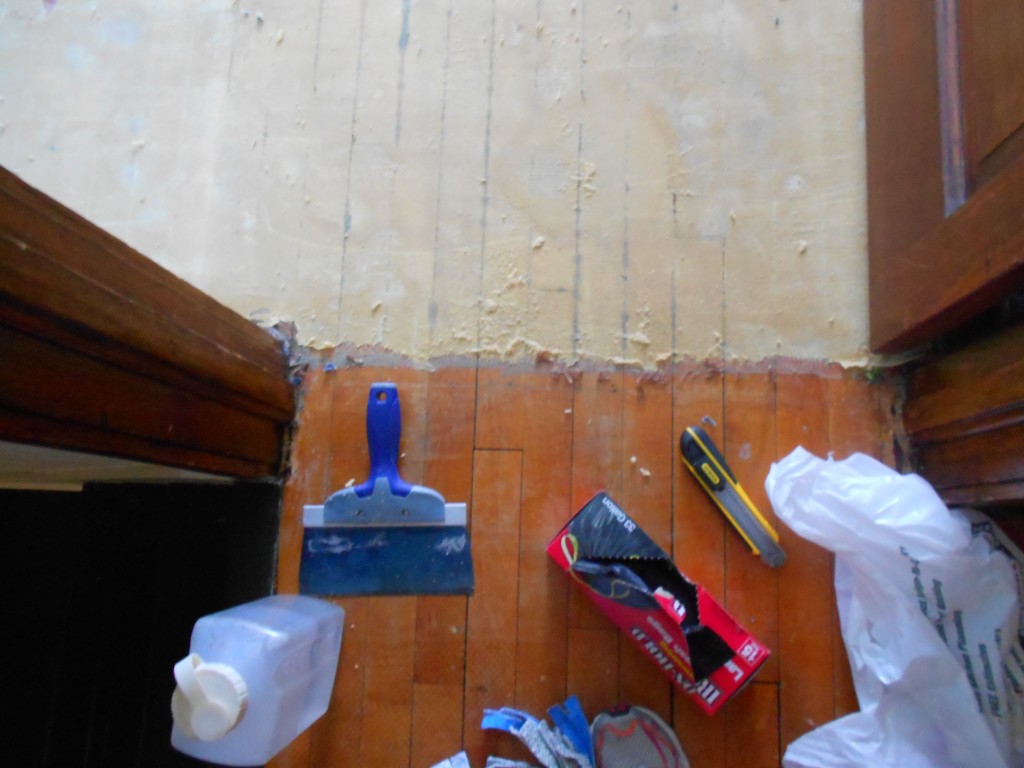
Things were going really well until I ran into that nasty carpet glue situation.
This took a lot of time and energy, but it really wasn’t too pricey. I think the remover and bags cost me about $35 total. I described the process in this post. After the glue was all gone I cleaned the sticky gluey floor and the floor in the other room {which was just dirty from old carpet padding} with hardwood floor cleaner. {Cost $8}
Step three was tearing out the wall.
Step Four was more difficult: Rebuilding. After the rubble had been cleared I was left with a dirty floor and lot of work to do. Here is how Contractor Darrell and I split the work.
Darrell: Supervise demolition, build header where the wall came down, all wall framing {closing off old doors and framing in a new closet}, hanging drywall, hanging closet doors.
Amy: finding good friends to help, mudding drywall, mortaring over exposed chimney, patching hardwood floor, cleaning, painting, hanging new light fixtures, finishing hardwood, replacing trim, hanging closet system.
You can look back at the process here.
Because I did so much of the work myself {or my friends did…} what I paid Darrell ended up being a fairly low sum. The materials for his part of the job cost about $400. {Wood, nails, screws, drywall, dump fee.} His fee for the hours he spent on my project totaled about $400.
Total to this point: $843
For my part of finishing the walls I spent another $40 on dry wall compound and wall texture. I patched the floor with leftover pieces of hardwood that were left in our garage by the previous owners. Paint for the walls and ceiling was purchased on sale at Sherwin Williams for 40% off. A steal at $55 for both gallons. I finished the floor with two coats of polyurethane. It took less than a gallon, which I paid $35 for at Menard’s.
Total for the technical part of the project: $973
Now the fun stuff.
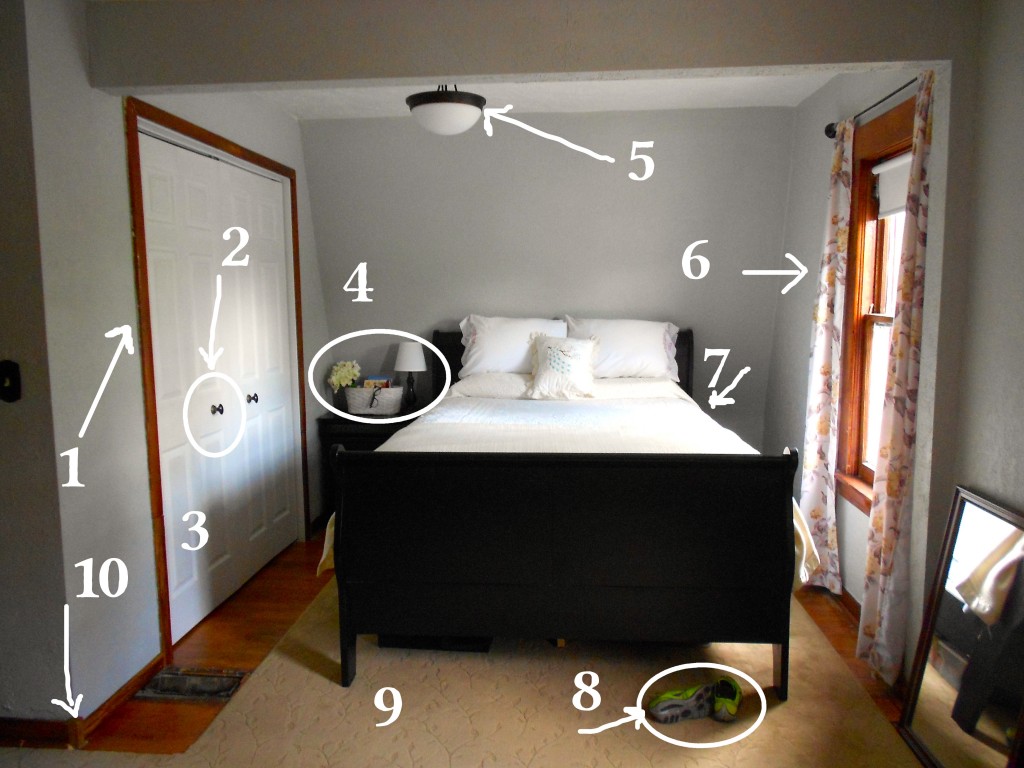
1. The trim around the closet was salvaged from when I prepped the rooms for demo.
2. These closet doors came with cheap {ugly} plastic handles. I bought these for 50% off at Hobby Lobby…$2 each.
3. The closet doors are from Menard’s. $30 per door.
4. All the furniture in the room was our existing furniture. On the night stand is a lamp that used to reside in the guest room, originally from K-Mart back in my college days. I stashed my nigh-time necessities {bible, journal, lotion, contacts, retainer, glasses} in a basket I nabbed from a garage sale for $1.
5. I bought two matching light fixtures from Menard’s for $32 each to bring a little unity to the room.
6. When I was in Florida recently, I went to TJ Maxx Home Goods. I got these lovely yellow and gray hydrangea Laura Ashley curtains for $25/2 panels.
7. My bedding is a vintage chenille bedspread I bought in college from my favorite hometown antique store in Indiana. My pillows are also covered in vintage embroidered “His & Hers” shams we got as a wedding gift. My grandmother made the accent pillow before she passed away.
8. Amazing running shoes that somehow slipped into my photo. They are Brooks. You should buy some.
9. I got the rug from a local carpet shop. It was a remnant of carpet that they cut and bound into a custom area rug for my room. This was the room’s single biggest investment at $571. Yikes!! The craziest part is that was the best deal I could find.
10. I don’t have a miter saw, so i used corner blocks {$2 each} alongside my salvaged baseboards.
On the other end of the room…
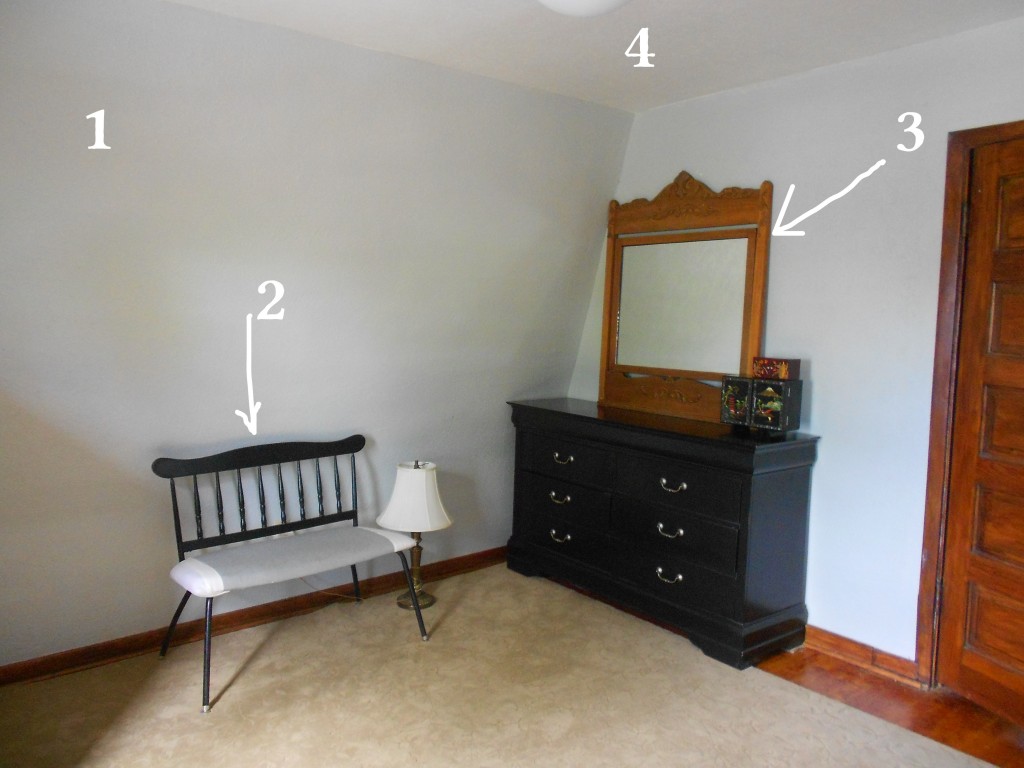
1. Wall color: Aloof Gray from Sherwin Williams
2. A bench that was living in our basement finds a home in the bedroom. I recovered the seat with scraps from my upholstery project.
3. This awesome mirror was cast off from a friend’s house. She passed it on to me instead of putting it on the curb.
4. Ceiling paint from Sherwin Williams in Dover White.
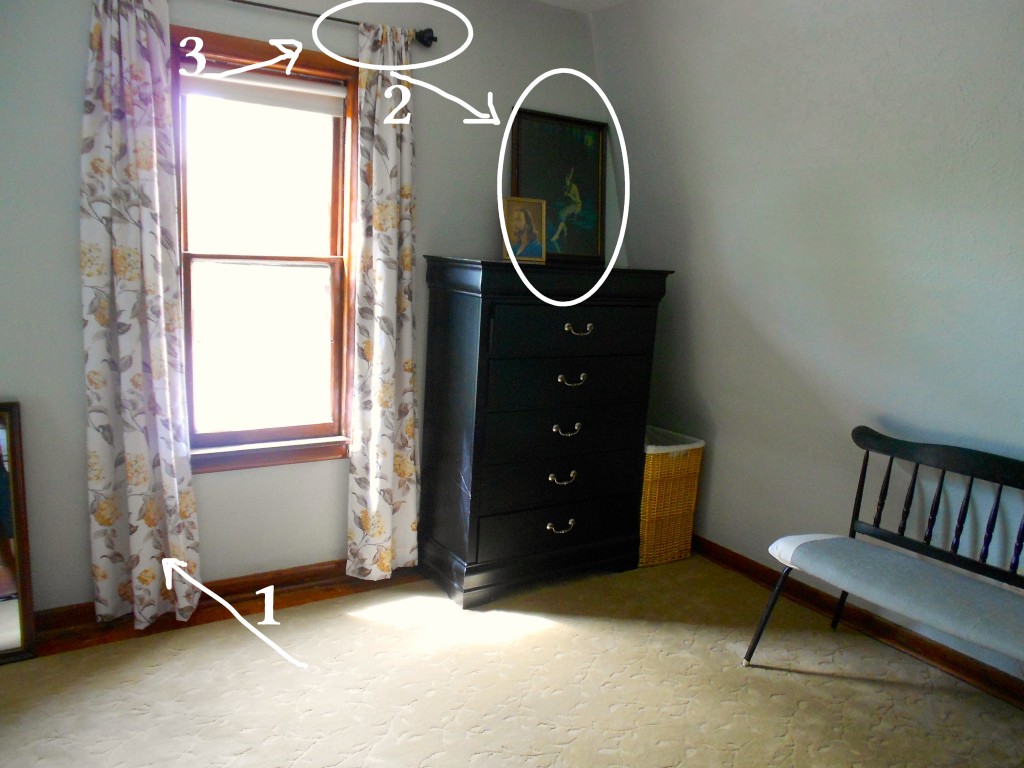
1. A better look at those TJ Maxx curtains.
2. Some of my most favorite vintage art finds a home on the dresser. The print of Jesus has been in my room as long as I remember. The print of the Indian Girl was my great grandmother’s.
3. I bought these curtain rods for $2 each at K-Mart. I added finials that we had in the garage to the ends with hot glue.
So there you have it. That’s the whole project. From start to finish. Yes, it was expensive…but it was also worth it. We didn’t just decide to jump into this over night. It’s something we budgeted every month for. If it’s doable for me, it’s doable for you. If you have a big project, my best advice for you is to find a trusty contractor to help you. Without Darrell I could never have done this.
My second best advice is this: Don’t be scared. If you mess up a room you hated, what’s the worst that will happen? You’ll need to hire a little more help? Be brave. Do some research, get a book from the library, enlist your friends. You can do it.
And always stay within your financial means. A fancy new bedroom isn’t so fun if you are in the poorhouse once it’s finished.
Oh, yeah…and have fun. Hobby DIY is fun. It’s an adventure. Just like life.
Amy
PS…I’ll do the math once more for you. Total, start to finish…$1663. Not too shabby.

