by Amy | Aug 20, 2013 | Blog, The Art of Projects, the house
I can count the number of manicures I’ve ever received on one hand. Heck, I could count them on a Fraggle’s hand. The number is two. Once during a bridal luncheon before a wedding. Once before my own wedding. You know I’m cheap. I don’t fancy spending money on something that I wreck in a day or two. My hands get a lot of use {could you tell…?} and I’m not very delicate with them. All in all, it’s not worth it.
But professional manicures, and a certain friend {Angel McCurdy…awesome name, right?} have taught me all the proper steps to take for a lasting mani.
And I’ve come to the conclusion that refinishing cabinets, or probably any furniture for that matter, is a lot like a manicure.
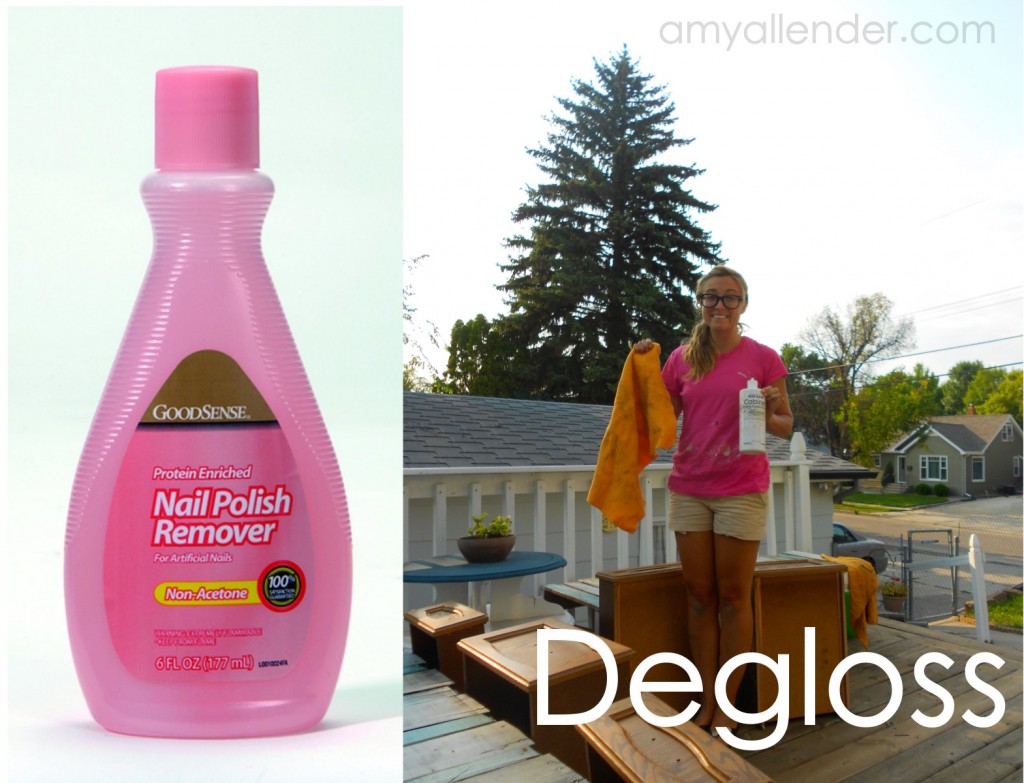
First, you get out the nail polish remover and buffer. Get all the old paint off and prep the surface for your new paint. That would be the deglossing process I showed you last week.
Next put on your base coat. That’s the bond coat I told you about.

Follow that with any embellishments you want to add. Glaze.
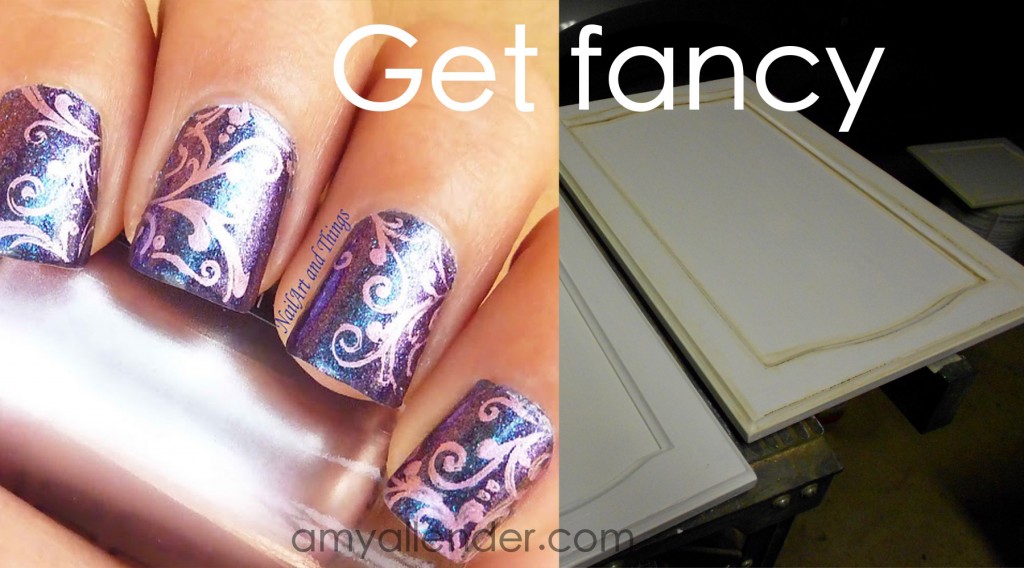
Top it all off with a top coat to keep it all in place for a good, long time.
That was the final step in my cabinet project before rehanging them. And since it is a clear, slightly glossy finish…there really isn’t anything to show. It took a day to put the top coat on all the frames, rails and doors. Only one coat {awesome}, but the doors needed to dry 3 hours before I could flip them. Then the whole shebang had to set up for 6 hours {overnight} before hanging them.

So that was Friday.
Saturday afternoon I started the hanging process, which is relatively difficult solo, but I got it done. More than anything it’s awkward to do alone. I started by reattaching the hinges. Then I held the door up to its former home, lined up the screw holes and braced it in place with my body. The lower cabinets were easy. The uppers were a different story. For this stage in the game I’d recommend bribing a friend/parent/family member/spouse with a treat of some kind to help you out.
I should also tell you that my mom and dad were due to come in Sunday afternoon. However, I’m impatient. And when I saw how lovely things looked I just couldn’t wait. I needed those cabinets up. Needed.
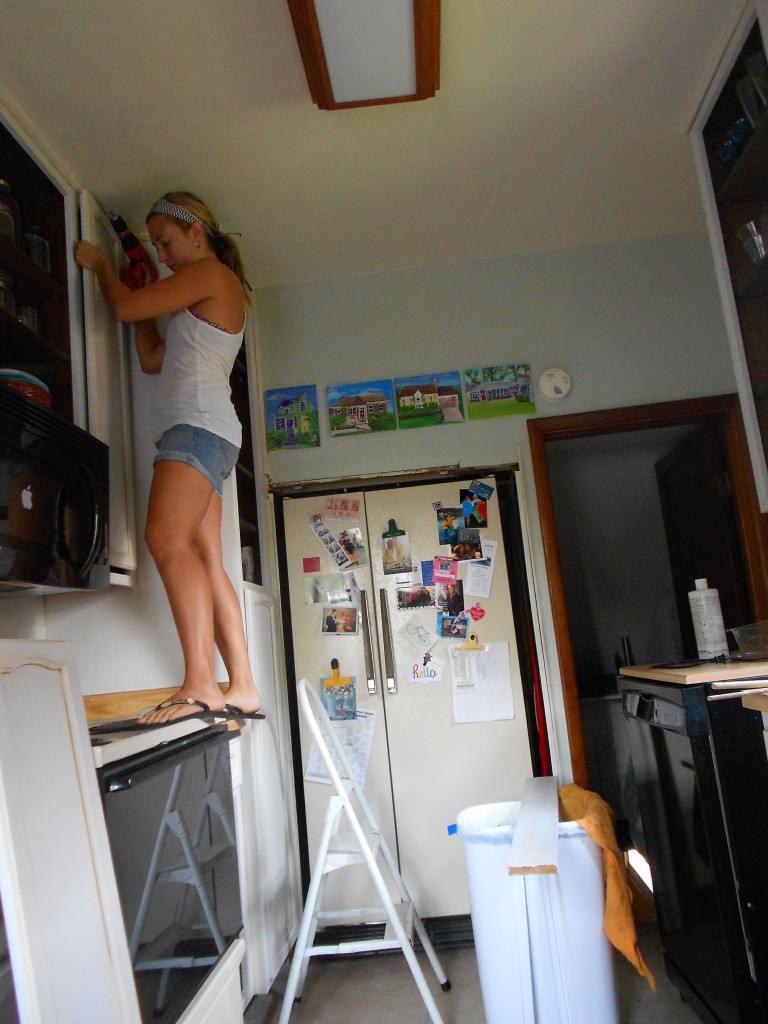
So I hung them. And. It. Looks. Awesome.
Oh, and the best part? If you follow the Facebook page, you saw this when I was at Menard’s shopping. {And if you don’t follow, you should. Then your should tell all your friends to follow too. Because it makes me feel good when I see a new ‘Like’ notification.}
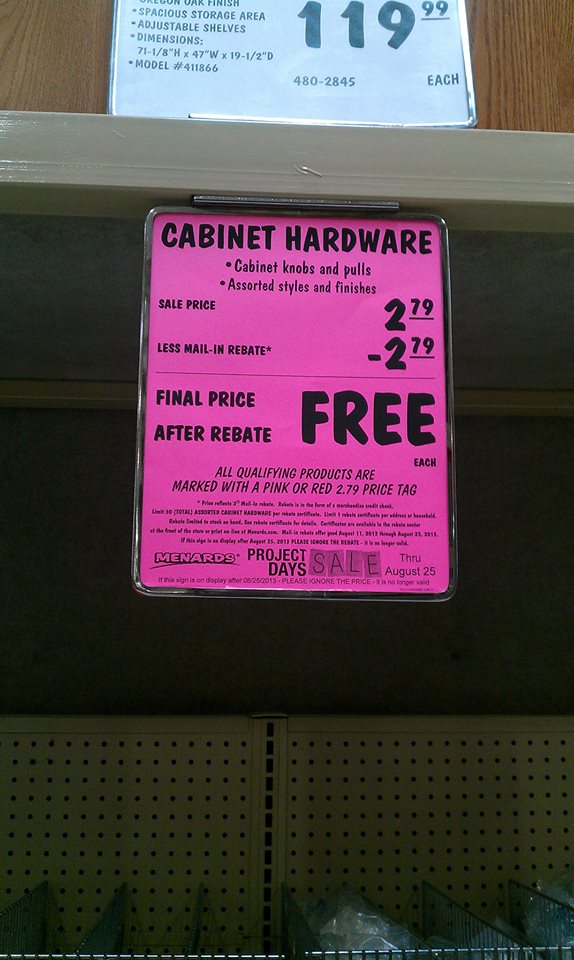
If not, I’ll tell you about it right now. I got all my knobs with a mail in rebate…a rebate for 100% of the price!! After I get my rebate, I will have only paid tax on them. Pretty great, right?
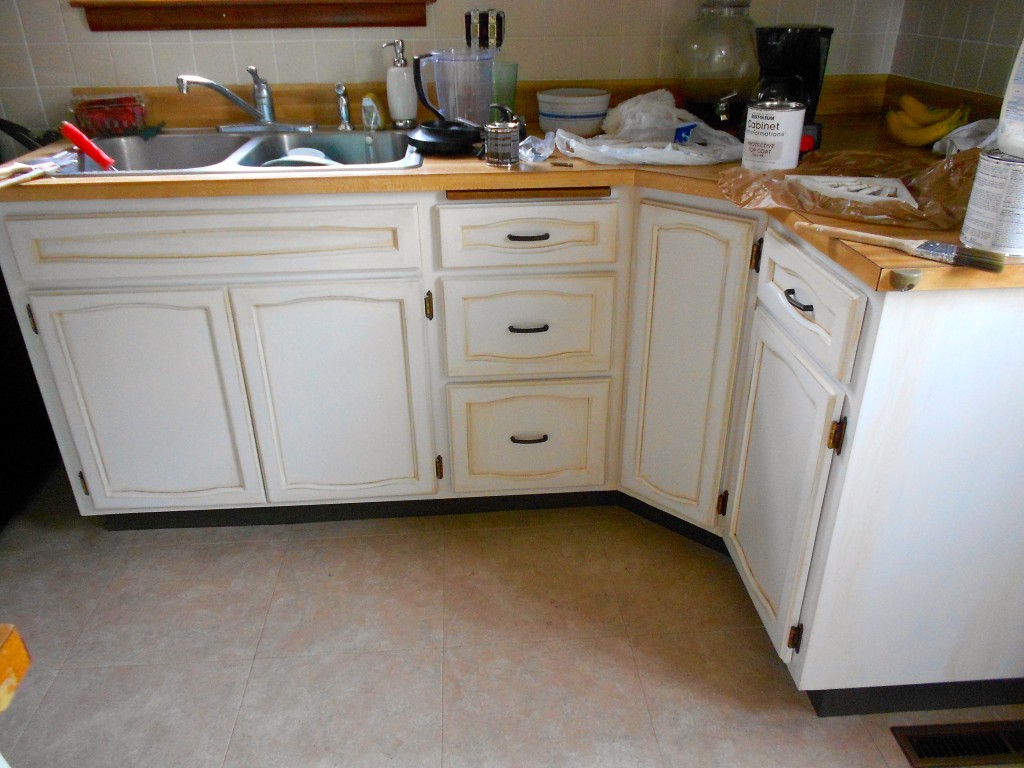
So, yeah…take a look. Tomorrow I’ll have a full B&A along with my final review of the Rustoleum Cabinet Transformation kit. {Hint: It’s going to be a rave review.}
Amy
by Amy | Aug 17, 2013 | Blog, The Art of Projects, the house
Yesterday was about getting things d-o-n-e. Yeah, it was so hard core and awesome I felt the need to spell it out. Because that really proves how much I got done.
Okay, enough explaining why I write the things I do. If I did that I’d never leave the laptop…
Anyway at the end of the day on Wednesday I had the cabinet frames painted {with three coats} and the back of the cabinet doors painted {with three coats.} I ran out of tape…so things were only partially taped off when I headed to bed.
I was a little slow to start, a few late nights of DIY-ing can leave a girl sleepy in the a.m. But yesterday I had a ton to get done in order to stay on my timeline. So, I started by flipping all those cabinet doors over in the garage. Something I forgot to mention is that I filled the hardware holes in with wood filler after deglossing. They were all big, bulky and attached to the center of the doors. I thought it made them look outdated. So i filled the holes in. After flipping them all, I gave the wood putty a quick sand and wiped each door off with a rag to get rid of the dust.
Then I started painting. Paint your cabinet doors fronts like this.
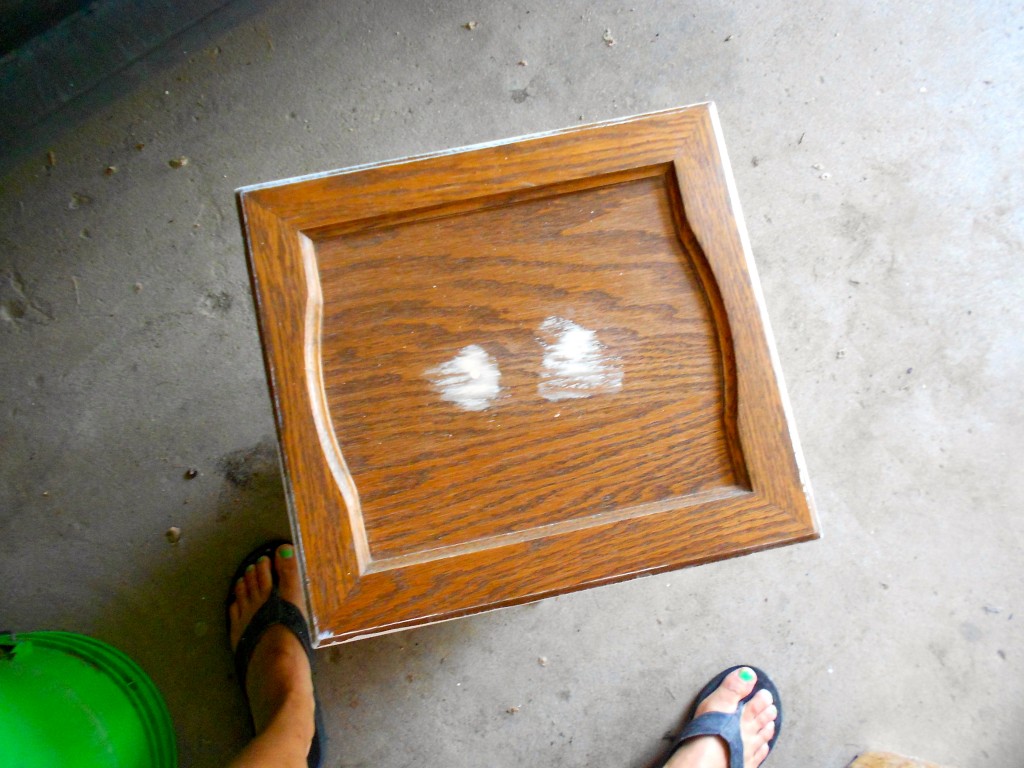
After doing lots of doors, I found this technique to be the most efficient. Start with the outside. Remember to paint with the grain of the wood. Get your brush down into all the beveled edges. All the painting for this project was done with a 2″ synthetic brush.
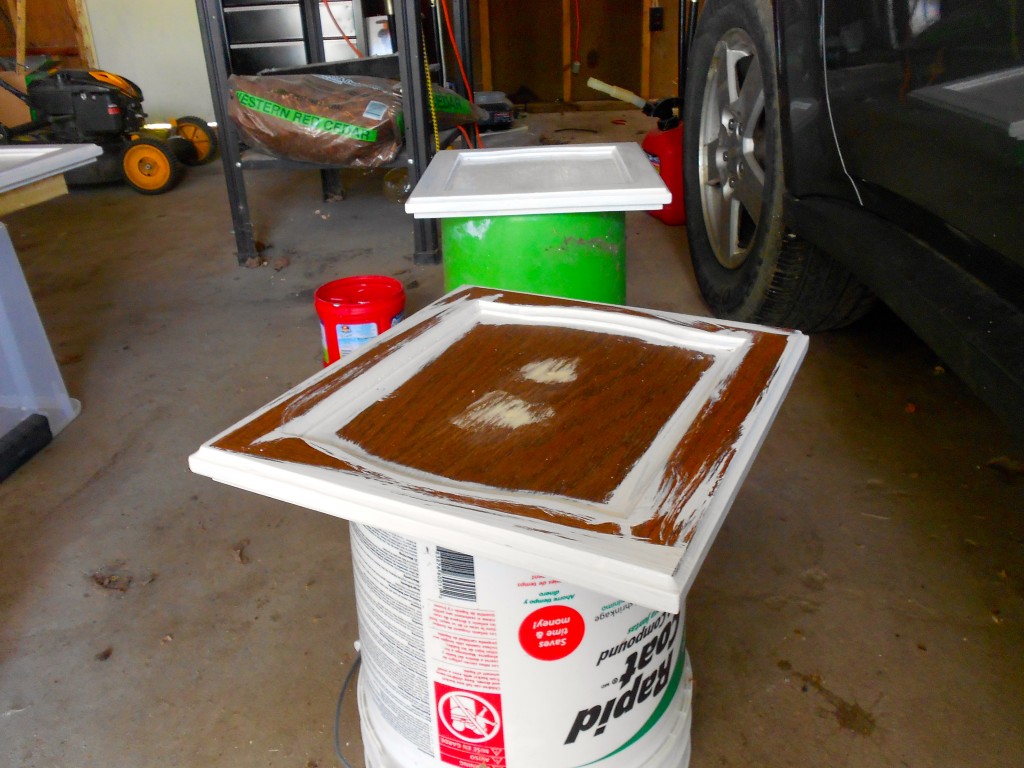
After you’ve gone around the edges paint the vertical and horizontal flat edges. Then fill in the middle.
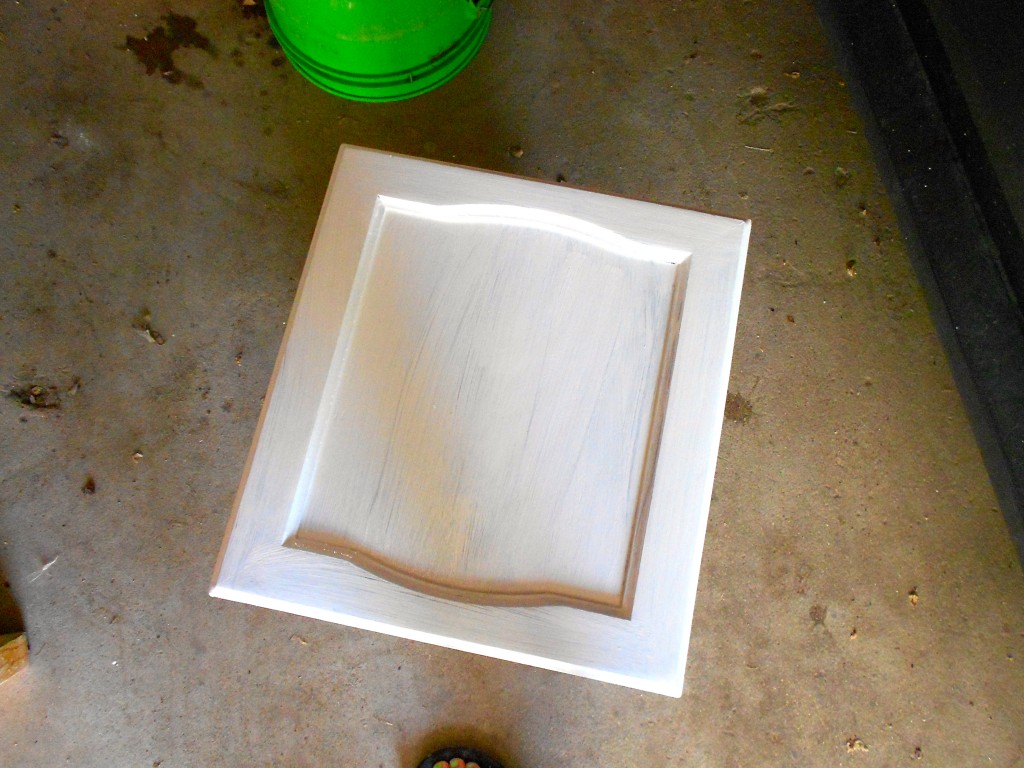
I did a coat on the all the door fronts then went inside to tape off the ceiling trim. I ate lunch, then it was time for coat number two on the doors.
After that I painted the ceiling trim and started in on glazing the cabinet frames. Let me just say that I love this kit more and more every day. It comes with everything you need to make your project look totally high end. I almost opted out of using the glaze that came with the kit. In the DVD and on the box they show a very heavy technique for using the glaze provided. They paint it all {ALL} over the cabinet then wipe it off. That leaves the nice, crisp, white cabinets looking…tan.
Lemme ask you this: Why would I paint my cabinets white just to smear them with a brown stain and leave them looking tan? Why not just paint them tan?
There’s no answer to this.
So instead I made my own technique. I wanted a nice light glaze that really just highlighted the texture of the doors and the lines of the frames. I only applied it to the edges of the frames. Like this:
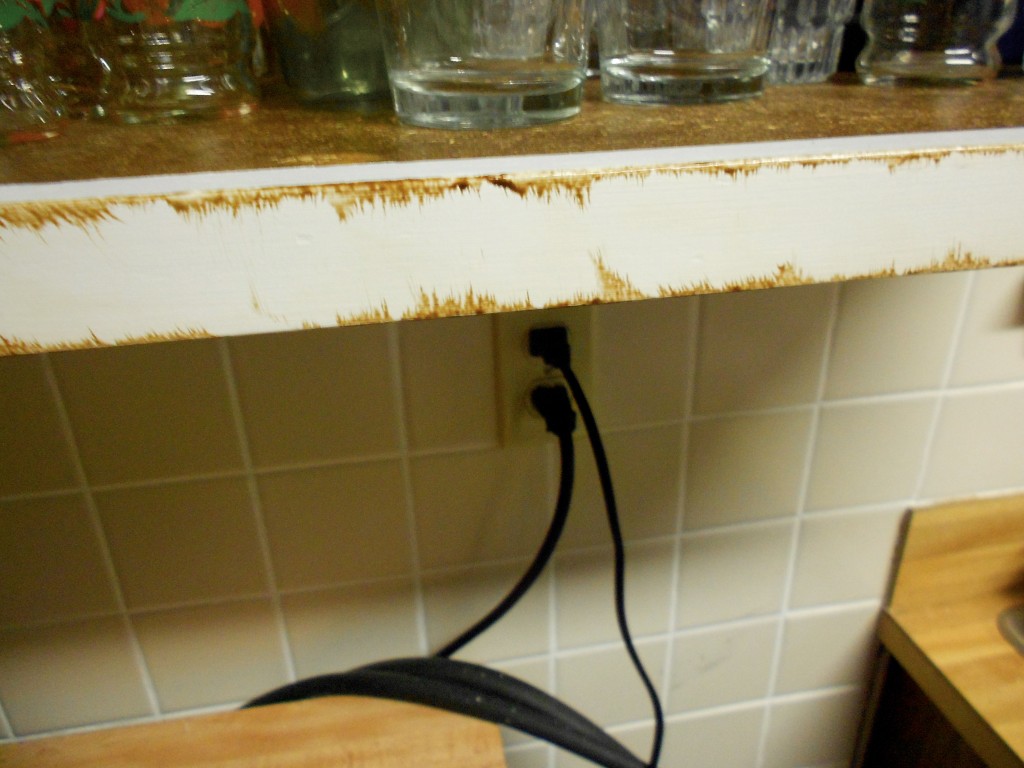
Use your same {but clean and dry} brush to paint a line on the edges of the frame. Then feather it inward. Next, use one of the rags that comes with the kit to gently wipe some of it away. You get lots of these rags. And you’ll use a lot. From here of out we’ll be calling them boogie rags. {That’s a nod to my dad, it sounds like something he’d say. If you know him, I know you’ll agree.}
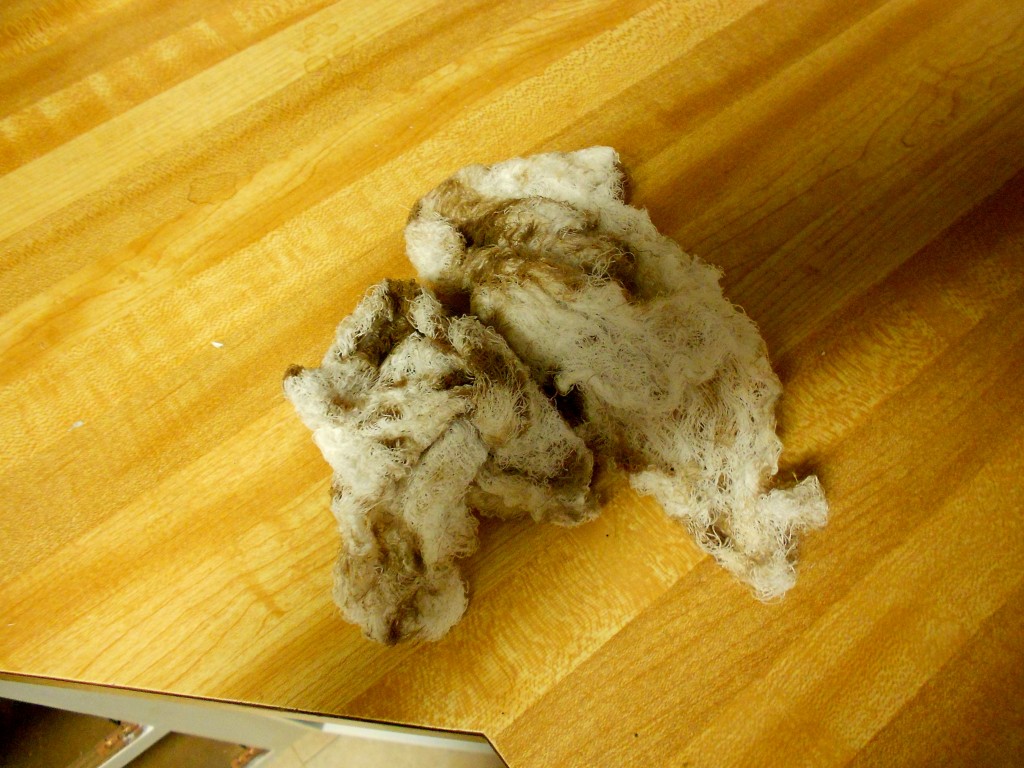
This is what a boogie rag looks like. Throw it away when it starts to get too stained. You’ll just be wiping more stain on your beautiful cabinets…instead of wiping it off.
After getting about halfway through the cabinet frames it was time for coat #3 on the doors. So I did that. Then it was time for Insanity at the gym. I love those workouts. It worked perfectly because I had just enough time to finish glazing the frames before the dry time was up on the doors. When the 2.5 hours had passed since I finished painting that third coat, I went out to the garage to glaze the doors.
This took a little doing, but eventually I got the look I wanted. here is my most efficient method of getting it done.
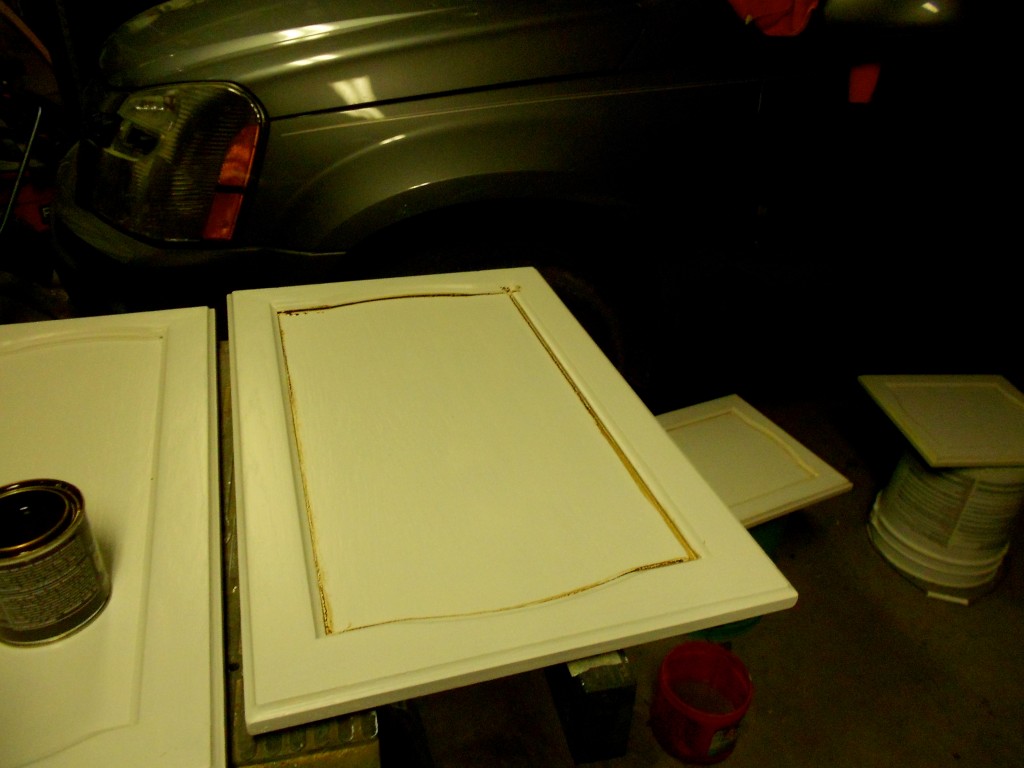
Step one: Put your brush into the crack around the inside bevel of the door. Then wipe away the glaze. Wedge your finger into the edge to really press the glaze into the crack to highlight that line.
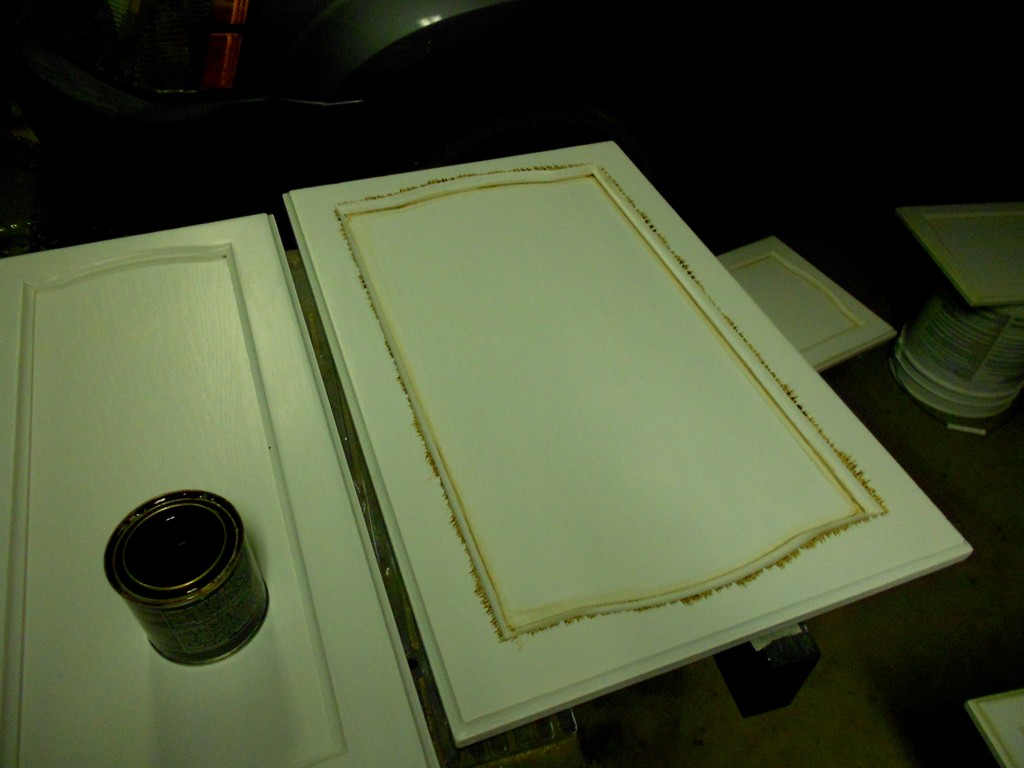
Step two: Just like on the frames, feather your glaze. Drag it out toward the outer edge of the door. Again wipe it away. This time, pinch the corner, leaving a bit of glaze on the edge.
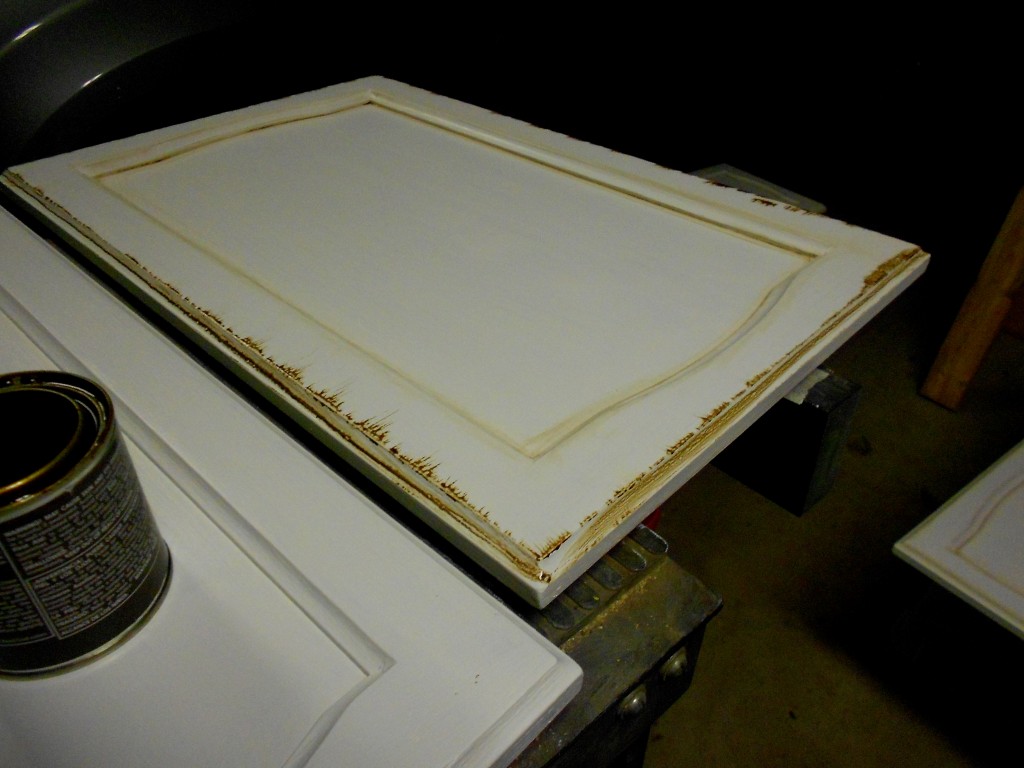
Step 3: Brush a line into the outer edge of the door and feather that inward. You guessed it…next, you wipe it away.
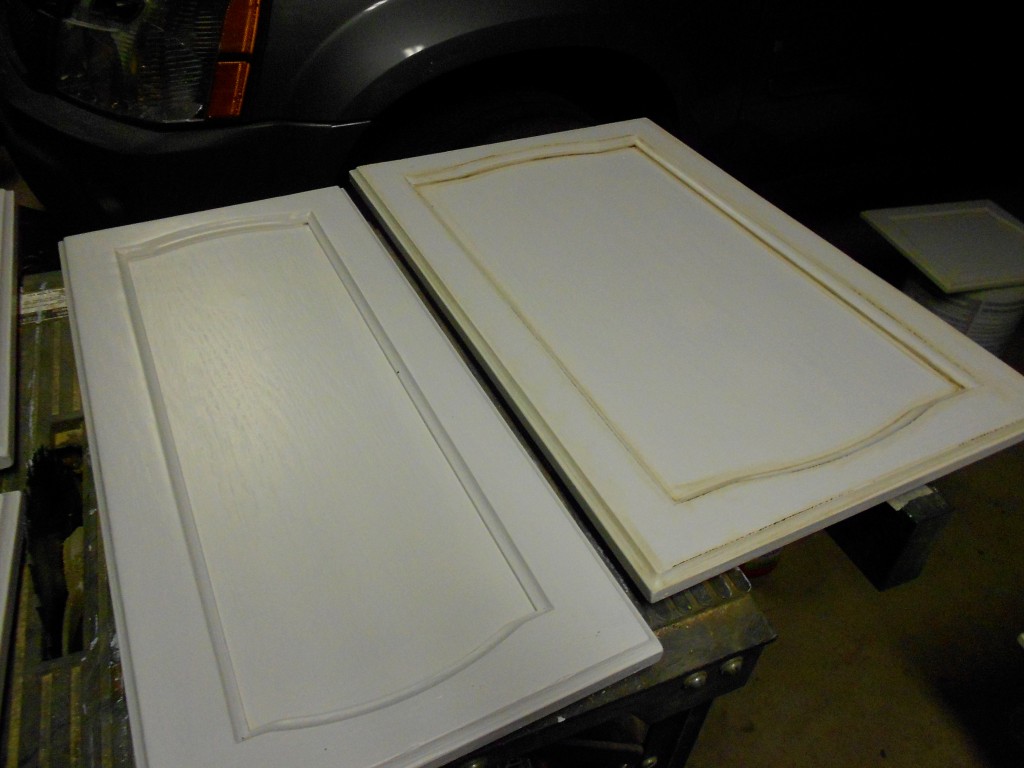
Lastly to add just a tiny bit more emphasis on the edges of the decorative trim I lightly touched the side of my brush {not the tip, this side of the bristles} to the hard edges and dragged it a few inches. Above here you can see the difference between a glazed and unglazed door. Doesn’t it look high end?
The answer to that question is: Yes. But it does come at a price:
Gross hands.
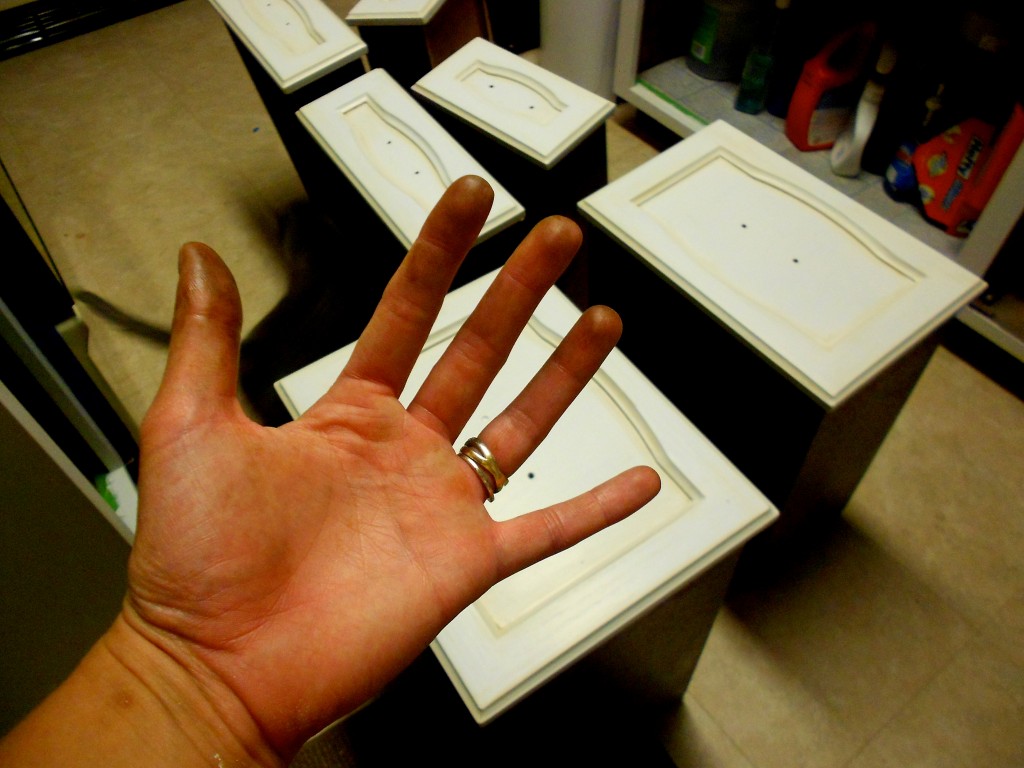
Today I’m happy to report that all the painting is done. But I’ll tell you about that tomorrow. Right now I need a {literal} midnight snack.
Thanks for popping in!
Amy
by Amy | Aug 16, 2013 | Blog, The Art of Projects, the house
Wanna see day one of my Kitchen Transformation? Click here. Want the before photos? Click here.
So…yesterday turned into a bit of a DIY marathon. By now you know me well enough to know that I have a problem quitting, stopping, quieting my mind. When I’m in the middle of a project, especially a project I have set a deadline for this problem with stopping grows even more intense.
Last night I painted until about 11pm. Then I was simply too pooped to take another brush stroke. And if I was too tired for another brush stroke, you can bet your bottom dollar that I was too tired to shower. That’s one of the few perks of having your husband away. With no one else in the house I don’t feel peer pressured to keep my cleanliness intact. But for all wider purposes, yes…I usually shower on a regular basis {kind of} and I believe hygiene is an important aspect of life {even if it is a bit of a drag.}
But now I’m getting off track.
Back to the kitchen. I’d offer you something, but things are kind of a wreck in there.
Yesterday I kicked off my day with a few hours of photo work. {Those two sessions I wrote about on my first project day are now done!} Then it was off to the gym at 10am for a bit of personal training. Home for lunch…then work time.
As luck would have it on my most intense day of painting my dear friend Shea was off work and willing to help me paint. I taped off the places I wanted to protect, then we dove in. So we started around noon. Per the DVD instructions, we started with the cabinet frames. Paint with the wood grain. Vertical on the vertical parts…horizontal strokes on the horizontal rails. They call this the bond coat. I don’t know why…but that’s what it is and I think it’s a cute name. Bond Coat….
Shea and I worked until she had to leave at 4:15. By that time we had two good coats on the cabinet frames, drawer fronts and cabinet backs. The cabinets {PS} are all laid out in my garage on all kinds of makeshift tables. Saw horses, a table saw table, buckets, an old planter, even a couple cardboard boxes are supporting my cupboard doors. It’s janky, but it’s the only way I could get them all laid out.
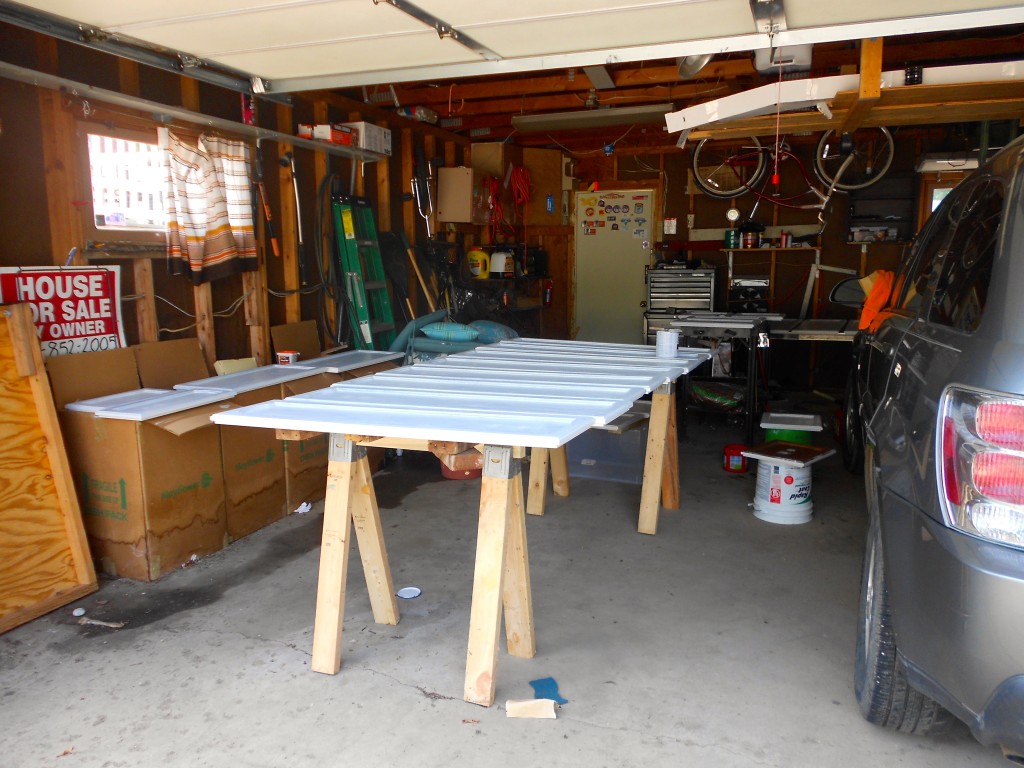
After Shea left I took a little snack break. Upon further inspection, I knew everything would take a third coat. That was a big bummer because the box and DVD said two coats would do the trick. Despite the extra time and work, I want this to look awesome, so I started on a third coat. I hit the cabinet backs once more, then it was time for youth group.
I got home from hanging out with my favorite teens around 9:30…after making a pit stop at Pita Pit for a garden pita. I ate and watched some AGT until about 10. Then I repainted the cabinet frames with a third coat. When I went to bed the kitchen was looking like this.
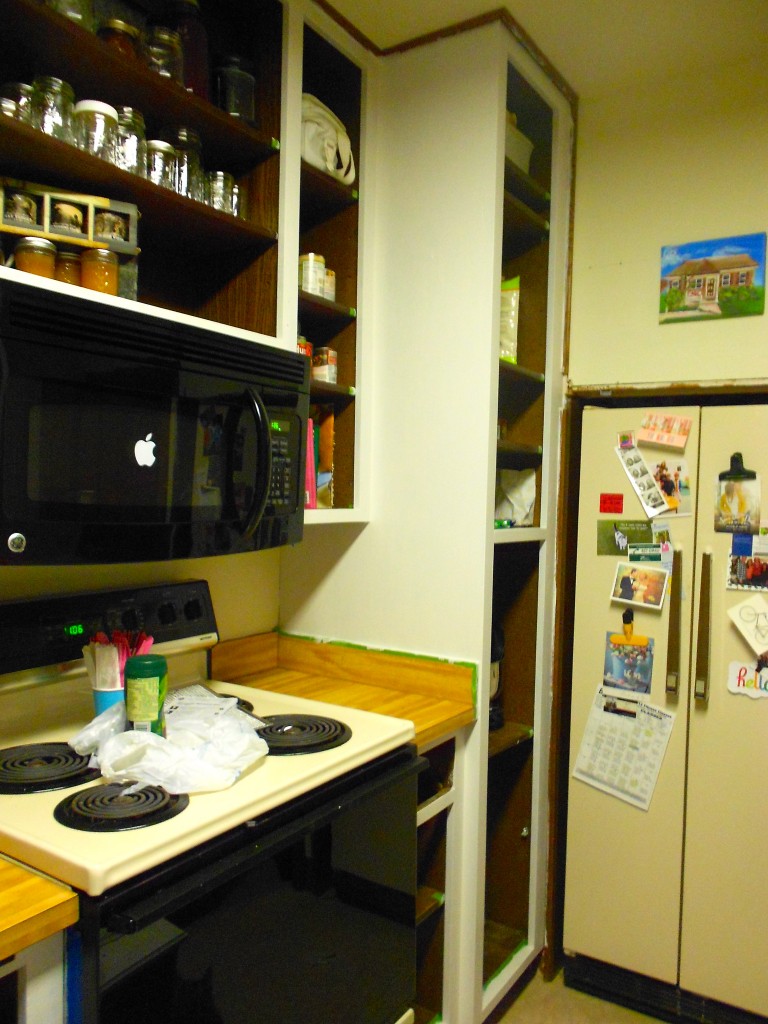
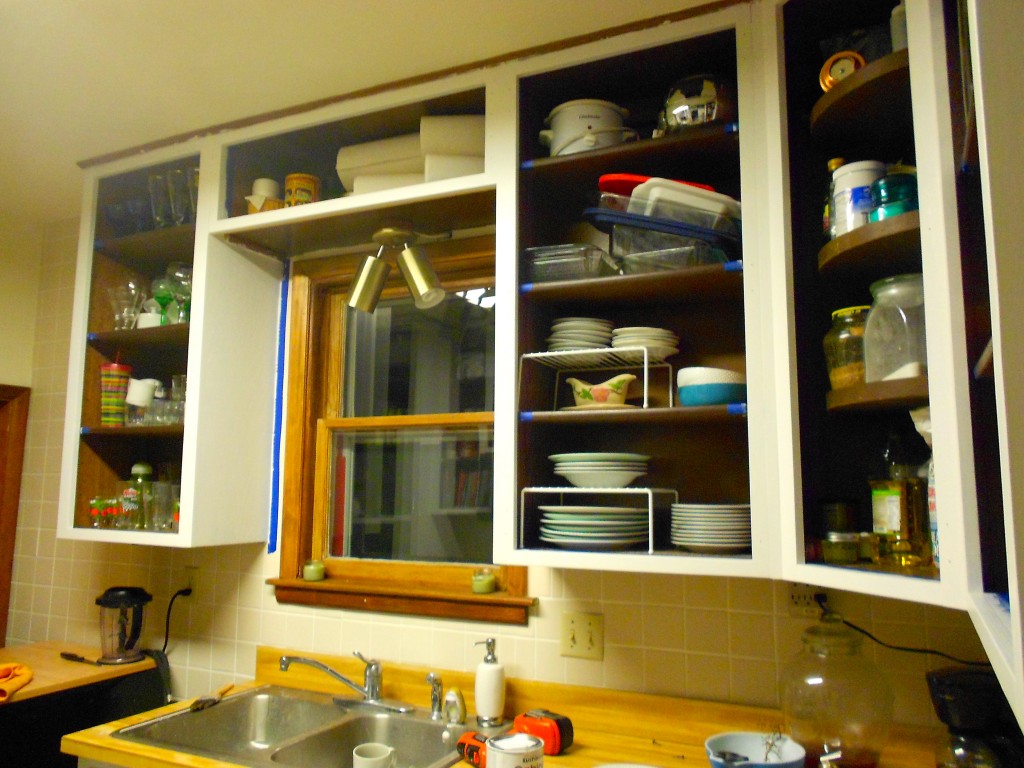
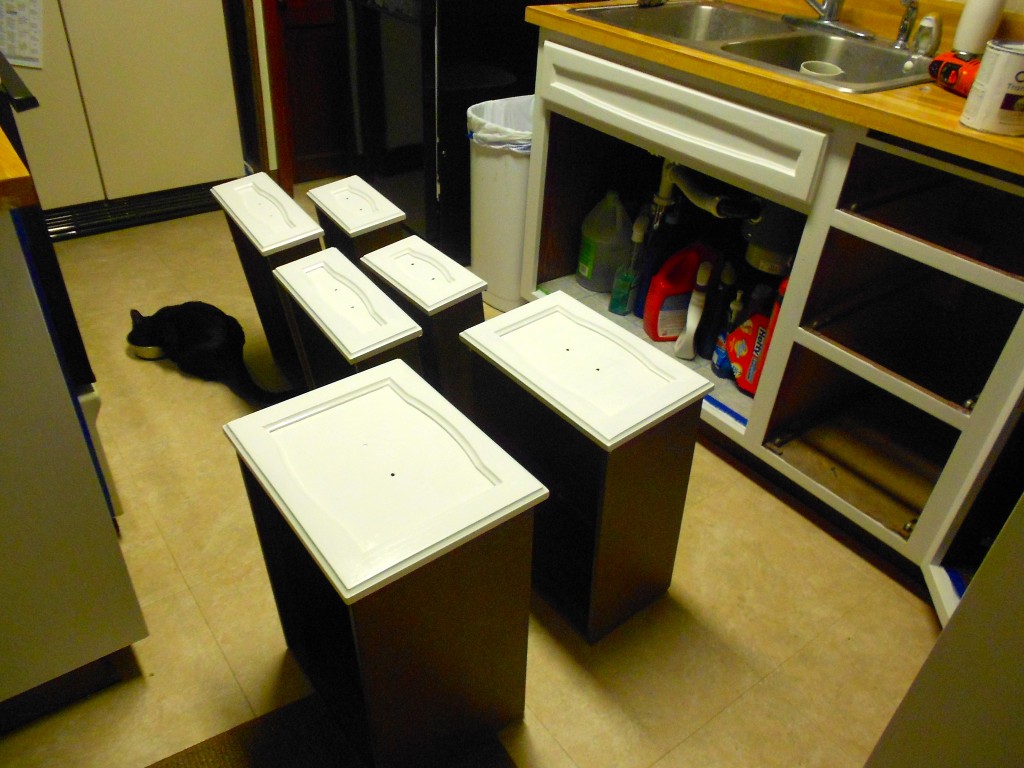
As you can see in the evening I had some extra special help, and he’s eating in the photo above. Yes, that is Panda Kitty’s BFF, Bandit. Well, he’s actually her only cat friend. And they really aren’t that close. He chases her around and she hisses and growls. It’s a unique relationship. I’m getting off topic again.
I’m left with a big dilemma. What color for the walls? And…How fast can I get rid of that over-sink fixture? I’m dealing with those questions tomorrow {or maybe a little tonight…}
I’ll try to take a few more interesting {embarrassing photos of myself} photos tonight to make tomorrow’s update a bit more entertaining.
It’s coming along well, though. You may have caught on earlier when I said I work to the bone when I’m on a deadline. You may be wondering, What deadline? Well friends, my dear mother and father will be here Sunday. So ideally it’ll all be put back together by then. Stay tuned!
Amy
by Amy | Aug 14, 2013 | Blog, The Art of Projects, the house
Usually when I do projects I put off writing a big post about it until the project is all done. Then I show you the whole process. This time, I thought I’d try something different. I get a lot of questions from friends asking how I do it. How I tackle a project all by myself, power through and get it all done in a {sometimes very} short time. So here goes. This week I’ll be updating every day on the progress of the kitchen. So, if you aren’t in to home improvement…hopefully you are into my awkward sense of humor, because this week is dedicated to the kitchen.
Yesterday’s post talked about some of the prep. I got the doors off and moved outside, I bought all the stuff I needed to do the project and moved what I needed out of the cupboards.
Today was even more prep. FYI prep stinks. It’s the worst, most important part of any project. And for this project it took forever. Like all day forever.
I got up at my usual I-don’t-have-to-work-at-the-gym time of 8:30 am. I had some coffee, did some Googling, drank a smoothie and watched the end of last night’s installment of the Harry Potter series. {I’ve been working my way through the entire series in bits and pieces. This morning I finished #6…but I always skip the part when Dumbledore drinks that potion. Too sad.} After that I edited some photo orders….they’re just about done. All that took me to 10 am.
That’s when I started step one of the Rustoleum Cabinet Transformation kit: Deglossing.
The kit comes with a DVD. Which is good for me, because it shows {in theory} what every step should look like. But here is the difference. In the video the girl doing the demo looks like this:
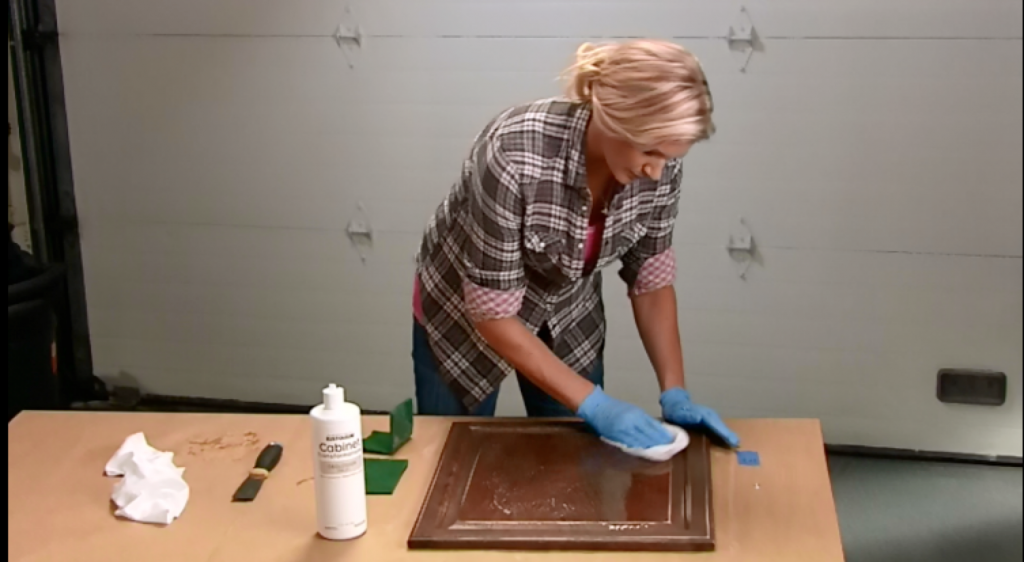
Cute hair, nice outfit. Basically DIY chic. Here’s what deglossing looked like at my house:
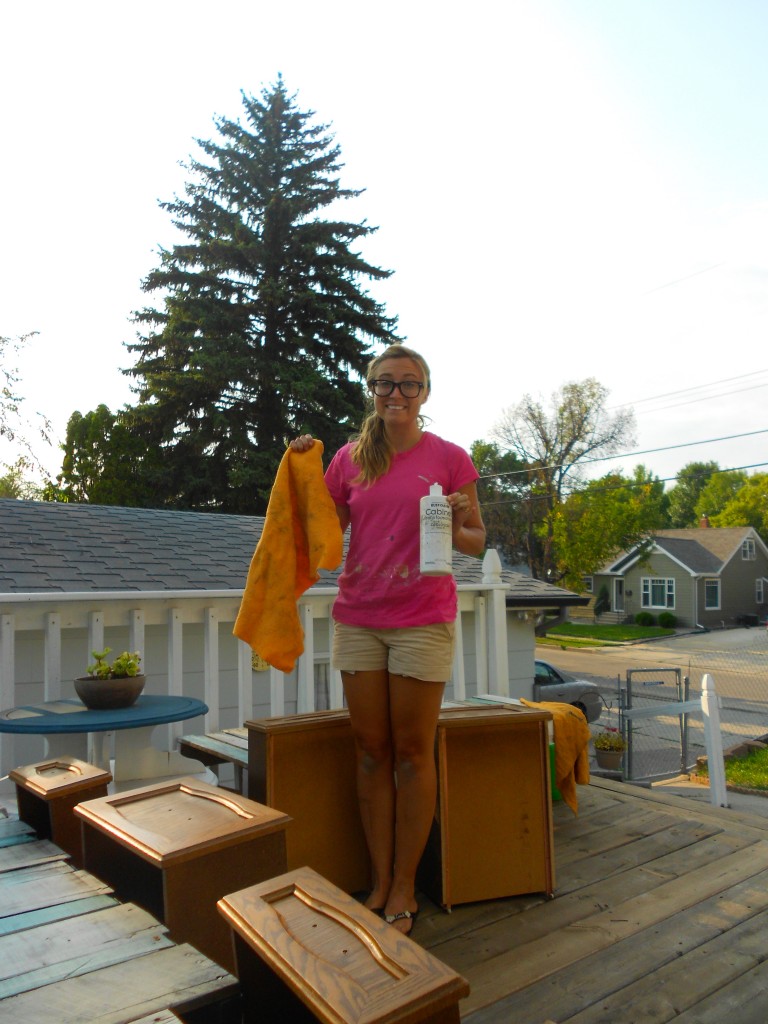
Khaki shorts that were nice until I sat in paint a few days ago, a million Sham-wow’s, glasses {AKA protective eye-wear}, dirty legs from sitting on the garage floor. Yeah, it’s a different look.
Okay, despite what it looks like, deglossing is a big deal. You squirt this stuff on a scouring pad, wearing latex gloves {I did wear them, pinky swear} then scrub, scrub, scrub. I spent about 3-4 minutes on each cabinet surface {front then back}. That really adds up. My wrists were sore, I was sweaty, my elbows were starting to crack. I started inside with the cabinet frames. Then I took a short break to write a few emails and edit a few more photos. Then the cabinet fronts. Then break for an episode of the Office and a few more photos. Then the cabinet backs. I started to get really sloppy because I was getting so tired, hence the breaks.
All in all this took me the entire day.
I was nervous about not having enough deglosser for all my doors. But that proved to be a silly fear. I had plenty. So much, I even went back over a few pieces that I had skimped on the first go around. I still had some left at the end of the day {which today was around 6:30 pm}.
After I absolutely could not get any more gloss off of the frames, doors or drawers I filled the handle pilot holes with wood putty and called it quits. I watched the next segment of the how-to DVD. Then I took a shower, posted some youth group photos on Facebook, and headed to a friend’s house for an evening showing of the 2000’s classic….”Summer Catch.” Yep, the one with Freddie Prinze Jr and Jessica Biel. While watching I’ve written this post, sent some more emails, snuggled one of the world’s cutest babies and Skyped with Derek. When I get home tonight I’m going to put up painter’s tape. Tomorrow I’ll start putting the paint on. That’s the exciting part.
So that’s how I did it today. I won’t lie to you. Today really blew. I was so sick of scrubbing I could have screamed. It was hard, but not…hard. Physically demanding, but anyone, even you can do it. {And as a side note, Mary Jo…Mom told me you are thinking about doing this up at the lake house. You totally could. But wait until I finish so you can benefit from all my mistakes…} Tomorrow I’ll have some more visible progress for you. For now, it’s official, I’m past the point of no return.
See you tomorrow.
Amy
by Amy | Aug 13, 2013 | Blog, The Art of Projects, the house
Derek doesn’t read my blog. Well, I shouldn’t tell you that he never reads it. He does sometimes. Just not often. He doesn’t really need to. We talk, he sees me, he lives with me {well, most of the time} for goodness sake. Basically he knows all there is to know about my goings on. There is no need for him to spend time reading a recap of what he witnessed first hand. He lives the adventure…and gets bonus features. Like all my lame jokes, seeing the awkward unfold before his eyes, and putting Band Aids on all my mishaps.
Between you and me, I think he gets enough of my madness as is.
All that to say…I’m pretty sure I can safely write to you about my next project without Derek finding out.
He will find out, of course. Unless he decides to stay away forever…Which I know he would never do. So yes, he will eventually see the results of my latest effort. So that begs the question…why does it matter if he reads about it or not?
Two words: Painting. Cabinets.
You see, most boys aren’t fond of the idea. And Der-Bear is no exception. But you know what I’m not a fan of? Cooking in a dark, ugly closet. And that’s pretty much what my kitchen is/was like. Derek’s big objection is that the cabinets are real wood. They are very nice, very heavy. They’ll still be wood even after they are refinished, right? Right. I know in my heart of hearts it’ll look loads better when I’m done. Derek will agree too. I just know it. Sometimes, though, it takes a little beyond-the-point-of-no-return convincing.
Let’s me honest. There isn’t a lot Derek can do to stop me if he isn’t home. Which, in my eyes, makes this the perfect time to tackle this project. That way he can’t talk me out of it…
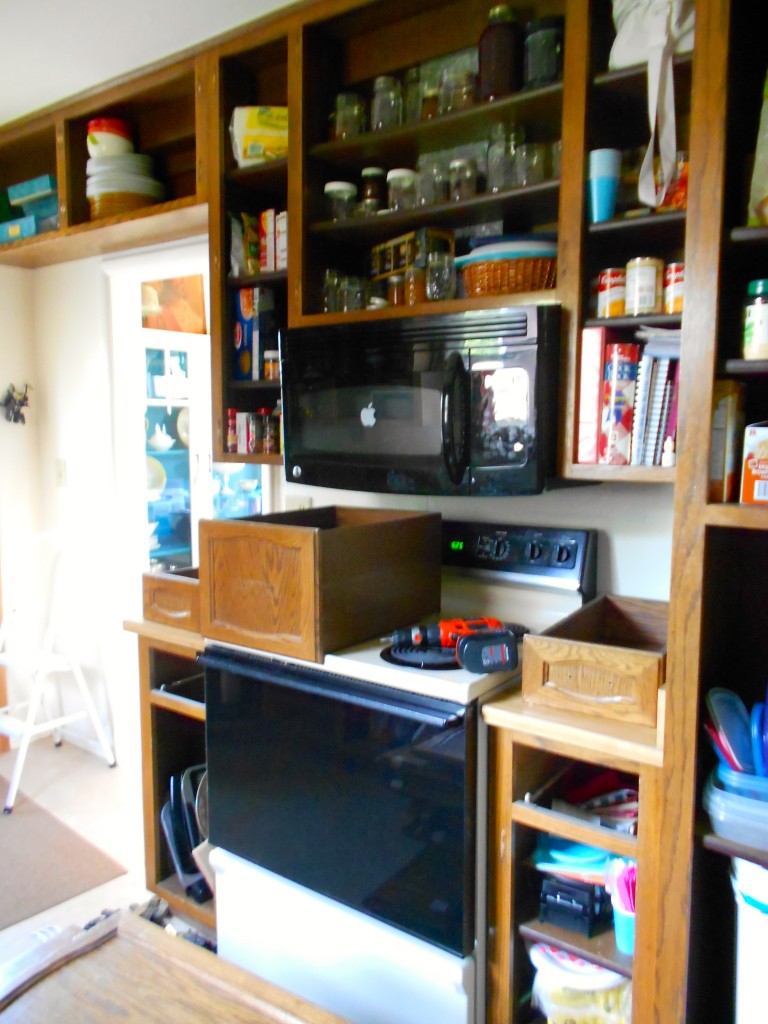
Here’s what I’m talking about. This is the kitchen before.
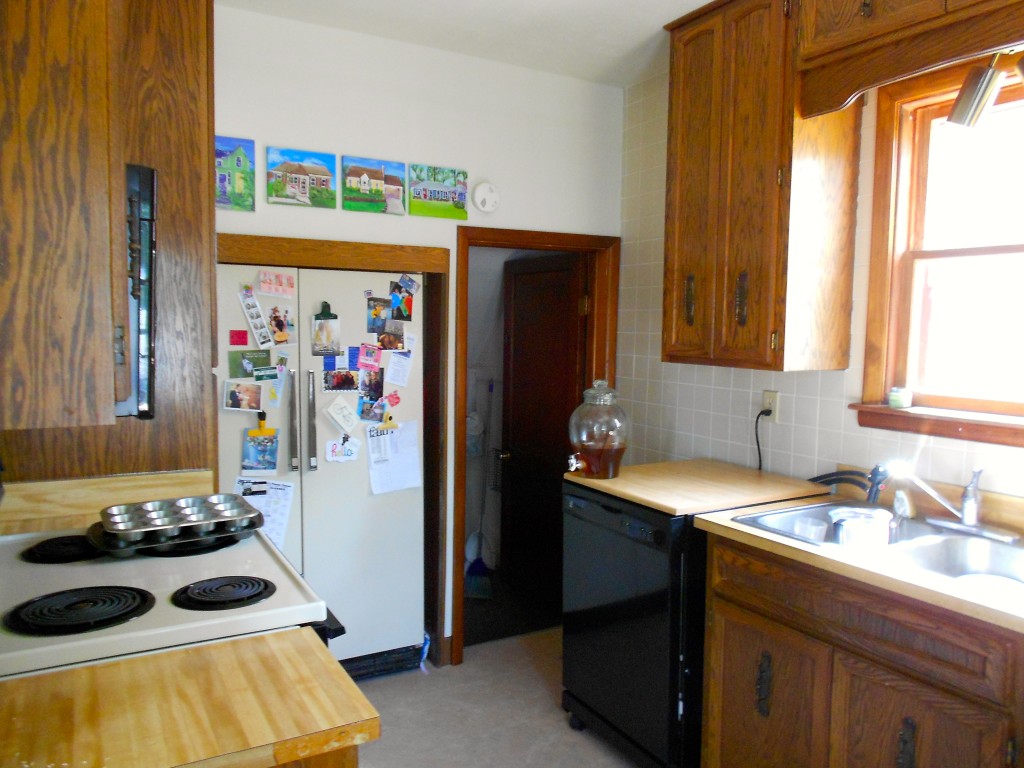
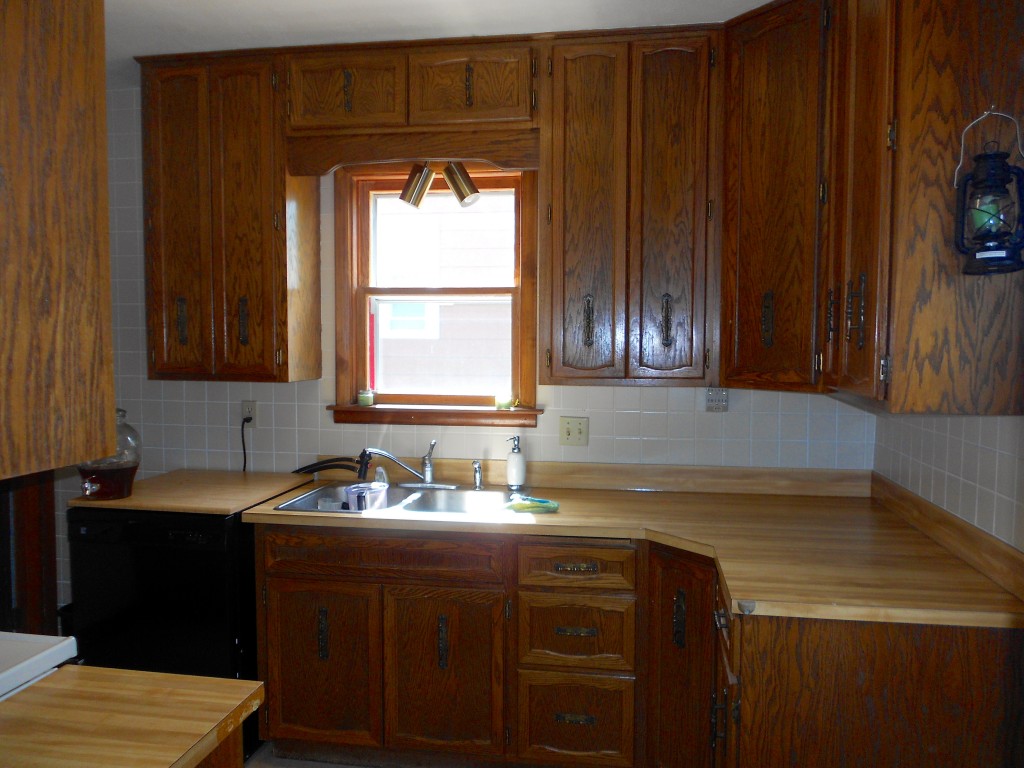
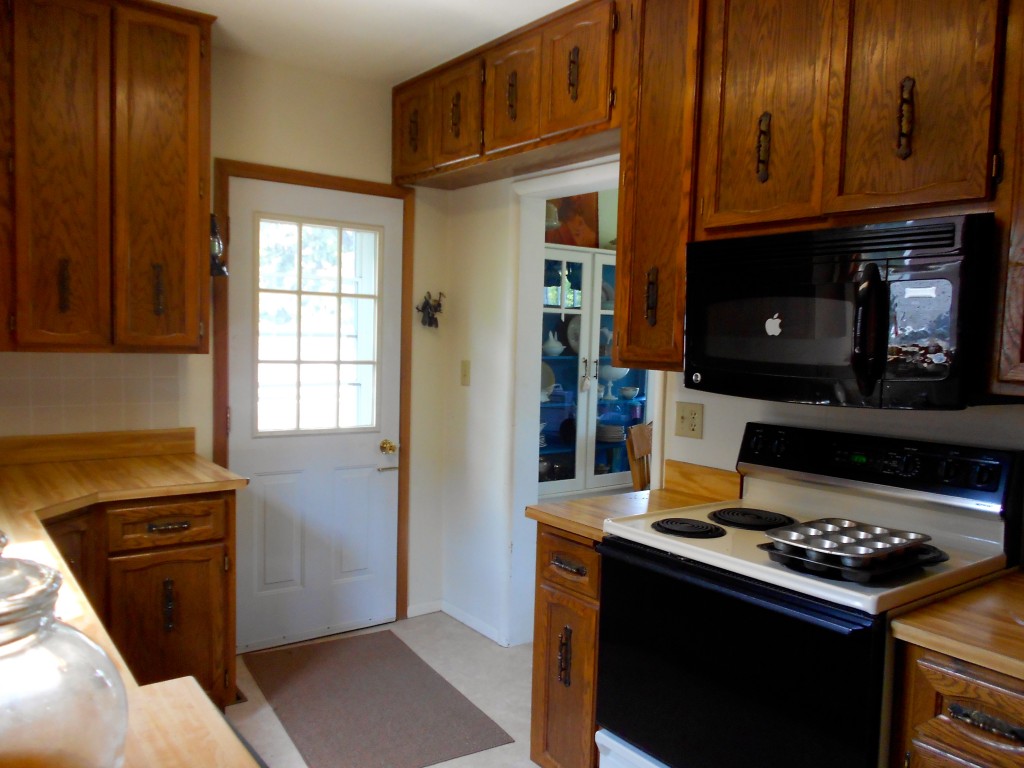
As of this very moment the kitchen is looking like this: Doors off, drawers out, hinges removed.
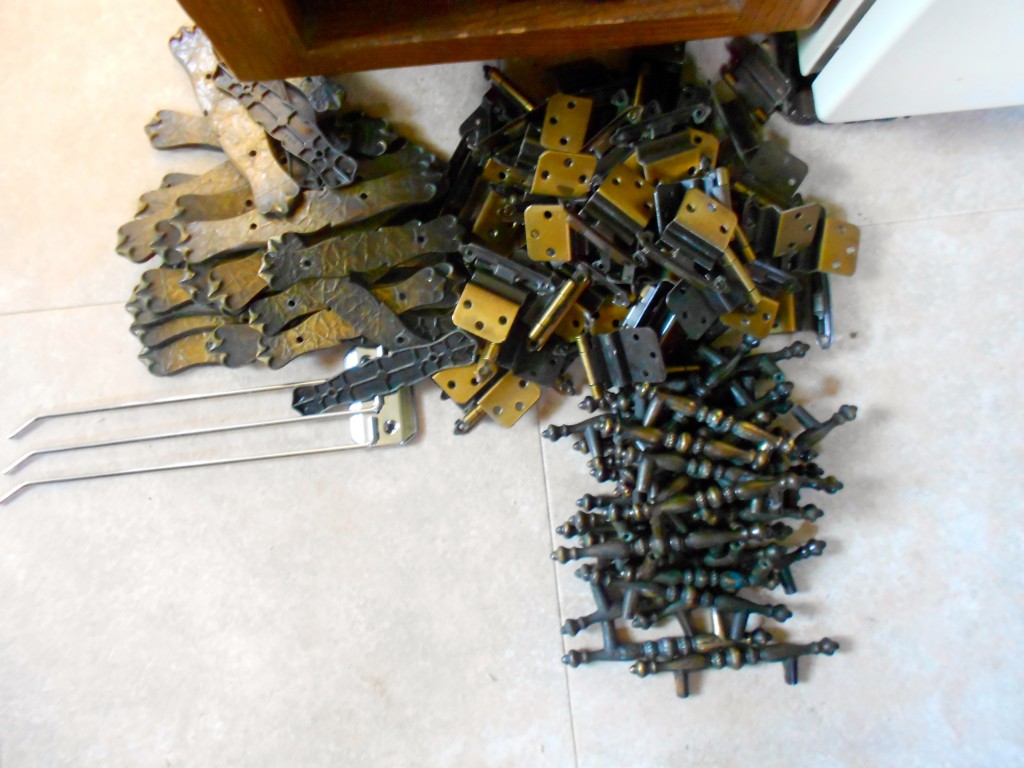
And just look at this pile of hinges and hardware. For such a small kitchen there are so, so, so many doors.
Tomorrow {or tonight if I get a second wind} I’ll be deglossing and prepping the surfaces. I’ll be using Rustoleum’s Cabinet Transformation box kit. I love the Rustoleum products…so I’m anxious to give this a whirl. More on that later. Now a snack.
Amy
by Amy | Aug 9, 2013 | Blog, Context, The Art of Faith

Some of you may know that I work with the high school youth group at our church here in Minot. I love it. For a lot of reasons. It’s such an exciting time in life, the kids are fun, they keep me current, they know how to do adorable things with their hair and wear to find the cutest dresses in town {okay, not the boys…}. But I also love being around this age group because they are old enough to really grasp spiritual lessons. They are old enough to ask critical questions and seek out Biblical answers…and young enough to be excitable.
Last school year our church was without a youth pastor. So the youth group relied on volunteers to run the show. I’m so happy to tell you all that the church has hired a new pastor of student ministries…and he is awesome. And so is his wife. The kids adore him, his teaching is solid, he knows tons of fun games, he’s an all around keeper.
So, it’s been a while since I blogged a devotional…and last night’s discussion with the youth was just so awesome I had to share it here with you. These are mostly thoughts from Sam {the new YP}, so don’t go thinking I’m a genius. I’m simply a vessel to carry the message across.
Last night he started devotional time by telling us that the Bible will blow our minds. It’s a statement I totally agree with. It’s blown mine on numerous occasions. It’s a perfect document. Complete and complex. Clever, current and {most of all}, living. If it hasn’t ever blown your mind, I encourage you to spend some time with the good book. Read it. Read commentaries. It’ll happen. Your mind will explode. In a good way.
The passage Sam focused on was Matthew 22:15-22. For those of us who grew up in VBS, this is a familiar story. Jesus talks about paying taxes. It’s pretty famous really. I’ve quoted the NIV below. But here is the gist. Jesus is asked if, since we belong to God, that we have to pay taxes. He asks to see a coin, which has Caesar’s face on it…then tells them to give Caesar what is his, and God what is His. Make sense?
Then the Pharisees went out and laid plans to trap him in his words. They sent their disciples to him along with the Herodians. “Teacher,” they said, “we know that you are a man of integrity and that you teach the way of God in accordance with the truth. You aren’t swayed by others, because you pay no attention to who they are. Tell us then, what is your opinion? Is it right to pay the imperial tax to Caesar or not?”
But Jesus, knowing their evil intent, said, “You hypocrites, why are you trying to trap me? Show me the coin used for paying the tax.” They brought him a coin, and he asked them, “Whose image is this? And whose inscription?”
“Caesar’s,” they replied.
Then he said to them, “So give back to Caesar what is Caesar’s, and to God what is God’s.”
When they heard this, they were amazed. So they left him and went away.
Now, let’s take a step back. {Get ready for that mind blown moment when you realize just how amazing and perfect this Word is.} Take a look at Genisis 1:27.
So God created mankind in his own image,
in the image of God he created them;
male and female he created them.
After looking at these two passages and discussing them a little, Sam put them together…it went something like this:
So…Jesus says that the money for taxes was Caesar’s because it bared his image. Then he tells us to give back to God what is God’s. What is God’s? What in this world bares His image?
These instances happened several thousand years apart. The Bible is perfect. My mind blew up when he made this connection.
Think about it. Are you a tax evader when it comes to the Kingdom? We all bare God’s image. There is no way around that truth. Think critically and pray critically about what you need to give back to God.
Amy
by Amy | Aug 7, 2013 | Blog, Crafts, The Art of Projects

Tonight I went out for some dessert with my friends from Bible study. I’ve been practically living in my gym attire, so when I get a chance to wear regular clothes, slap on some mascara and be seen in public…I jump. Tonight I even wore {gasp} a necklace.
Which meant that I went into the guestroom, opened the top drawer of the dresser, dug through some packing paper {where most of my necklaces are still packed from two moves ago}, found something worth wearing, and put it on. It’s a mess in there. And, honestly, embarrassing that I have a lot of really awesome stuff shoved in a drawer, still packed from when we lived in Oklahoma.
Case in point, I need an organizing solution. Here are 11 of my favorites. I’ll probably pull inspiration from from a few of these and come up with a custom solution perfect for my space and collection. In the mean time, get a little inspiration of your own. Right here.
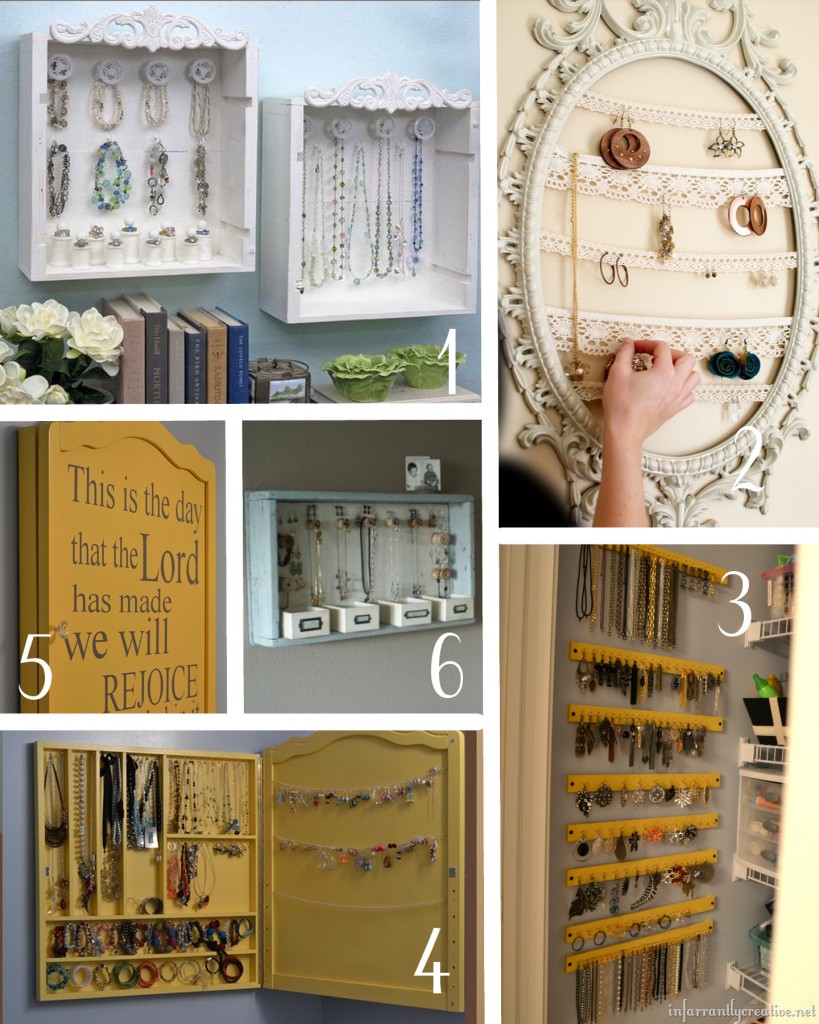
1. HGTV has a great tutorial for making these cute organizers from cast off wine crates. Not a wine drinker? Your local liquor store may have crates on hand that they toss after a shipment comes in. Pro…this is beautiful. Con…will all of my necklaces fit??
2. I bought a frame from Hobby Lobby on clearance that looks just about like this. It’s on my gallery wall. Originally this was an item for sale on Etsy. But Allender readers are super savvy, so I know we could whip one of these up on our own. So clever for organizing earrings.
3. This is a great idea from Infarrantly Creative, and it’s super cheap! These are paint sticks {free} from the hardware store. Painted and adorned with cup hooks. The best part of this design is that lots and lots of bling can be stored this way. I think this idea could transcend into the craft supply realm as well.
4 & 5. These two images are of the same organizer. Also from Infarrantly Creative. There is a killer tutorial on how she made this sneaky organizer. I love it because it can masquerade my mess as classy art work.
6. Shelterness shared this organizer. It’s simple and effective. I like how there are bins at the bottom to catch all the random bits and pieces. Oh, and the shelf space on top isn’t bad either.
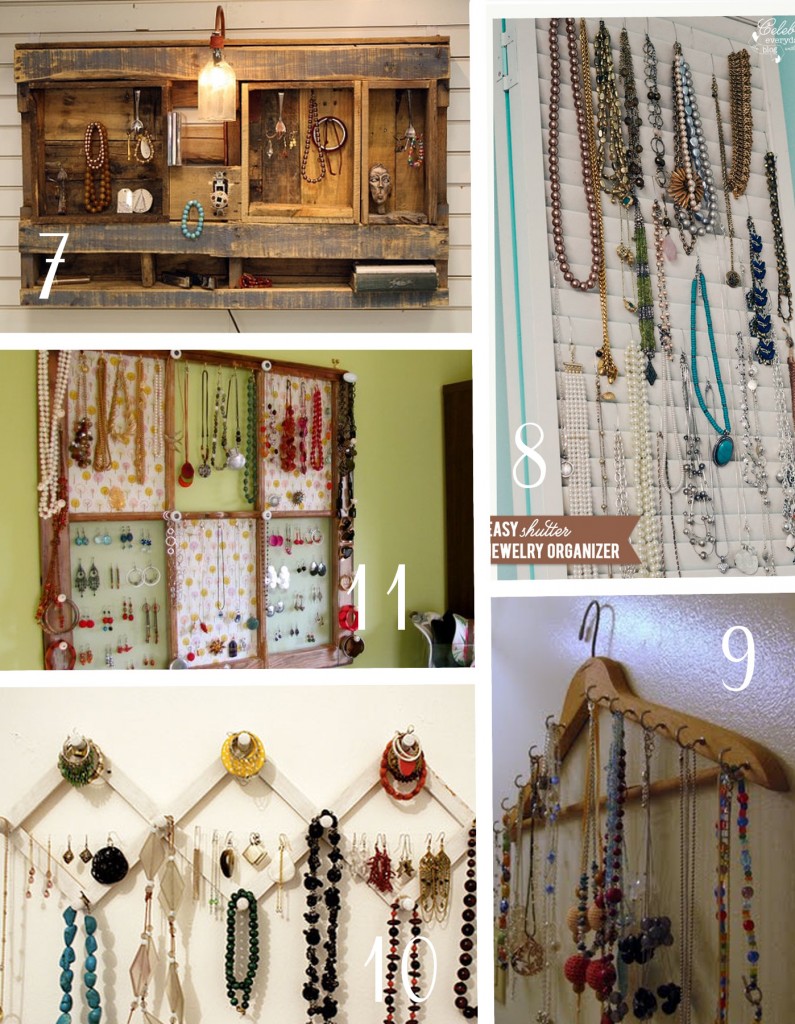
7. I love the idea of building an organizer with pallets. Especially since I can pick them up for free. This may be too bulky for my room. But that won’t stop me from loving it. {From the Rustic Creek Etsy shop}
8. I saw some shutters sitting on the curb in my neighborhood a few weeks ago. How I wish I had picked them up. Maybe they will throw out some more. At any rate, this shutter organizer from Celebrating Everyday Life is so simple to make and it’s tall and skinny so it can fit in a tight spot.
9. I think vintage wooden hangers are just beautiful. I can see three or four of these bad boys lined up on my wall. All Our Days came up with a great solution.
10. Apartment Therapy featured this easy to make organizer from Solaana’s Flickr page. Go on over to their site to get to the original image. I’ve even seen these accordion peg hangers at Dollar General!
11. Who doesn’t love an old, rustic window frame? Husbands, maybe. But we all know boys can be weird. I am loving window frames right now. And this organizer is just adorable. I love how the look can be customized with scrapbook paper or fabric. Our Borrowed Abode has a great tutorial on how this beauty is made.
by Amy | Aug 6, 2013 | Blog, The Art of the Moment
One hundred years. Can you even fathom that? I certainly can’t. I can’t imagine what it would be like to have seen and remember when telephones became commonplace. Then to see them transform into something cordless…and something that we now carry everywhere with us. To remember the earliest of records and the invention of the MP3 player. To have probably known people who fought in the Civil War {or at least remembered it} and have lived through many, many others. If you were 100 years old you would have lived through Charles Lindbergh’s flight…then seen a man walk on the moon.
Incredible.
I could go on all night. It just blows my mind.
That’s why several weeks ago when a friend who comes to my fitness classes approached me about taking some formal portraits at a family reunion honoring her mother’s 100th birthday…I was all over it.
So I showed up with my camera to her {stunning} home. The garage door was open and there was a woman sitting in a wheelchair surrounded by family. As I walked up the driveway I figured that this must be another relative. Someone probably in her mid-80’s. She chatting and asking questions about the evening. This didn’t look like a 100 year old woman. For goodness sake, she was sharp as a tack and beautiful.
“You must be Amy. This is Jean…our guest of honor.”

This was her. In all the years that I’ve been blessed to live I’ve thought about time a lot. In school I learned history. In elementary school we counted out the days. Evey year on the 100th day of school we were supposed to bring in 100 of something, to give us an idea of what 100 “looked” like. I’ve pictured 100 in pennies, elbow macaroni, crayons and even Kleenex. But never have I seen 100 look as brilliant as Jean.
Being able to photograph these precious family portraits was a great honor. I’ve still got some editing to do…but here is a sneak peek for you.

{Jean and her four children}

{The whole gang. 38 in all!}

{Look at all those beautiful great-grands}


