by Amy | Aug 2, 2013 | Blog, The Art of the Moment

You remember Lauren and Ricky {oh, and Samson of course}?! Well their beautiful baby has made her debut and I had the grand pleasure of taking sweet baby Evolet’s first set of portraits. Just like her parents, she is great in front of the camera. So photogenic, so laid back. She doesn’t even know what it means to pose, but she’s pretty darn good at it.

Recently I added these super adorable vintage nursery scales for my prop collection. Don’t you love it?
Shooting Evolet’s session was so super fun. And I do mean SUPER. Lauren and Ricky are a fun, quirky couple and I’m all over that. So when Lauren pulled out a pair of daddy-daughter super hero capes that she gave Ricky for Father’s Day {how sweet, right?} I was more than excited to shoot a few {okay, a few dozen} frames of the two disguised as their alter egos.

Tomorrow I’ll be putting together a birth announcement for this exciting addition. Be sure to look for Evolet’s full session on the Facebook page next week!

Amy
by Amy | Aug 1, 2013 | Blog, The Art of Projects, the house
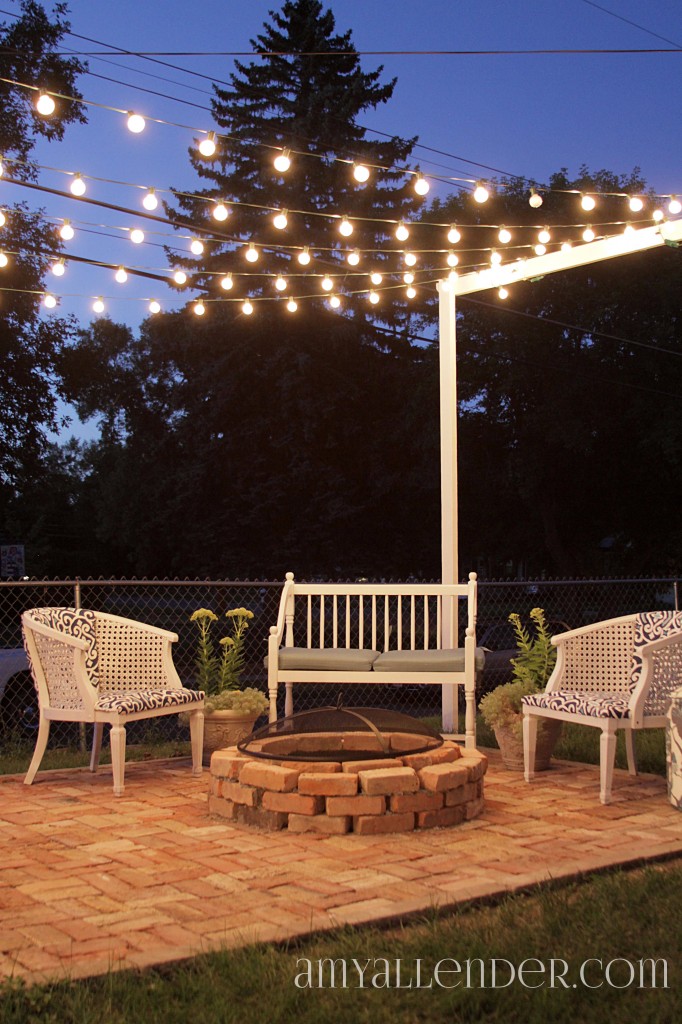
Okay folks. Today is the day I show you how I made my outdoor room dreams come true. I’ll tell you what I did, what I bought and where I got it. Heck, I’ll even tell you things that I got wrong so you can get them right. Now, I know you’ve seen this photo a million times…but here’s the shed. This is what I started with.
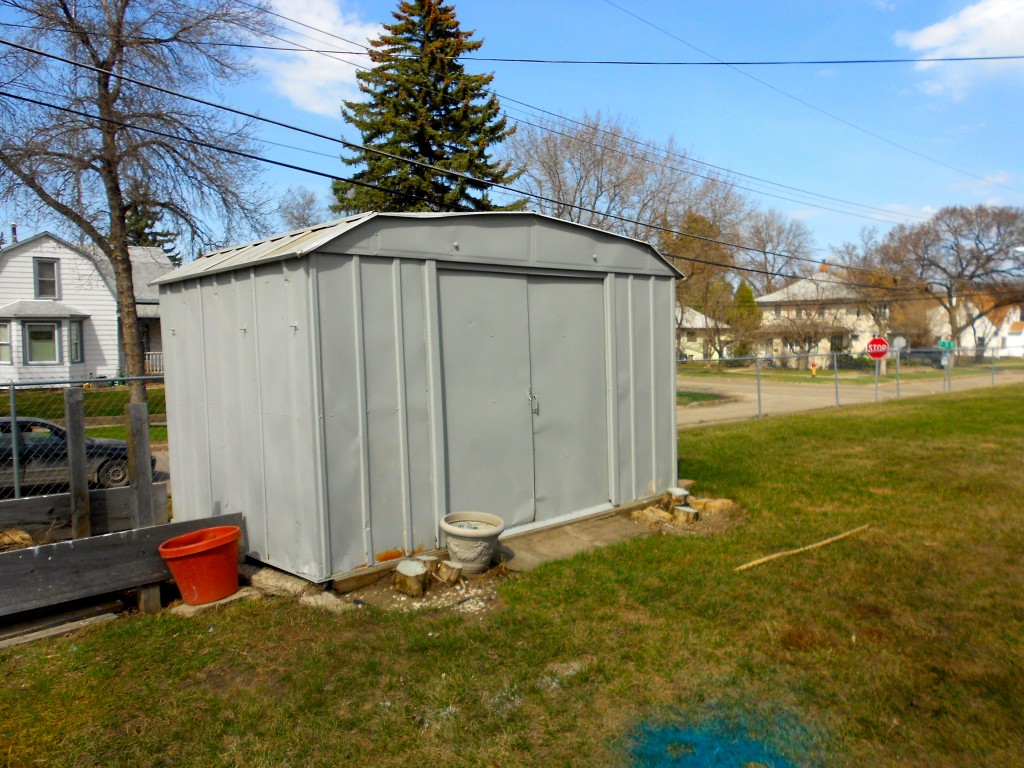
The first challenge was getting rid of that thing. Originally I had thought the toughest part of getting that out of the yard would be convincing Derek that it was a good idea. But, well, then he had to leave for a bit. And there is very little he can do to stop me via Skype. So I made sure all our stuff had a home in the garage or the garbage can and listed this bad boy online.
A nice gentleman and his wife wanted it. They came, dissembled it and hauled it all away. Then I was left with this…Which, according to the neighbors, was already an improvement.
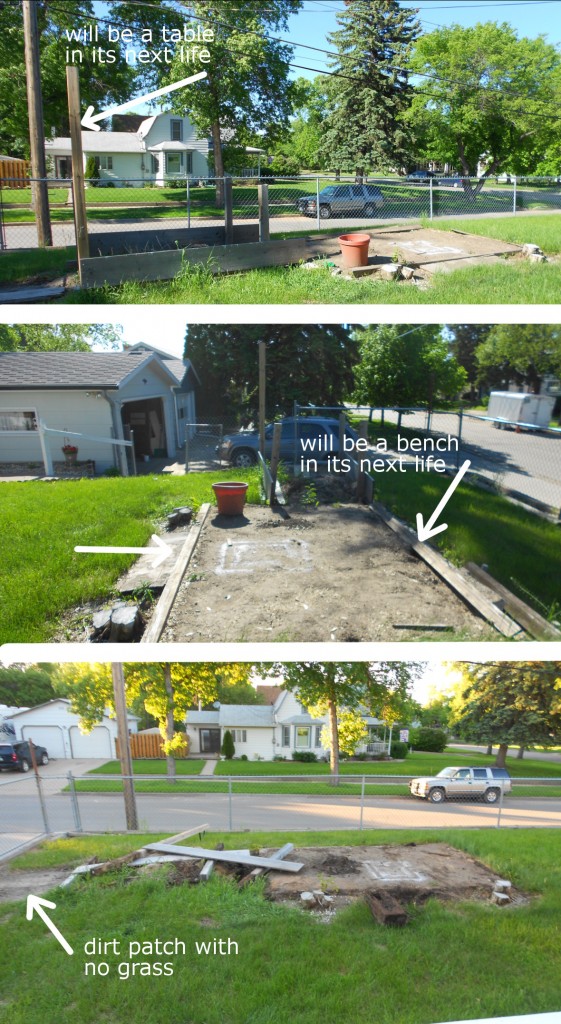
There are a couple things you can note from these images. First of all…I used the packed dirt where the shed had been to do a little spray painting. That’s from a frame I repainted for my gallery wall. Next you can lay your eyes on all the other junk trash usable materials without the shed to distract you. At the time I didn’t know if or what for I could use all that weathered wood, but I decided to keep it on hand…just in case. It was all pressure treated, so despite it’s color it was actually pretty good quality.
In the end, keeping it proved to be a good choice. Now I have a table and benches to match.
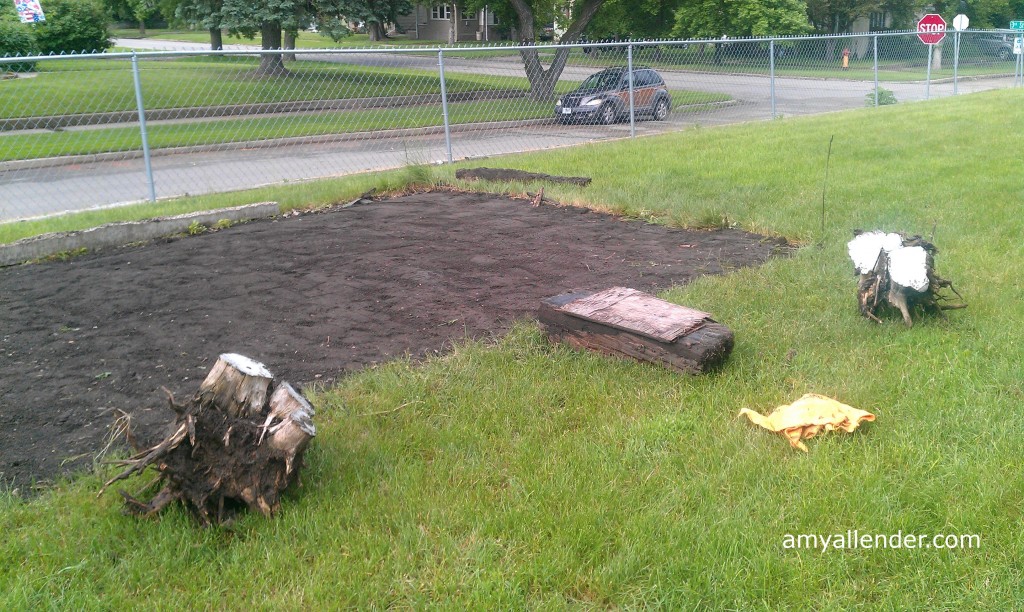
Next came the most challenging part of this whole process: making the ground level. This was hard for a few reasons. One being that there were two stumps and a chunk of rail road lumber in the dirt where the patio would be. I had decided on a 10×15′ patio space, so I needed to level the ground where the shed had stood as well as the surrounding area.
I looked at renting tools to remove stumps. {I’m too cheap.} And tutorials on burning them out. {Too impatient…I was itching like a kid with poison ivy to start laying bricks.} Eventually though, I decided to just dig. If I couldn’t get them out…well…then I’d have to resort to different measures. So I dug down around each stump. It was pretty easy going because the stumps were a big rotten underneath. When I hit a root that my shovel couldn’t cut, I took an axe to it. This took a bit of time…and boy were they heavy to pull out, but out they came.
To get the rest of the area leveled, I began shoveling the elevated dirt from the shed’s foundation to lower areas. In places where grass would be covered I dug it up and transferred it to that dead dirt patch you saw in the previous image. There is no secret to this. Just one shovel at a time. I packed the dirt down with a home-rigged tamp and checked for level until it was pretty much even.
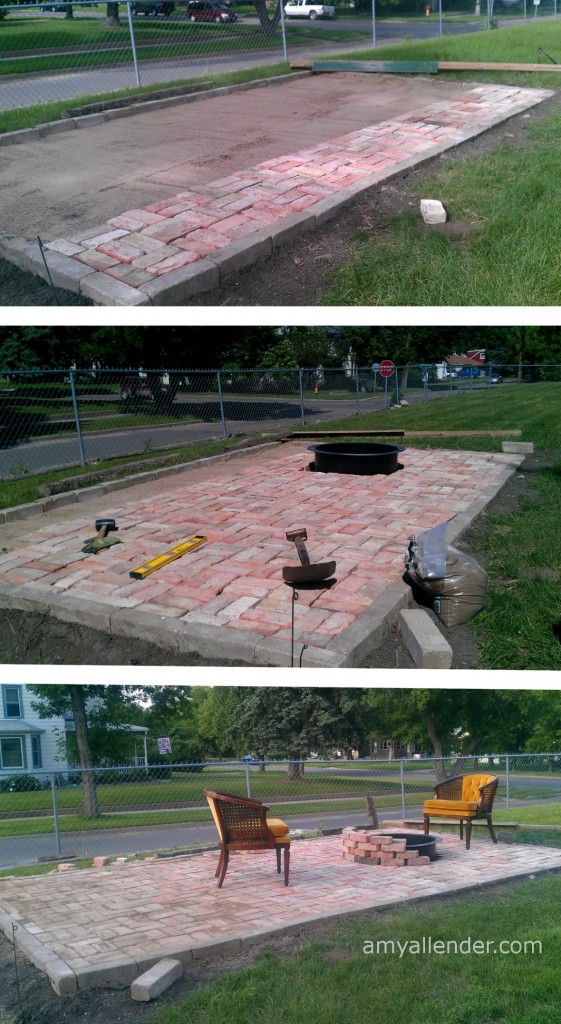
Now I had to make a big trip to Menard’s. I picked up edgers to contain the patio floor {that’s those long gray stones around…well…the edge}, play sand {the cheap kind you’d use in a sand box}, and a steel fire ring {nothing too fancy since it would be covered by brick anyway.}
First set your edge blocks. This is a bit hard and time consuming. They need to be set in the dirt a few inches to be firmly held in place. And they need to be level.
Now…let me take a moment to talk about level on a patio. You do not want things to be exactly level. Yep, you read that right. To allow water to run off, set your stones on a slight {very slight} slope.
So put your edgers in one at a time. Check for level after each one. Use a square on your corners to make sure they are 90 degrees. This friends, I did not do. And boy was it a mistake. If you come to my house you’ll notice a weird side of my patio. That’s because it’s not perfectly square. Bummer. So check for level and square. It’s worth it.
Once your perimeter is in place rip open those bags of sand. The area of my patio is about 150 ft sq. I used 30 bags of sand at 50 lbs each. You need a bed of sand at least an inch deep. So pour it in. Then level that out. I used a little contraption my dad showed me how to make. You can see it in the first image above.
Take a long level length of wood. {I used a 4×4 post I dug out.} Lay that across your patio space, resting on the edgers. Attach a second, skinnier piece to its side. Attach it so that it hangs down to the point you want the bottom of your pavers or bricks to rest. In my case, I used 2.5″ bricks, so my board {the green one above} hung 2.5″ down from the edgers. With your long post resting on the edgers, drag it across your area {best if you invite a friend to help}. No you have level sand. Make sense? I hope so.
Once the sand has been leveled out, you can start laying your stone. Again, always check for level.
I used a quick set mortar to hold the bricks in place around the fire.
After all your bricks are in place get a few more bags of sand. {I used 2.5 50 lb bags.} Dump some sand out and start sweeping it into the cracks. Do this over several days as the sand settles.
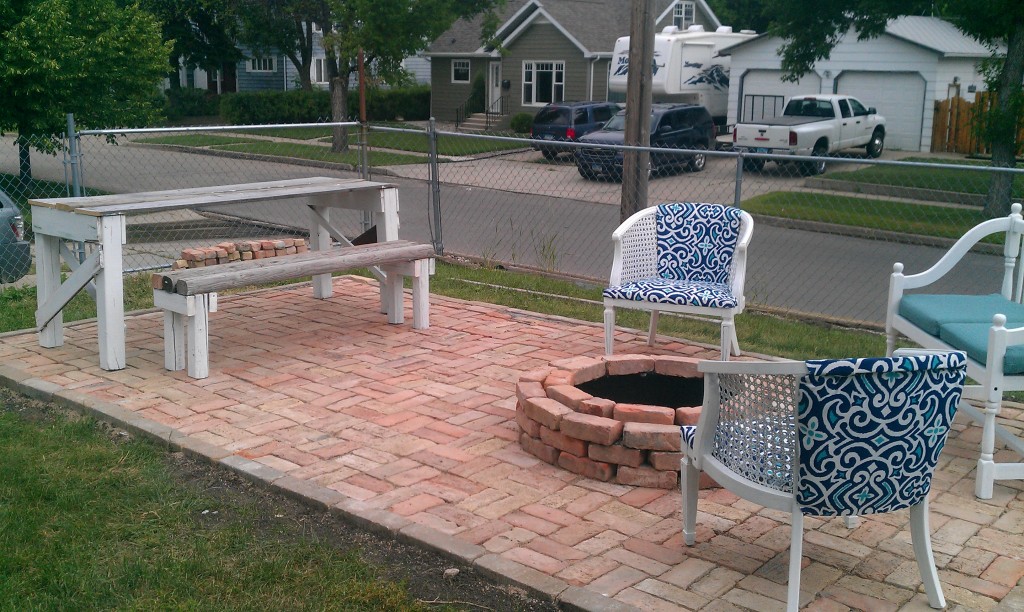
Then furnish your new space. As I told you in previous posts…the pair of chairs was a Salvation Army find for $30 total. I recovered them. The bench was pulled from a local variety shop in town. The cushions were a summer clearance item from Target.
It looked good…but I craved more. It needed light! I have no trees around the patio to hang them from…so I came up with this alternative.
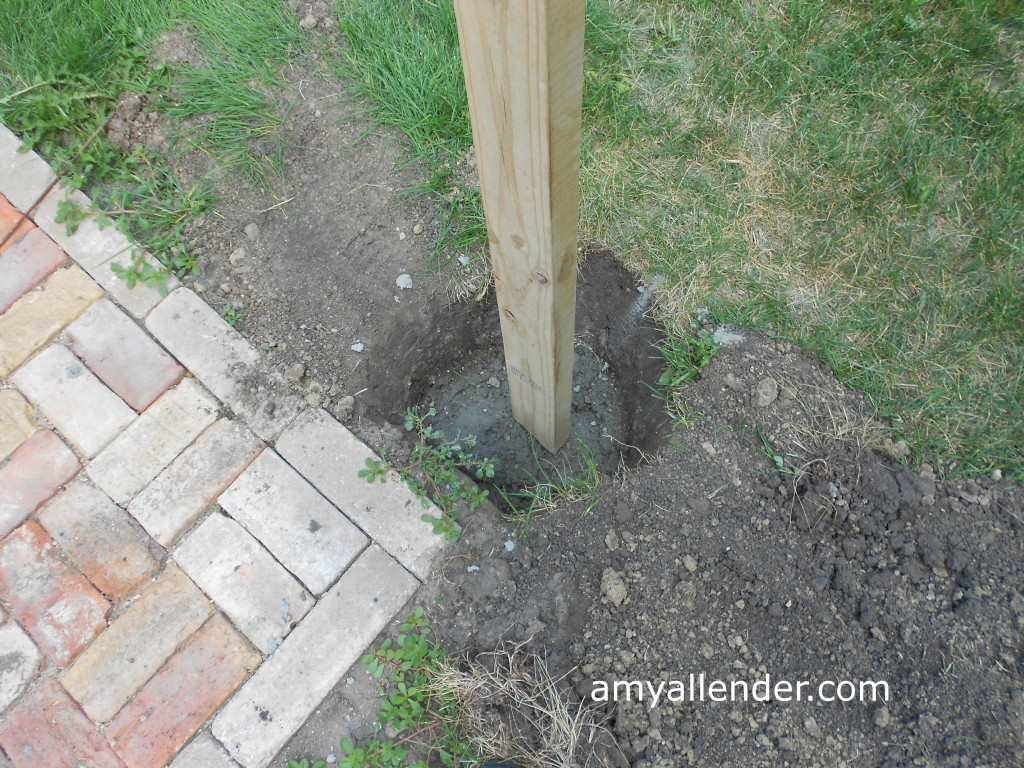
Back to Menard’s. This time for new 2×4’s. I bought 4 12′ posts and 2 10′ posts. At each corner of the patio I dug down three feet. Yes, that’s deep. Then I cemented the four tall posts in with Quickrete. Check for level!!
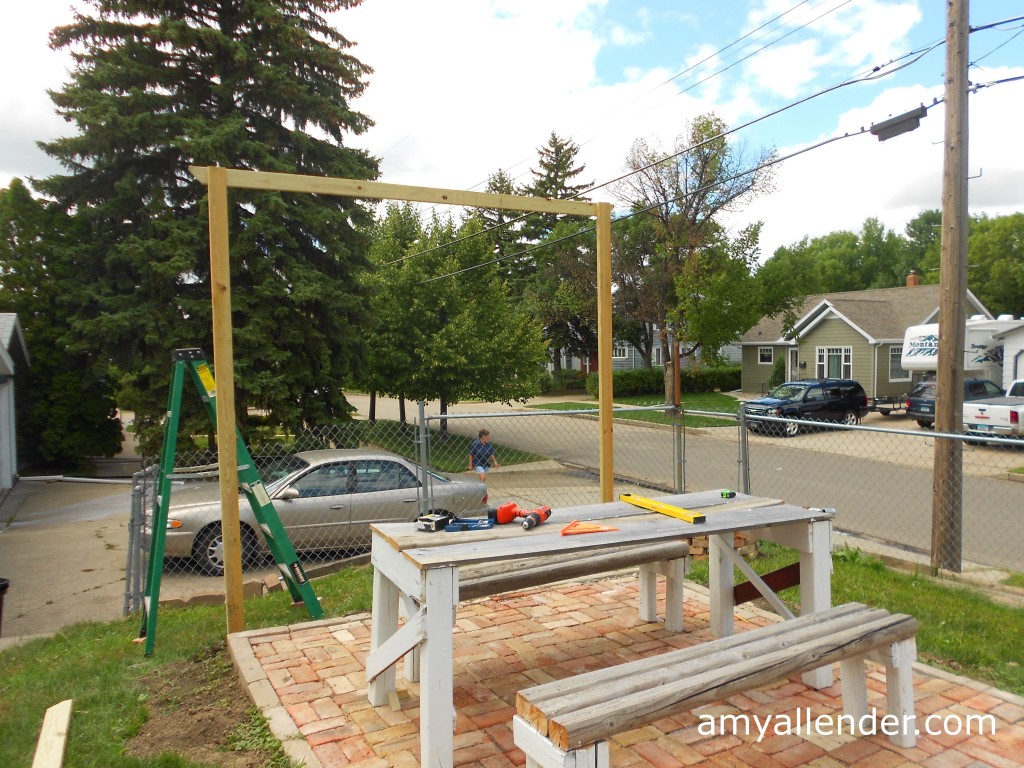
Grab a friend for this next part. Once the concrete has dried completely, you can hang the upper lintel. I did it alone…but I really don’t know how I manages it. Screw them in place with deck screws.
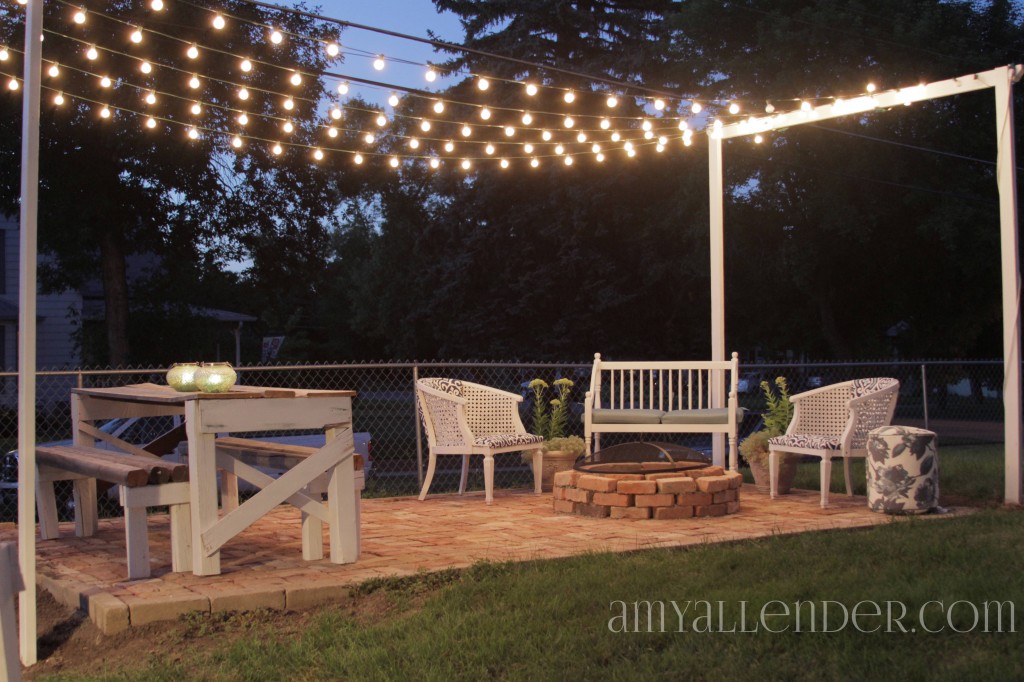
I used 5 strands of 20′ patio lights from Target to create a canopy of light above the patio. I ran each strand between the posts around nails that I put in the top of each lintel. After wrapping the cord around I hammered the nail head down slightly to hold the cord in place.
Then I moved all the furniture back in and boom…patio, roasted.
Other things on my shopping list:
A grate to cover the fire pit…that’s code here in PraCan.
An adorable ottoman…super sale from Target for only $12.00
Plants for planters recovered from the yard
A white extension cord to power those precious lights {Target}
Two mercury glass lanterns from Menards
Two citronella candles to ward off the state bird of North Dakota {mosquitoes}
Did I miss anything? If you have questions that I didn’t cover…let me know! I’d love to hear from you. And yes, I did this. Me. A girl. With no husband in sight. I’m terrible at math. And only moderately strong. If I can, you can.
Amy
by Amy | Jul 31, 2013 | Blog, The Art of Projects, the house
A month or so I told you about my Mele Kalikimaka moment. If you have no idea what that means…read the post here. When I started with the patio I really wasn’t sure how it would all come together. But it’s done now, and I think it turned out pretty nice. At very least, I think we can all agree that it’s an improvement from the rusty shed that I started with.
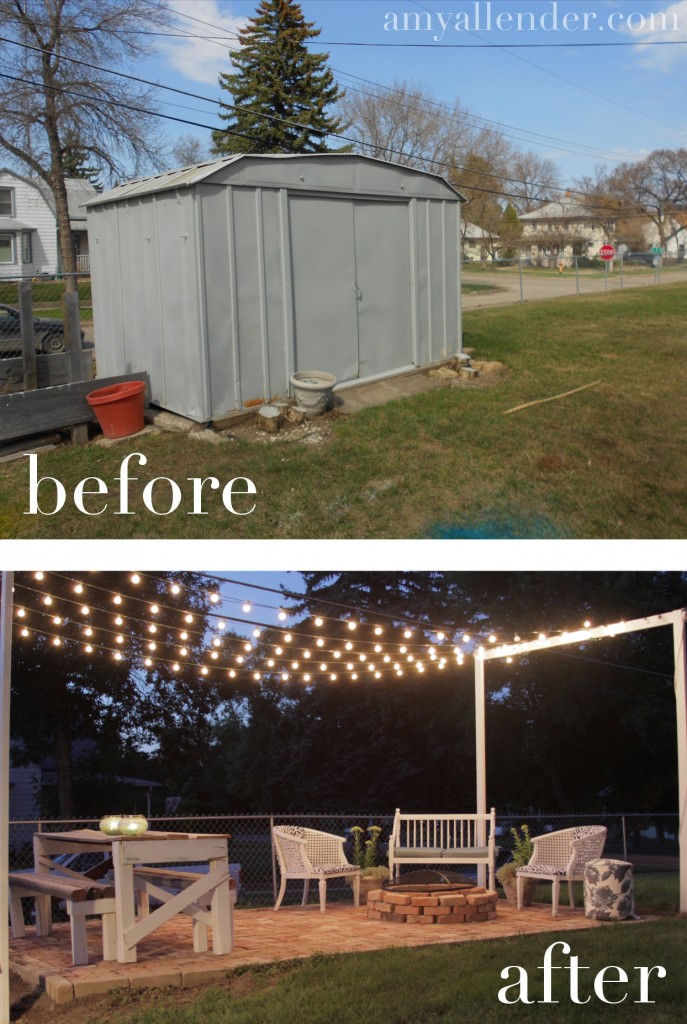
You like?
I do.
I’m still missing a little grass around the edges, but in the big scheme of things it’s not such a big deal. And the craziest thing about it is I did it all by myself. Well…that’s not entirely true. I had some help hauling bricks. And a bit of help leveling the soil. And moving furniture. But it’s been a one man show for the most part.

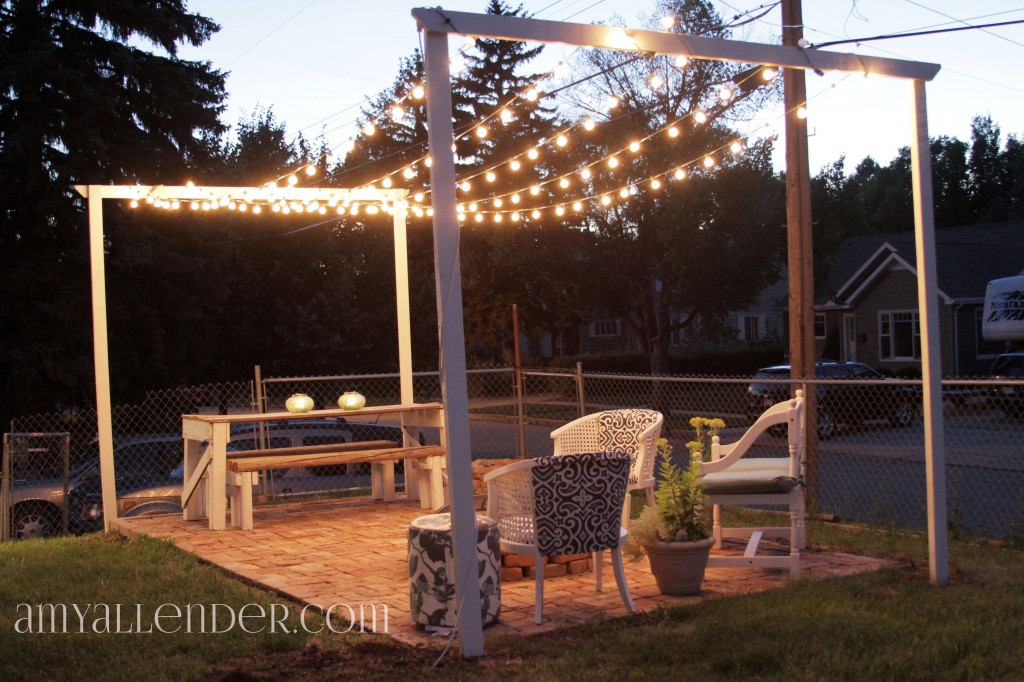
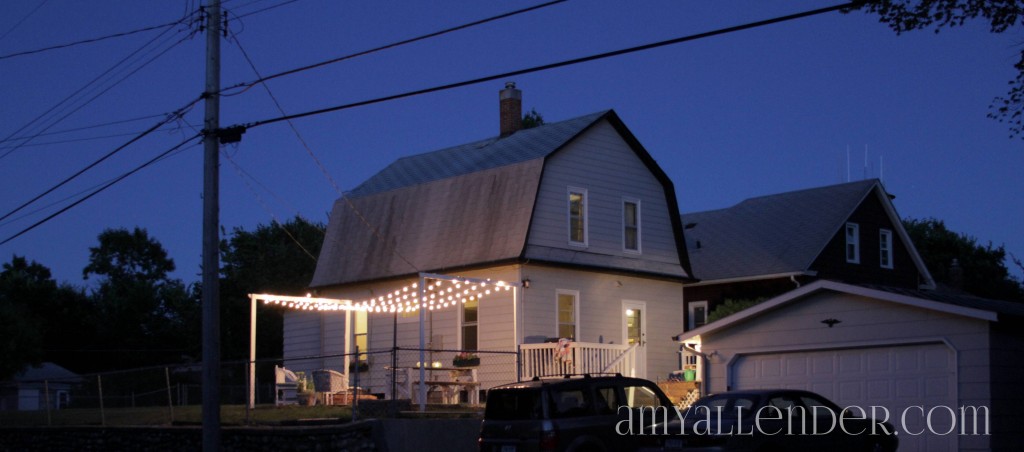
It’s twinkly. It’s warm, cozy, inviting. It looks like summer. I’m really happy. Now who wants to come over and hang out?
Tomorrow I’ll give you all the tips and tricks I learned along the way.
Amy
by Amy | Jul 30, 2013 | Blog, The Art of Projects, the house
I wish I took more self portraits. That way I could show you just how ridiculous the things going on at my house really look. But alas…I’m much too busy with my projects and hurting myself…and doing things in weird, awkward, one-man-show type ways to stop and pose for a selfie. Maybe I’ll work on that in the future.
So, you’ll never believe this, but…the patio is done! Yep. Done. As in finished. As in I’m hosting my very first big party on the patio on Saturday. You’ll have to wait until tomorrow to see some photos though. I put the finishing touches on it this past weekend. While doing so, I got to thinking about what the neighbors must think.
You see, Derek and I moved into our house just about a year ago, but up until recently–while he’s been gone– we didn’t know any of the neighbors. My sole interaction with one of them was just long enough for Henry {yes, that’s his real name and he is married to a Betty–adorable, I know!!} to tell me not to shovel my snow over the property line. So I didn’t. And I minded my own business. And I went about my business. Then something happened. I think I sort of morphed into that “crazy person” down the street. I started unleashing fury on my project list and in turn, created a bit of a spectacle.
At first I only noticed some looks from folks driving by. Then walkers turned into gawkers. Then the neighbors started asking questions. I get pretty shy and awkward when approached sometimes. I don’t mean to, but it happens. For as many projects as I’ve done, I still get kind of self-conscious about my abilities. Especially while Derek is away. When people see me working and stop to chat about it, I always figure they know more than me {which they probably do} and think I’m a fool because I’m going about things the wrong way {which may or may not be correct.} So when the neighbors started coming around to ask what I was up to I got nervous. We own the corner lot, so everyone can judge see my antics.
Overall, to my relief the response has been overwhelmingly positive. Now I not only know my neighbors, but consider them friends. Even Henry and Betty…who have proven to be gems. I’ve even met some people who live in the surrounding blocks. They’ve stopped by the fence to say “hi” and ask where I get all my nonstop energy.
At the very least I think I’ve been a pretty good and cheap source of entertainment. Especially since several of my undertakings have really been two person jobs that I’ve jimmie-rigged to be solo acts.
Tonight I thought I’d take a brief moment to look back some of this summer’s finest moments that could have been seen through the windows of the houses next door.

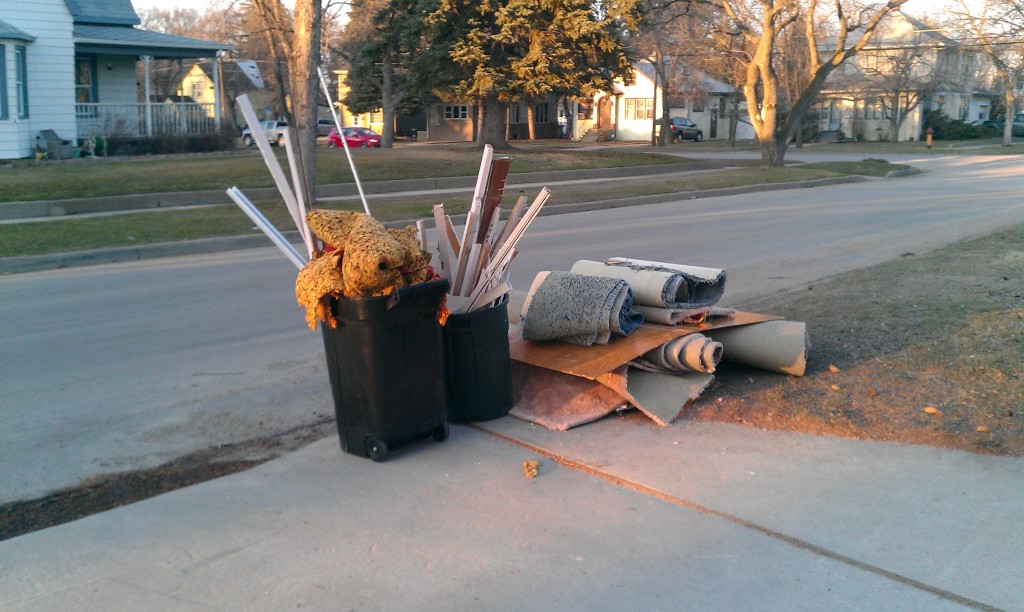
1. Before the weather really turned I was busy working on the bedroom. That meant many, many days a mysterious neighbor girl hauling roll after roll of carpet out of the house. And several garbage days that looked like this:
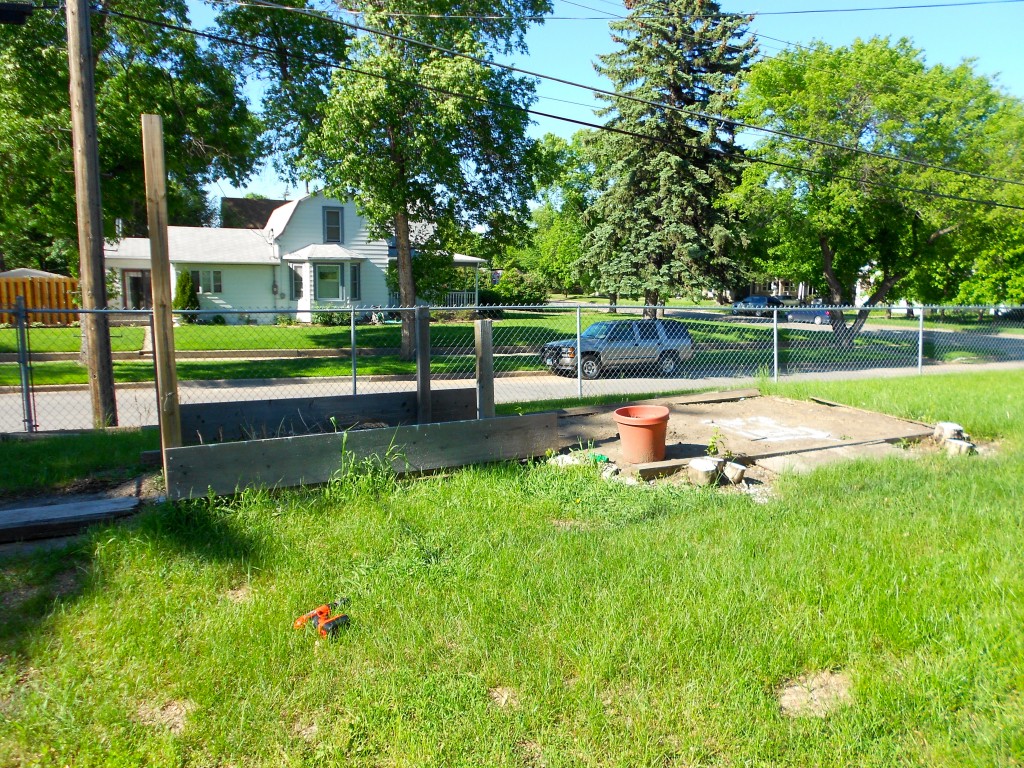
2. First of all, the process of moving everything from our ugly, rusty shed to the garage. Then a stranger coming and dissembling the shed to take it away. {Oh, and let’s not forget the spray painting projects that were done in the yard. You can see remnants in the photo below.}

3. I spent an afternoon putting all of my body weight and energy into wiggling 4×4’s loose and pulling them up out of the ground from the area around the shed. Yeah, that stuff down there.
4. I have only had one vehicle parked in the garage all summer because the other half has constantly been devoted to project space. When the garage has been opened passerbys have been able to see chairs being rehabbed, pallet benches in the making, fence posts turning into window boxes, planters being filled and crap wood being turned into a table.
5. While we are talking about the garage…there’s a good chance a few people have spotted me using my car as a ladder to reach high items in there. Someone saw my hand and feet prints in the saw dust that had accumulated on it and asked if someone had been standing on my car. Yes, weird…it was me.
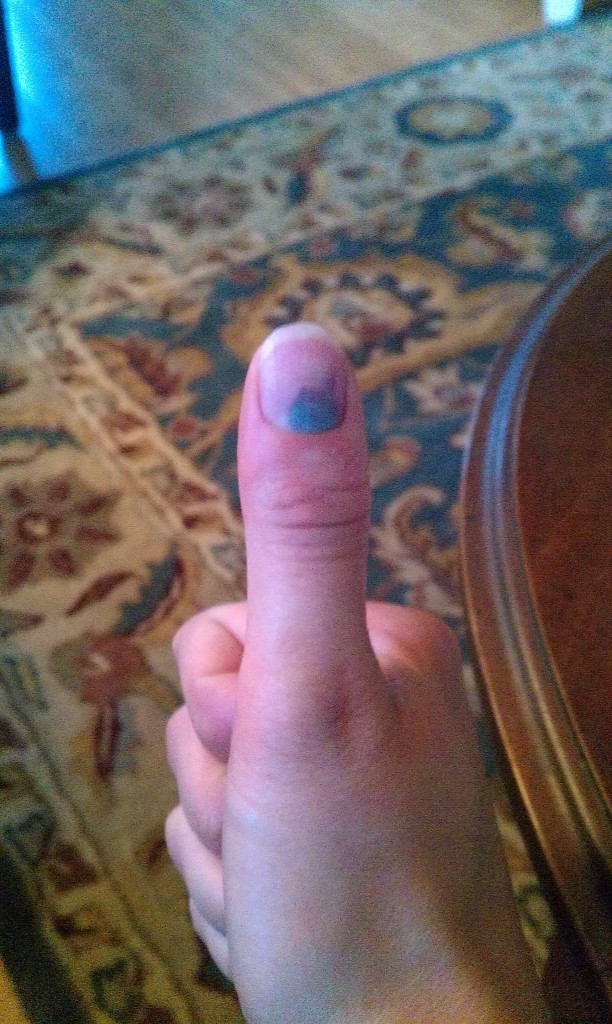
6. Several may have heard me udder some form of gibberish profanity when I dropped a patio edger on my thumb. It feels better, but looks a bit worse.
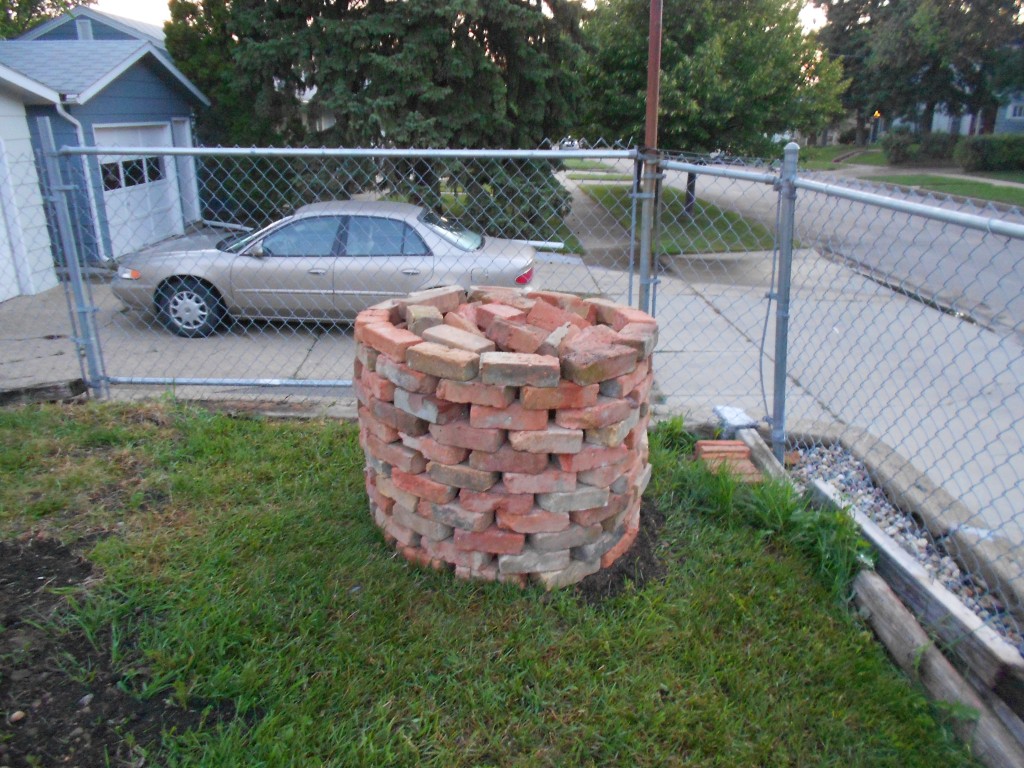
7. And let’s not forget load after load of bricks for the patio.
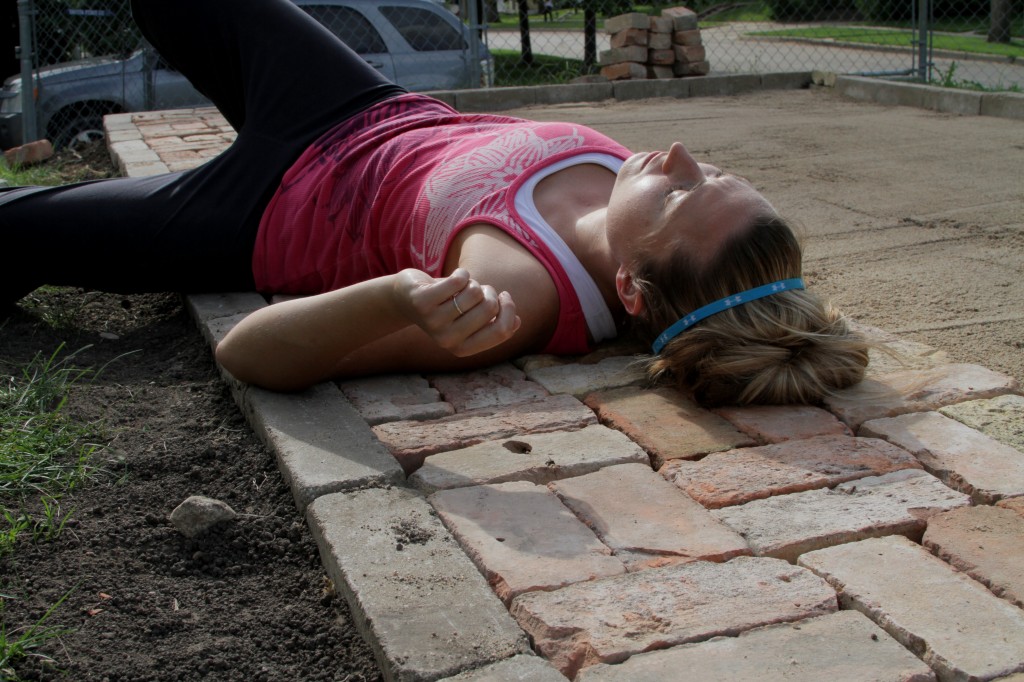
8. Speaking of the patio…I’m sure watching me dig and level the ground was a treat. I dug up three 5-gallon buckets worth of landscape rock from where the shed used to stand. Let me tell you this. Hauling those away was not a graceful looking task. I’m strong, but not that strong.
9. One day I didn’t have time to leave the house to do my personal training at the gym, so I had my client come to my house. We got some weird looks for doing lunges, weird kicks and sprints across my yard.
10. Maybe the most awkward, entertaining thing I’ve done all summer has been finishing the patio {let’s be honest, it’s an outdoor room} project. I wanted to hang a canopy of lights so I built a post and lintil structure on either end of the patio. Simple enough…but getting the lintil up alone was quite a challenge. Let’s just say there was a ladder, a prop, a second ladder, some words not fit for children and a lot of luck involved.
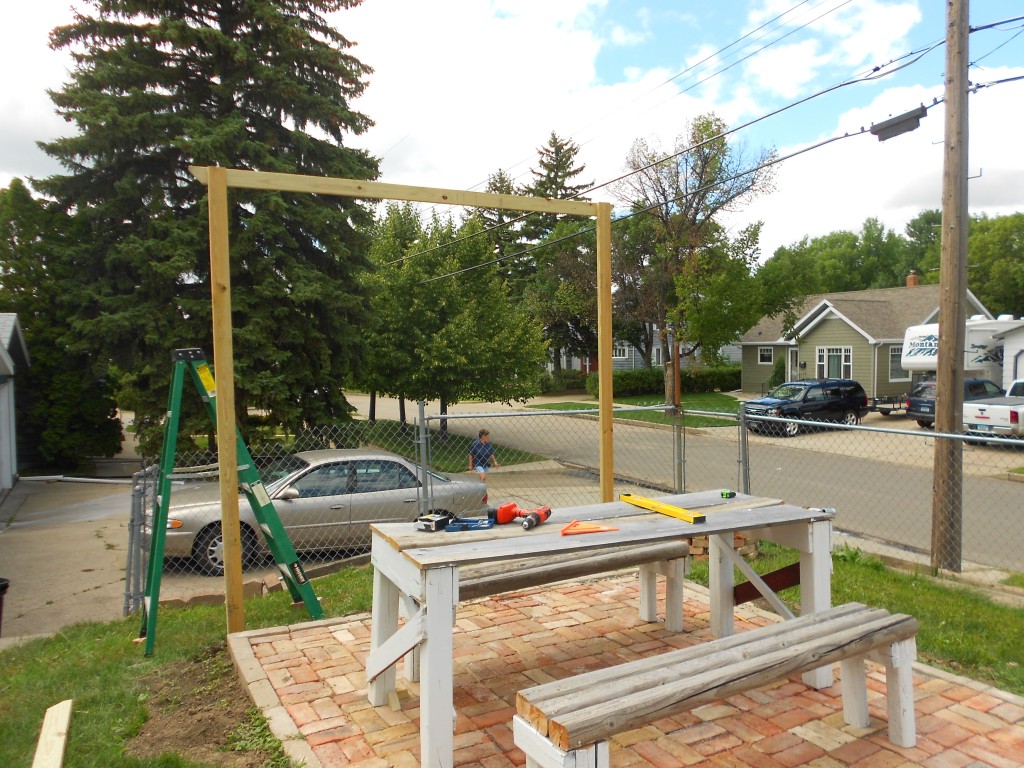
11. Yesterday I spent an hour sledge hammering a bunch of concrete I found after the shed came down. I felt like Thor.
12. Summer is coming to a close up here in PraCan…and so is my outdoor project list. But I’ve got one more big one up my sleeve. What is it? Who knows? I’ve had a lot of questions and I’ve explained it to many. My response is the same for all my undertakings: if something goes terribly, horribly wrong, I’ll just rip it out…sledge hammer it…or chain saw it down and pretend it never happened. So…any guesses?
Amy
by Amy | Jul 26, 2013 | Blog, The Art of Adventure

I’ve been gone a long time. I know. I have this goal of “writing out” so that even when I’m away and unable to post I’d have content coming up every day or so. But, as you can tell…that goal keeps getting shoved underneath a bunch of other more pressing/urgent/fun things. Anyway I’m home to PraCan now and I’m very happy to be here. The weather is simply ideal.
While on vacation I was all over the Midwest. I even took along a native Californian who had never explored the possibilities this amazing region has to offer. Since I wasn’t just bumming around solo the pressure was on to show her a good time. It’s no secret that I adore the Wisconsin/Michigan/Indiana zone…and I wanted her to adore it too.
I’ll be breaking my trip up into a few posts. And tonight I’ll be addressing a question I get asked a lot:
Where do you come up with these places? How do you find them?
Yes, true. That’s two questions. But the premise is the same…I love to travel {even when it makes me nervous}. As in every other aspect of my life and personality, my travel practices are quirky/unique/weird. I’ve been on arranged tours and I don’t like them. I’ve stayed in the “it” places of the classic “destinations” and I didn’t like it. I’m all about creating a get away that is unique. Something you’ll remember. Something your friends have never done. Something off the beaten path.
I’ve been a lot of places and my best trips have been to places most have never heard of, when I’ve stayed in little known nooks and eaten in dive-ish diners. I’ve two-stepped with locals in a Texas dance hall, stayed overnight in an airplane hanger-come-hotel, listened jazz in NOLA, eaten world famous dinner rolls and even jumped off a cliff.
Don’t stop reading here and think that I’m a big, fat bragger. I’ve been blessed enough to do some really cool things. And you can too. When I get home and post my photos people always ask how we came across all these wild/weird fun-tivities. On my most recent adventure I decided to visit the Wisconsin Dells. Here is where we stayed the night.
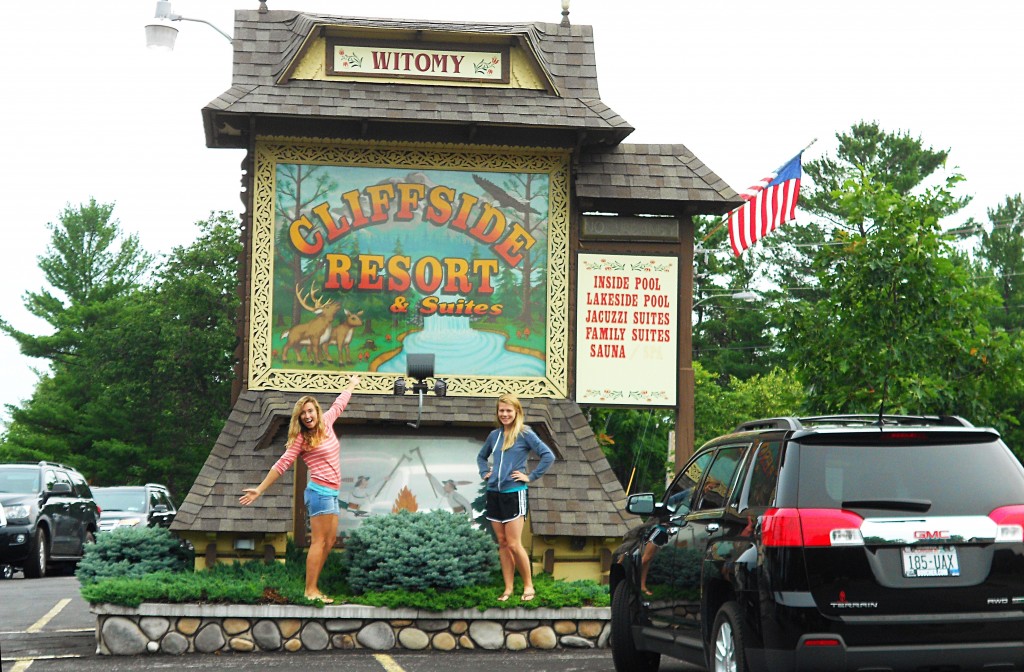
Remember I was traveling with that California Raisin…so this trip had to be a blast. So, for better or worse I dragged her along on one of my signature adventures. Cliffside Resort and Suites. Sound like a place you’d book? Well you should.

Why stay here instead of the well known Holiday Inn Express? A bunch of reasons. First of all you’ll be supporting a local business. Second, just look at this place. It’s soaked in quirky lake-house nostalgia. Even better…it sits right on Lake Delton directly across from the Tommy Bartlett stands. So you can take in the show from the resort grounds. Don’t know Tommy? Look at his website here, and we’ll get to how to find similar attractions in a minute.
Not to mention a pristine outdoor pool, lakeside seating and fire pits for guest usage. This place was just precious.
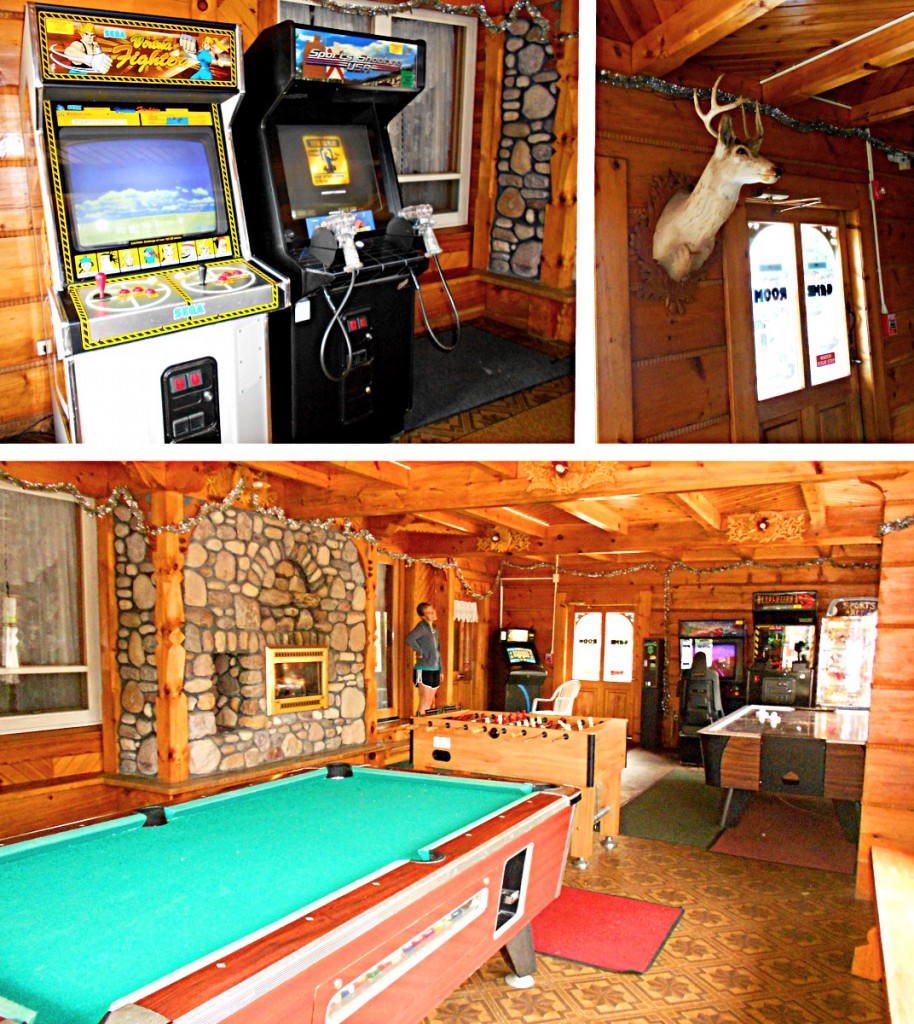
Being at the Cliffside Resort made me feel like I was at summer camp {and I never even went to camp as a kid.} Or at very least like I was in “Dirty Dancing” at that family camp where Baby met what’s-his-name. Now, it’s your turn. Here’s a quick list of ways you can track down the coolest, weirdest, quirkiest travel spots. (more…)
by Amy | Jul 19, 2013 | Blog, The Art of Adventure
I know I’ve been absent. If I was really a good friend to you, I’d be writing every single day of all the adventures I’ve been having in Indiana. But here’s the thing. I’m having so many, many, many adventures that are lasting late into the night I’m just too pooped to put a full sentence together by the time I’m home for the night.
However, I’m so excited to show off not one…but TWO vacation bro images.
The first comes from my recent visit to Noah’s Ark Water Park {America’s largest water amusement park}. While floating down the lazy river, I discovered that the park offered tubes that were built for two people to share. Perfect for friends. Immediately I began wishing and hoping that I’d see two bros sharing one of these tubes. And…bingo. Right behind us on the river two bros hopped in one tube together.
Just two bros floating down the lazy river.
Now, this first one shows a view from the side. It kind of looks like they are just floating close. Nope. Oh, and don’t mind that creeper in the corner. Katie was smiling so it would look like I was taking a photo of her and not the bro show.
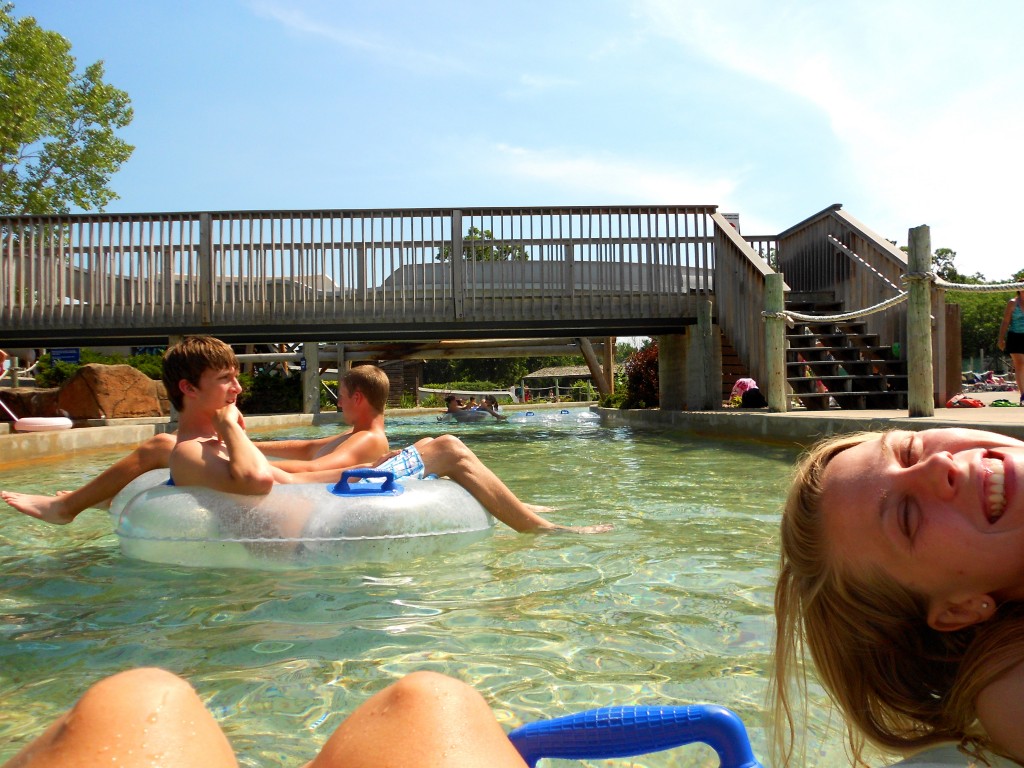
This one really shows off the bro moment that was taking place.

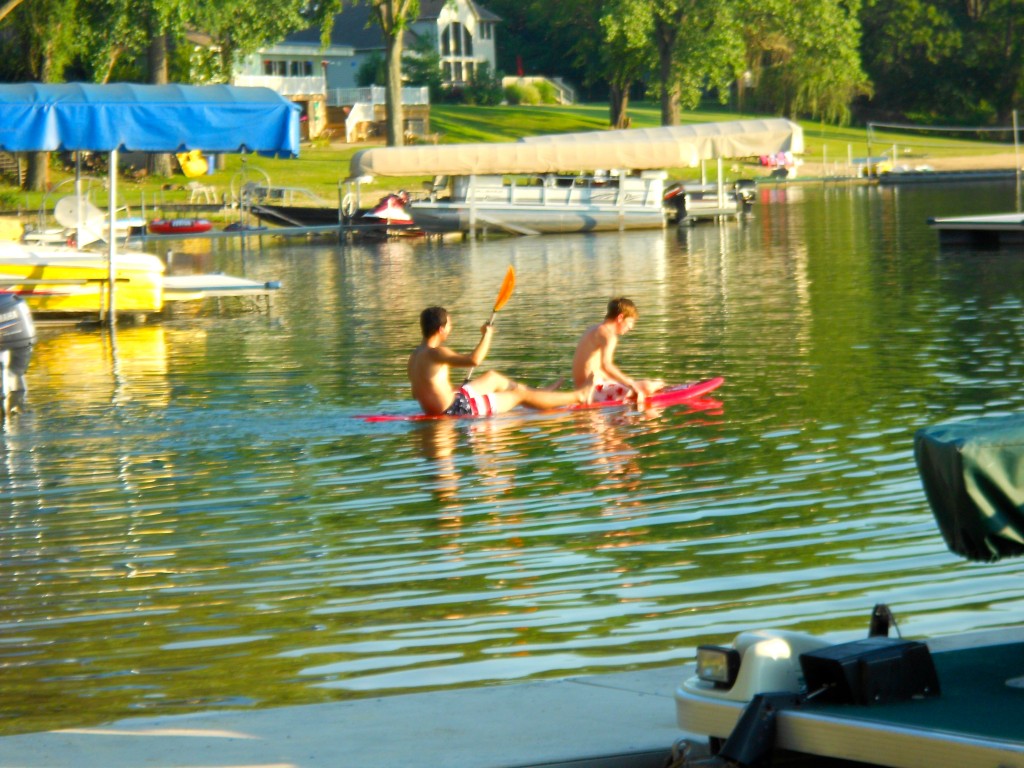
Last night Katie and I ventured up to Baron Lake near Niles, MI where Derek’s family has a cabin. We didn’t expect to see a bro moment take place. But that’s the thing with moments like these. Sometimes they can crop up out of no where. While we were taking turns practicing our dives off the pier we noticed two bros climbing on to a paddle board together. Nice and cozy. The icing on the cake? They literally referred to each other as “bro.” The cherry on top? One was wearing American flag board shorts and the other was sporting Canadian flag shorts. Priceless.
Just two bros doing a little paddle boarding.
by Amy | Jul 11, 2013 | Blog, The Art of Projects, the house
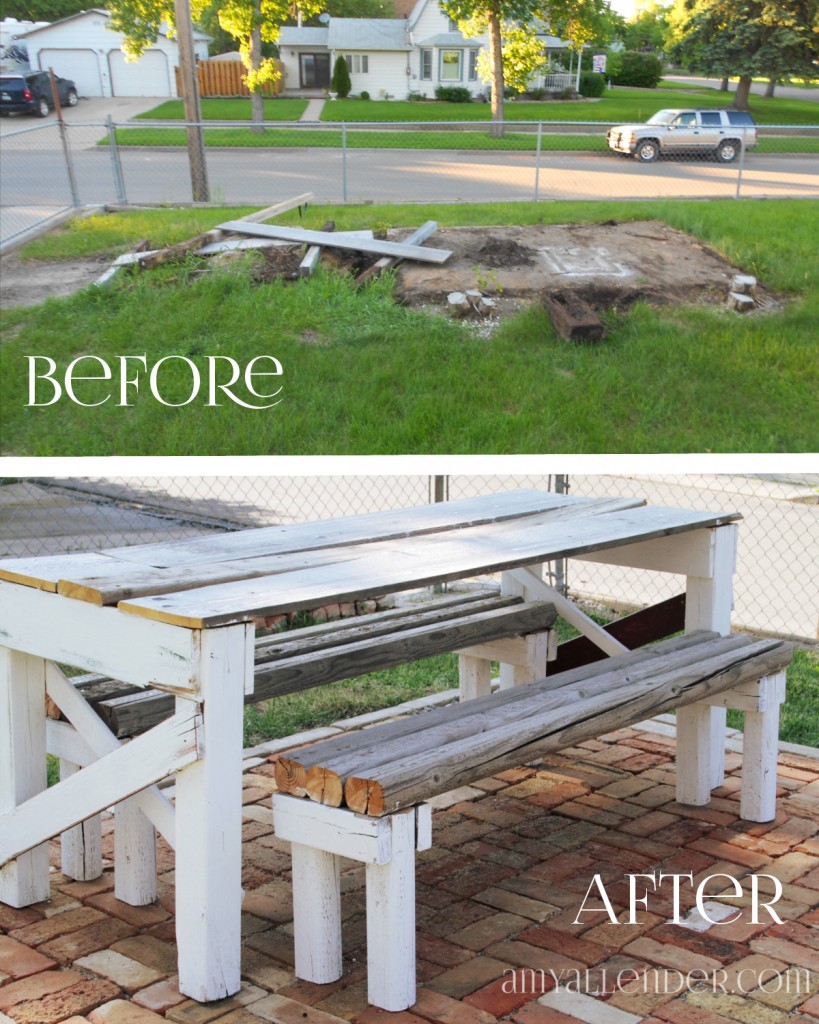
Today I’ll show you how I {yes, me…all by myself} built this table and benches for my patio. Are you impressed, or what?!
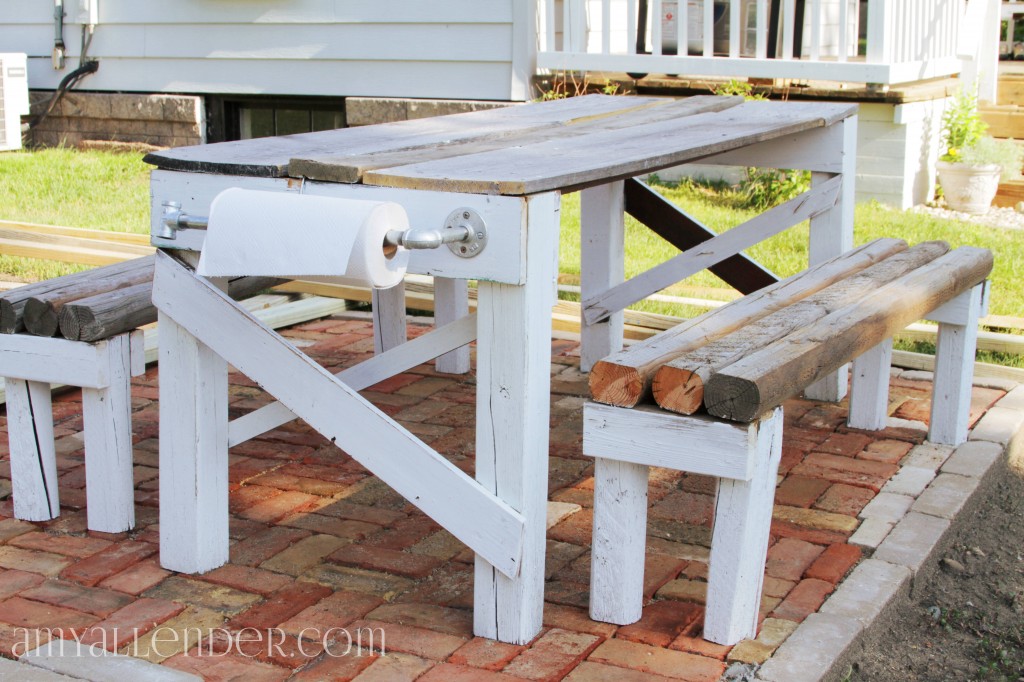
I have to say, this is one of my greatest before and afters. After my shed came down from the space that I wanted to lay the patio, I was left with a bit of a mess. Wood from the previous home-owner’s garden frame was left hanging around…then, as I leveled the ground I discovered quite a few landscape timbers lying in the dirt around the space that the shed used to stand on. I knew I wanted a place to sit and eat outside, but even the simplest table and bench combo was going to set me back several hundred dollars.
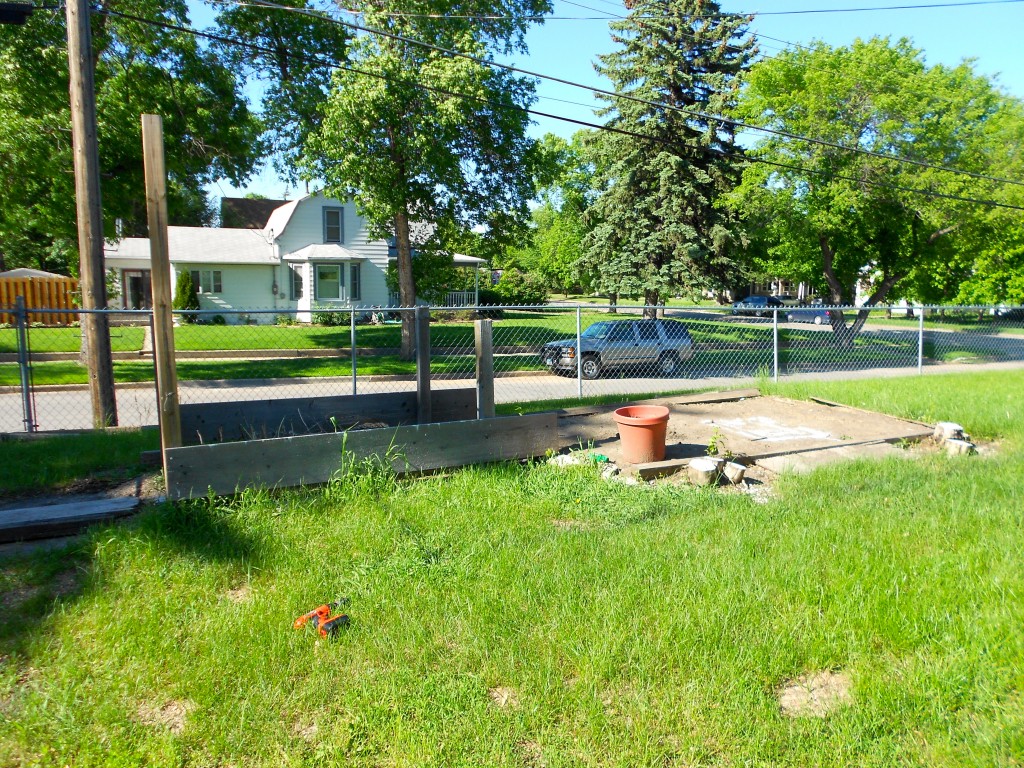
Not happening.
So I got creative, collected the resources I had on hand and got a little gutsy…and I made this happen.
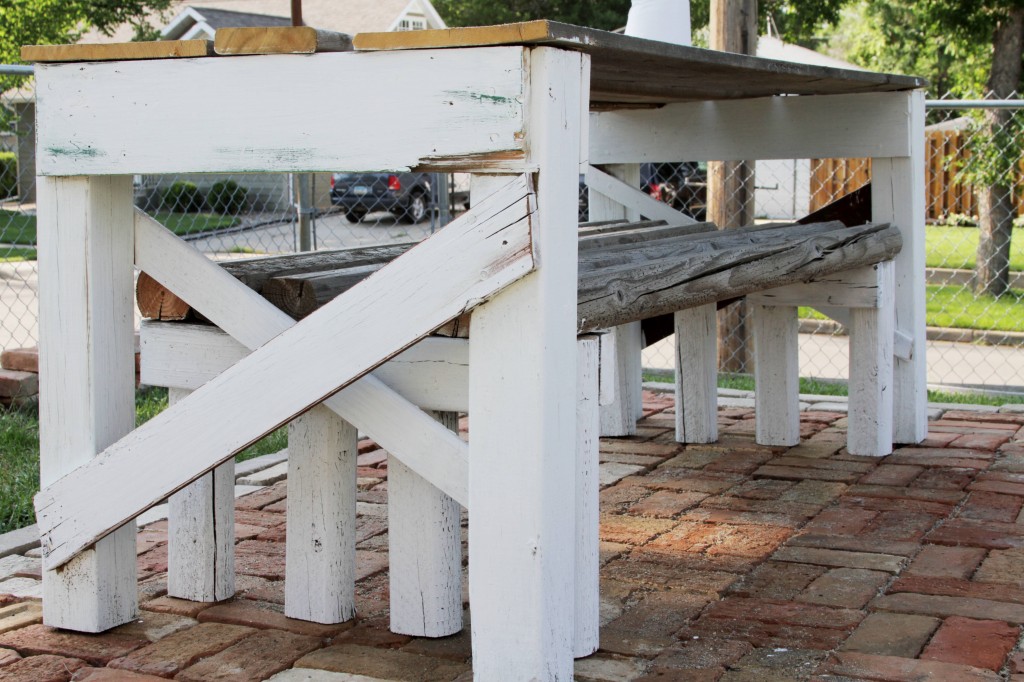
The inspiration for this project really hit me when I visited the Vintage Fair here in Minot a few weeks ago. I had been all over and racking my brain trying to figure out a way to get a table for my new patio without breaking the bank. I had kind of hoped to find something I could use at the Vintage Fair…but no luck. Instead I came across a table that was PERFECT in every way, except for the fact that it wasn’t for sale. Bummer. This is it:
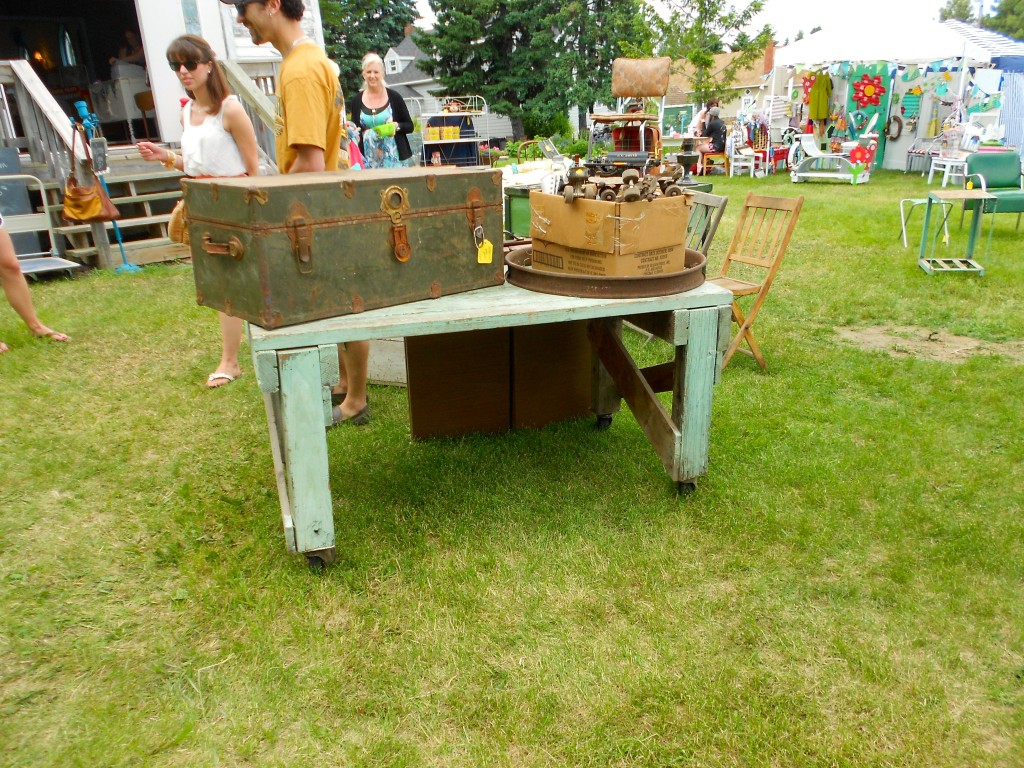
It was apparent that at one time, this table had been made with scrap lumber. Even though I couldn’t go home with it, it sparked an idea. Like a big cartoon thought bubble, my mind was filled with the memory of all that crap wood I pulled out of the yard. Bingo.
I was a little worried, because I’ve never been much of a carpenter. The closest I’ve come is following Jesus…and a couple woodworking projects with my dad when I was a kid. {But let’s face it…I was mostly an innocent bystander for the majority of those shop projects.} But I armed myself with lots of photos of this table, from every angle I could get…and I went home to replicate.
Here goes nothing.
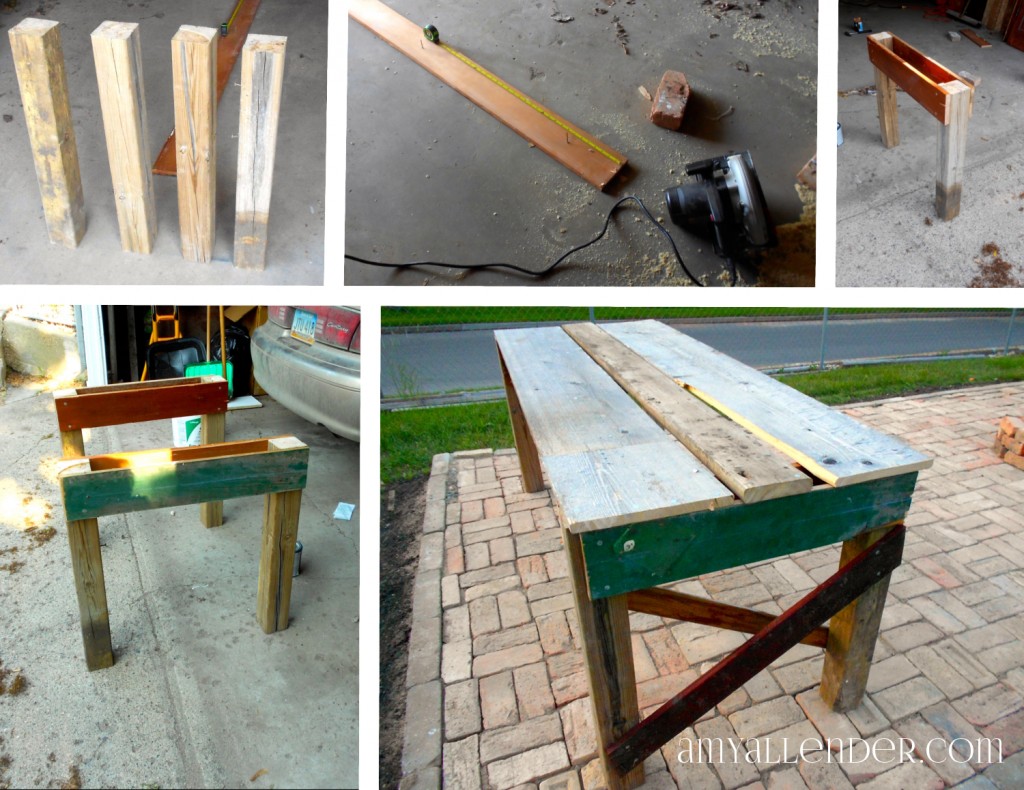
1. First I did a little Googling to figure out how tall a table usually stands. Most plans say 30-31″. I cut up this tall 4×4 to four 30″ lengths.
2. Next I did a little more Googling to find the typical width of a table. I wanted mine on the slender side to conserve space, so I decided on 28″. I cut four pieces to 28″. These will hold the legs in place. For this part I actually used a couple spare baseboards from the bedroom redo.
3. Nail those suckers in place. Make sure the top of your 28″ piece is flush with the legs and that the legs are square. Nail one brace to each side of the 4×4 legs.
4. Repeat that process for the second pair of legs.
5. To lend additional support you’ll need to come up with four more pieces to attach in an X to the legs. I also thing this looks super cute. I found some old fence posts{?} behind the garage. So I used those. You want one end to rest right under the brace. To make measuring easier I laid my leg piece right on top of the piece I wanted to use for the X. Then I drew a line and made my cut. Attach one to each side of your legs.
6. Next decide how long you want your table to be. For my space 6′ was just about perfect. Stand your table legs apart and lay some long planks across the top. I used the two sides from the “garden” and one leftover deck plank. When you’re happy with how it looks nail them in place. Use at least four nails per end, per board. {2 into each brace.}
For this project I used all nails. Partly because that’s what the table at the Fair was made with and I liked the rustic feel of seeing them. Partly because that’s what I had on hand.
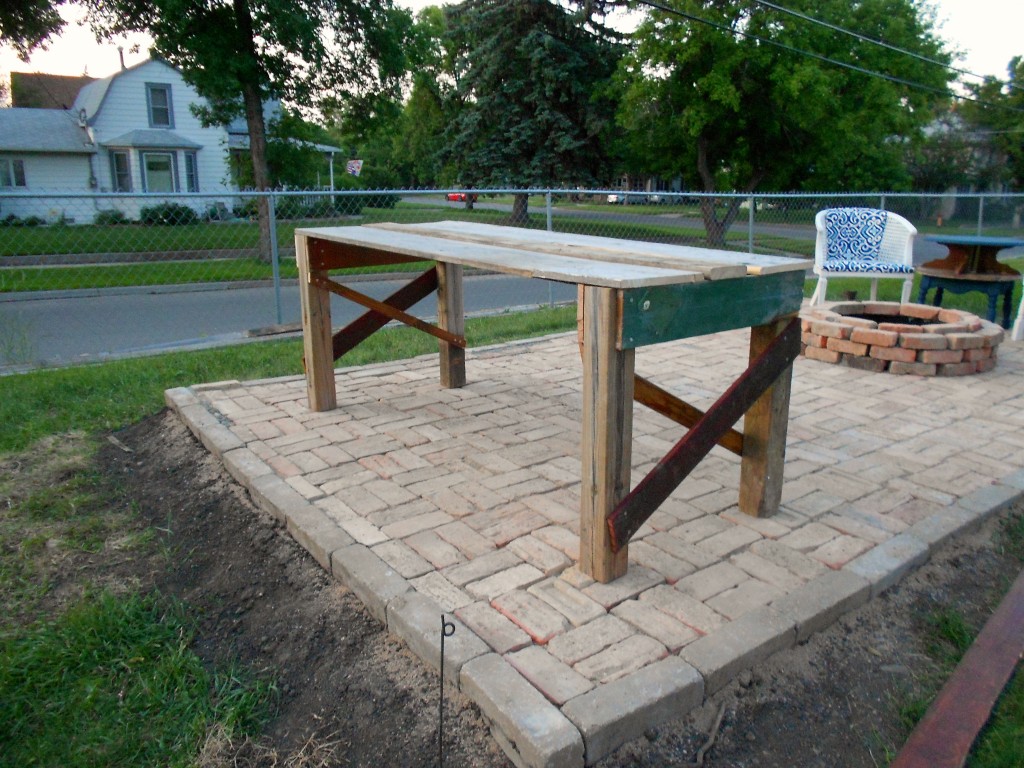
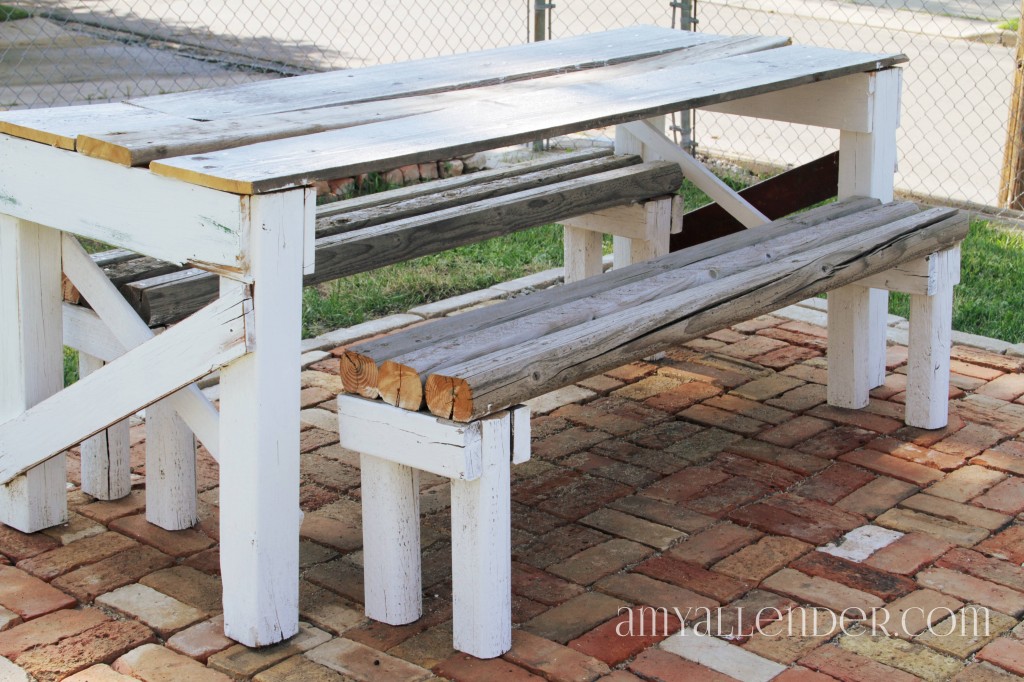
I so wanted to be happy with it just like that. All rustic and mis-matchy. But…you know me. Nothing is complete without a little white paint. I felt like it would really unify the table with the rest of the patio {ahem…my awesome chairs} if I painted it. I painted the legs and left the top alone. I love its weathered gray tones.
Now on to the benches. Those were so easy! They are like mini tables, so once you’ve done the big part these will be a breeze.
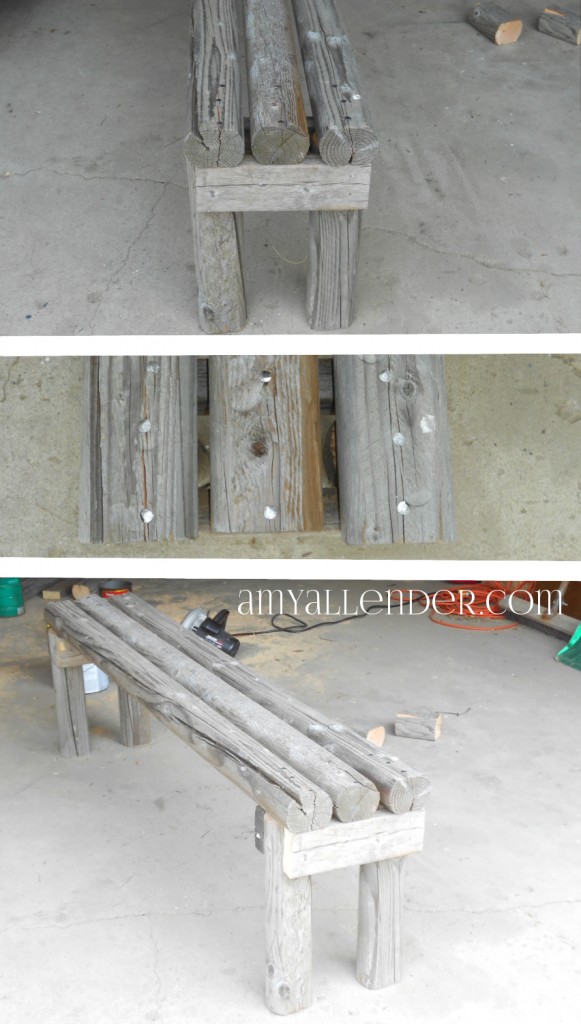
First build your legs. Google told me the bench should be about 18″ tall, so I had to do a little math. The landscape timbers are 3″ thick, so I cut my legs to be 15″ tall.
Next decide on your seat width. I made mine on the narrow side so I could store them under the table together. These are 10.5 inches wide. Cut your braces and attach them. One to each side of each set of lets.
Then nail your long timbers across the top. My benches are 54″ long. Again, so they could be stored under the table. Since these timbers are so thick I had to make a run to the hardware store for extra long nails. This was my only expense in the whole ordeal…$4.59. I’d say that’s a pretty good deal for a table and two benches. And as an added bonus I don’t have so much junk lumber laying around my yard.
Just like with the chairs yesterday, if you want this to last you’ll need to use products made for being outside. All this lumber is pressure treated or cedar {with the exception of those two baseboards} so I know it’ll hold up. The paint I used is more of that white deck stain from last summer’s Deck Redo.
And, for real…if I can make this, so can you.
Amy
by Amy | Jul 10, 2013 | Blog, The Art of Projects, the house
Let me start by telling you that…the patio is done! It’s been done for about a week…but things have been pretty busy around here so I haven’t had the time to sit down and really show it off to you the right way. I even had my very first dinner gathering on it on Sunday. Pretty darn exciting! It’s still missing the lighting, but besides that I’ll call it good. The lighting will just have to wait until I return from a visit home to Indiana next week. But more on that later.
If you have a patio or a deck…or are looking at putting one in you’ve probably noticed that, well, outdoor stuff is pretty pricey. I hate pricey. I like affordable, eclectic and thrifty. If there is one thing that the Allender clan is good at {but let’s be honest, we’re pretty savvy at lots of things} it’s coming up with solutions. We are brainstormers willing and able to see a creative use for a mundane item. So that’s exactly what I did. I got creative and thrifty when furnishing my new ODR {outdoor room, folks.} Today I’m thrilled to show you the first part of of my conversation area…take a look.
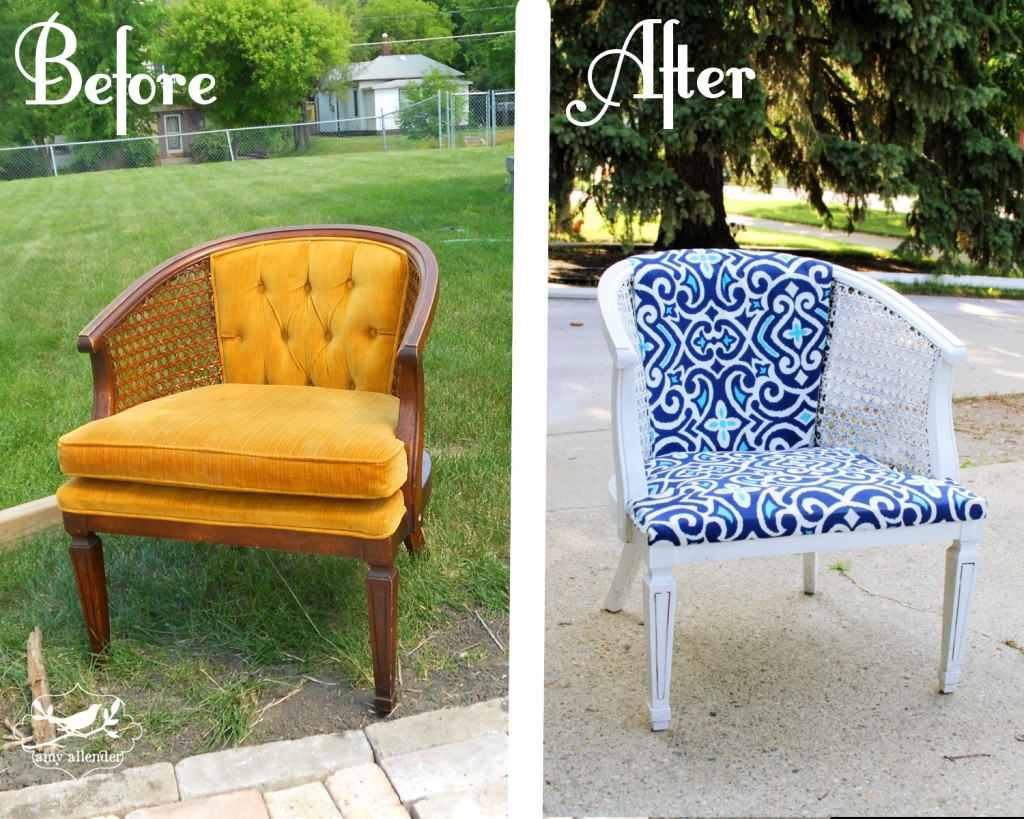
Big difference, right? I bought two of those yellow upholstered chairs at the Salvation Army Thrift Shop for $15 each. When I laid my eyes on them, I knew that if I put a weather resistant fabric and some white paint on there…they’d be perfect.
Here’s what I did. Really, it was so easy, I know you can do this. When I got these chairs they smelled super bad. Like mothballs and musty closets. When I proudly showed these gems to my friends in the garage, the first thing they noticed was not the cool lines or the potential. It was the smell.
So my first order of business was ridding them of anything that could capture the odor inside. I tossed the cushion and ripped off the fabric and all the padding underneath. Then I scuffed up the glossy finish on the exposed wood with some sand paper and added two coats of exterior grade paint. {Leftovers from last year’s deck redo.}
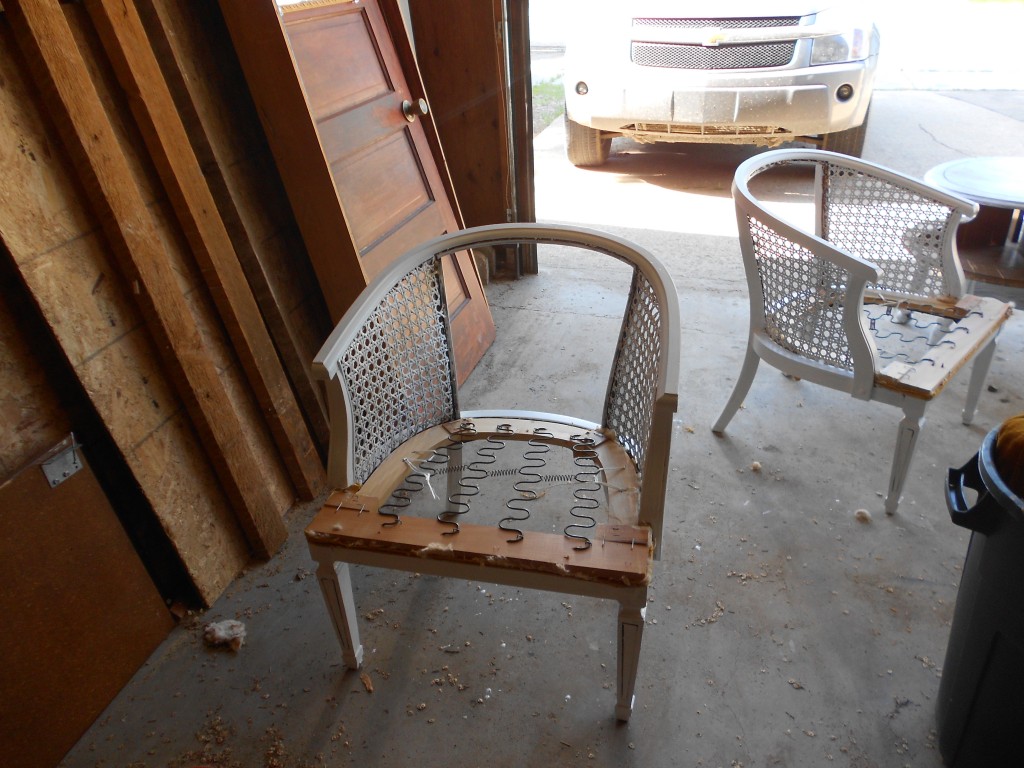
Once the paint was dry and all the stuffing was safely in the trash it was time for new cushioning and upholstery. I went down to my ever loyal JoAnn Fabrics. I picked up two yards of outdoor fabric and outdoor cushions. If you are making over a piece of furniture that you plan to keep outside, it is pertinent that you use things made for the open air…fabric, padding, paint, everything.
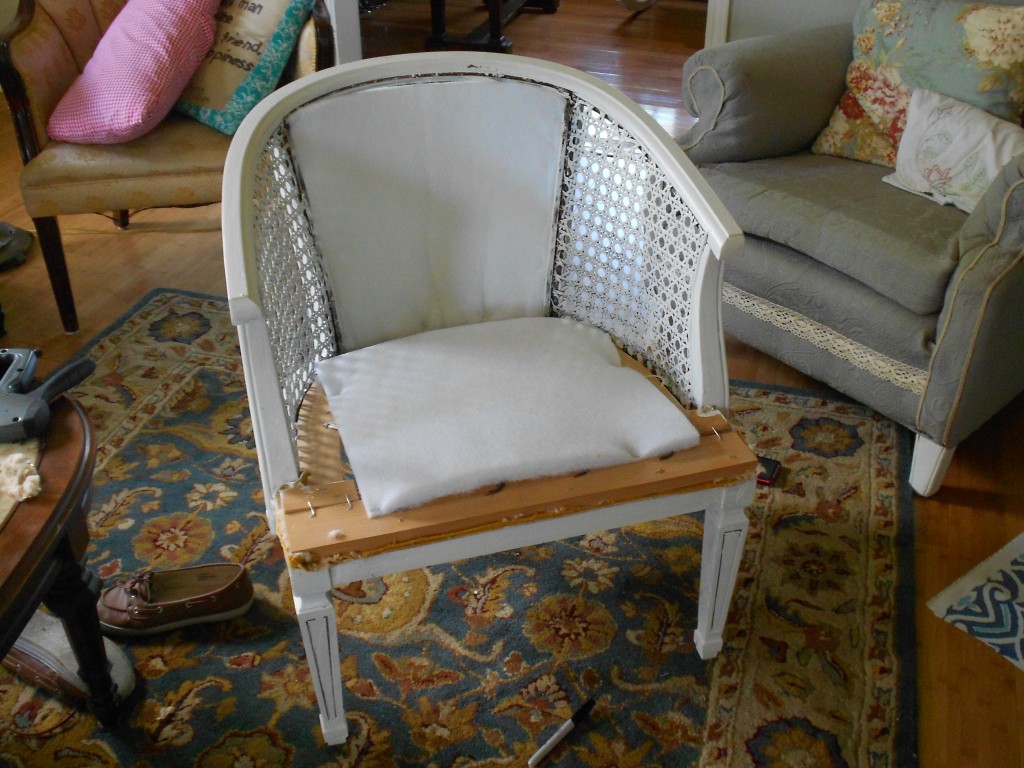
Now, the way I did the upholstery is a little janky. I put one cushion on the seat {as you can see one a size bigger might have been a better option, but this is still okay because it covers the springs.} The other cushion a put in the back of the chair. I took the staple gun to them to hold them in place. Then it was time for fabric.
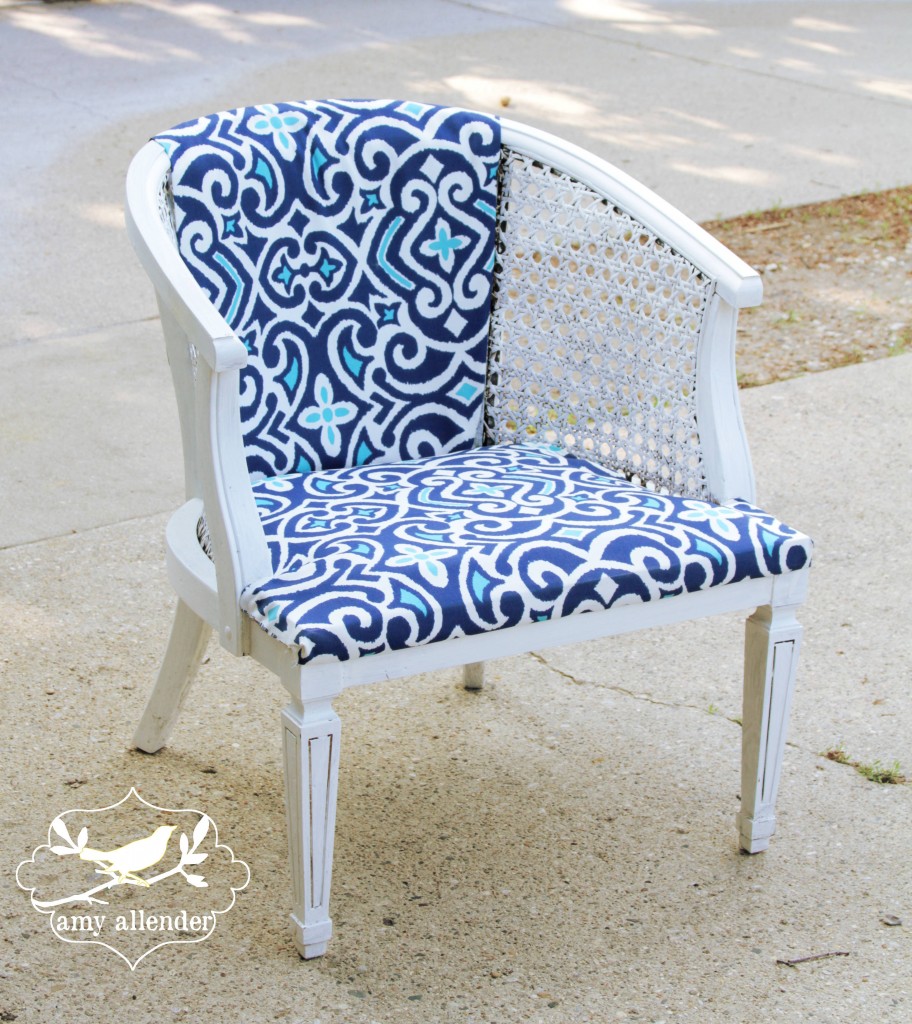
I measured the size of the seat and added about 2″ to the whole perimeter. Then I did the same thing for the back of the chair. I whipped out my high-heat glue gun and started attaching it to the chair frame. Starting on the bottom {or back of the seat} I glued it in place, then pulled it tight in the opposite direction. You want it really good and taut. In the places that the seam shows, fold the fabric under to make a “finished” edge. As you go, trim off any excess that gets in your way.
Just to make things easier on myself, I wrapped the fabric all the way over the to of the chair and attached it to the back.
It’s not perfect by any stretch of the imagination, but it looks {and smells} lots better. And the total cost with all the supplies, came out to about $50 for the two chairs. And while these are weather resistant, I don’t recommend leaving them out in a downpour if you know it’s coming. Taking them in, or covering them with a plastic drop cloth will prolong their life.
Come back tomorrow and I’ll show you my new patio table. That I made. For FREE! Yep, free. Okay, if we are getting picky, it cost $4.59 for nails. Give a girl a break.
Amy


