by Amy | Jan 29, 2013 | Blog, The Art of the Kitchen

I live by the theory that if we only had good days we’d never really appreciate them…because we wouldn’t know the difference. So every once in a while it’s okay to embrace a day of complete chaos where nothing turns out as it should. Then we can really understand the value of a good day.
Okay, with that said, I bet you can guess what kind of tale you’ll see here tonight. That’s right. Another awkward, silly, can’t-believe-that-just-happened story of my life. Like I told you last week when I shared my jeans and biscuits and gravy tales {didn’t read them?…you need to} when something embarrassing happens my first thought is anger/never-tell-anyone. Then I cool off and realize just how entertaining it was. To be sure that this was worth relaying to you I tested it out on my classes today at the gym. Their reaction assured me that you too will enjoy this nugget of crazy.
It all happened on Saturday. The spouses from Derek’s squadron were getting together for our monthly social at a paint your own pottery place downtown. {Margies. If you live in Minot, you really need to go.} Everyone was asked to bring a dessert or appetizer to share. I volunteered on the dessert side {greedily thinking I’d be able to binge on the leftovers with a white russian late at night.}
I found an awesome recipe for snicker-doodle blondies. {The recipe is pinned to my get-togethers board.} So I whipped them up put them in the pan and into the oven. Obviously I licked the bowl. Boy was that batter a delight.
While the blondies were baking I decided I’d turn the kettle on and have a cup of tea while watching some Dateline online. No big deal. I should also mention in here that we have an electric range. I prefer gas. Why, you ask…one primary reason: You can immediately tell what burner you’ve switched on. Yes, my friends…I’m foreshadowing.
I got so into the Dateline mystery that I didn’t even think about my tea. That show is good. Am I right? The timer went off and the blondies were done. I pulled them out. They were truly a vision of perfection. I sat the pan {a glass 9×13 pyrex} across the burners on the stove to cool. I went back to the couch. A few minutes later I remembered the kettle and wondered why it hadn’t gone off. About this same moment, Derek asked if I smelled smoke.
Yes…yes I did.
Into the kitchen we ran to see the blondies smoking. I grabbed a towel and lifted it above my head. Sure enough, I flipped on the wrong burner. The kettle was stone cold, and I had sat my pan on a very hot burner. Through the glass on the bottom of the pan I could see a perfect circle of black, burnt blondies. Woof.
To get the smoke out I took the pan outside and set it on the deck. Once the kitchen was clear I brought the pan back in. You think the story’s over? Not even close.
As the glass cooled further something awful happened: the pan exploded. Glass and sugary delight went everywhere. Pan ruined, dessert ruined even more.
Being quick on my feet I pulled a carton of strawberries out of the fridge and chocolate chips from the cupboard. I was taking a dessert, darn it. I put the chips in a small bowl and put them in the microwave, stirring every 30 seconds. Well, the bowl got too hot on the last 30 and the chocolate burned into gross clumpy ball.
It’s now 10 minutes until I need to leave. I’ve given up on dessert. When my friend Allison arrived to pick me up she stepped inside and said, “Uh, did something burn?” She’s too sweet…she should have said, “What the heck, it smells like burnt hair and black marshmallows in here.” Not to even touch on the fact that the whole house was still very cloudy and hazy from the disasters that had just occurred.
Pottery painting was fun. And there was so much food my single dessert wasn’t missed and I didn’t offer up an explanation for why I showed up empty handed. {I was still in the never-tell phase.}
I got home and decided to make potato soup for dinner. {Yes, the madness continues.} Everything in the house smelled like burnt sugar; my hair, my clothes, the couch cushions. Yuck. But we must persevere. So I peeled potatoes. No big deal. I’m sure even a well trained monkey can do that…let alone a college educated 26 year old wife. I picked up my last potato. Peel, peel, peel, rip.
I caught the peeler on my middle fingernail and ripped it. Not like, “Oh I broke a nail.” I’m taking seriously ripped. Blood gushing. Nail torn 1/3 of the way to the nail bed and half way across. That was it. Cooking fail number three in less than twelve hours. I couldn’t even believe it.
The story has a happy ending though. The potato soup {minus one bloody potato} was delightful. The blood finally stopped. We had friends over to play euchre and Derek and I won. Then we played rummy and I cleaned up on that too.
Not that this story will change your life, but as always when I share these moments from my life I hope they bring you a little smile and some laughter. The value of days like this is priceless because it really does teach us to cherish our “average” days.
Amy
PS…Are you guys watching Downton Abby? I couldn’t even believe last night’s episode!! Yikes!
by Amy | Dec 17, 2012 | Blog, The Art of Gathering, The Art of the Kitchen
Last night we hosted our annual Jingle Mingle holiday party. Of all the parties I have the privilege of hosting every year, the one we host at Christmas is my favorite. This year I kept things simple by setting up a hot chocolate bar {with all the fixin’s} and of course cookies and treats.

Here are my tips for a stellar hot cocoa bar.
1. Set out a canister of hot chocolate instead of packets. {So guests can make it as strong as they like.} A recipe for my mix is below.
2. Offer a variety of stir ins. Crushed peppermint, whipped cream, marshmallows, cream, and Kalua are all good options!
3. Keep the milk hot. Don’t send guests running to the microwave. Keep the moo juice warm in a crock pot.
In addition to cocoa powder I also made those cute hot-chocolate-on-a-stick’s that have been cropping up all over the Internet. Now, don’t be intimidated. They really were not as hard as you’d think. I followed this recipe for the chocolate blocks…and used this Alton Brown recipe for the marshmallows.
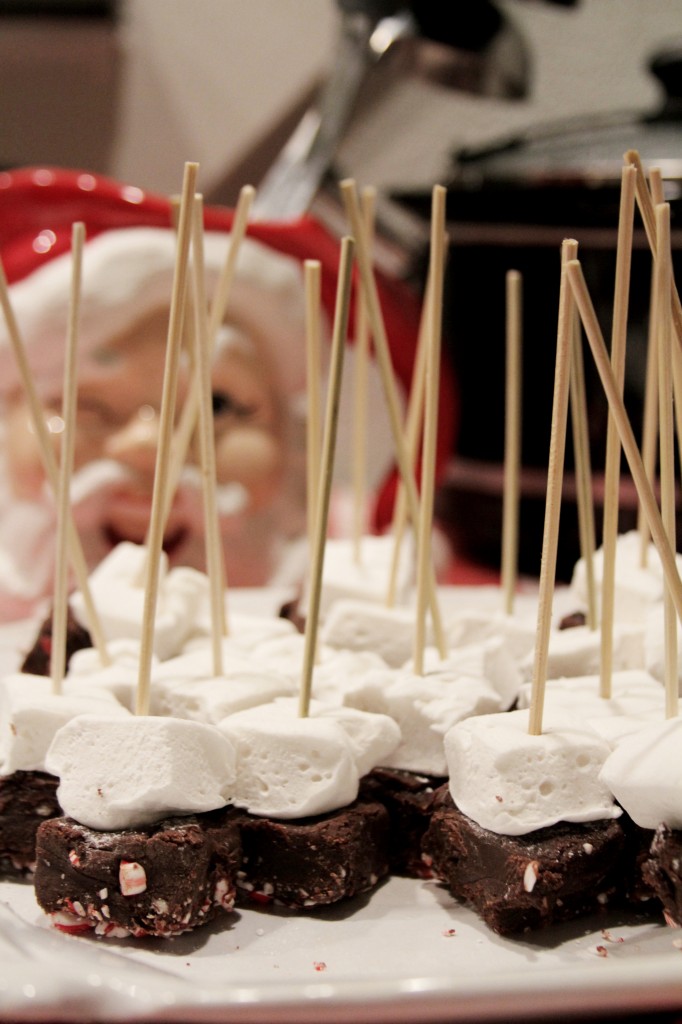
Word to the wise…Homemade marshmallows are the bomb. So good! And don’t freak out if you don’t have a fancy Kitchen Aid mixer. I used a little hand mixer and it worked just fine.
When I poured the fudge blocks into my pan I sprinkled crushed candy canes on top to make a rich peppermint hot chocolate block.
When just stir into a cup of hot milk. Very tasty!
To make your own hot cocoa mix follow this recipe:
Mix all these ingredients together…
1 Cup unsweetened cocoa powder | 1 Cup powdered sugar | 1 tsp cinnamon
To make flavored hot cocoa mix these ingredients together…
3/4 Cup unsweetened cocoa powder | 3/4 cup powdered sugar | 2/3 Cup of your favorite flavor dry coffee creamer {like CoffeeMate}
Stir 3 spoonfuls into a mug of hot milk. Yummm!
If nothing else…make the marshmallows. Thank you to Make & Takes for the awesome idea that has swept Pinterest this holiday season. You rock!
See you tomorrow!
Amy
by Amy | Dec 4, 2012 | Blog, The Art of Gathering, The Art of the Kitchen
What would Christmas be with no cookies? I guess it’d still be Christmas. A holiday celebrating the birth of Saviour of man kind…but there would be fewer stomach aches, and nothing to dip in your hot cocoa.
I digress…
Point? I. Love. Christmas cookies. Love.
So I was thrilled with a friend hosted a get together to make several yummy batches. The best part was that we all got to split the goodies at the end.
Upon arrival I found that our hostess {Wyrene} had been busy before our arrival. She had already prepared a crockpot full of hot cocoa and these AWESOME hot-chocolate-on-a-stick. I’m not sure what recipe she used, but they were amazing. How genius? Fudge+Marshmallow+Stick…stir it in a hot cup of milk for a delightful treat. Here is a similar recipe I found. Seriously…there were bomb.
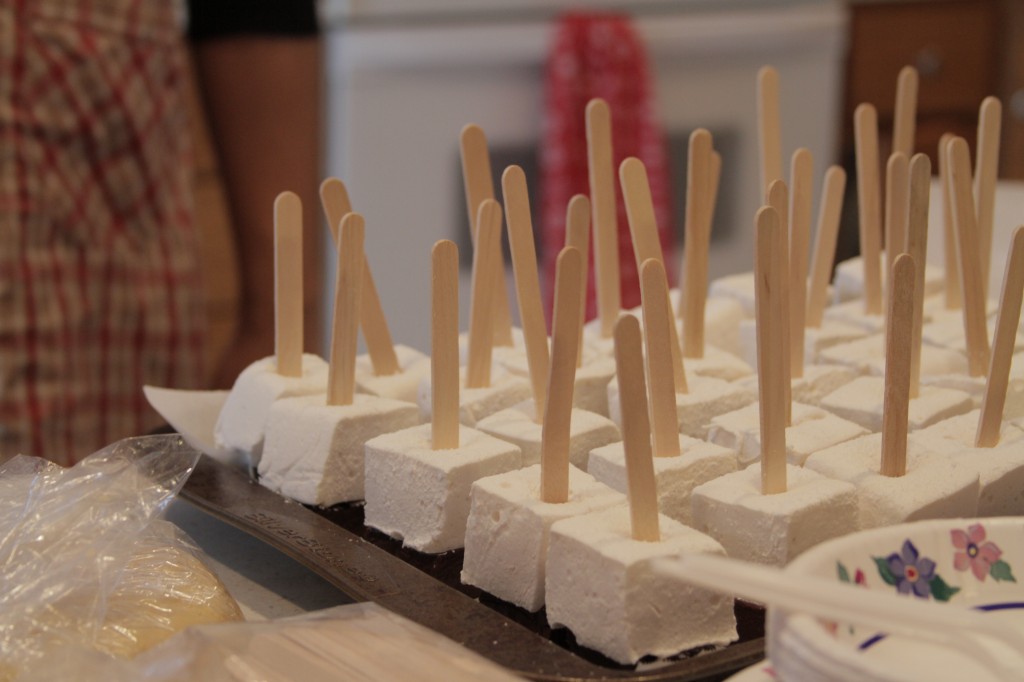
Wyrene had also made sugar cookie and peanut butter cookie dough ahead of time, so we got to do the fun part together. We started with the PB. Let me tell you…these were my favorite cookie of the day! How adorable is that?
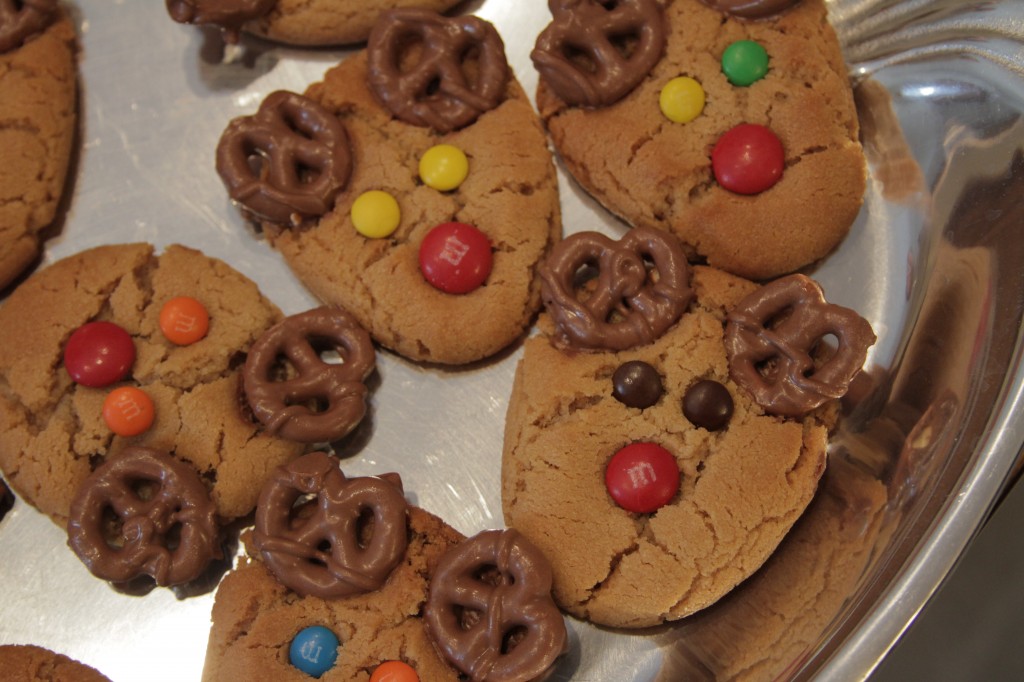
They’re reindeer!! Those are chocolate coated pretzels and M&M’s. Press them in place as soon as the cookies come out of the oven. How sweet would these be for a classroom party? If only I were in 2nd grade again and my mom knew these existed…
I like the brown eyed ones best. The others look a little zombie-ish. Especially that one in the photo with the glowing yellow eyes…But who cares? It’s Christmas and we are totally allowed to eat things that look like laser-eyed-sleigh-pullers.
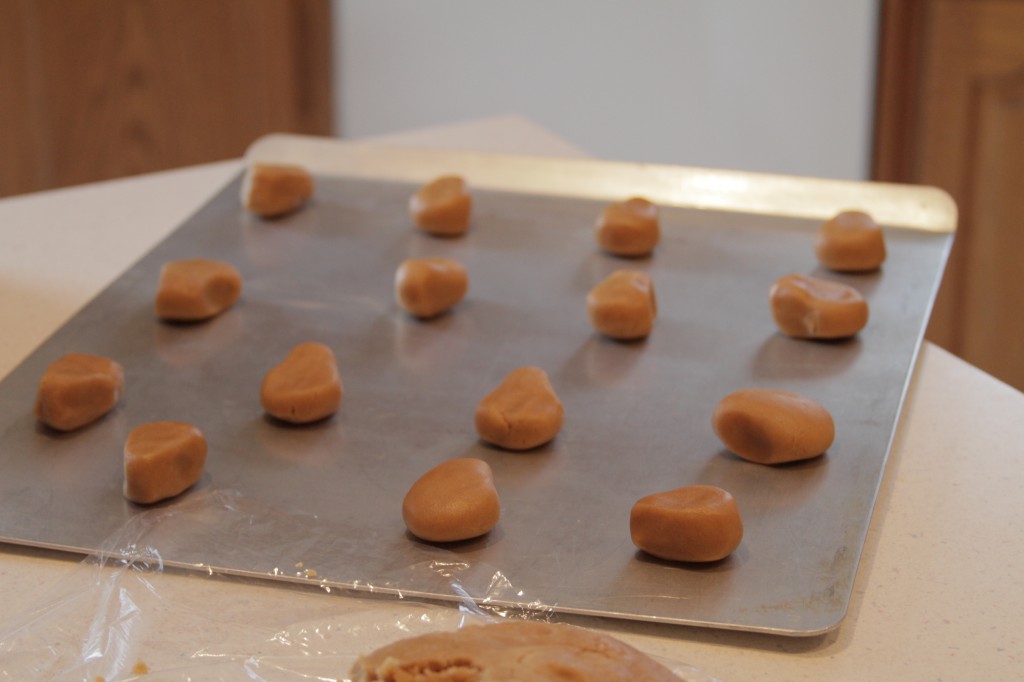
Here is a photo of how we shaped the dough to get our heads just right.
So the cookies were delightful. But what really took the cake {or cookie, as the case may be…} was Wyrene’s two-year-old daughter. She is a laugh a minute. I am in love with her busy personality. Let me tell you…this is one spunky kid. And even though she’s a mini, she’s still a girl…entitled to her fair share of cookie making.
One of my favorite moments came when we were done rolling out the dough for the sugar cookies. We left the flour on the counter and next thing we know, this little one had made a giant mound of flour. She’d taken it teaspoon by teaspoon out of the canister. We had our backs turned until we heard a little voice yell:
“Look! It’s a mountain!”
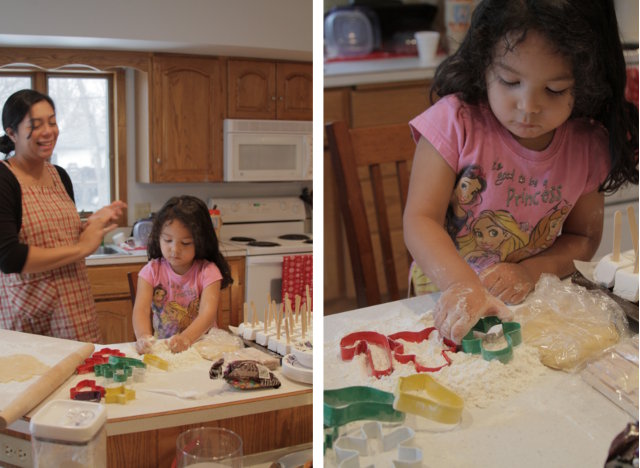
Yes…a mountain of flour. In the photos above she had torn down the mountain and begun burying cookie cutters. Needless to say she was a mess. But a little flour seems an awful low price for a good laugh. {Notice that she’s in different clothes in the following set of photos. Wonder why?}
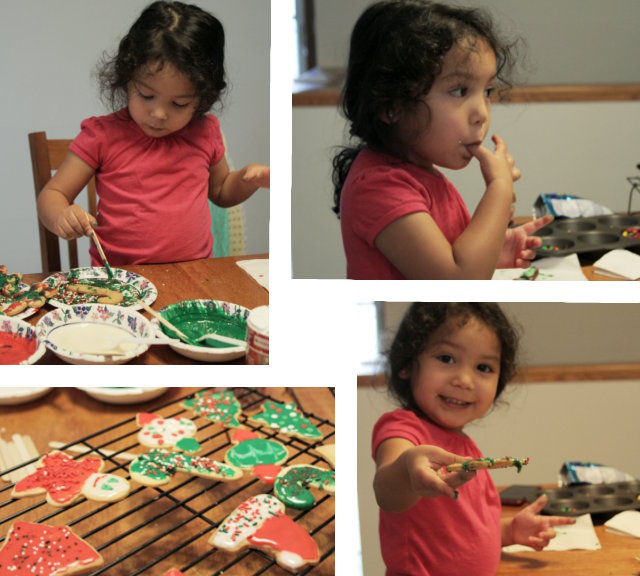
To me, no matter what kind of cookie…the best part is always decorating them. Whether that means slapping some pretzels in place as antlers or glazing them with bright icing. As you can see our best helper was very into this step as well. She did a great job. Seriously, are kids precious? Who wouldn’t want to accept a cookie from a cutie like that?
We had a great day. If I can’t be with my mom and sister and aunt and cousin to bake holiday treats, I’m glad I can be among a lovely group like this. My cookies are gone now, but let me assure you…they were indeed made with love.
Amy
by Amy | Nov 19, 2012 | Blog, The Art of Gathering, The Art of the Kitchen
It’s only a few days away!
If you don’t know what I’m talking about, you must be reading from another country. Because in America, the only thing we love more than food…is a holiday that celebrates food.
Thanksgiving.
My parents got in last night, and boy am I glad to have them here. I just adore it when folks make the trip to come visit us…wherever we are. But I digress. You saw the title of the post and you want a recipe, darn it.
So here we go. This pumpkin bunt cake is a creation of my own and I’ve been celebrating fall and Thanksgiving with it for years now. {Ever since the recipe came into being.} It takes about 20 minutes to whip together…then about 55 minutes of filling your house with amazing cinnamon-pumpkiny smells.
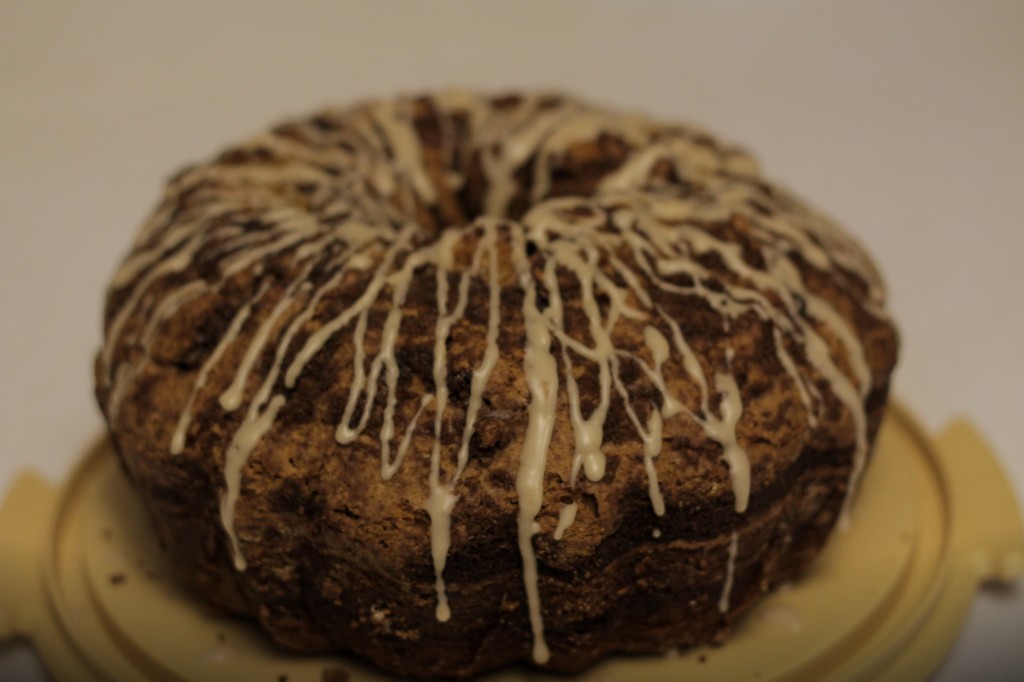
Here’s what you do:
Get out a big bowl.
In that bowl beat together:
3 cups sugar
1/4 cup butter {softened}
1/2 cup vegetable oil
Then…
Add the following ingredients one at a time, mixing after each:
4 eggs
1 tsp vanilla
1/4 tsp salt
1/2 tsp allspice
3/4 tsp cinnamon
2 tsp baking soda
Finally…
Alternate adding the final two ingredients. First some flour, then some pumpkin…until it’s all mixed in.
3 1/2 cups flour
1 – 15 oz can of pureed pumpkin
Pour half of the batter into a greased and floured bundt pan. Sprinkle with 1/3 cup brown sugar and 3/4 tsp cinnamon. Then pour the rest of the batter on top. Sprinkle the top of the batter with more cinnamon and sugar.
Bake at 350 for 50-60 minutes. It’s done when a knife stabbed into the center comes out nice and clean. After it’s cooled for a bit mix up 3/4 cups of powdered sugar with 1/4 cup of milk {more if you want a thinner glaze}. Then use a spoon to drizzle the glaze over the top of the cake.
You’re gonna love this one.
Amy
by Amy | Sep 5, 2012 | Blog, The Art of the Kitchen
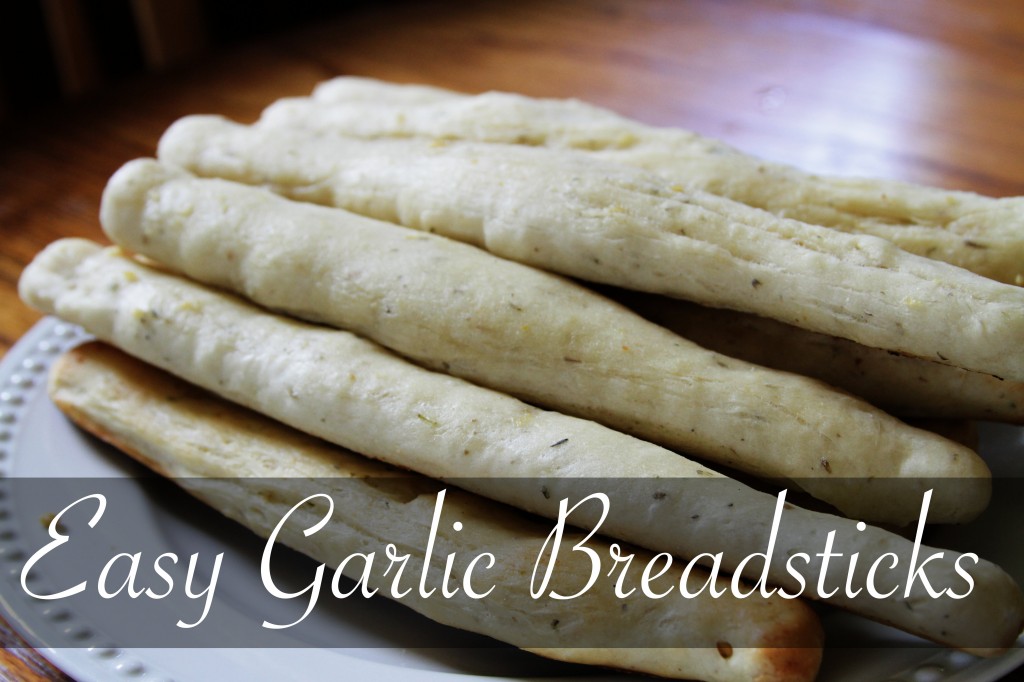
I’m not one to brag about things I do. When I do, it’s mostly just making a cocky joke. Really, deep down, I think I’m pretty plain. But I am good a few things. Making bread sticks is one of those things.
And because I believe everyone should be entitled to a good bread stick and bowl of soup, I’m relaying my recipe to you.
It’s easy. You don’t have to be a whiz bread maker like Peeta Mellark. All you need is a little time and an electric mixer.
Here’s the full list of ingredients.
Flour | Yeast | Salt | Oregano | Garlic Powder | Olive Oil | Pepper | Water | Butter!!
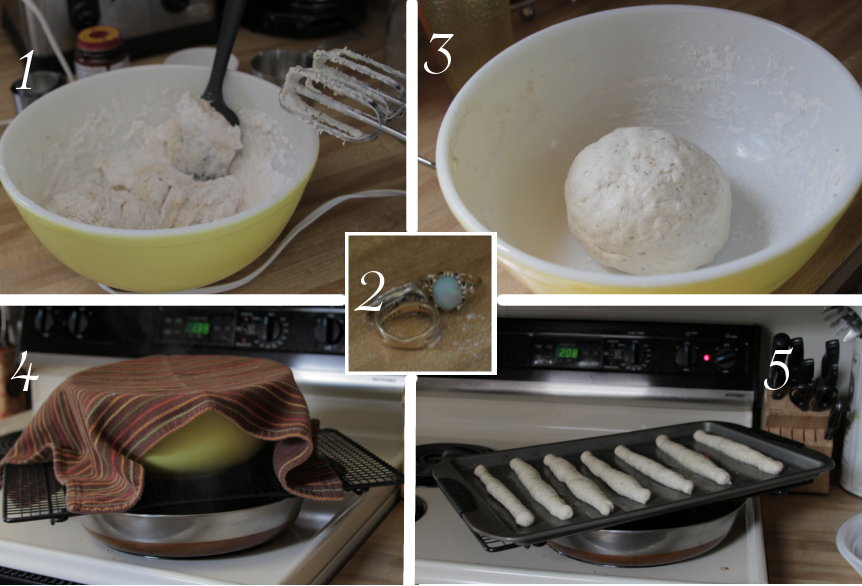
1. Mix up your dough. | 2. If you wear rings…take them off before you knead!! | 3. Coat your ball of dough with oil and let it rest. | 4. To speed up rising time, set your covered bowl over a baking rack on a skillet of simmering water | 5. Roll your sticks and let them rise again. {cover them with a towel}. | Read on for details!
Here’s what you do.
In a medium mixing bowl mix these ingredients together:
- 1 1/4 C flour
- 1 packet of yeast
- 1/4 tsp salt
- 1/2 Tbsp oregano
- 1/2 Tbsp garlic powder
- 1/2 tsp olive oil
- 1/8 tsp black pepper
- 1 C warm water
Use your electric mixer to combine all these things for about 30 seconds. Then crank the speed up to high and let it mix for 3 minute. The consistency will be sticky and gluey.
Take your beaters out, grab a sturdy spatula or wooden spoon and gradually mix in 1 1/2 C more flour. {I do 1/2 C at a time.}
Now it’s time to knead. I leave the dough in the bowl, but you can turn it out onto a clean floured surface if that’s what you prefer. Knead the dough, folding it over itself and adding a bit more flour as you go for about 7 minutes. By the end of that amount of time your dough should be soft {but not sticky} and stretchy.
Sprinkle a little olive oil on your hands then pat your dough into a ball. Cover it in the bowl with a clean towel and “let it rest.” I just learned a cool tip for expediting the rising time….Simmer a pan of water on the stove, place a baking rack over the pan then place your covered bowl on top of that.
If you are doing the water technique let it rise for 15 minutes. If you are just letting it rise on the counter let it sit for 25 minutes.
Once you dough has had a nice rest divide it into pieces just a bit bigger than a golf ball. Roll the small dough balls into skinny ropes. I just roll them between my hands. Place those on a greased baking sheet. Once they are all rolled, let the sticks rise again {covered with a clean towel.}
You can place the pan over steaming water for 15 minutes…or let them rest on the counter for 25 minutes.
While your bread is resting for a second time melt 1/2 stick of butter. And preheat your oven to 400 degrees. When time is up, gently brush the raw dough with butter. Sprinkle lightly with garlic powder. Put directly into the oven.
Bake for 6 minutes.
Remove them from the oven. Brush more butter over them and return to the oven for 5 more minutes.
When they are done baking…coat them again with butter and sprinkle some Parmesan cheese over them if you like. {I like…} And you’re done.
Megan…I know this is your favorite. I miss our days at Olive Garden together, so just know that this post is dedicated to you!
Amy
by Amy | Aug 7, 2012 | Blog, The Art of Adventure, The Art of the Kitchen
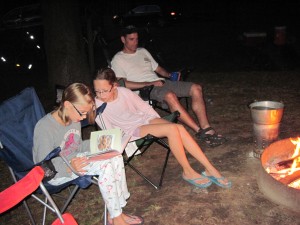
Tonight I am going to change your campfire world. Ready? Let me introduce you to s’more’s younger sister…The campfire cone.

I originally saw the idea here…and since I was in charge of bringing dessert for one night of our camping weekend, I thought it would be a perfect addition. Here’s the drill. You’ll need:
Waffle Cones * Mini Marshmallows * Chocolate Chips {or a mix of chocolate & peanut butter chips} * Banana* Aluminum Foil * A Camp Fire * Tongs
Here’s what you do. This is a DIY creation. So, name your own adventure. Put in what you like…and leave out what you don’t want. Layer in marshmallows, chips and fruit until your cone is full. Then wrap it up in foil. Place the wrapped cone in the embers around the fire {not on direct heat} or on a charcoal grill. Use the tongs to turn them every minute or so until everything is gooey and melted. This will take about 5 minutes. Be sure to turn them or else you’ll end up with a burned cone!
Have the wet wipes handy…this can get messy. But I promise it will be worth it. I’m so glad I stumbled across this tasty treat. I hope you enjoy!
Amy
by Amy | Aug 1, 2012 | Blog, The Art of the Kitchen
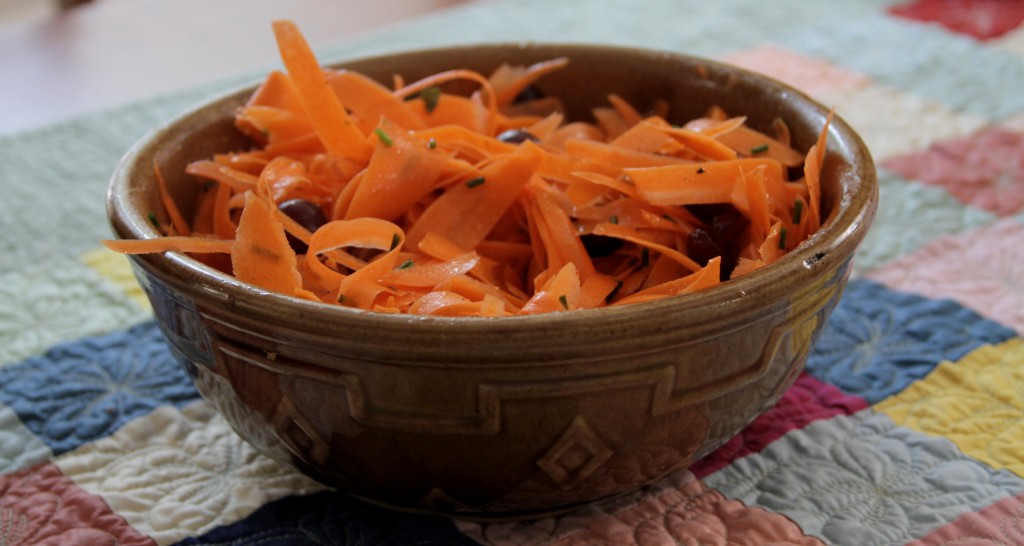
Summer is salad season. And, as I’ve been trying to eat more raw {produce washed, but uncooked or altered in any way}…this salad was a good find. I can only do so many spinach side salads before it gets old.
I saw a salad like this in an issue of Better Homes. I didn’t write it down though and was forced to make up my own version. So I did.
It’s light juicy and totally guilt-free.
For this big bowl that served as a side for about 8 of us I used:
- About 2 lbs {or 5 large} carrots
- 1.5 Cups of red grapes, halved
- 1 to 1.5 Tablespoons of chopped chives {green onion would work too}
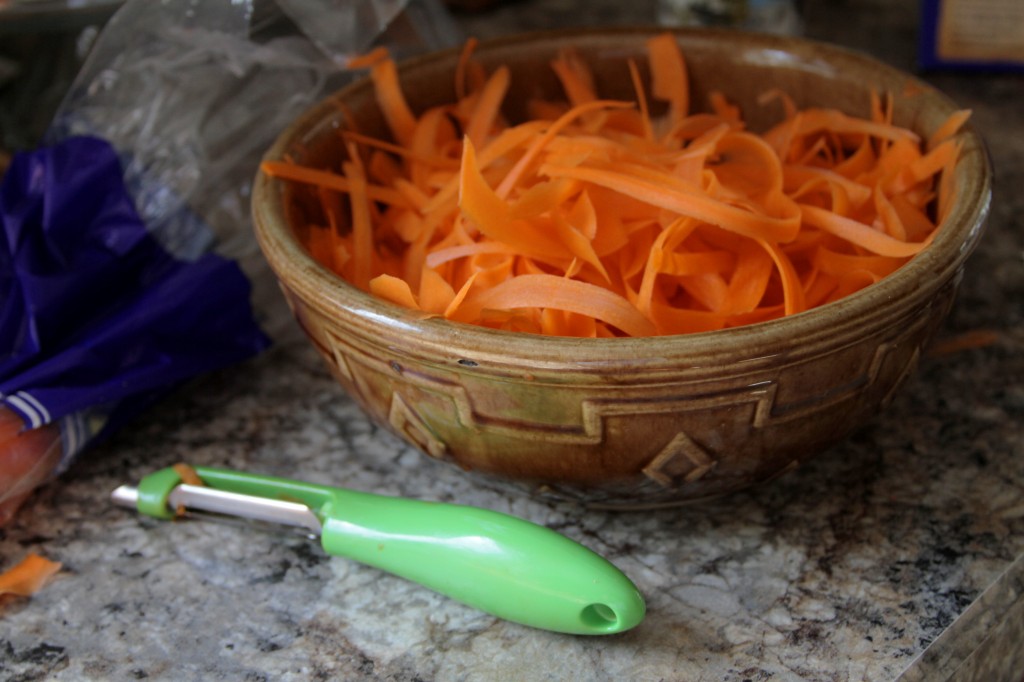
Use a vegetable peeler to peel the carrots. Once the outer skin has been removed rinse the carrot off and begin to peel off “ribbons” into a salad bowl. Add the grapes and chives to the bowl.
In a small bowl, mix up the dressing:
- 1/3 cup red wine vinegar
- 1/3 cup olive oil
- 1.5 tsp ground ginger {more to taste}
- Freshly ground pepper {to taste}
Whisk the dressing together, then pour over the salad. Let it all sit for about 30 minutes before serving.
It’s good.
Amy
Linked Up at: Bowl Full of Lemons, Funky Polkadot Giraffe, Adventures of a DIY Mom, Homework, Vintage Wanna Bee, Hope Studios, My Uncommon Slice of Suburbia, Sweet Anne, Coastal Charm, The Gunny Sack


