by Amy | Aug 7, 2013 | Blog, Crafts, The Art of Projects

Tonight I went out for some dessert with my friends from Bible study. I’ve been practically living in my gym attire, so when I get a chance to wear regular clothes, slap on some mascara and be seen in public…I jump. Tonight I even wore {gasp} a necklace.
Which meant that I went into the guestroom, opened the top drawer of the dresser, dug through some packing paper {where most of my necklaces are still packed from two moves ago}, found something worth wearing, and put it on. It’s a mess in there. And, honestly, embarrassing that I have a lot of really awesome stuff shoved in a drawer, still packed from when we lived in Oklahoma.
Case in point, I need an organizing solution. Here are 11 of my favorites. I’ll probably pull inspiration from from a few of these and come up with a custom solution perfect for my space and collection. In the mean time, get a little inspiration of your own. Right here.
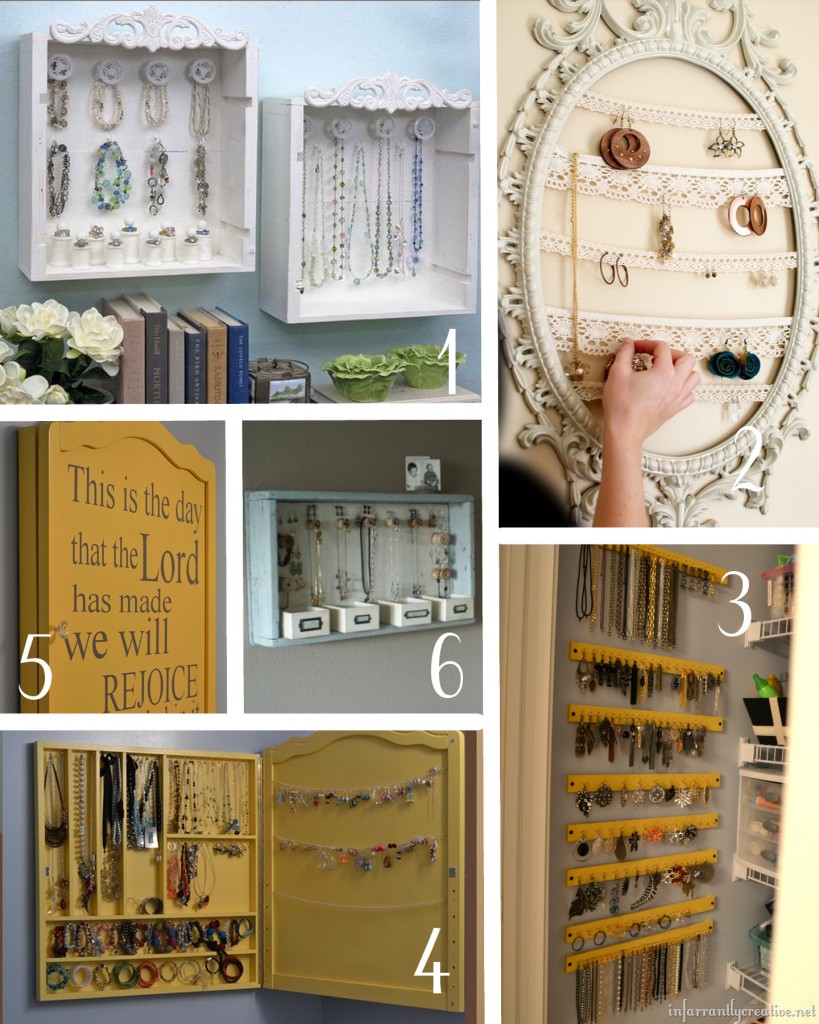
1. HGTV has a great tutorial for making these cute organizers from cast off wine crates. Not a wine drinker? Your local liquor store may have crates on hand that they toss after a shipment comes in. Pro…this is beautiful. Con…will all of my necklaces fit??
2. I bought a frame from Hobby Lobby on clearance that looks just about like this. It’s on my gallery wall. Originally this was an item for sale on Etsy. But Allender readers are super savvy, so I know we could whip one of these up on our own. So clever for organizing earrings.
3. This is a great idea from Infarrantly Creative, and it’s super cheap! These are paint sticks {free} from the hardware store. Painted and adorned with cup hooks. The best part of this design is that lots and lots of bling can be stored this way. I think this idea could transcend into the craft supply realm as well.
4 & 5. These two images are of the same organizer. Also from Infarrantly Creative. There is a killer tutorial on how she made this sneaky organizer. I love it because it can masquerade my mess as classy art work.
6. Shelterness shared this organizer. It’s simple and effective. I like how there are bins at the bottom to catch all the random bits and pieces. Oh, and the shelf space on top isn’t bad either.
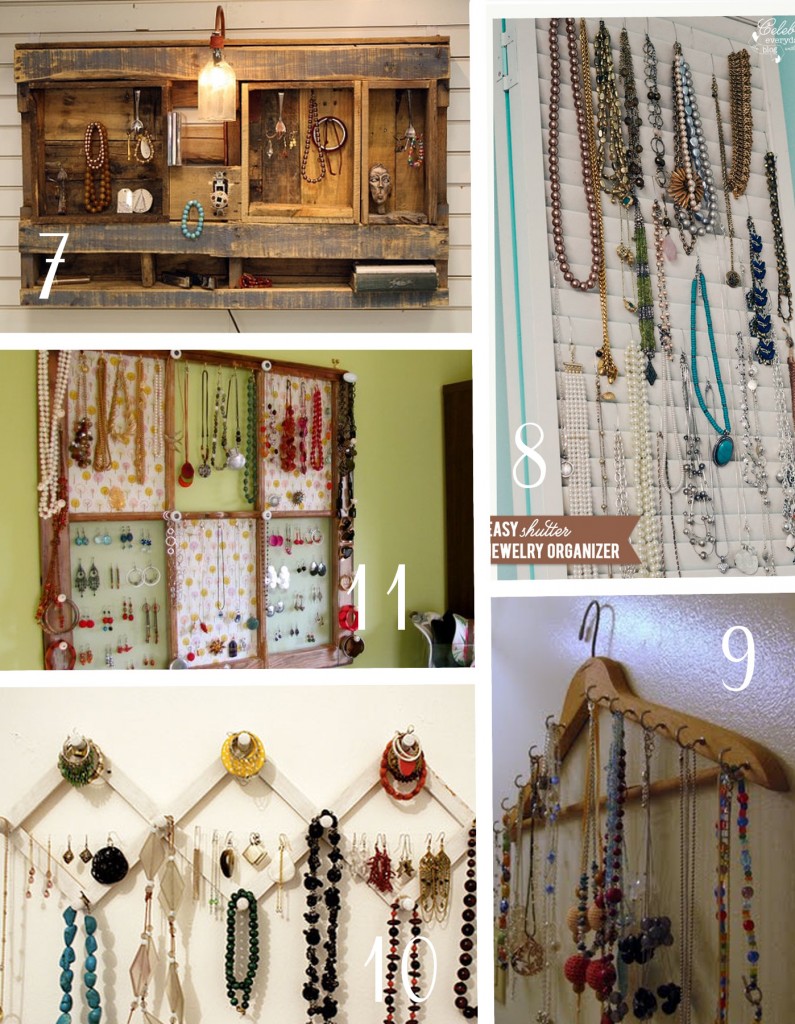
7. I love the idea of building an organizer with pallets. Especially since I can pick them up for free. This may be too bulky for my room. But that won’t stop me from loving it. {From the Rustic Creek Etsy shop}
8. I saw some shutters sitting on the curb in my neighborhood a few weeks ago. How I wish I had picked them up. Maybe they will throw out some more. At any rate, this shutter organizer from Celebrating Everyday Life is so simple to make and it’s tall and skinny so it can fit in a tight spot.
9. I think vintage wooden hangers are just beautiful. I can see three or four of these bad boys lined up on my wall. All Our Days came up with a great solution.
10. Apartment Therapy featured this easy to make organizer from Solaana’s Flickr page. Go on over to their site to get to the original image. I’ve even seen these accordion peg hangers at Dollar General!
11. Who doesn’t love an old, rustic window frame? Husbands, maybe. But we all know boys can be weird. I am loving window frames right now. And this organizer is just adorable. I love how the look can be customized with scrapbook paper or fabric. Our Borrowed Abode has a great tutorial on how this beauty is made.
by Amy | Jul 6, 2013 | Blog, Crafts, The Art of Adventure, The Art of Projects
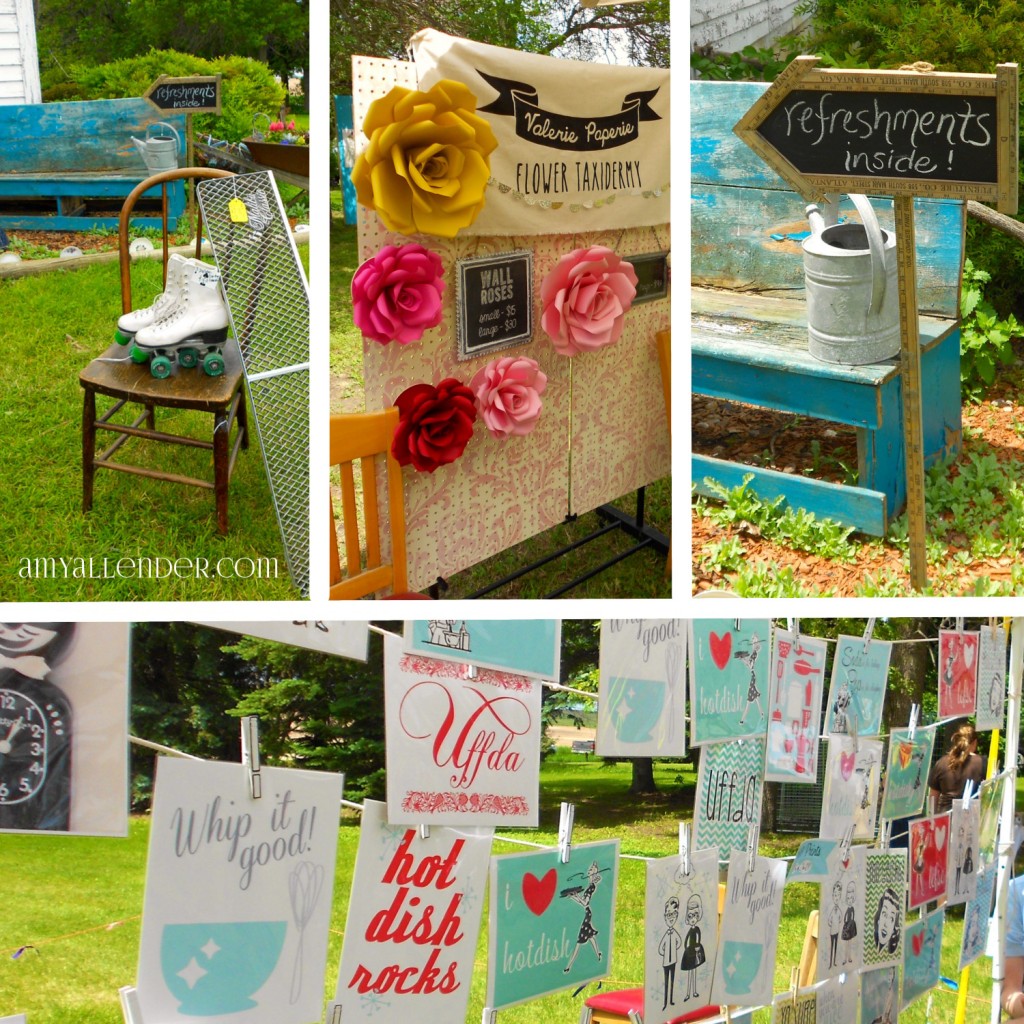
I was incredibly and pleasantly surprised recently when I attended Minot’s second annual Vintage Fair. When I heard it advertised I was excited, but I never expected it to be such a wonderful and inspiring event. When I drove up to the rustic family farm on which it was held I felt like I stepped out of my Chevy Equinox and into an issue of Country Living Magazine. Seriously, all, it was that wonderful.
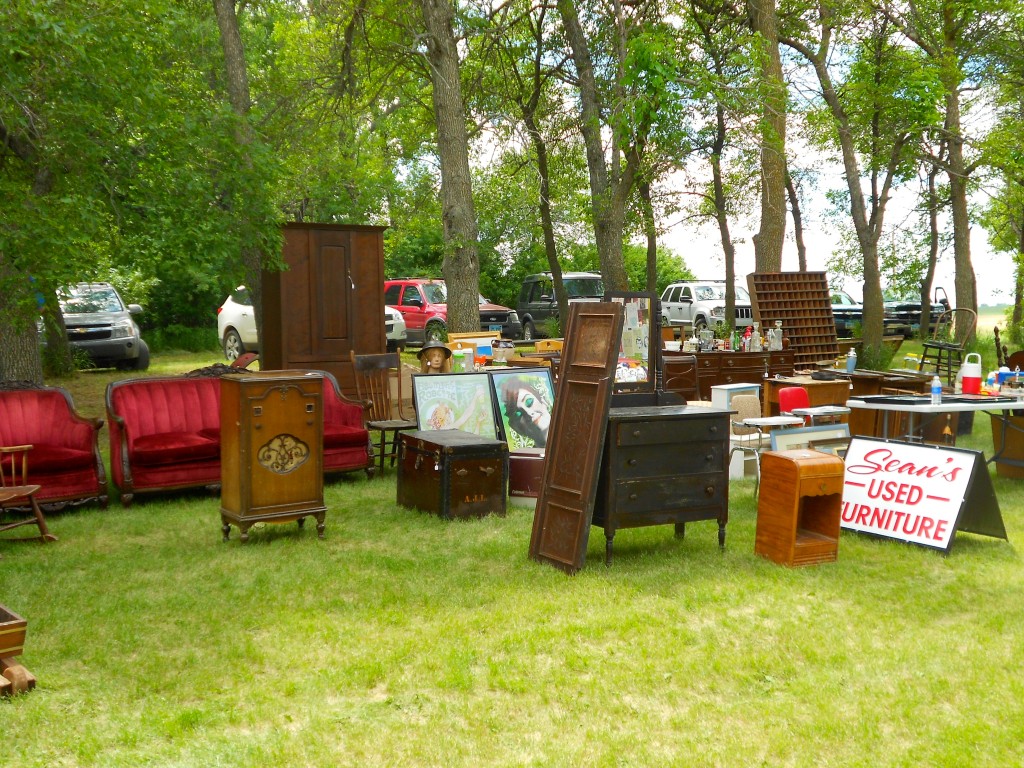
Furniture, antiques and vintage inspired artisan goods littered the open air market. Booths of venders lined up with goods repurposed from nostalgic wares. I’ll call it a junker’s/upcycler’s/collecter’s/thrifter’s paradise. Cast aside cupboards, doors and windows waited anxiously to be snatched up by an inspired fair goer. Things forgotten were seen in a new light under lots and lots of creative eyes.
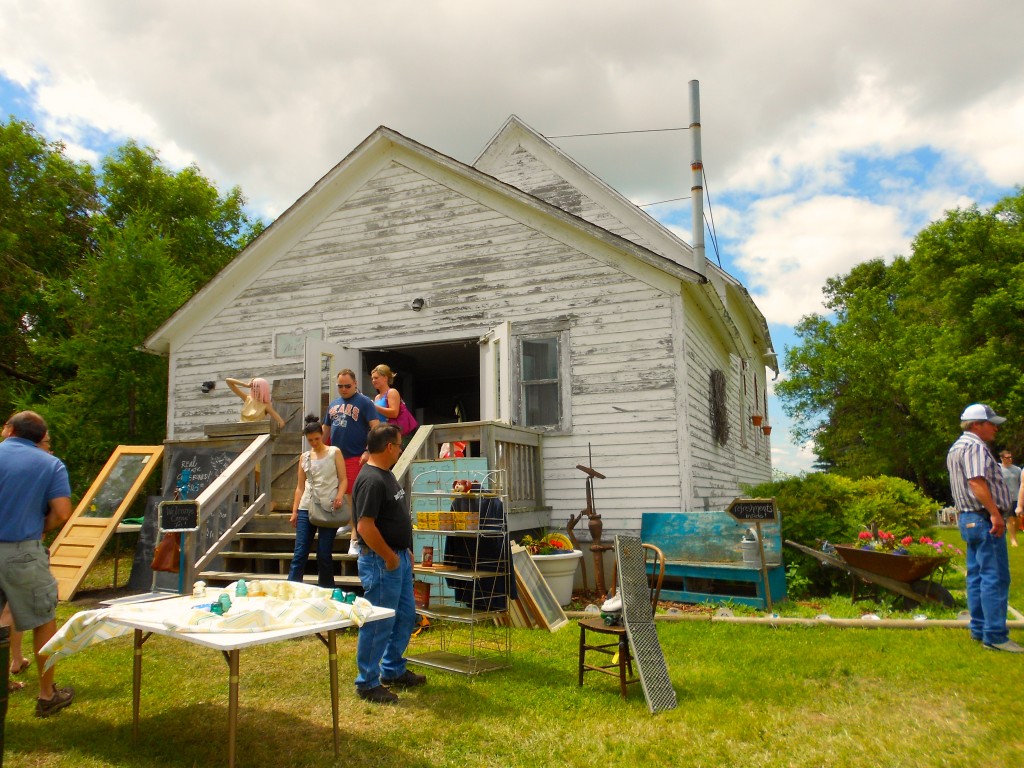
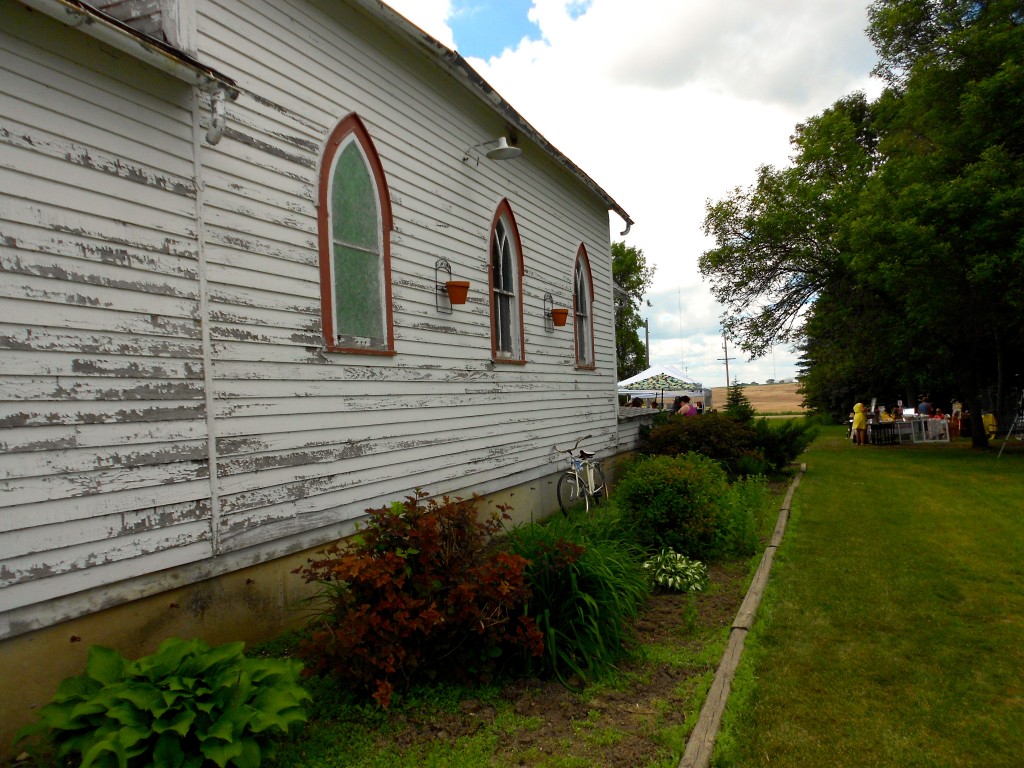
Minot’s very own Darling Stewardess brought everything-but-the-kitchen-sink from their downtown shop and set up in this adorably rustic church. Lots of venders were local to Minot, but a good number flocked in from all over the state. The only requirement is that you sell vintage or vintage inspired items. Seriously, can you imagine a better place to spend and afternoon? One of my favorite venders sold North Dakota inspired greeting cards with sayings like, “Uffda,” “Oh you betcha,” and “Oh for cute.” They really say those things up here.
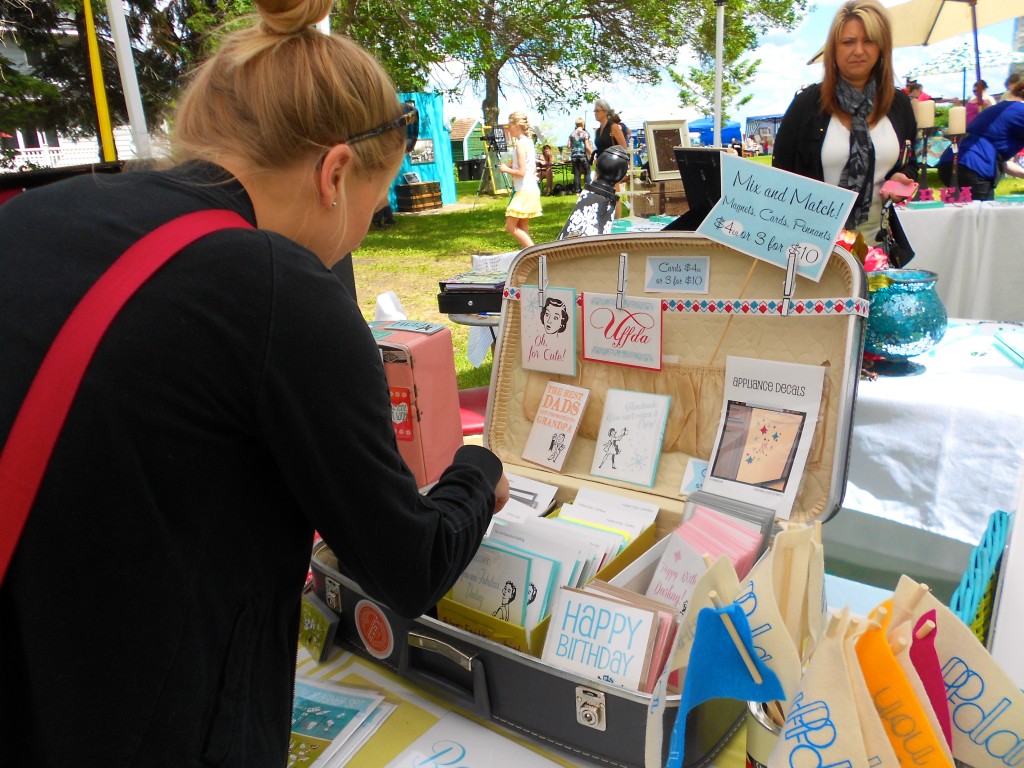
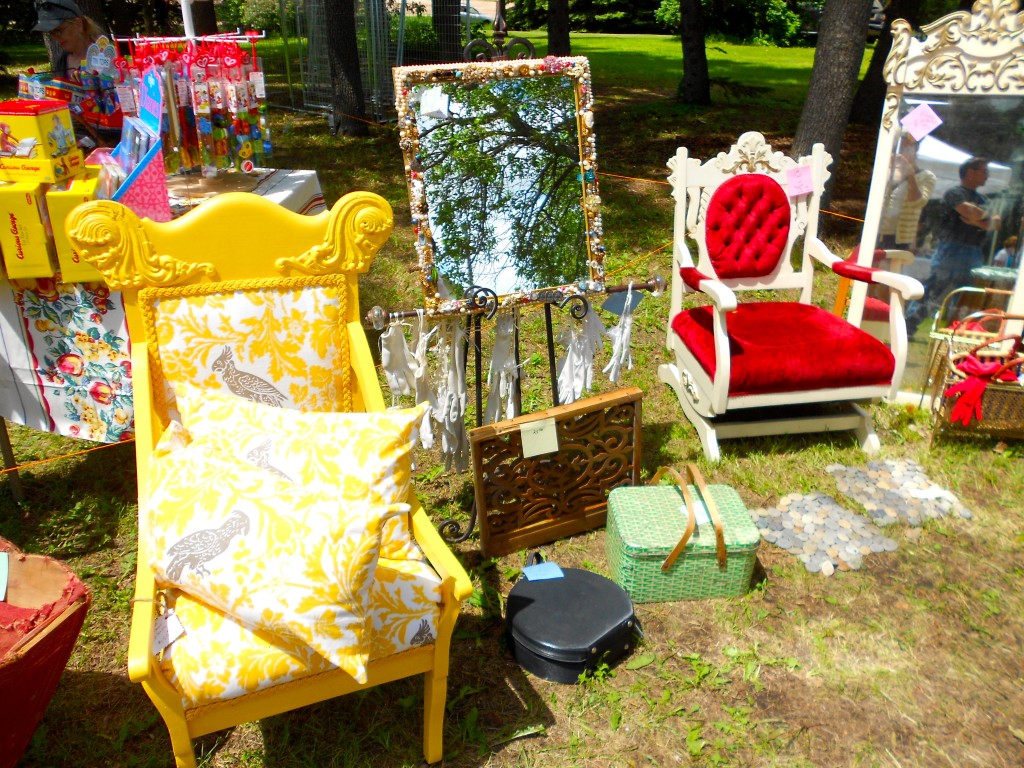
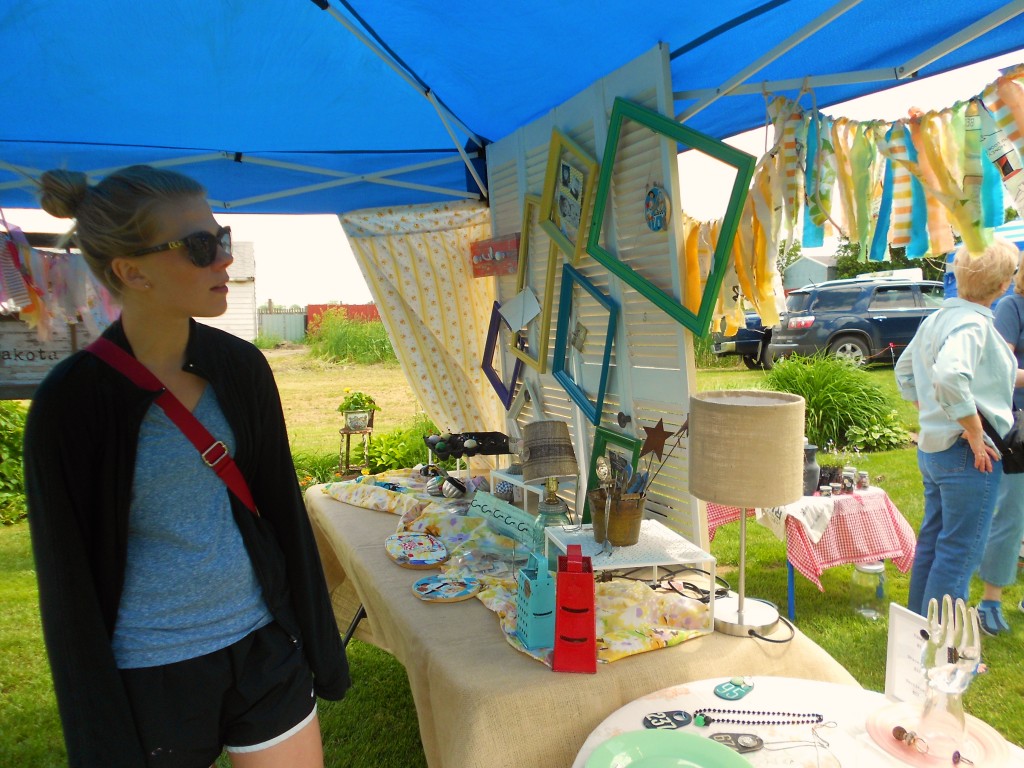
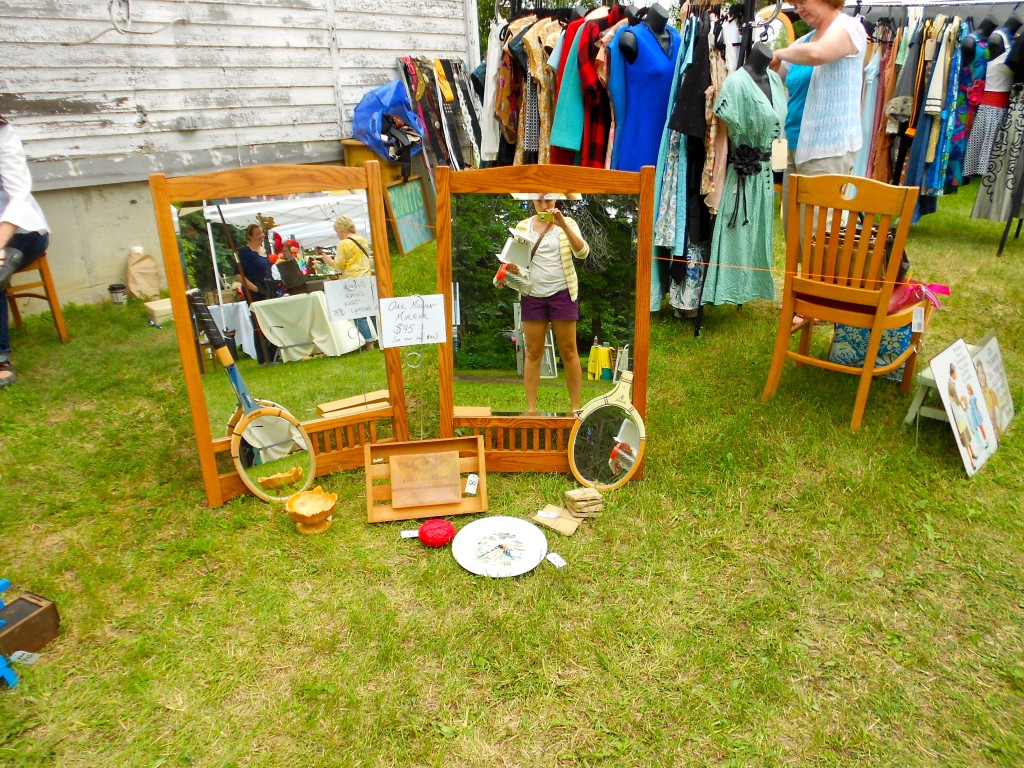
I walked away with just a few items…but a lot of inspiration. My new goal is to participate next year with my very own booth. I walked away from Minot’s Vintage fair knowing, just knowing that I’ve got to get in with this crowd. If you didn’t go this year, you’ve gotta check it out next year. And if you aren’t lucky enough to spent your summers in Practically Canada…at least find a flea market or swap meet to hit up this season.
Amy
by Amy | Jun 18, 2013 | Blog, Crafts, The Art of Projects, the house
Did you know that I was formerly banned from hanging things on the walls of my house? Yes, me. The girl who can rip out a wall, tear up carpet, wire a light and texture dry wall. I can make over a room like the best on HGTV, but I was banned from putting nails in the walls. Sad, but true.
It started when I lived in Florida. I know some of you readers are friends from those days, so this story will probably ring a bell with you. Back in 2009 I was a newly wed, living in a new state and a cute rental house with my new husband. This was my first place outside of a college rental house I shared with my girlfriends down the street from our University’s village. Pretty big deal.
Like all newly wed girls I was pretty stoked over our wedding photos. I loved them and I wanted everyone who came into our house to know that we had had a wedding…and it was awesome. I wanted…a gallery wall.
I wish I had a photo of this undertaking. It was really something. Like most of my best work, I hit this project hard one evening when Derek wasn’t home. Unlike most of my best work…this was a pretty big fail.
I went in armed with a huge blank wall and a lot of photos and cute frames, but things really took a nasty turn. Here’s what went wrong:
1. My photos were TOO SMALL. At the time I had no concept of what size wall art should be. I printed a load of 4×6 and 5×7 photos {and just a couple 8×10’s} and expected them to look good strung up on my giant wall. What I ended up with was a messy looking display of things that you had to be right next to to view.
2. It was more vain than artistic. This gallery wall was dubbed by our friends {and ourselves} the “Wedding Wall.” Seriously, just photos of our wedding. Lots of them. It’s nice to have photos of yourself around, but a gallery wall is a home focal point. After a while I felt kind of weird about having so many pictures of us on display. I mean, we see ourselves all the time…A gallery wall should speak to who you are in a creative way, without becoming a shrine to you, you, you. **I’m not saying you shouldn’t include yourself on your wall. Just don’t overkill it like I did.**
3. This is the big one…I didn’t plan. I thought I could go in with a rough idea and come out with something Martha herself would envy. Wrong. The reality was I ended up hanging a frame, then hating it and moving it…and making another and another hole in the wall.
It was this second error that caused me to lose my hanging privileges. When it was time to move it looked like Al Capone himself had taken a tommy gun to our wall. There were so many, many holes. Derek and I had a pretty good laugh about that. Then he said I should probably run everything I wanted on the walls by him before any nails get hammered.
This ban was never officially lifted, but this summer Derek isn’t around and I really, really wanted another crack at the old gallery wall game. This time I was determined to do it right. It was like a Tosh.0 web-redemption. I got a second shot to do something trivial and meaningless right. And I’m happy to report that I succeeded. Here’s the secret:
PLANNING.
Go figure. One of my favorite high school teachers used to tell us that “Proper preparation prevents a poor performance.” {Bonus points to any Jimtown Jimmie that can name the author of that quote.} And boy was he right. I spent an evening looking at all my gallery options, then whittling it down to only the best. Once decided I traced the shape of everything I was going to hang on some cheap-o wrapping paper and played with my layout like so:
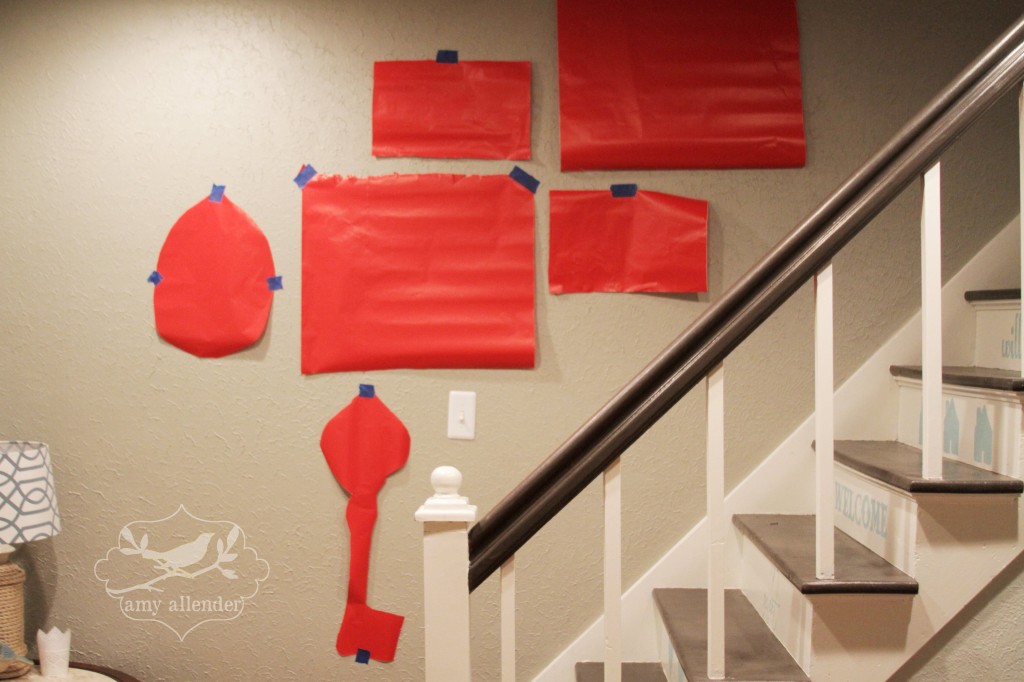
Once I was happy I carefully hammered a nail through the paper, took the paper off the wall and hung my frames.
I didn’t mis-nail once! I guess you could say I really “nailed” this one. Don’t even try to tell me that wasn’t a clever pun.
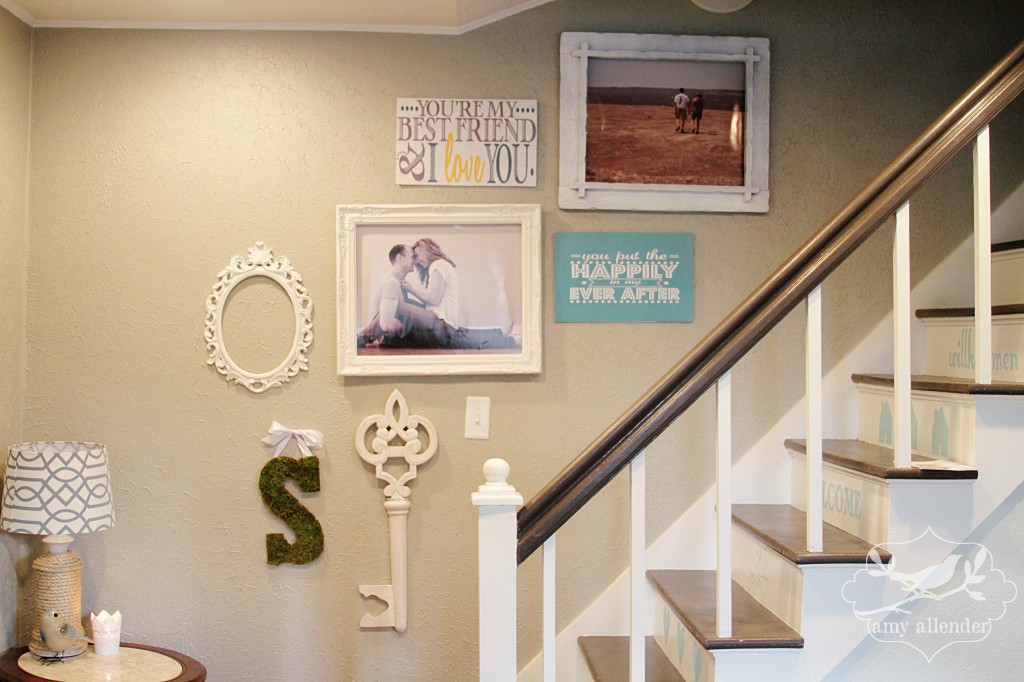
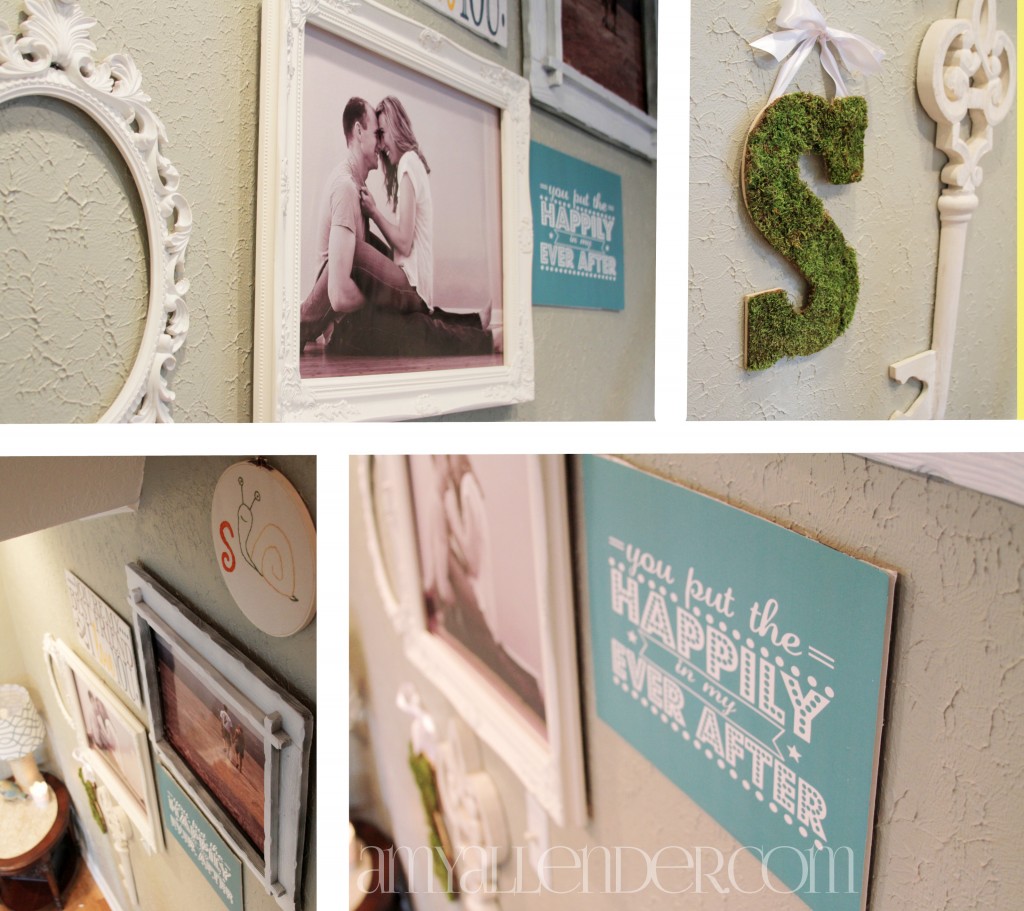
So here are my tips for being successful with your focal gallery wall.
1. Decide what you want to hang.
2. Keep a common theme. Go figure, my theme here is white…my favorite decorating color.
3. Be simple. Bigger and fewer is a good place to start. Lots of small frames can look crowded and cheap.
4. Be thrifty {that’s really a life tip.} I had my big prints made at Staples. They are printed on photo paper, then glued to foam core. Much cheaper than canvas prints and easy to switch out.
5. Put up things you love. While Derek is gone I love seeing a photo of us together on the wall. When he returns I may change it. Who knows. The other large print is of us hiking in Texas. Both remind me of happy times. I like happy. That empty oval will soon house a portrait of my cat. Don’t judge me.
6. Leave room to grow. You never know when you’ll want to add. Plan some space for future finds.
It feels so good to have my hanging privileges back!
Amy
by Amy | May 6, 2013 | Blog, Crafts, The Art of Gathering, The Art of Projects
I’m so excited to be showing you some highlights for a baby shower I threw yesterday. Not only was it fun, it was super special because it was a shower for…not one…but two babies! Yes, that’s right, twins!
The best part of any shower {for me at least} is picking the theme. And boy, did I go threw a long brainstorming session before choosing a theme for yesterday’s get-together. I mean, how often do you get to celebrate two babies at once? To make things even more exciting my friend Kim is expecting one of each. A boy and a girl!
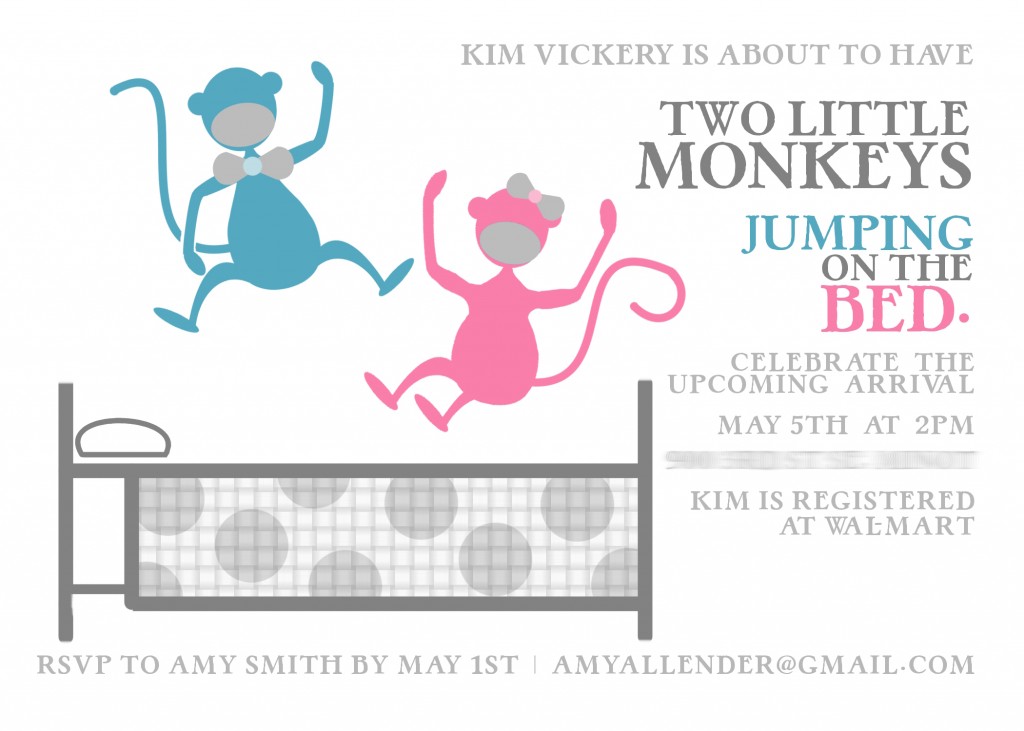
After lots of list making, and learning that the nurseries will be decorated in a jungle/monkey theme I decided on “Two Little Monkeys Jumping on the Bed.” Okay, okay…enough of the chit-chat. Here’s the highlights.
I started with these custom invitations:
Then my awesome-amazing-wonderful friend Emily helped me create a fun afternoon full of monkey business.

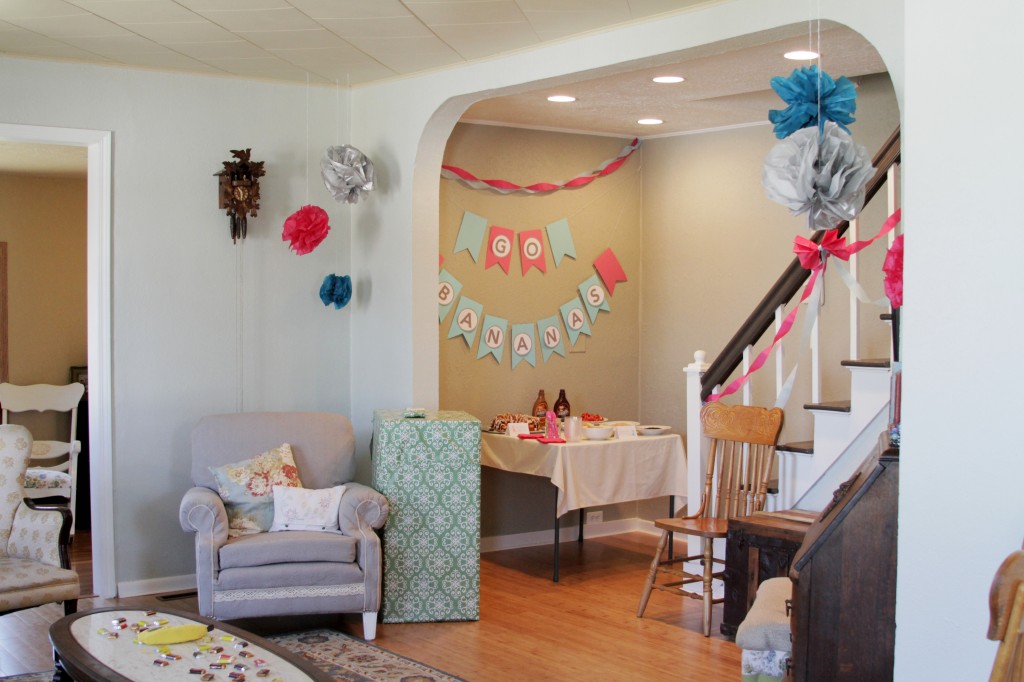
1. This was our killer dessert table. I made this Go Bananas banner with scrapbooking paper. The letters were made in Microsoft Word. I drew a gray circle and added each letter within a text box. I printed them from home, cut them out and taped them to the banner.
2. During the shower we split into two teams for a Banana-Grams face off. Each team had to make as many baby themed words as possible in 4 minutes. The team with the fewest letters leftover wins.
3. Emily prepared all the food. We tried to keep the non-dessert foods healthy, so she prepared chicken salad and veggie trays. I hung some quick and easy tissue paper pom poms from my light fixture for a little pazazz.
4. On the dessert side we put together a banana split bar. Complete with all the fixings.
5. Emily made this amazing monkey bread. I’ll be honest. It tasted like I was eating magic.
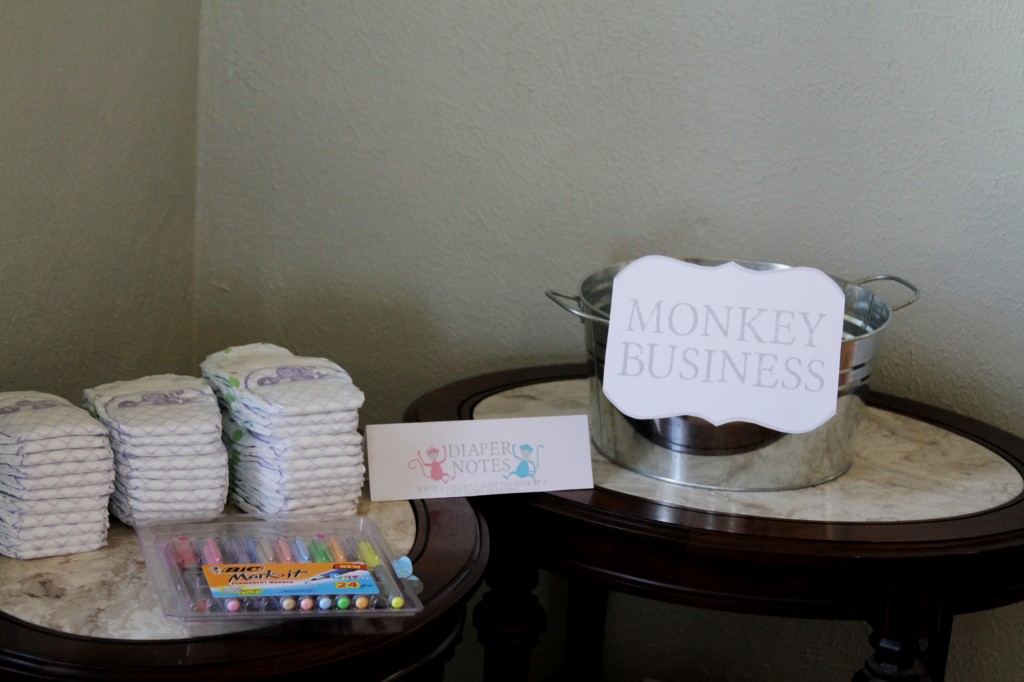
Guests spent time writing notes to the parents-to-be on diapers…to lighten the mood of those late-night changings. I was so pumped when i found these Luvs with monkeys on them.
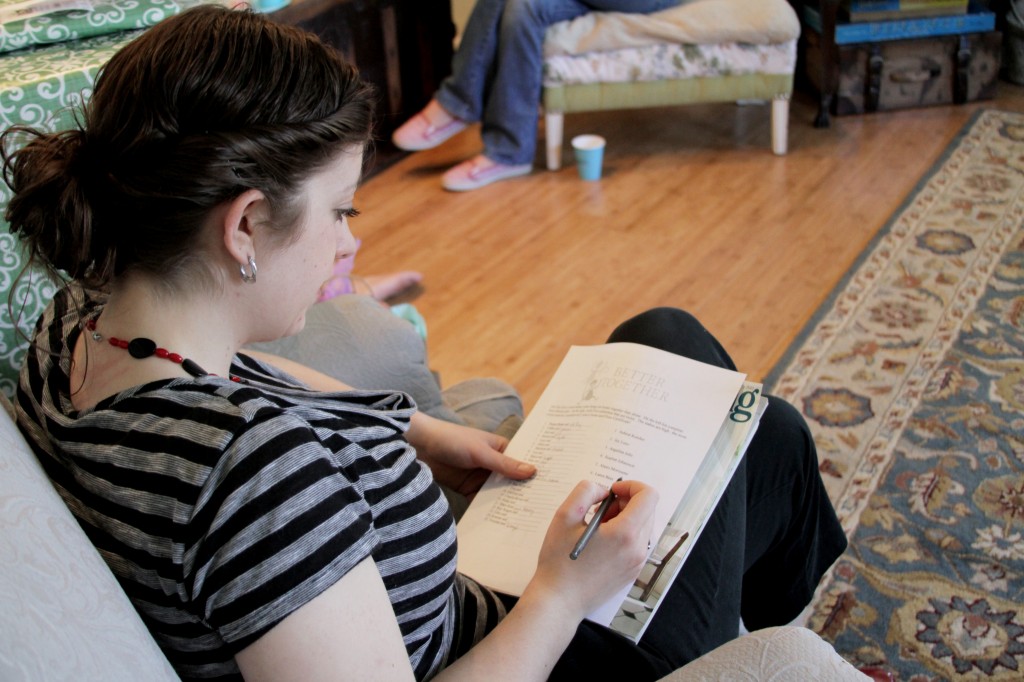
Our second game was created by yours truly. On one side was a list of 25 famous pairs. Guests had to fill in the missing half. They ranged from Milk and {Cookies} to Ginger Rogers and {Fred Astaire}. The second list included 10 celebrities. Guests had to choose five that are actually twins. {Did you know that Vin Diesel is a twin?}
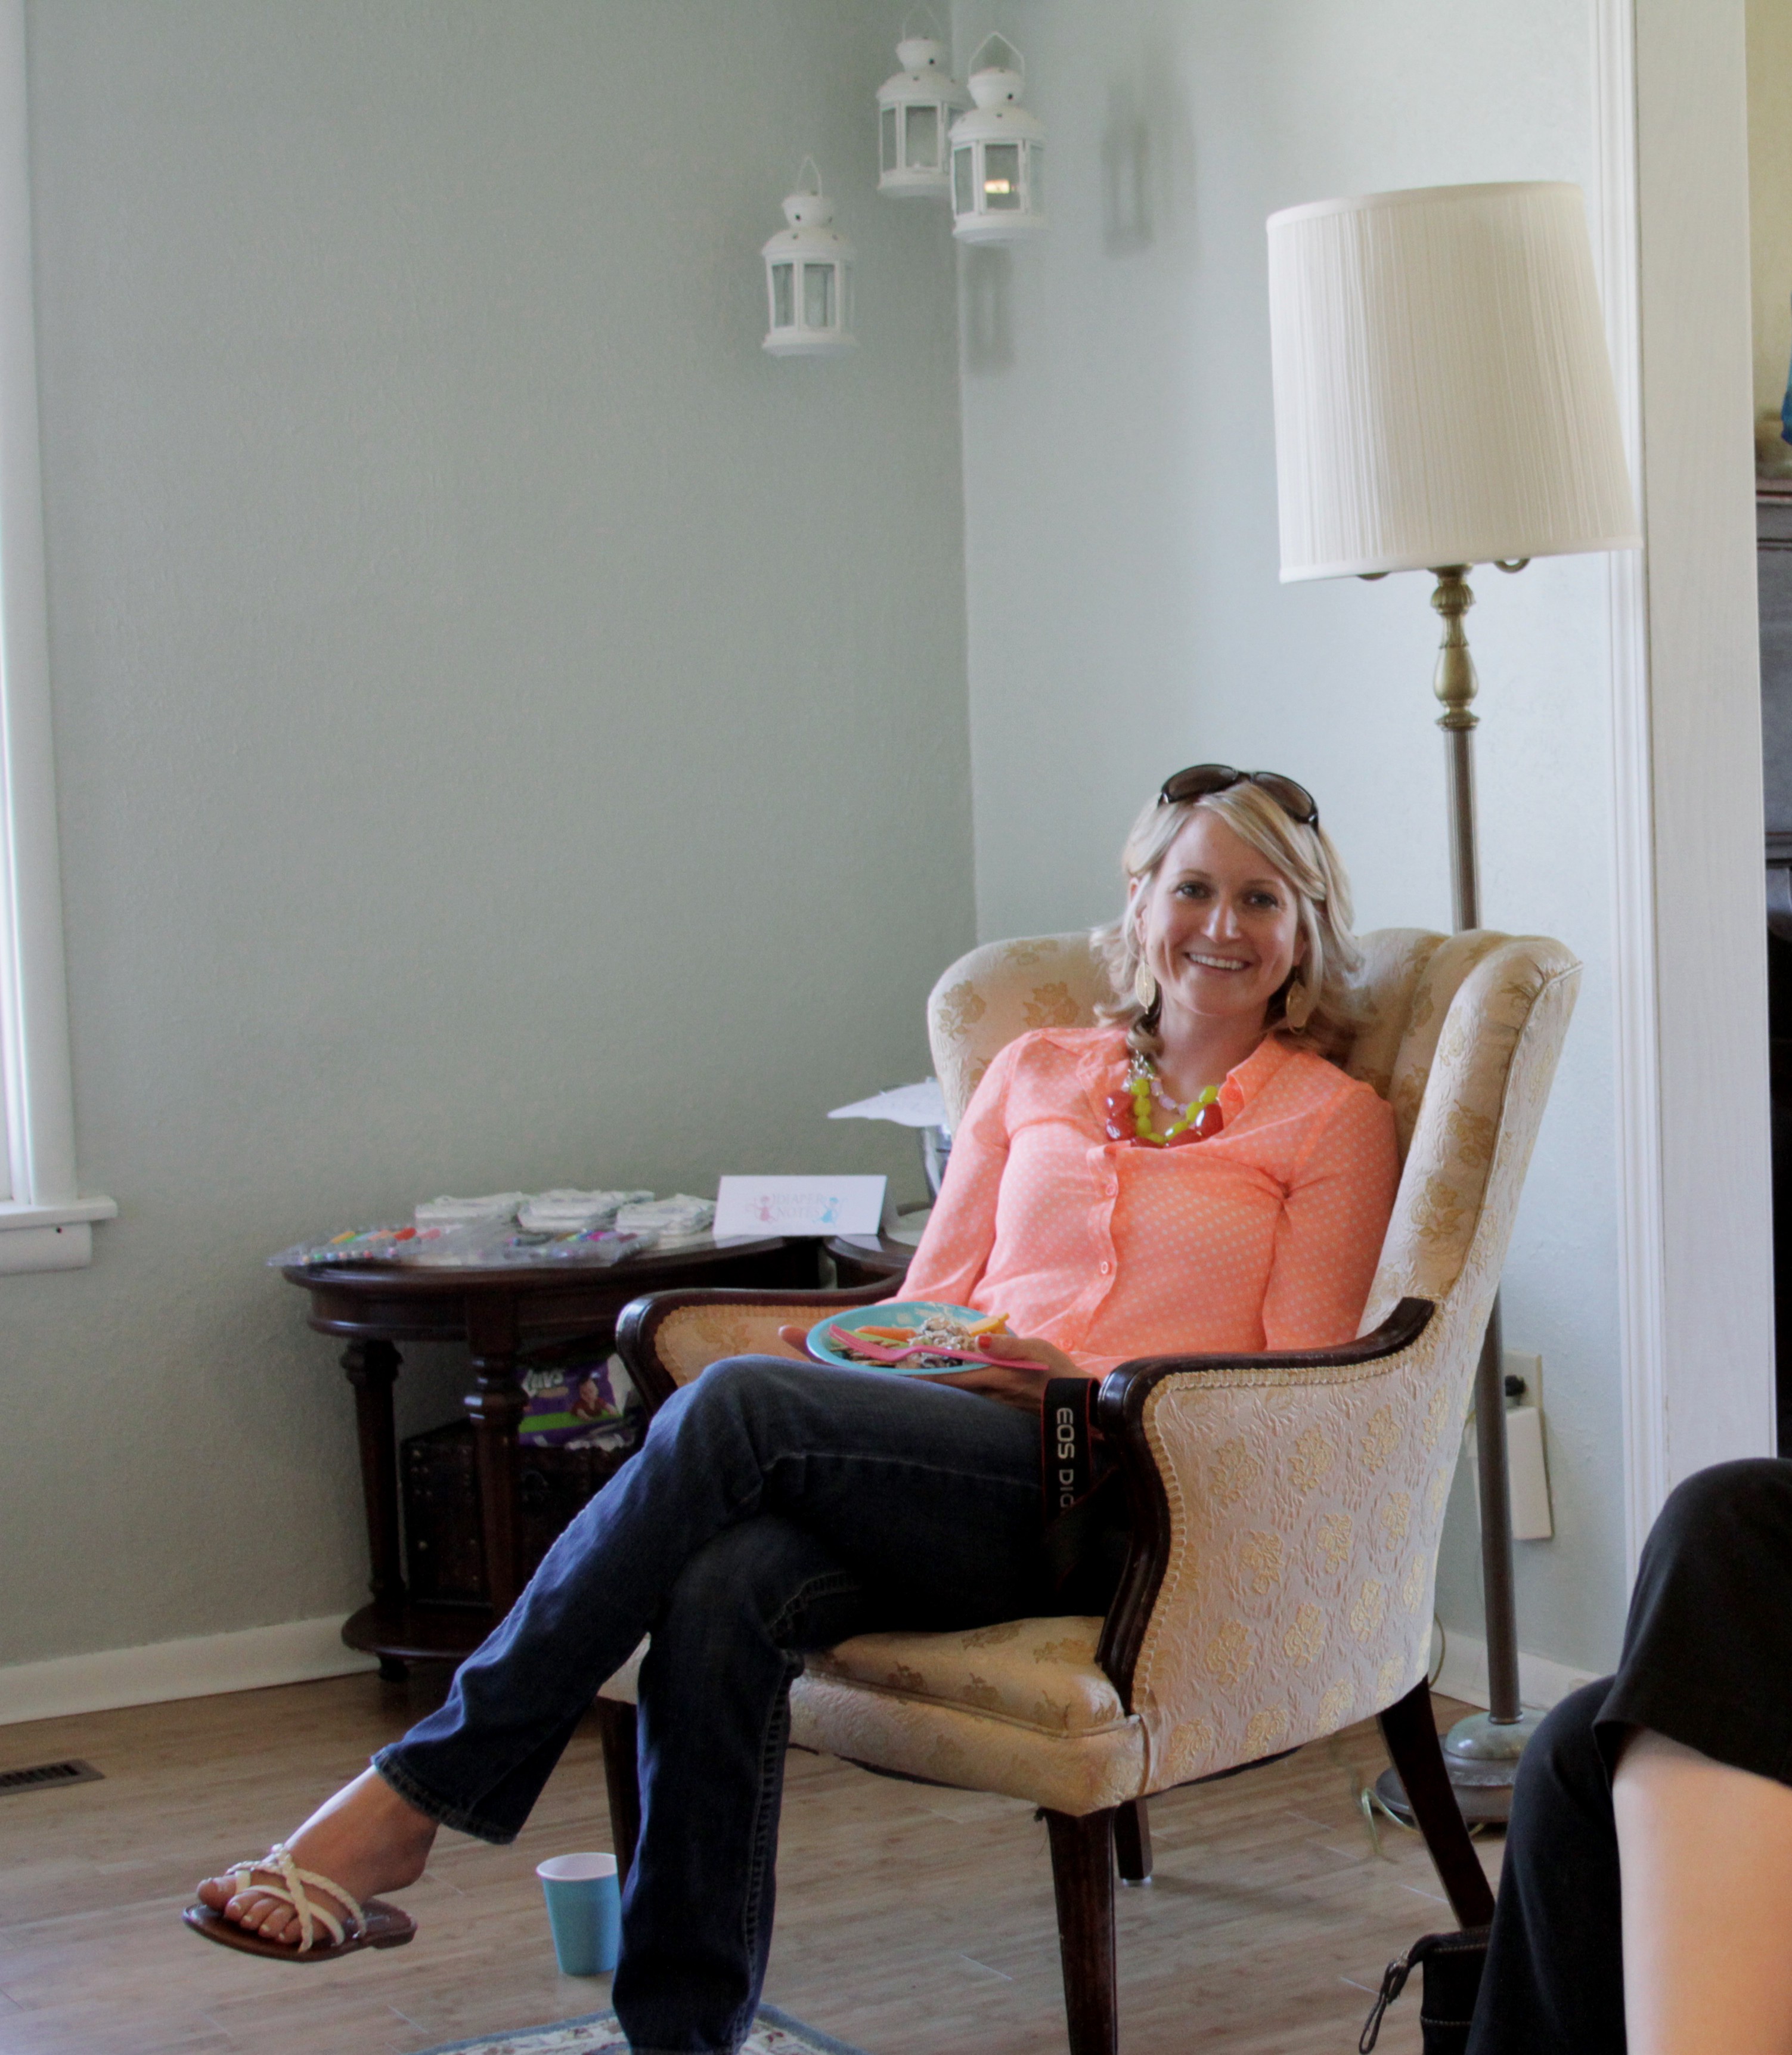
It was such a fun day! I cannot thank my partner in crime enough. Isn’t Em just adorable? She’s the best.
Hope you got some good ideas!
Amy
PS–This party is partying at these linky parties.
by Amy | Apr 8, 2013 | Blog, Crafts, The Art of Projects
It occurred to me yesterday that Derek has been gone a whole week and I hadn’t done a single project. I know, me–alone–unsupervised. That’s a combination that has project written all over it. But alas, I didn’t get into a single bit of trouble last week.
So I decided to change all that. I sat down last night and did a quick makeover I’ve had on my mind for months now. It took about 10 minutes to complete and I love the way it looks. And if I ever decide I don’t like it…I can always revert to the original. Check it out.
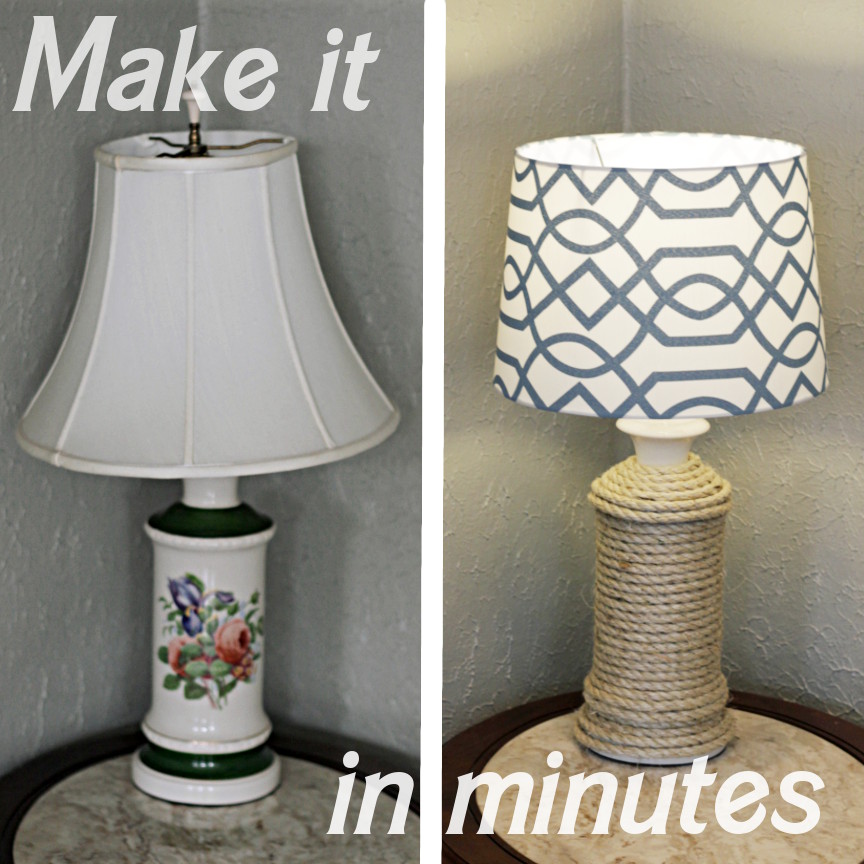
Right before Derek and I got married we had each lost grandparents. This sad event turned into a blessing for us young newlyweds. We had two estates to look through and “shop” for things for our home together. The greatest part is that now our home is filled with things that constantly remind us of our grandparents.
One of the things lifted from Derek’s grandmother’s home was a pair of floral lamps. In our current house we don’t have room to have both lamps out at once. So the one lamp has lived lonely on a side table at the foot of our stairs since last July. For a few months now the lamp has been staring at me, just asking for an update.
It took a bit to come up with a way to modify it without permanently changing it. Finally I decided on summering it up a little with a rope-wrap and a new shade.
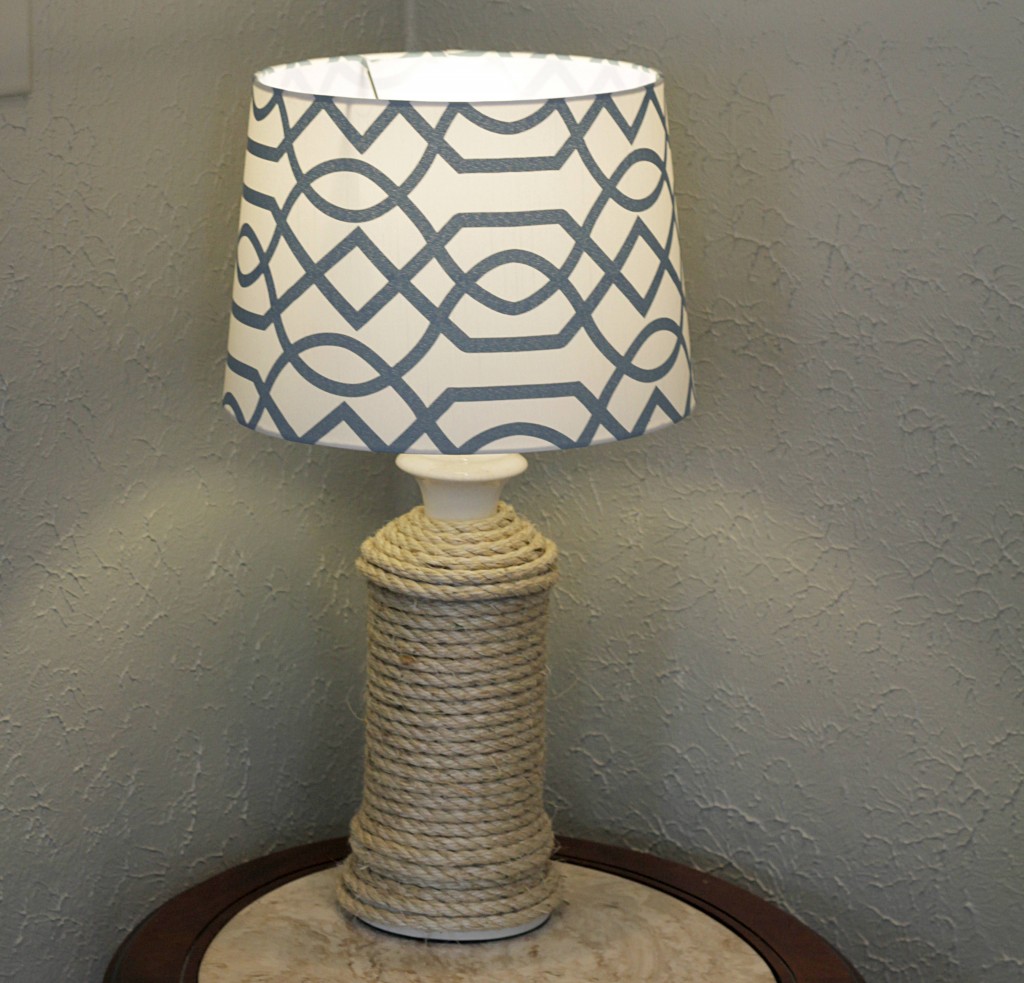
I bought a package of Manila rope from Menard’s and simply wrapped it around the lamp. I used hot glue to secure it to the lamp. If we want to revert back I’ll just remove the rope and peel off the glue.
What can you wrap in rope? My answer…anything. Anything solid or with a glossy finish can be wrapped and removed. Just put a little hot glue on it and see if it peels up clean. Rope says nautical. Nautical says summer!
Amy
PS…see you tomorrow for another adventure.
This post is linked up at Home Stories and these great parties.
by Amy | Mar 2, 2013 | Blog, Crafts, The Art of Adventure, The Art of Projects
I don’t Instagram. Really, I don’t even understand what that means. I thought it was just fancy filters you could add to your phone photos. Now it’s all…”Follow me on Instagram.” “Oh, Amy, you’d love it.”
Guys…I don’t need any more social media in my life right now. Pinterest was a pretty big step. Maybe someday I’ll get on board. It must be pretty awesome because loads of my awesome friends do it. For now, I’ll sit this one out.
However, when I’m out and about I do tend to snap photos on my phone. When I see something that strikes my fancy I take a photo. Especially if it’s something that I think is “over-priced” and I could “…easily whip that up at home,” or “find something like it at an estate sale.” So I looked back through my phone. I really do need to do some deleting. And I put together this little collage of things that have been inspiring me lately.
Enjoy.
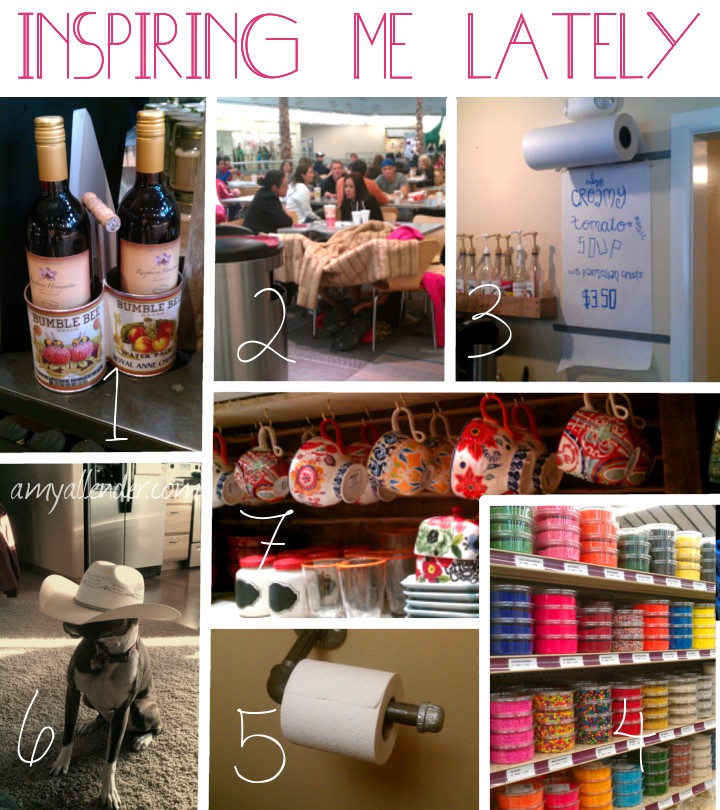
#1. We were in South Dakota last weekend. While visiting we went to what I consider the cutest winery ever. Total transparency…I haven’t been to very many wineries. But I really do love Prairie Berry. And their free wine tasting doesn’t hurt. Anyway I was this precious wine caddy. We could make that, don’t you think?
#2. When I was in Dallas for the Strip Church conference I took my lunch break at the Galleria Mall. In the middle of the food court two kids had used their mom’s coats {and their coats} to build an elaborate fort. NBD. Except that is pretty, stinking awesome. What’s even better was how the parents just continued to chat like nothing weird was going on.
#3. In Shreveport, Rhino Coffee uses table paper to write their ever changing menu. I don’t know where, and I don’t know why…but I need this in my house. A very welcome alternative to chalkboards.
#4. At a grocery store in Dover, DE there was an aisle completely dedicated to colored sprinkles. WHAT?!!
#5. Again, at Rhino, the bathroom had this nifty TP holder made out of plumbing. Sturdy, practical, I could totally do that.
#6. My friends’ boxer, Clara Belle incognito. Who’s that cowboy in the living room?
#7. I love this line of quirky-folksy tea cups from Anthropologie. Too bad I can’t afford them. I’m banking these cute patterns for my next paint-your-own-pottery night at Margie’s in Minot.
by Amy | Feb 20, 2013 | Blog, Crafts, The Art of Projects
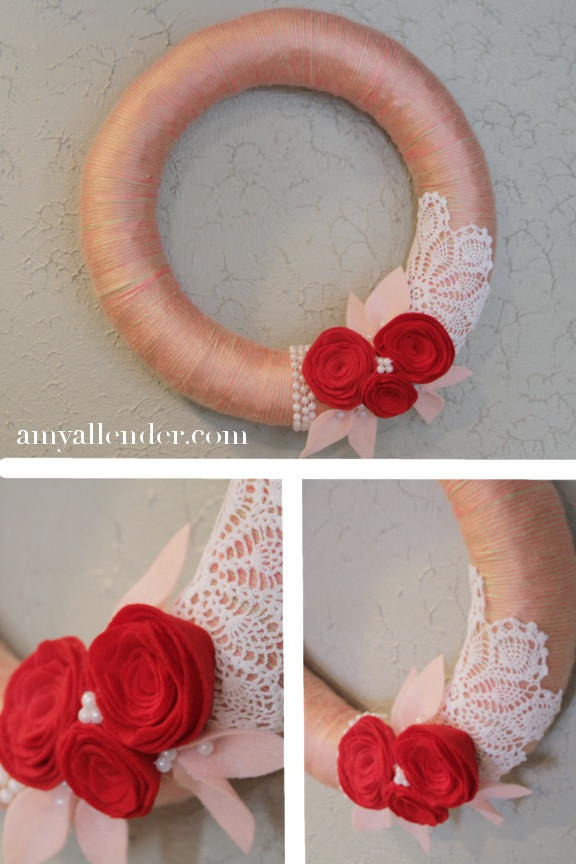
Pretty right?
This may be one of my favorite wreaths ever. I’m kind of a wreath junkie…so that’s kind of a big deal. It’s pink and romantic {a little late for V-Day} and just so gosh-darn pretty. I needed something to replace that awesome Pottery Barn knock off snowflake wreath from Christmas time. It’s really time I begin looking forward to a day with no snow and blooming flowers. This is a perfect fix.
I’ll tell you this: It was easy, but it wasn’t fast. Commit a few hours or a few nights of TV watching/multi-tasking and you too can be the proud owner of a wreath just like this. All for the low, low material cost of $9. Here’s what you’ll need: (more…)
by Amy | Jan 21, 2013 | Blog, Crafts, The Art of Projects
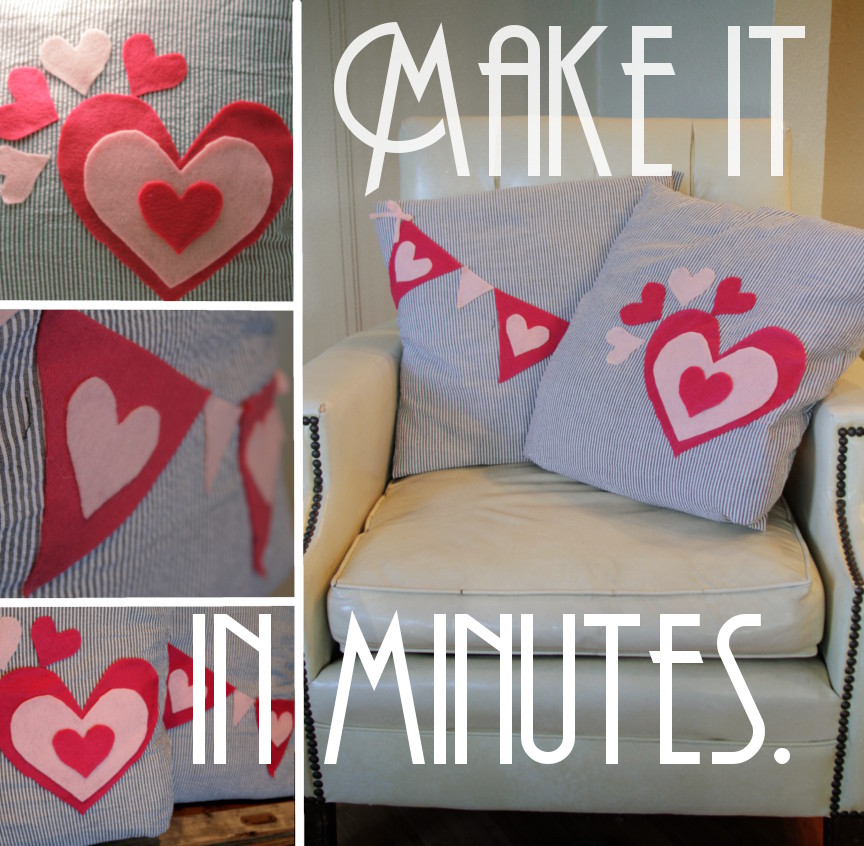
Hi there. So…as promised, today I’m going to show you how I whipped up these pillows. Now, you are not even going to believe how long these took. Ready? 9 minutes 35 seconds. Did I just blow your mind. Okay, total transparency…they took that long to make each…and it didn’t include the time it took to cut out felt hearts and glue those on. That was another 10 or so.
For this project you’ll need 1 yard of fabric {that’ll make 2 square pillows}, felt, and hot glue.
This is a long post…so if you are following along, go on and click through now. (more…)


