by Amy | Jan 18, 2013 | Blog, Crafts, The Art of Projects

A week ago I pinned this lovely idea to a board titled “Pretties Please.” Every day since then I’ve gotten notifications that it had been pinned and repinned and pinned some more. The image links to a good page of 5 sweet ideas for upcycling old dressers. And that got me thinking…what else could we do with those drawers. So, without further ado, I give you 7 Upgrades for Old Drawers. {#1 is the planter above.}

Our second idea comes from Kamm’s Korner. Click the image and you’ll be whisked away to her blog for the complete DIY tutoril. Don’t you just love the look of the window boxes? You could always remove the hardware for a less obvious drawer look.

Olive and Love took some cast off drawers and transformed them into pretty, easily accessible under the bed storage.

Nice Girl Notes used drawers to make a perfectly portable dollhouse.
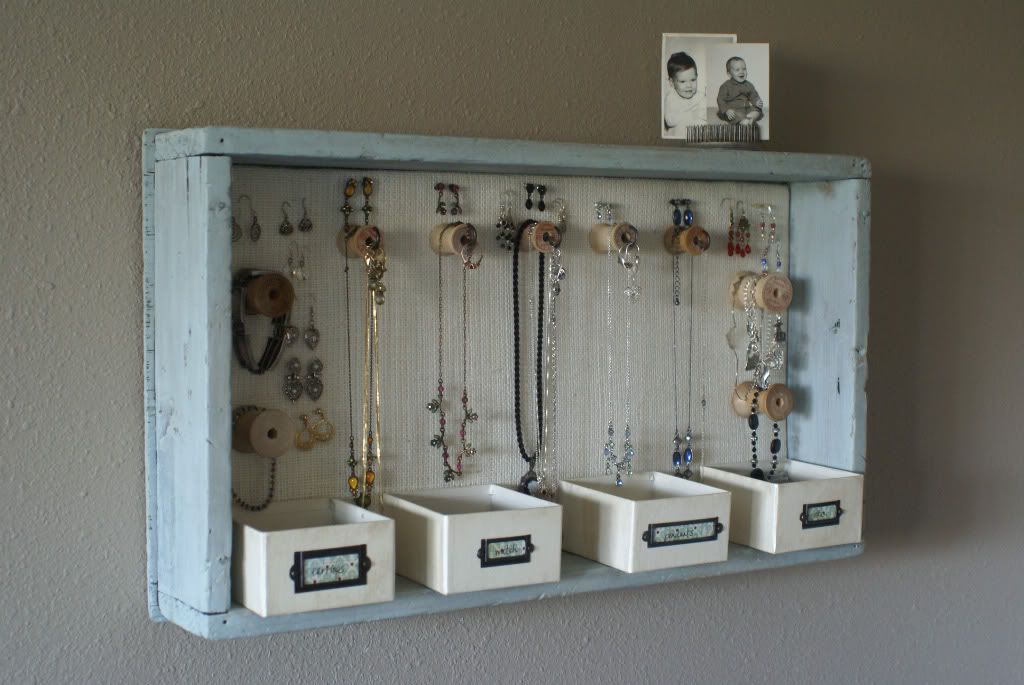
A Time for Everything made this jewelry organizer from an old wooden tray. But what’s stopping us from using an old drawer?
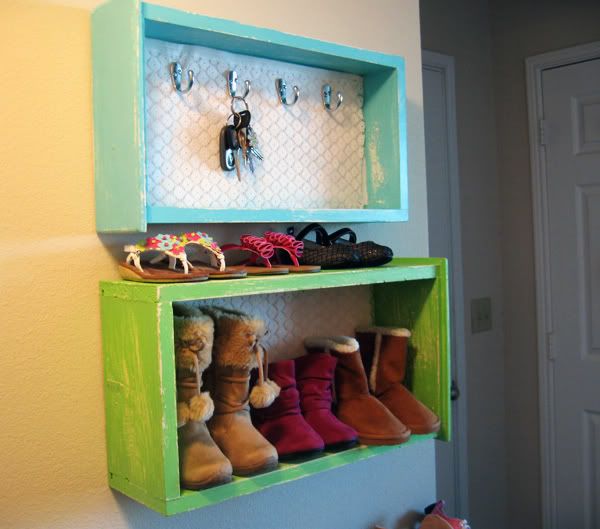
Entry ways can always use more storage. Why not get some of those shoes off the floor and up onto the wall? This project comes compliments of The Douangphila Blog.

Last but not least…Now that you’ve used up all the drawers what ever will you do with the dresser? Cameras and Chaos used this draweless dresser for storing her fabrics. I think it’d be lovely in a guest room or bathroom for storing towels and linens.
And where should you go to get these magic dressers? I dunno…thrift shops are always brimming with ugly dressers and nightstands. Check craigslist.org in the free section. Sometimes people are trashing the craziest things. {Like a dresser with no drawers…}
Happy upgrading!
Amy
by Amy | Dec 13, 2012 | Blog, Crafts, The Art of Design
Hi guys. We’ve had a little COP. {Change of plans.} Today I’m giving you six…count ’em SIX free printable gift tags for all your wrapping needs. They were really fun to make. I like to punch holes in the top and string them on to packages. But they are just as cute taped on. Enjoy!
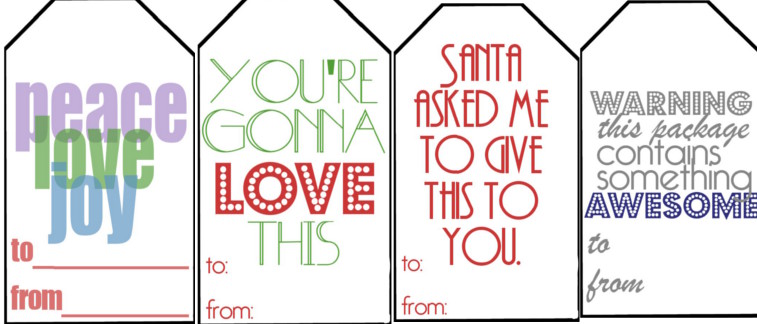
I’ve put all these tags into individual Google Docs. Just save the files you like and print them out. You can save paper by arranging more than one tag onto a Word document. The tags measure 3″ x 1.75″ but the files are high res…so you can make them a bit larger if you like. And, yes…they are free! All I ask is that when friends and family compliment them…you tell them that you got them here, at the very-fun-and-awesome Amy Allender blog.
Here is the Peace Love Joy tag…You’re Gonna Love This…Santa Asked Me…and the Something Awesome tag
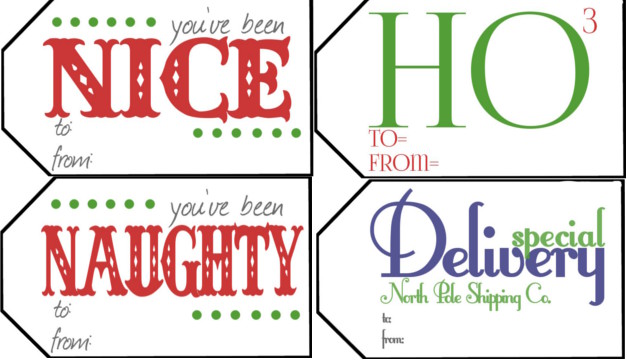
And here are links for the You’ve Been Nice tag…You’ve Been Naughty…Ho3…Special Delivery
Merry Christmas. Now, I’ve got cookies to make!
Amy
by Amy | Nov 28, 2012 | Blog, Crafts, The Art of Gathering, The Art of Projects
Is there anything better than a pretty cake stand?
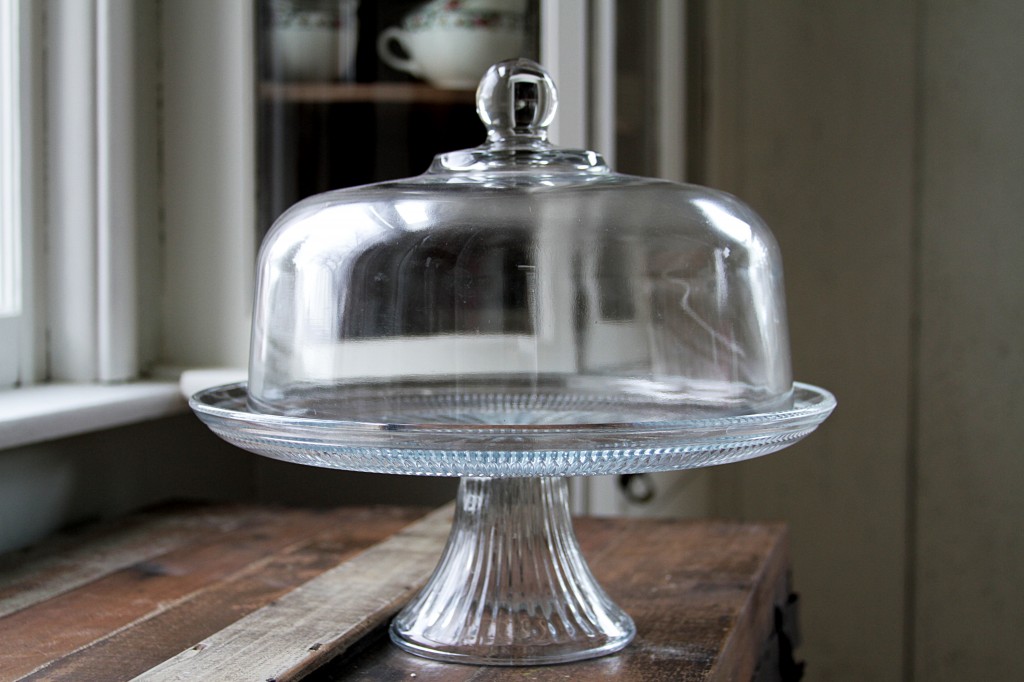
Not in my book.
Derek actually had to put a limit on my cake stand habit. I’ve got more stands than pans to make cakes in. But c’mon. They. Are. Awesome. Even the most aggravating icing job looks down right delectable when displayed proudly on a cake stand. Beyond their ability to display desserts {of all kinds…not just cakes, mind you} they are maybe the best decor around.
On Thanksgiving I threw together a quick centerpiece. It wasn’t anything special. It took all of 5 minutes to make…I didn’t think it was extraordinary. But my mom did. I thought I was using a trick that everyone knew…but she didn’t…and you might not either. So, I’ll tell you.
Most basic cake stands {the kind you get with a globe to match…like in the picture} are multi-tasking. Yes, that is right. Multiple uses for one beautiful piece of hostess-ware. Here’s the secret…make it do a handstand.
Yep. Take the globe off. Turn the stand upside down, so the cake plate is resting on the table. Most stands have a fluted base with a hollow center. Grab the glob, turn it upside down, and put the handle into the base.
Viola.
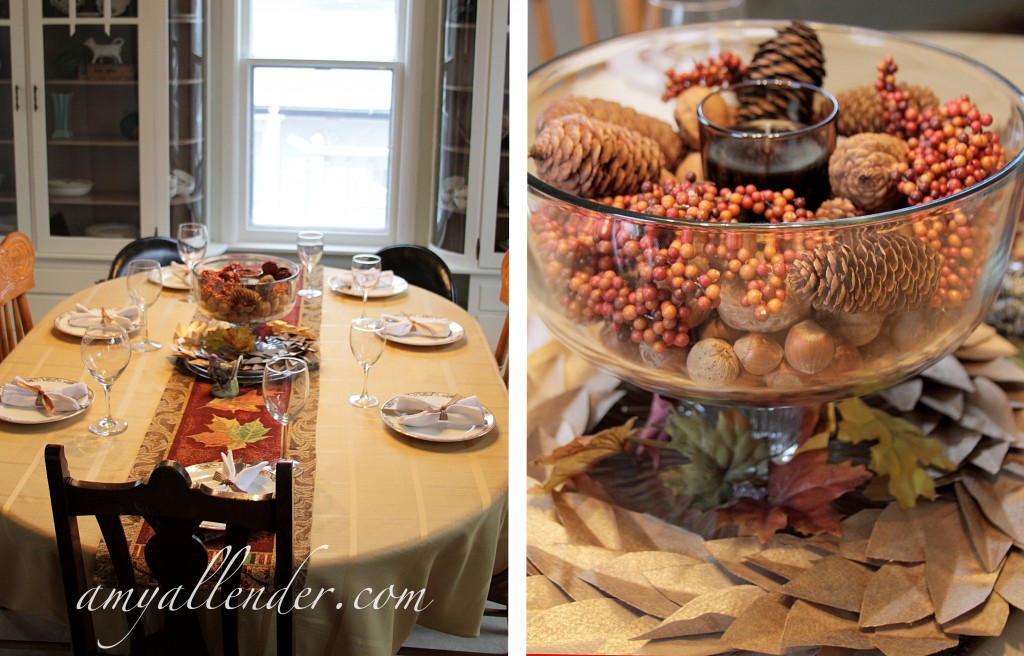
Now you have a truffle dish. Or in my case, the basis for a last minute centerpiece. {Recognize that paper wreath?}
For Thanksgiving I filled the dish with nuts {the kind you scoop into a bag at the grocery store} and pine cones. Now {since it was such a hit} it’s filled with Christmas bulbs {the cheap kind from Family Dollar}.
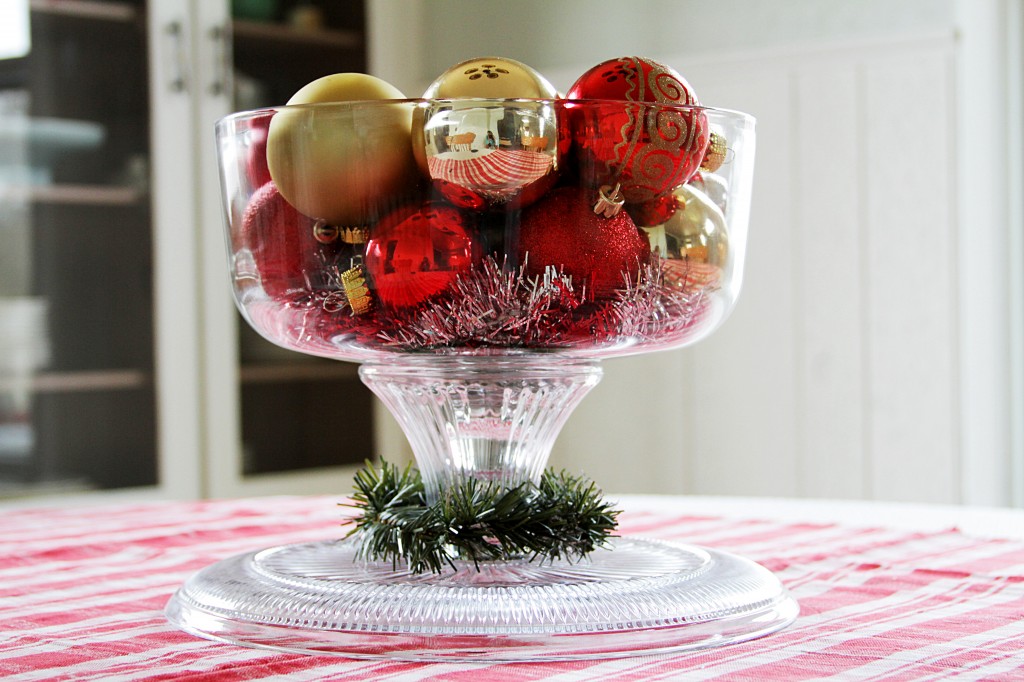
Derek uses this as an argument against me getting more hostess-ware. “Why do you need a truffle dish, when the cake stand does both?”
Um…duh…for those occasions when I’m making cake an truffle. Or when I want to use it as a centerpiece and bake a cake. I’m not budging on this. A girl can never have too many cake stands. Period. End of story.
If you don’t have one. Go buy one. You won’t regret it. It can take your blah-domestic skills to…whoa! Domestic skillz. {Yes, that’s right, the kind with a “z” at the end. That’s how cool you’ll be.} And make sure it can do double duty.
Amy
by Amy | Nov 27, 2012 | Blog, Crafts, The Art of Projects
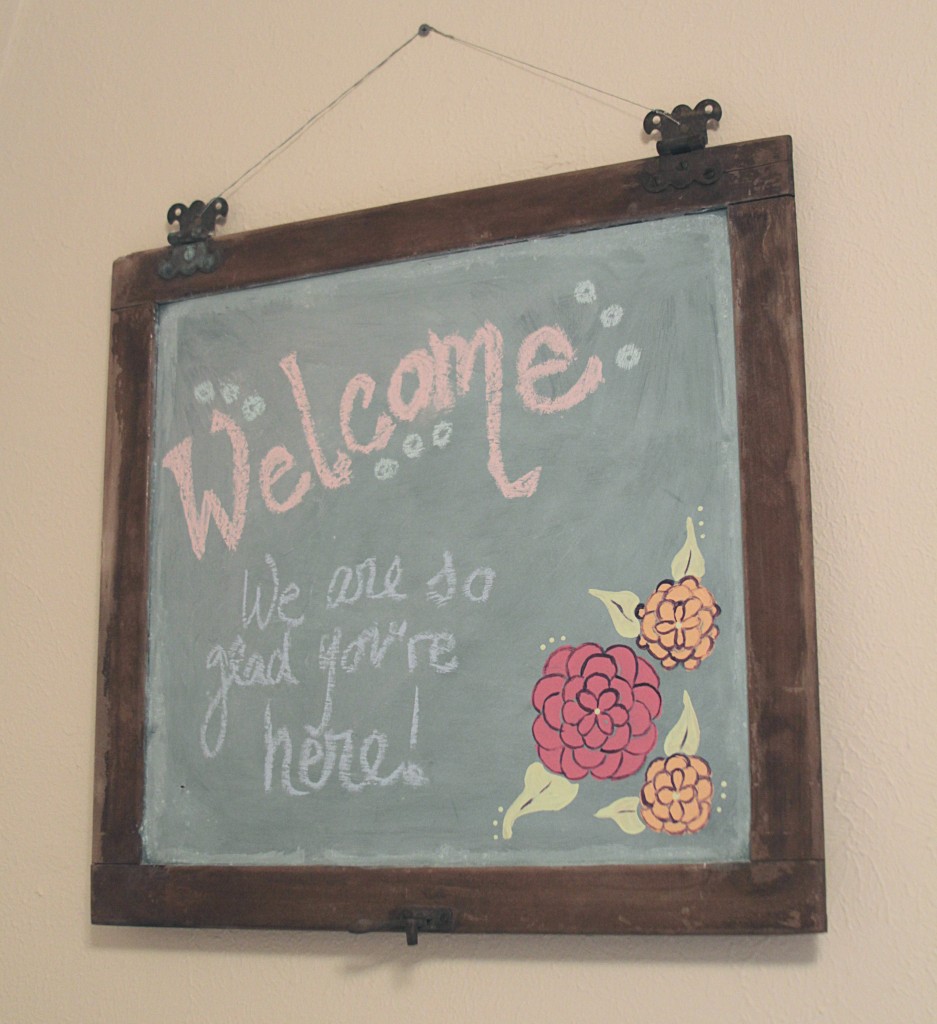
Here’s the thing. A few years ago {about three to be exact} I found an awesome old glass cabinet door in my family’s barn. You never know what you’ll find in there. There was something so…perfectly rustic about it. I needed it.
So I asked my dad if I could have it. He obliged.
And I convinced Derek to haul it back to Florida from Indiana.
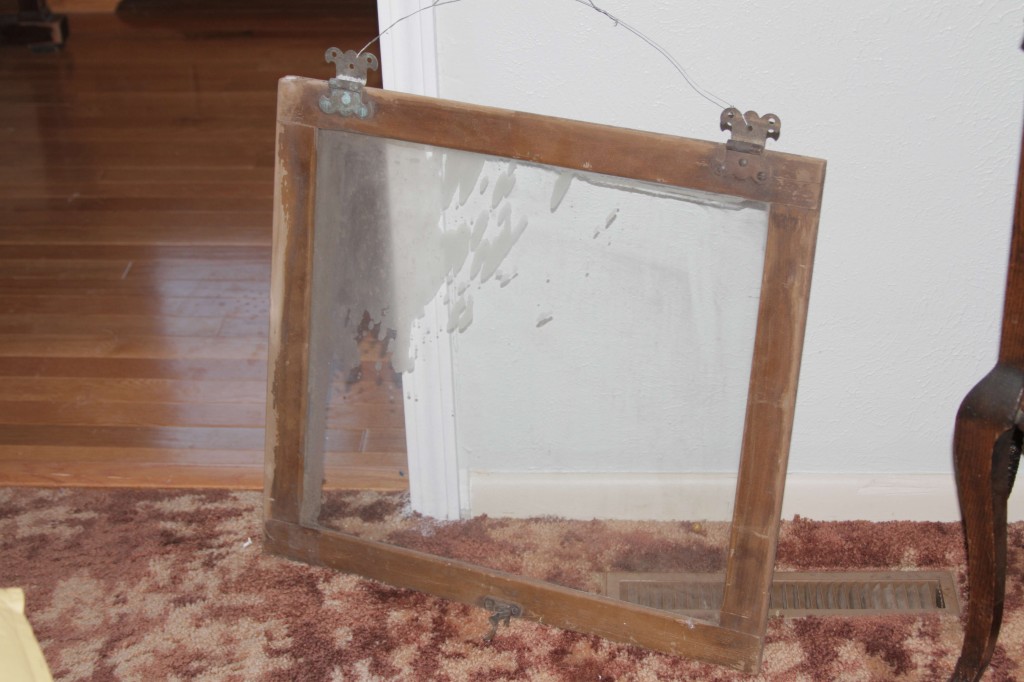
Once I had it home, suddenly I was stumped. And I stayed stumped. For years.
I moved the glass door from Florida to Oklahoma to Louisiana and finally up to North Dakota. By the time we got here Derek was less than pleased that I had dragged this piece of cast off garbage all over the country, only to let it sit in the closet. He even wanted to throw it out. Lucky for me {and the door} I tucked it behind the tool chest when he wasn’t looking.
Then a few weeks ago, I decided if I didn’t use it before Thanksgiving…it would be tossed out. It was beautifully rustic. I didn’t want to mess it up…but it was time to be bold or send it to the curb. So I made a plan and followed through.
I gave the old glass door a coat of custom chalkboard paint that I mixed up right here in my living room in a paper cup, and added a few painted flowers. I wrote a little message, and hung it up in the guest room. And I love it.
Doesn’t it feel good when you mark something off the to-do list that has made it’s home there for years??
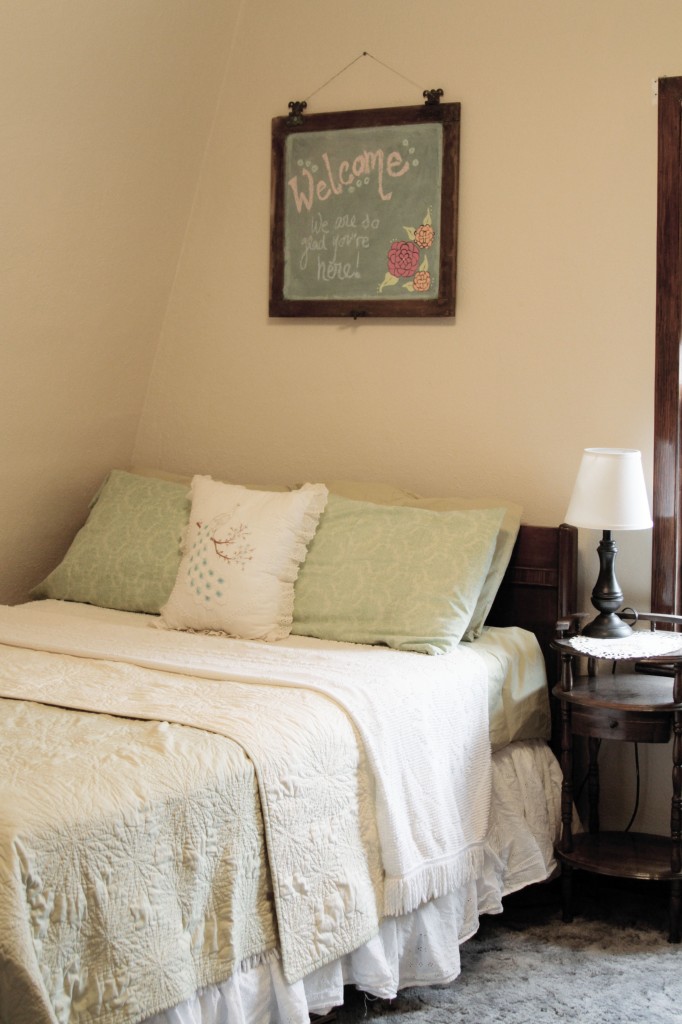
Okay, so I bet you want to know how to make that awesome chalk board paint. It’s easy…but you may need to make a trip to the hardware store.
First prime your surface with a coat of paint. Then mix up your chalkboard paint:
Put 1 TBSP of unsanded grout into a disposable container. Add a couple drops of water and stir until you have a smooth thick substance. Then add 1/2 cup of paint. Stir again until it’s mixed up real good like. Easy, right?
Your mixture will be thick. You can double, triple, quadruple…this recipe for bigger surfaces.
Apply it with a foam brush to get a good even coating without brush strokes. After it’s all dry lightly rub a piece of chalk on its side across the surface to condition it. Wipe the slate clean and use your new board!
Happy Crafting!
Amy
PS…For those of you following along, I was doing this project when I made that tragic oopsie poopsie on my carpet…
This post is partying at Between Naps on the Porch and these other great sites.
by Amy | Nov 16, 2012 | Blog, Crafts, The Art of Projects
You know what’s pretty? Pottery Barn stuff. All of it. Every season. Every stinking item in the catalog.
You know what I can’t afford? Pottery Barn stuff. Any of it. Any stinking item in the catalog.
But I really want a pretty PB house. I’ve started a board on Pinterest of things I think I can recreate. I’ve started frequenting this amazing site called Copy Cat Crafts. It’s chock full of knock off tutorials.
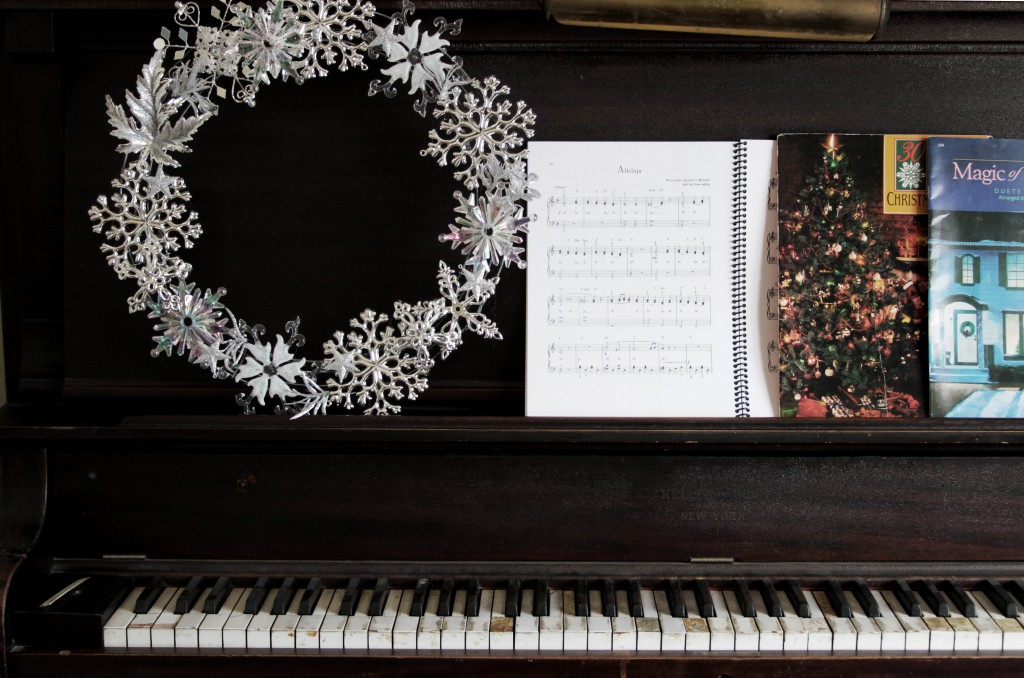
That’s where I got the inspiration for this wreath. I think it just may be the prettiest wreath I’ve ever made. {And I’ve made a lot of wreaths. Two which were awarded Grand Champion at the Elkhart County 4-H Fair.} Doesn’t it look sharp on the piano? Don’t mind those roughed up keys…It adds to the primitive look.
This is the tutorial that inspired this project. I followed pretty closely, but here is the process I used.
I bought:
1 Wire floral wreath form | A tiny can of silver spray paint | A stack of silver snowflake ornaments {they came in a tube} | An assortment of pretty glittery/silver snowflake ornaments
I used about 15 ornaments total for my 14″ wreath. You may want a few more. I did all my shopping at Hobby Lobby. But Wal-Mart and the Dollar Tree are known to have good sparkly ornaments too! This is one project where a little gaudy can still look classy. The key is to stick with one color {like silver} and motif {the snowflakes.}
Here is what I did:
1. Spray paint a wire wreath form silver.
2. Snip off tags and hooks from ornaments.
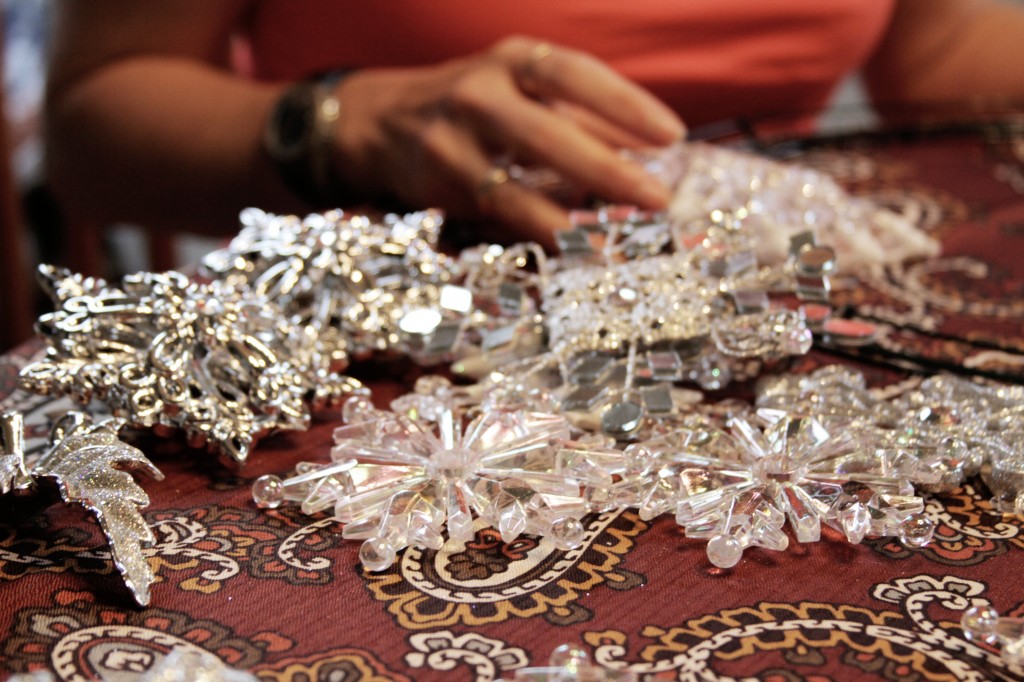
3. Arrange them on the form.
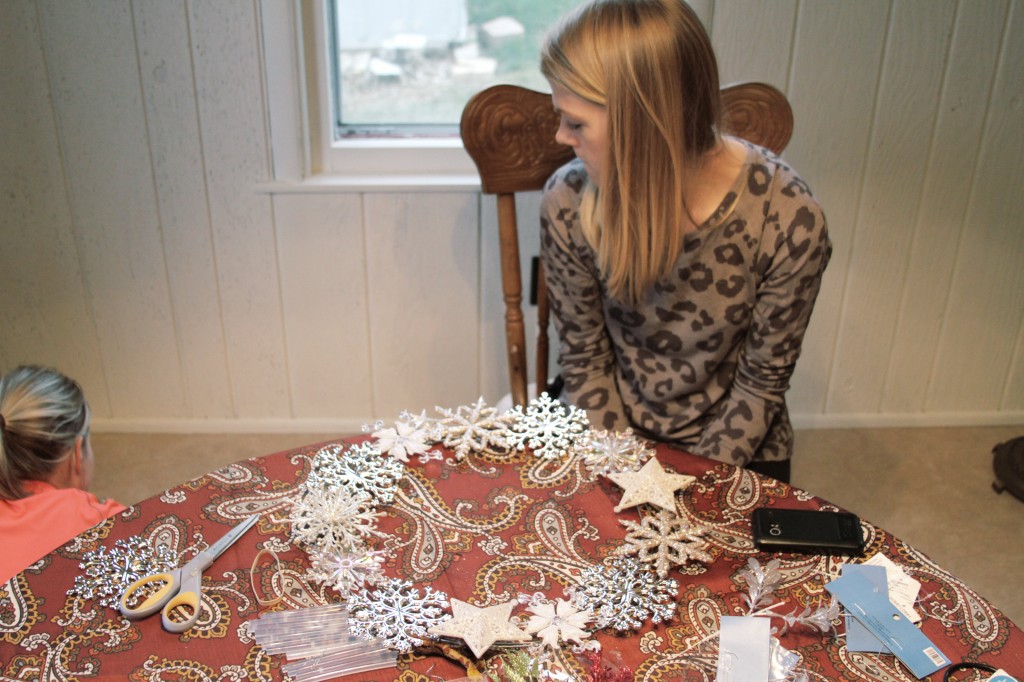
4. Hot glue them in place.
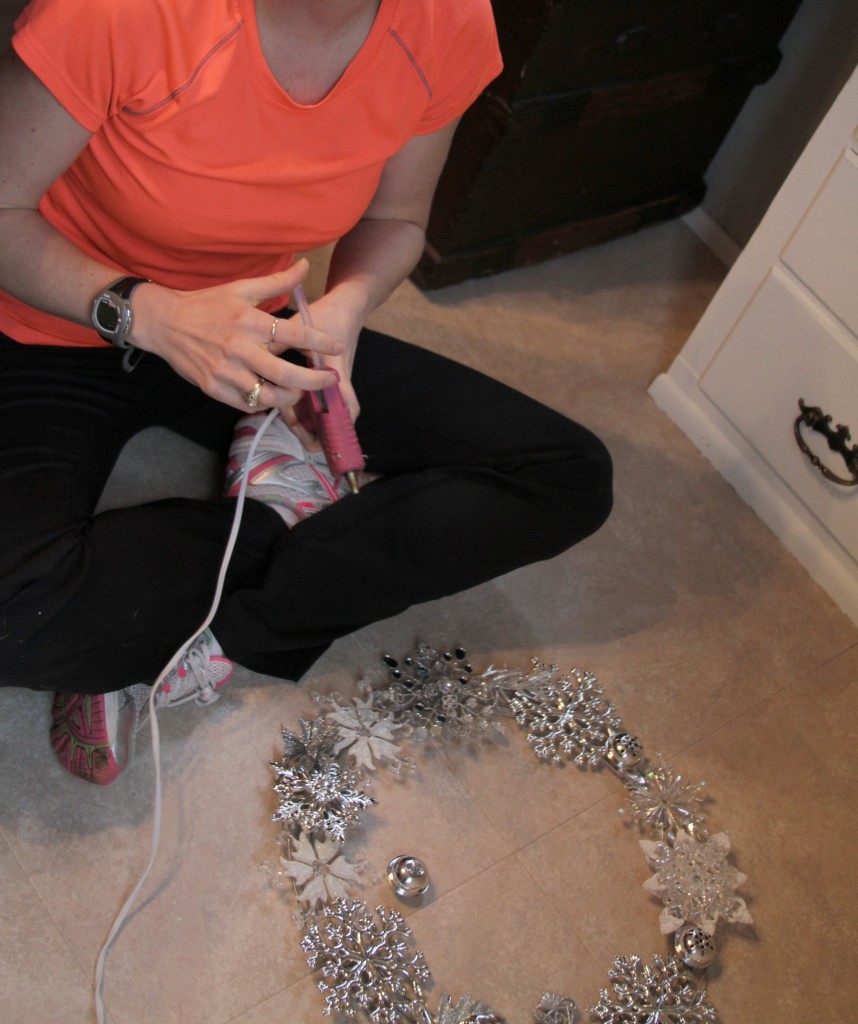
Done. It is so easy…I just couldn’t even believe it. I think it’s a classy wreath. Like snowflakes each one will turn out unique. And I plan to hang it the day after Thanksgiving until January 31.
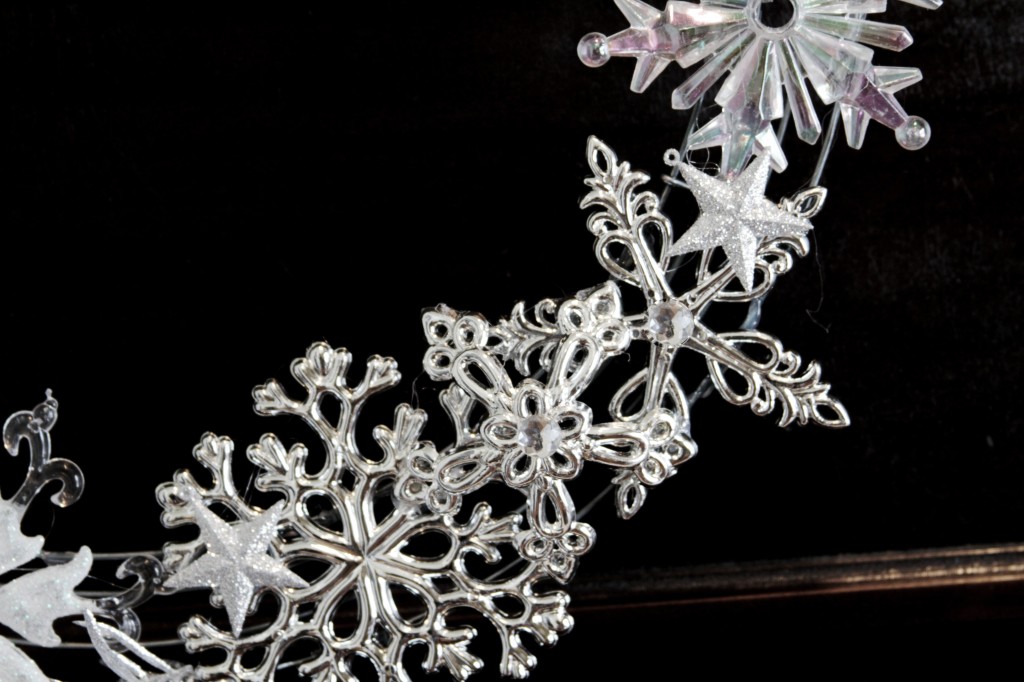
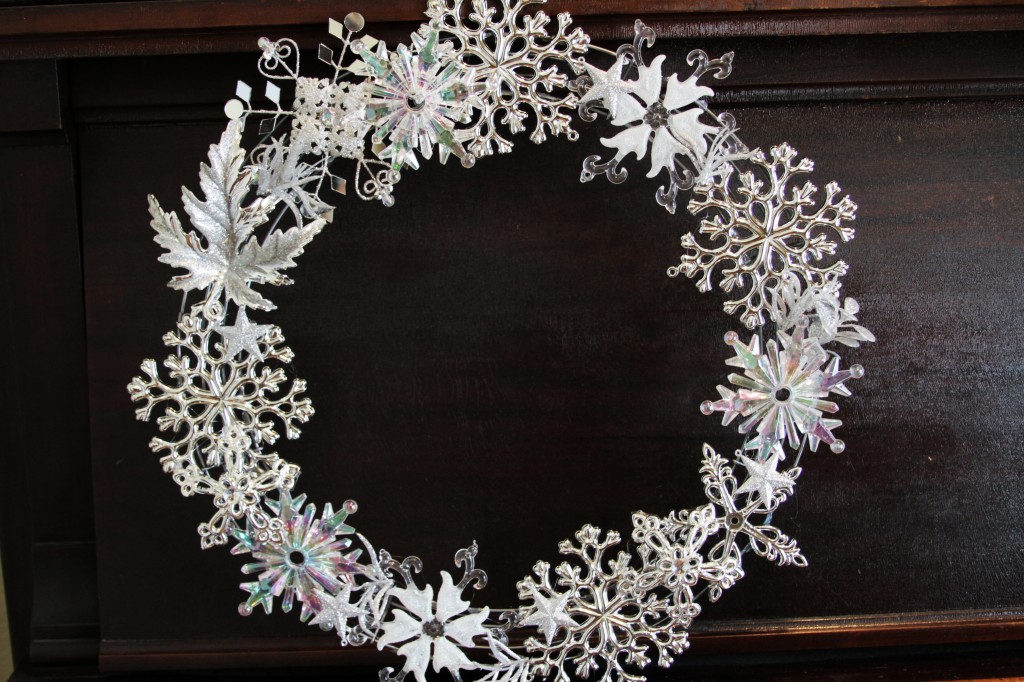
While it is super pretty, I don’t think I’d recommend hanging it outdoors. I think the elements may be a bit too harsh for this dainty project.
The best part? The PB wreath retailed at $70. Mine cost $15! Yeah baby. That’s what I like. Thank you Copy Cat Crafts for being so inspiring!
Happy crafting. And remember, friends don’t let friends craft alone.
Amy
by Amy | Oct 22, 2012 | Blog, Crafts, The Art of Projects
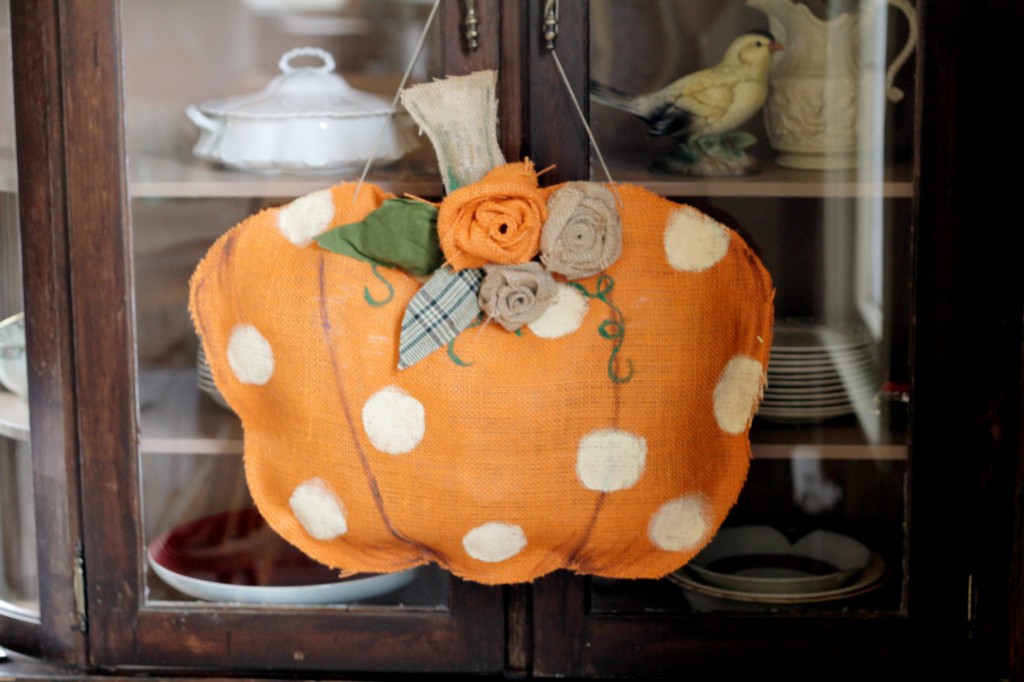
A while back {see the cabinets are still brown??} I did a little fall DIY crafting. I got together with a girlfriend and we made these super cute burlap pumpkins. Her neighbor had one. They are all over the Internets. {Yes, sometimes I call it the Internets. With an “s.”} They are retailing on Etsy for around $35.
Well…you know me. $35 for something made of burlap?? Maybe if the burlap also came with a gift card for some fro-yo and breadsticks at Olive Garden. Maybe…
So anyway. We made our own and I think they came out pretty darn cute. And now is the perfect time to whip one up as you swap your scary-spooky for harvest-happy. The best part? Ours cost $6. For both. What up? The second best part? It’s an awesome way to upcycle your plastic grocery bags! {Remember what we did with paper bags?}
Here’s what you’ll need: Burlap 1/2 yard per pumpkin {Hobby Lobby carries it in orange} | scraps of tan burlap | white & green paint | paint brush {bonus points if it’s one of those nifty circle sponges} | scraps of felt or other awesome fabric | hot glue | plastic grocery bags {unexpected…I know}
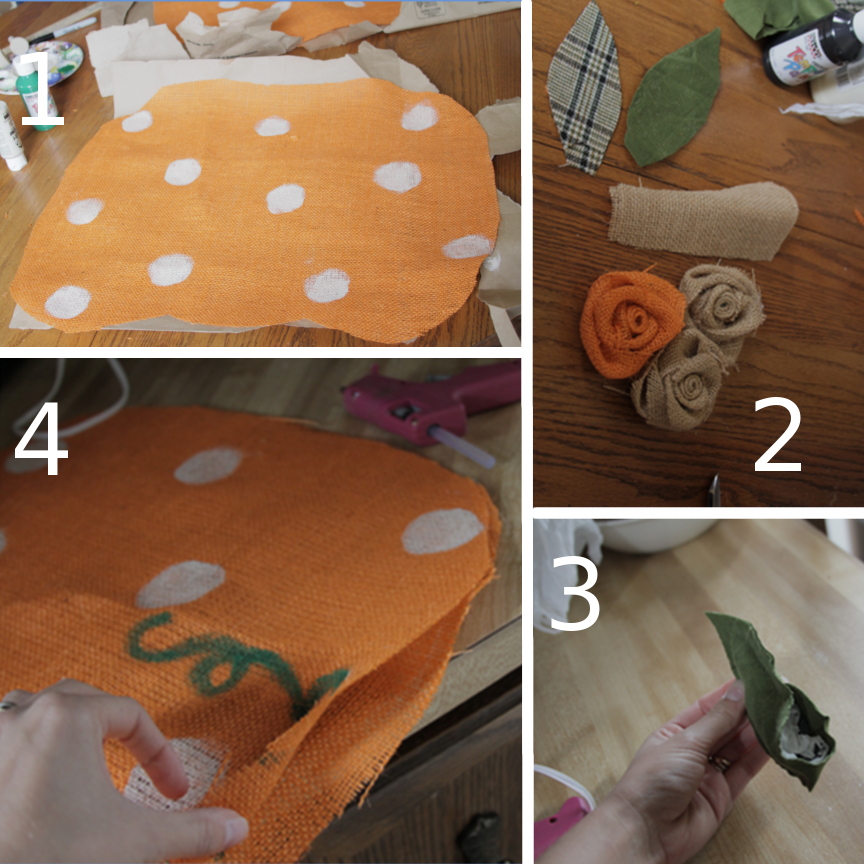
1. Cut out your pumpkin. Double your fabric up so you have two identical shapes. Mine is about 22″ wide and 16″ tall.
2. Cut a stem out of tan burlap. I cut leaves out of some scraps from the fabric bin. Wool, felt, and flannel from an old shirt are great choices. Use a few other scraps to make some burlap roses. Tutorial here at the old blog.
3. Start gluing your small pieces together. Lay them flat and run a bead of hot glue around the outside, leaving a little raw edge exposed. Be sure that both right sides are out!! When you’ve almost got the whole shape sealed up stuff it with some plastic baggies. For the small pieces you may need to tear the bag into smaller bits.
4. Almost done. Lay a paper bag between layers of orange burlap and paint. These look best when they are kept simple. I went with big polka dots…but you don’t even have to include the dots. Swirls, stripes, whatever…it’s your project. Add a few curly-q vines to the top. Follow your heart. Then repeat the gluing process. Leave the top open and stuff it with plastic bags. Glue your stem in place {sandwiched between orange layers} then glue the top shut.
Add your leaves and roses with a bit more hot glue.
I used a pen to open up a whole in the weave of the burlap, then I threaded a piece of craft twine through to create a hanger.
Why plastic bags? It’s simple. First of all…they are free, and we all have way too many on hand. Second, if you are planning to hang this gem out for all to see…plastic is an ideal choice. It won’t rot or get nasty. The rain won’t hurt it. I’ve seen other tutorials use brown craft paper…which is dandy…if you aren’t putting it outside.
As always, I love to see your creations. Feel free to send me a photo of your version of this craft {or any craft}. I love new ideas! AND…if there is a project you are drooling over, but can’t figure out how to make it happen…email me. I’d love to find a way.
Amy
This thrifty project is partying at Home Stories, My Uncommon Slice of Suburbia, Savvy Southern Style, and these other great parties.
by Amy | Sep 14, 2012 | Blog, Crafts, The Art of Projects
I have about a million of those re-useable grocery bags. My problem? I get to the store and realize they are still in my basement at home. Then I’m asked the question. The big question:
Paper or plastic?
Kill a tree. Or get my groceries in a bag that will never really decompose. It’s a lose-lose.
About a year ago I first showed you this project over at Aprons & Ambitions. It’s a super easy wreath you can make using just a paper grocery sack, an old box and some hot glue. I’m revisiting this tutorial today. It’s a bit updated, but still as easy and thrifty as ever.

Here’s what you do:
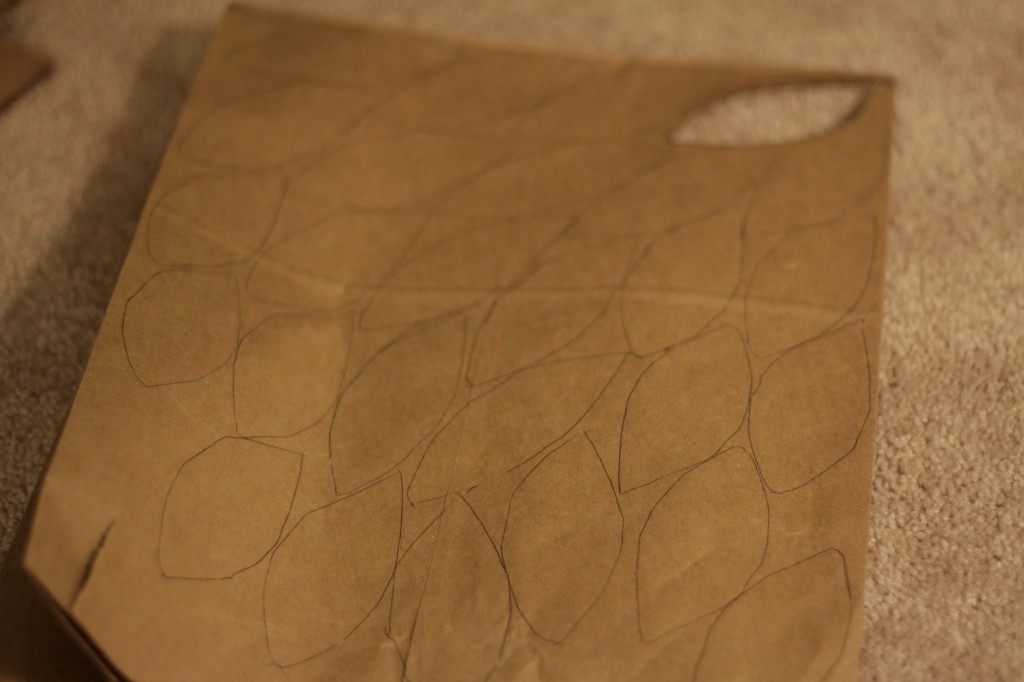
Draw a leaf shape on your bag. Mine is about 3″ long and 2″ wide. I cut one out then trace it over and over so they are all the same size. Then cut then all out. One bag full of leaves is enough for one wreath.
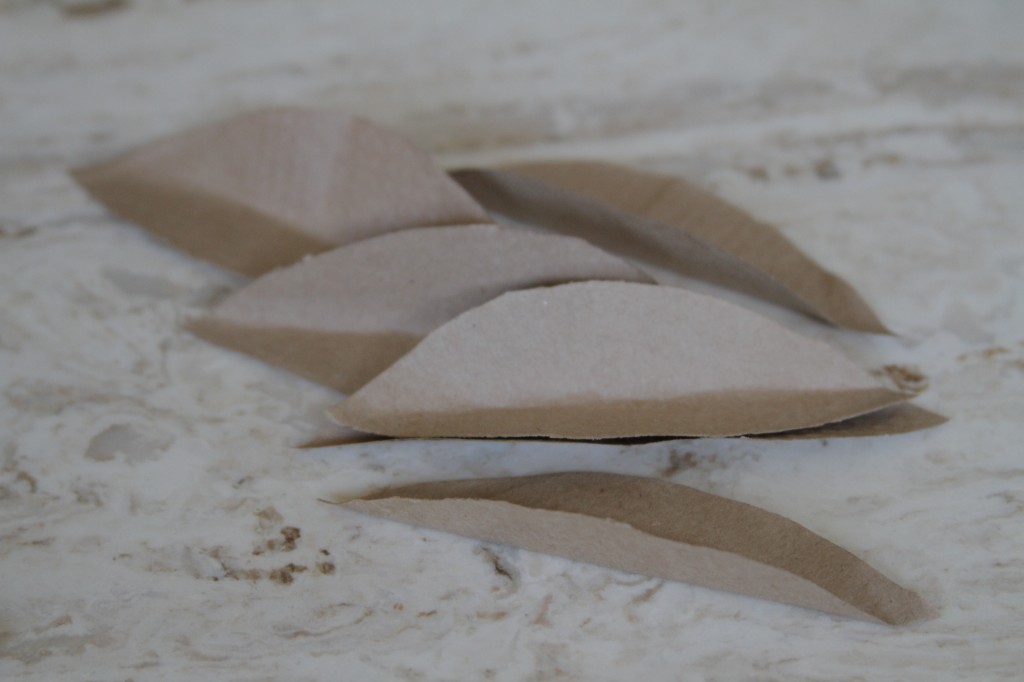
Once your leaves are all cut out crease them in half. Like so:
Next…make your wreath form. You can cut it out of an old box…or use up some more paper bags. For the one I made yesterday I used bags and a cereal box. The point is to make a form that is fairly stiff to glue your leaves to.
To make your form from bags do like this:
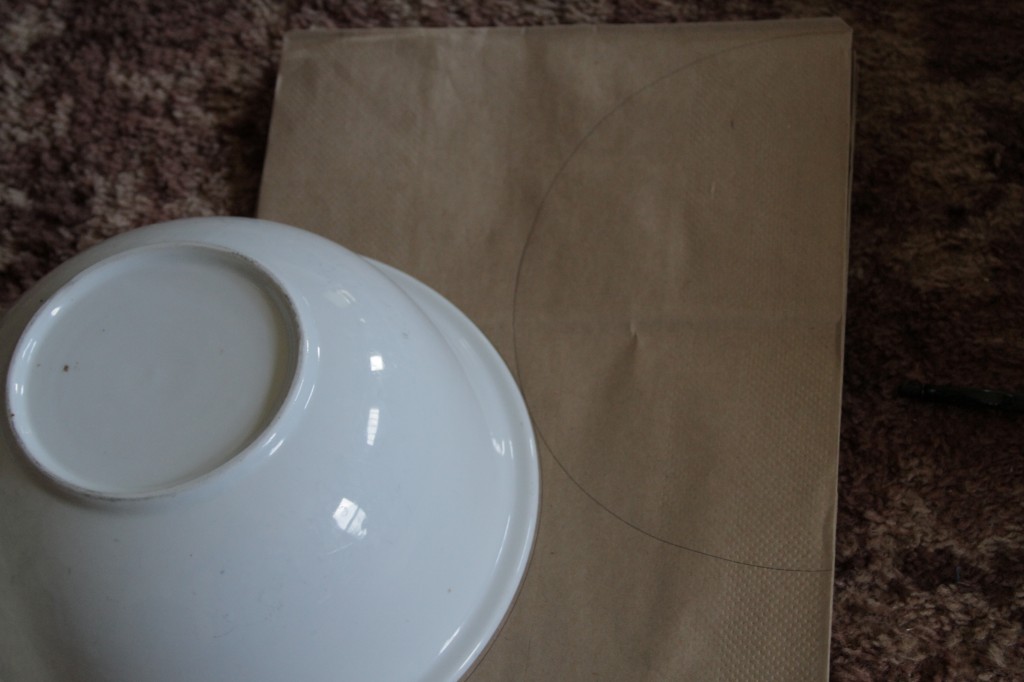
Use a big mixing/salad bowl to trace half a circle on your bag. If you are making a bigger wreath you may only be able to fit half on one bag. Use a smaller bowl to make an arc about 2″ wide. Cut them out of four bags. Trace your arc twice on a cereal box and cut those out too. Sandwich all your arcs together to make a full circle and hot glue them all together.
Then it’s time to glue on your leaves. Please don’t be too repulsed by my hideous carpet. You know how much I hate it. It’s days are numbered.
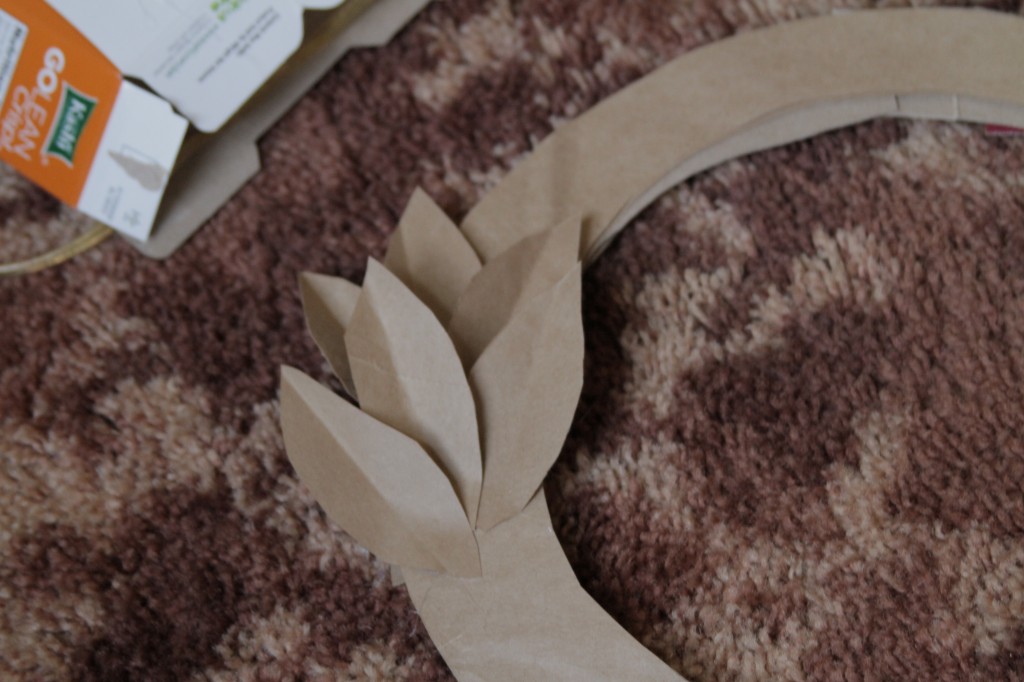
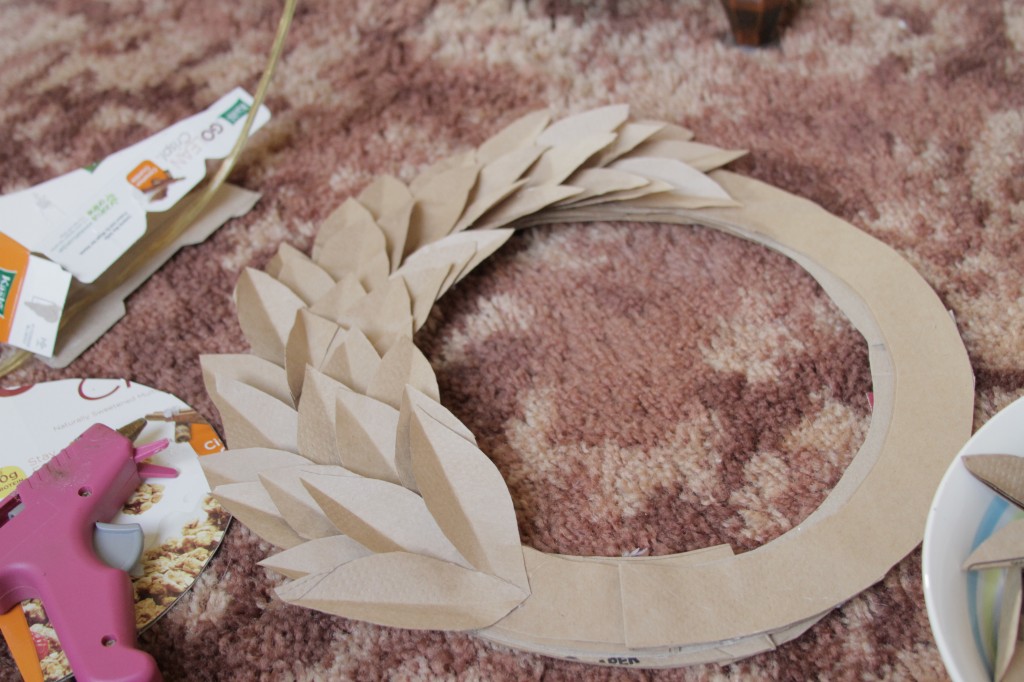
Glue them on in small clusters until you’ve gone all the way around. Finish it off with a dusting of gold spray paint. I usually get mine out in the fall…but it’s a super versatile wreath for all year.
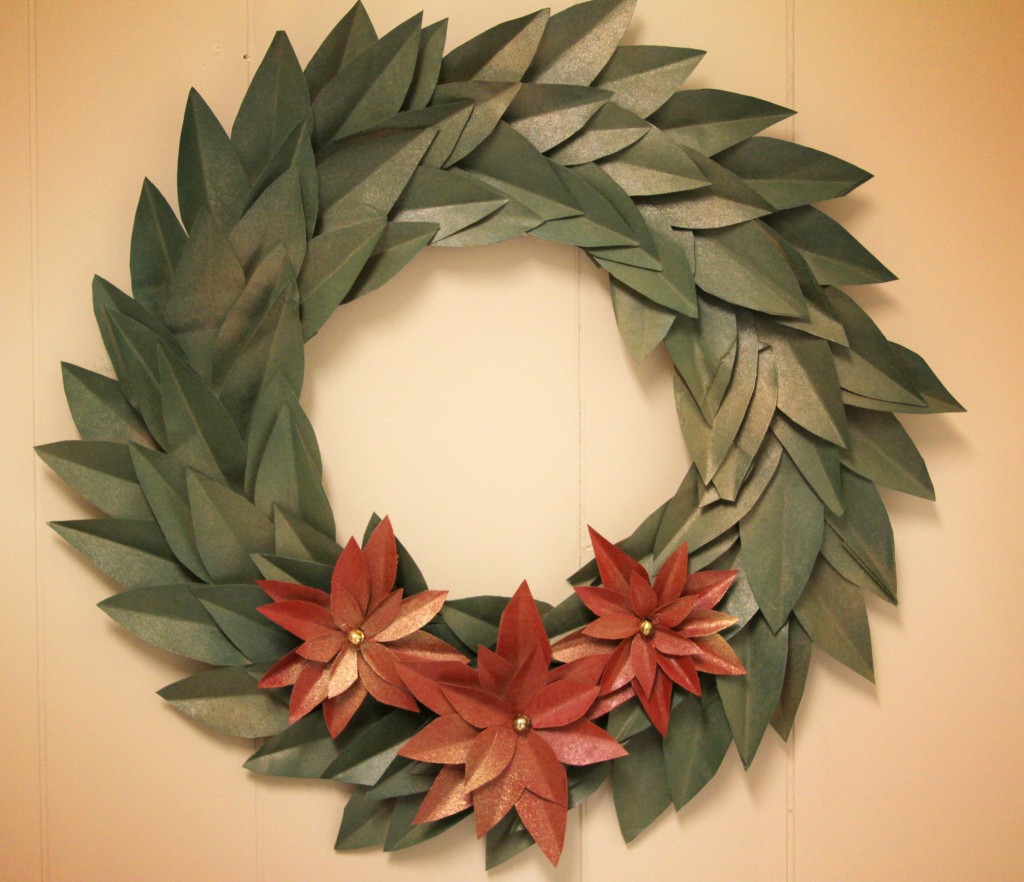
And…I know Christmas is still a long ways off, but while you are at it, you can easily whip one up for Christmas. Follow the same instructions, but spray paint it green and add some paper bag poinsettias. The tutorial for those is on the old blog. See it here.

Happy Crafting!
Amy
PS…This post is partying at Sew Can Do…and these other great linky get-togethers.

by Amy | Jul 31, 2012 | Blog, Crafts, The Art of Projects
I’m a 10 year 4-H member. I’ve been to a lot of fairs in my day. Yet…I’ll be honest. I’ve never seen a better display of projects and crafts than that at the Elkhart County Fair. Seriously, there are great projects. I’m always inspired by what these student come up with.
Here is a selection of my favorites. I’ll start with my absolute favorite category: Recycling. In this category you enter things made of upcycled objects. Just take a look here.
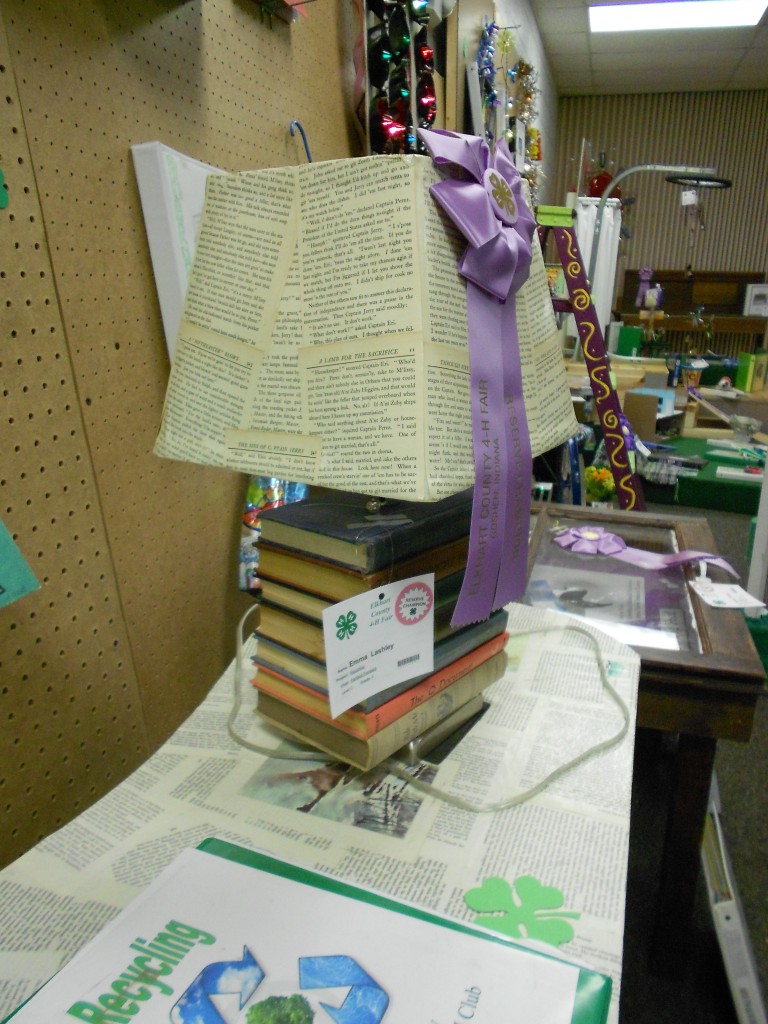
I’ll start with my favorite. {Left} Bask in the beauty of this lamp. It’s made up of vintage books that have been glued together. Then a hole was drilled through the center and it was wired with a lamp kit. The shade has been decoupaged with book pages. Genius.
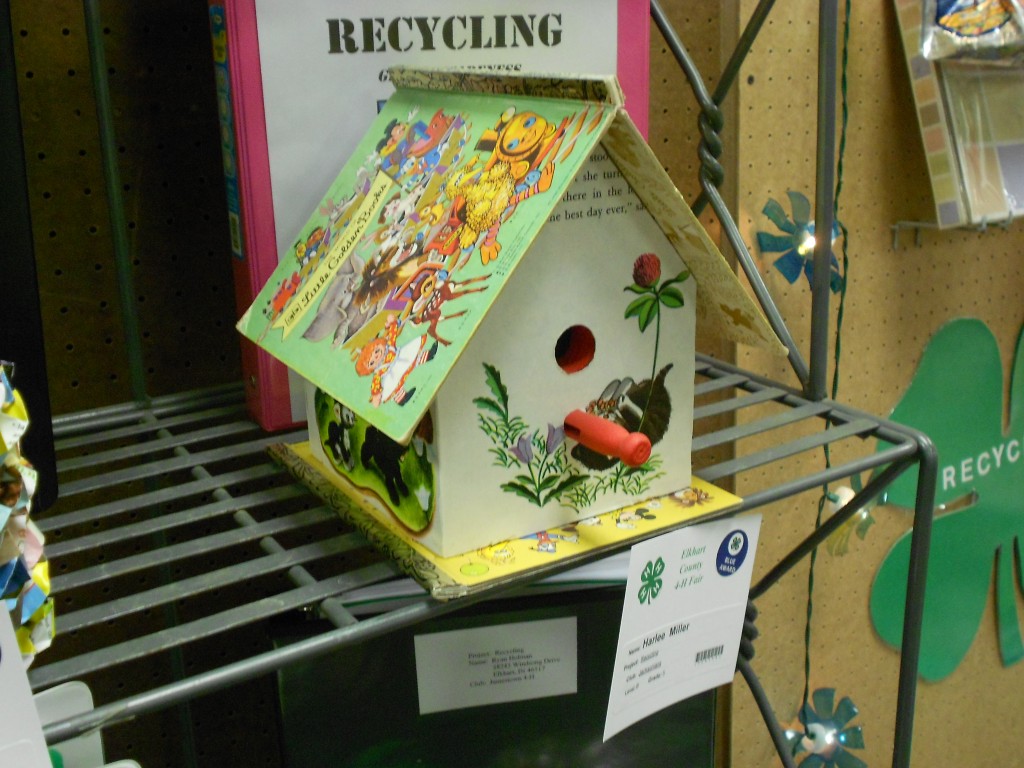
Remember those Golden Books? Check out this cute-as-a-button bird house. As far as I can tell…you could decoupage pages onto a pre-fab bird house. This one must have been custom made though, since the roof is made solely of the book. Take note of the little vintage clothes pin perch! I love it.
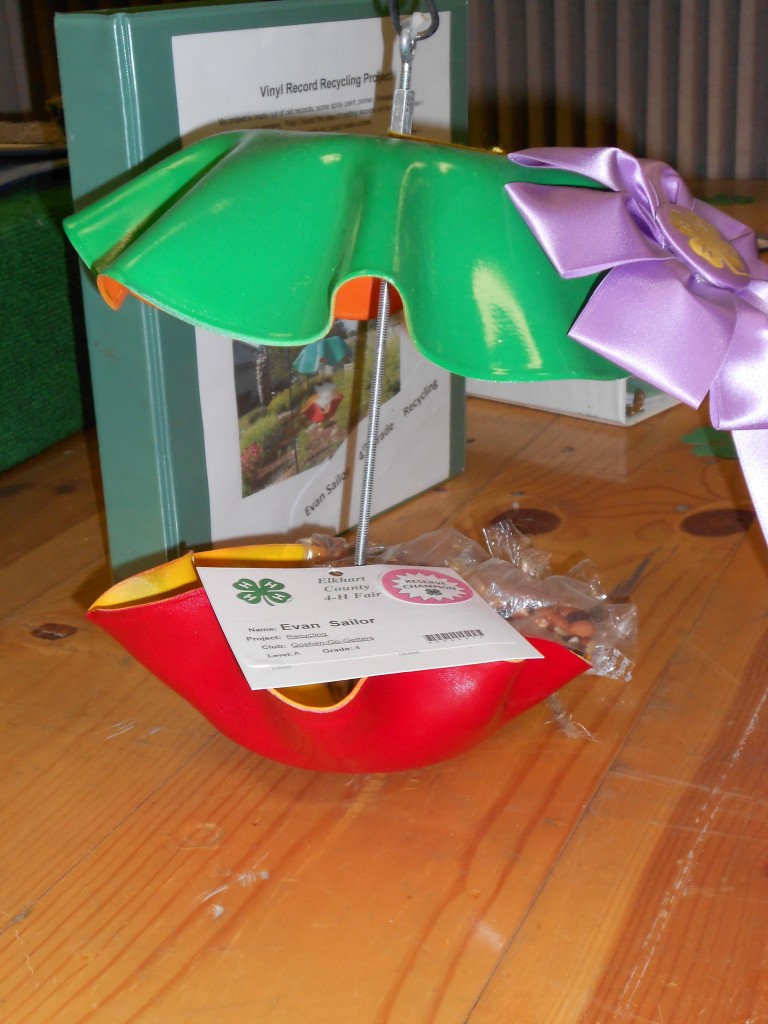
How about this bird feeder made of melted vinyl records? I think it could be a bit cuter…but boy do I adore this notion.
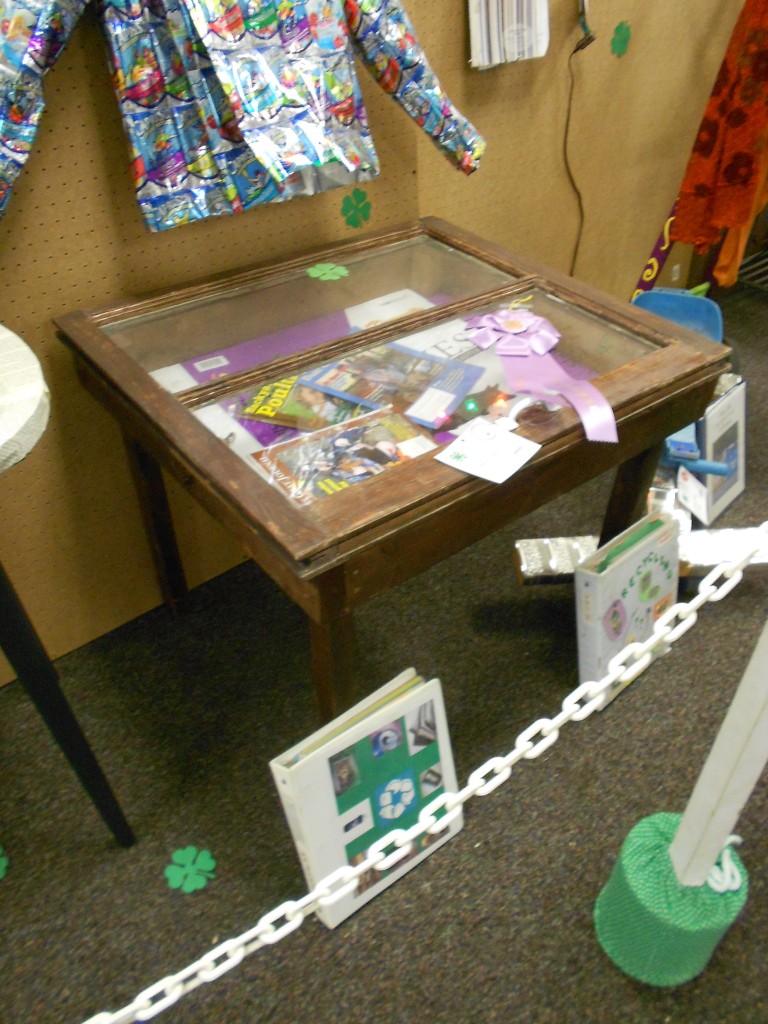
I’ve seen this before…but it doesn’t make me any less impressed. An old salvaged window, turned into a gorgeous end table.
I love being inspired.
Amy


