by Amy | Jan 18, 2013 | Blog, Crafts, The Art of Projects

A week ago I pinned this lovely idea to a board titled “Pretties Please.” Every day since then I’ve gotten notifications that it had been pinned and repinned and pinned some more. The image links to a good page of 5 sweet ideas for upcycling old dressers. And that got me thinking…what else could we do with those drawers. So, without further ado, I give you 7 Upgrades for Old Drawers. {#1 is the planter above.}

Our second idea comes from Kamm’s Korner. Click the image and you’ll be whisked away to her blog for the complete DIY tutoril. Don’t you just love the look of the window boxes? You could always remove the hardware for a less obvious drawer look.

Olive and Love took some cast off drawers and transformed them into pretty, easily accessible under the bed storage.

Nice Girl Notes used drawers to make a perfectly portable dollhouse.
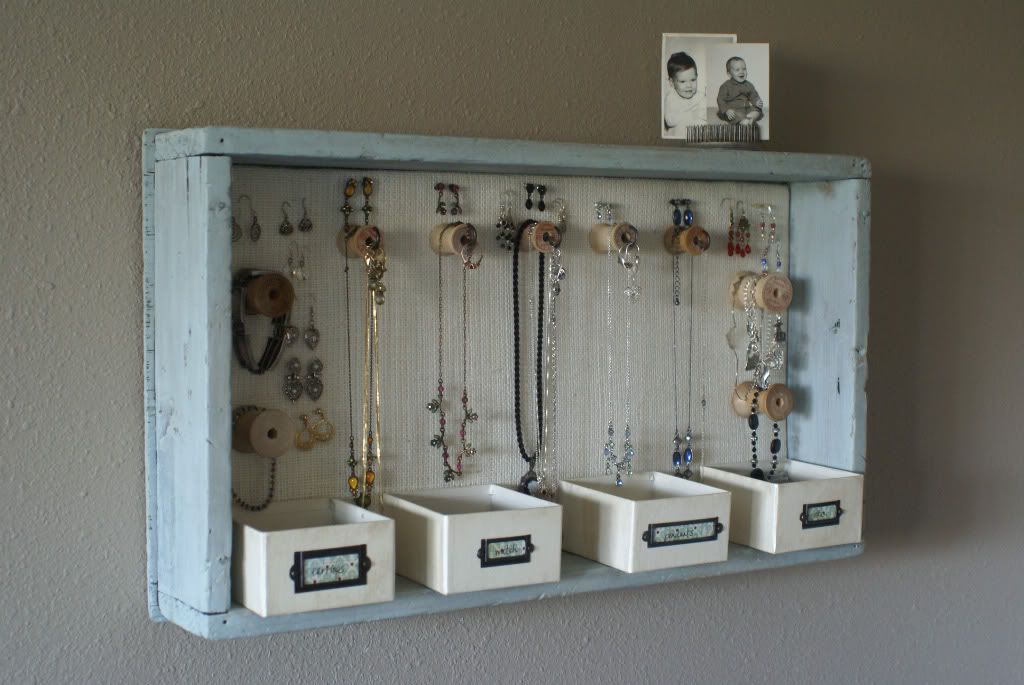
A Time for Everything made this jewelry organizer from an old wooden tray. But what’s stopping us from using an old drawer?
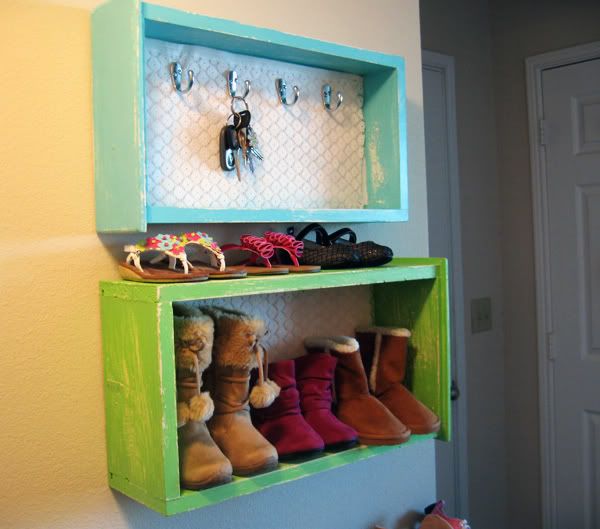
Entry ways can always use more storage. Why not get some of those shoes off the floor and up onto the wall? This project comes compliments of The Douangphila Blog.

Last but not least…Now that you’ve used up all the drawers what ever will you do with the dresser? Cameras and Chaos used this draweless dresser for storing her fabrics. I think it’d be lovely in a guest room or bathroom for storing towels and linens.
And where should you go to get these magic dressers? I dunno…thrift shops are always brimming with ugly dressers and nightstands. Check craigslist.org in the free section. Sometimes people are trashing the craziest things. {Like a dresser with no drawers…}
Happy upgrading!
Amy
by Amy | Jan 17, 2013 | Blog, The Art of Projects, the house
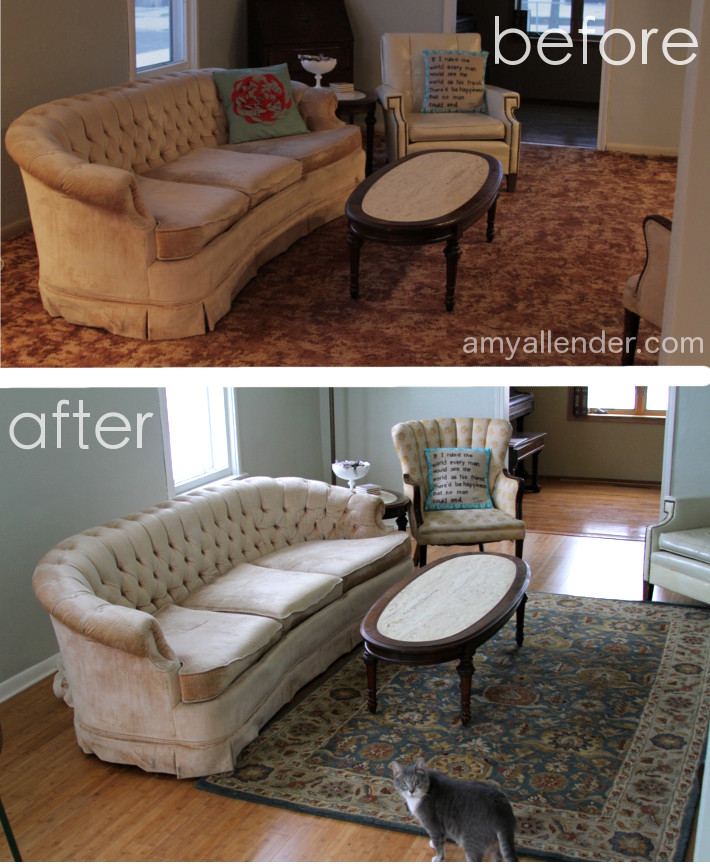
Here it is! It hardly looks like the same room. I know, amazing…right? I’ll just let the photos speak for themselves tonight.
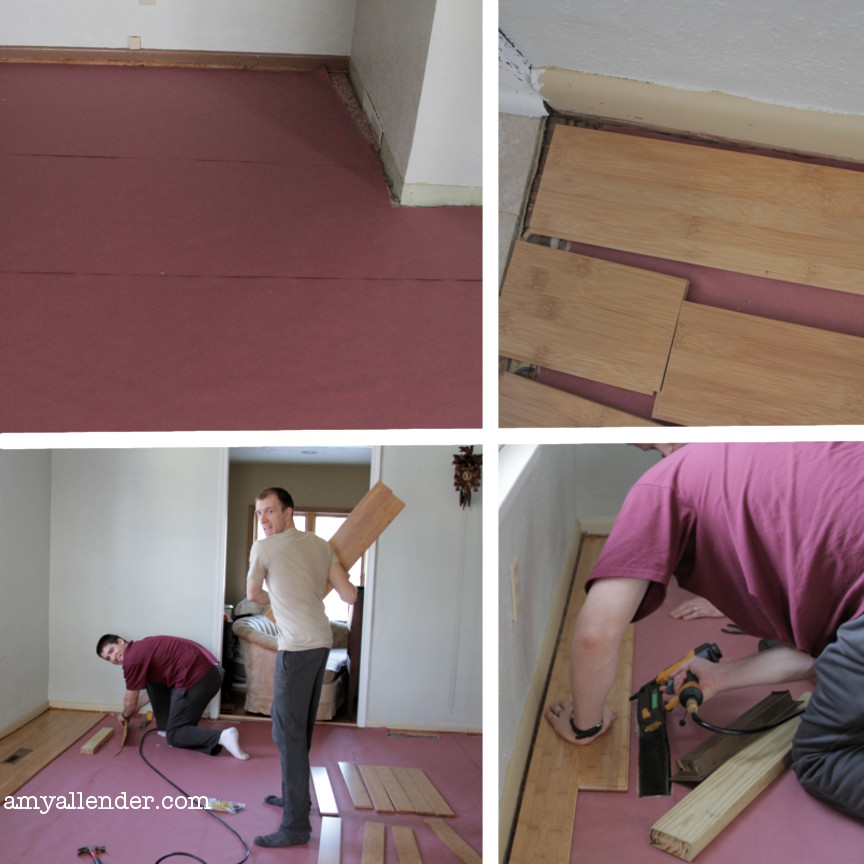
Here’s a tiny peek at the process. Luckily we ran into some friends at the hardware store who offered the services of their brad gun, air compressor and miter saw.
We covered the linoleum with red rosin paper so that if there was asbestos on the backing it wouldn’t get kicked up in the air when we nailed into it. Then it was a matter of interlocking the planks and nailing each one in place. Oh, and lots and lots of cuts to make everything fit just right.
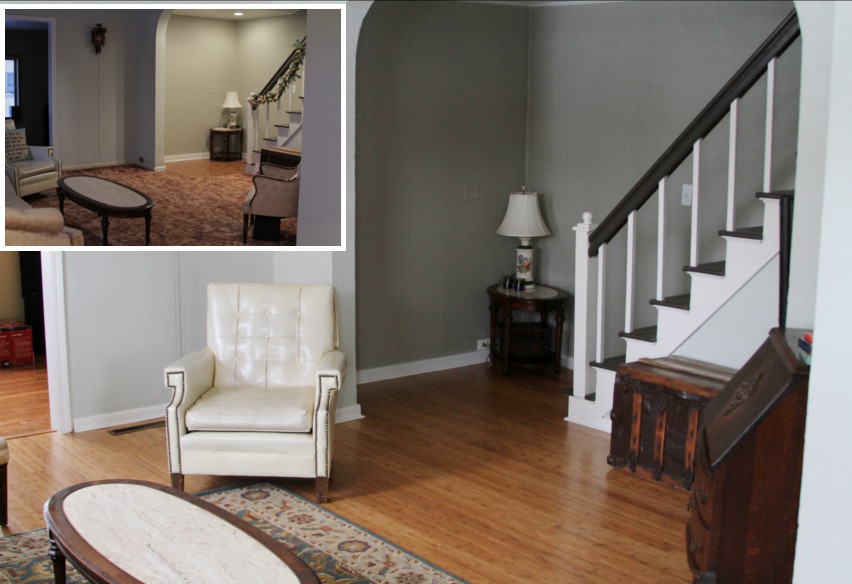
The whole project took 9 days to complete. From the day that I tore out the carpet until the last tool was put away. Read yesterday’s post about dealing with project aftermath for more on how to cope with the mess. Actually laying the flooring took two full days of work.
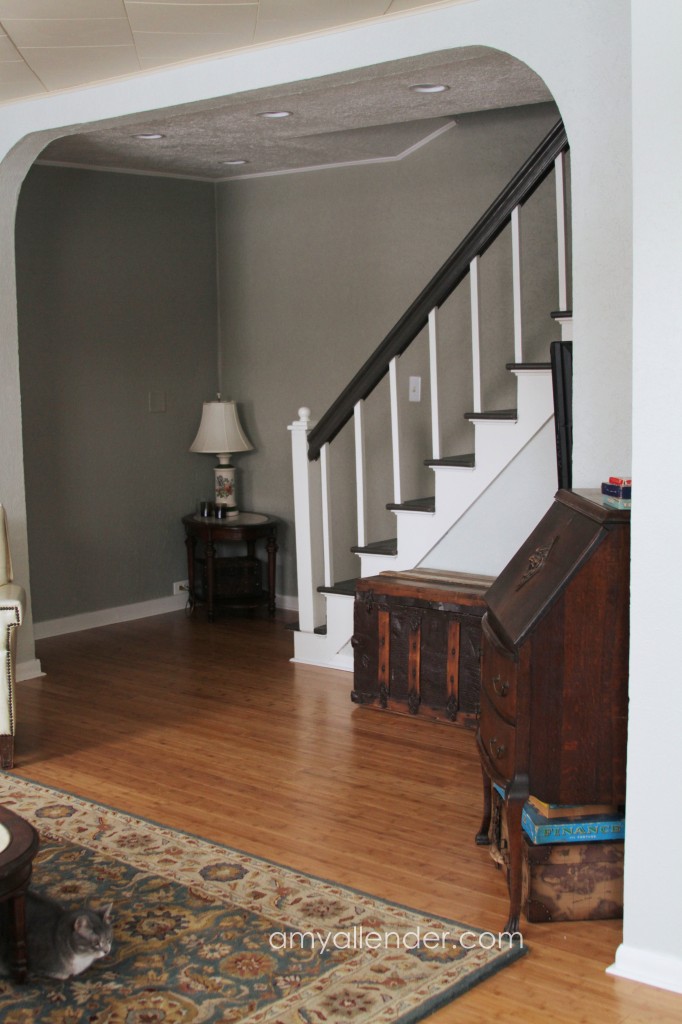
We went with bamboo for a few reasons. First of all, we really liked the look of it. I loved the color and texture. Second, bamboo is not a scarce commodity…it grows fast and is durable and hard. And third…because it grows so quickly it makes it an affordable choice too.
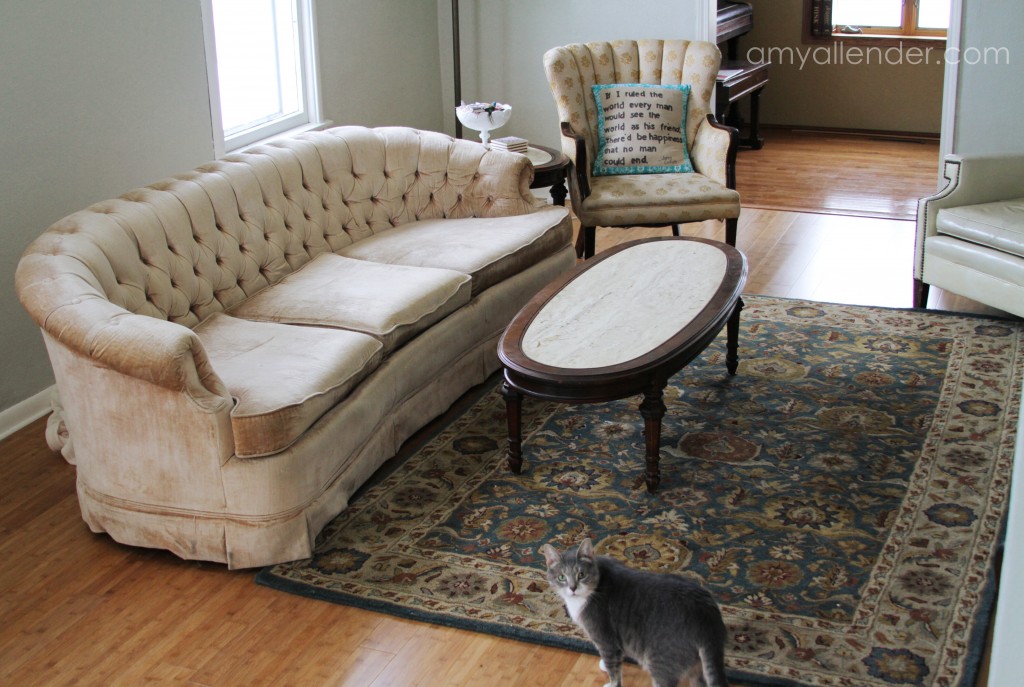
So, what do you think? Panda likes it. After all, we did find her wandering in the bamboo behind our house in Louisiana. I like it too. I really couldn’t be more please. So we will mark this one complete. Ahhh…it feels good to finish a project.
Amy
by Amy | Jan 16, 2013 | Blog, The Art of Projects, the house
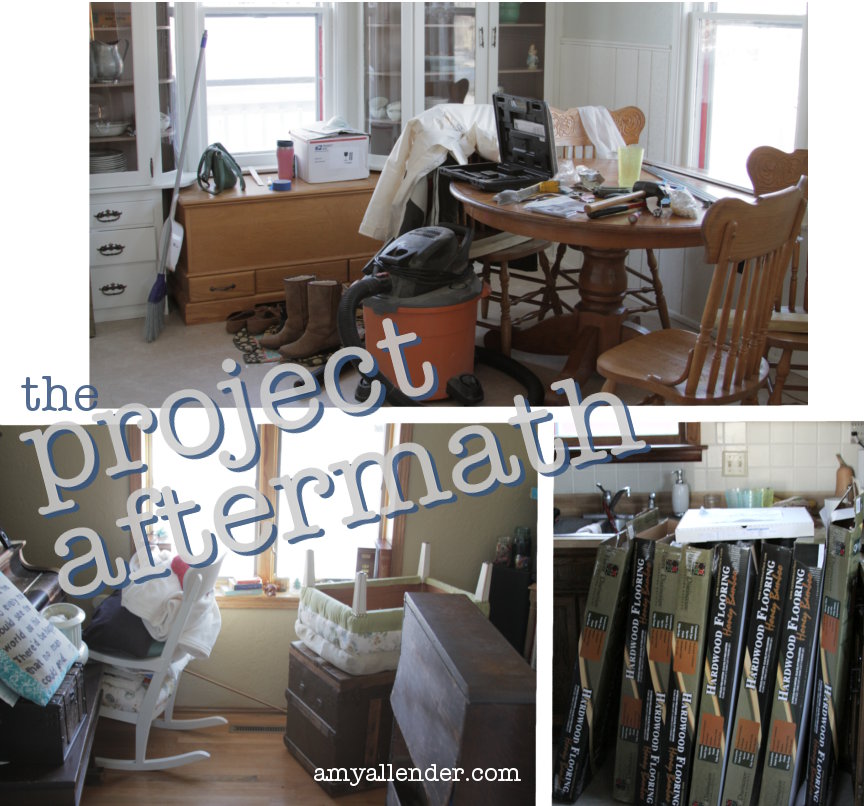
So often we can be fooled by DIY project photos. And I’m guilty of misleading you too.
We see the hideous “before.” The beautiful “after.” Photos of the steps that fall in between. But you know what you don’t see very often? The project aftermath.
The aftermath is all the things that are amiss you your home and life after a project is complete. As you well remember, just over a week ago I impulsively ripped out our nasty, smelly brown carpet. Eight days later we had a new floor and were able to call this project complete.
Seven days after I ripped up that carpet we had a new floor. Project done? Not hardly. Once you brush the saw dust off your hands, look proudly on your accomplishment, then promptly turn around to view the aftermath. Let’s see…there are tools strewn about. A Shop-Vac taking up half the dining room, the furniture is stacked Egyptian-tomb-style in the front room, empty boxes block the kitchen sink and cupboards, a basement full of saw dust and flooring scraps. And let’s not forget the non-project things that get neglected when doing some DIY…laundry, fast food containers {who has time to cook?}, the litter box…
Here are my ways of coping with the aftermath.
- 1. Don’t freak out. Yes, the house will be a mess. Don’t even try to stay on top of things while you are knee deep in project. Just let it happen.
- Schedule in an extra day at the beginning of your project. Do laundry, make a big meal that makes good left overs, take out the trash, clean the litter box…do all those little things ahead of time. Make your unaffected rooms clean.
- Schedule an extra day at the end of the project. When you put in that last nail, revel in your accomplishment. Go out for ice cream. Use the following day to put tools away, vacuum, do more laundry, etc.
- Save the prettiest part for last. I use my favorite part of the project as a reward for getting the aftermath cleared. Rearrange my furniture in the living room until this afternoon…when everything had been put away and all the boxes were taken to the recycling center. I wanted the room to look finished, but knew that I had to do the lame stuff first.
- Make piles. Don’t wear yourself out by making a million trips to the garage or basement. Instead, sort things out…then use plastic bins, bags or laundry hampers to haul big loads at once.
The moral of the story is that home improvement is more than just a before and after shot. {But seriously, who doesn’t love a good B&A?} I’ll show you the pretty before and after tomorrow. But for now, to be fair and totally transparent, I needed you to see the aftermath. Because I know we are all anxious…I’ll give you a preview.
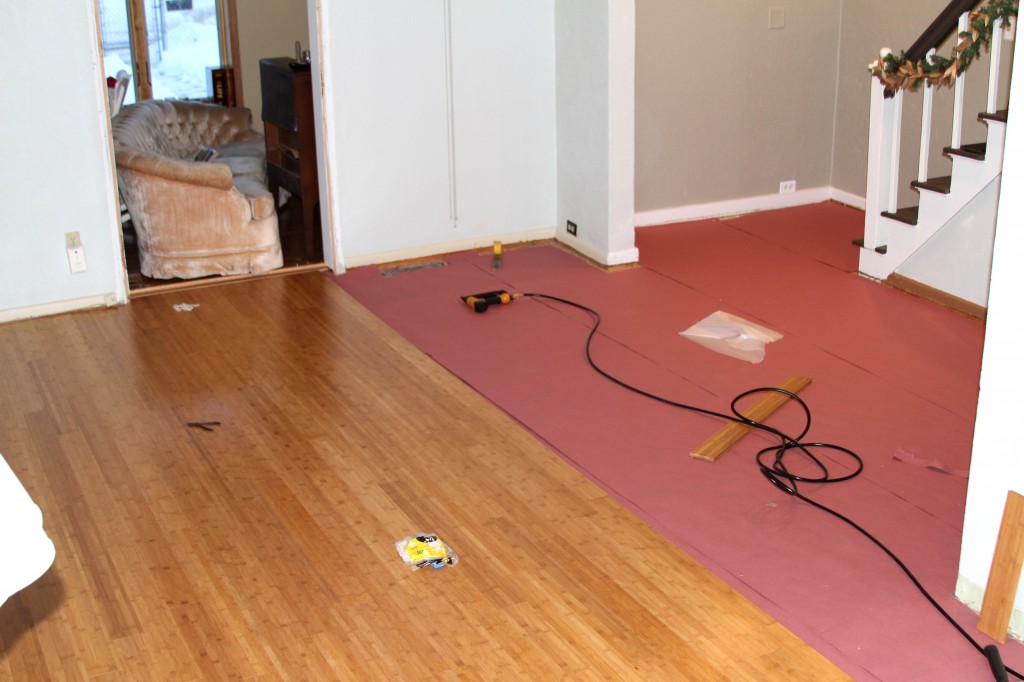
That’s all you get. Now, don’t get your panties in a twist. The big reveal is happening tomorrow evening. So be sure to check back! And like the Facebook page, while you’re at it!
Amy
by Amy | Jan 8, 2013 | Blog, The Art of Projects, the house
So when we moved in to our house here in Minot I was still blogging at my old blog. Since then I’ve moved here. To this prettier, roomier site. When I posted the carpet-rip-up post yesterday I realized that maybe I should house all the house before photos here. If you are a long time reader, you probably saw this post in July when we closed. Otherwise, enjoy these befores.
1. I was pleasantly surprised by the size of the house and yard. PS…the weather is just fantastic up here. It’s a dutch colonial revival circa 1911.
2. I love that the house sits up above the sidewalk. How cute is the stone wall?
3. I’m trying to convince Derek that we need a white picket fence. But in the mean time we’ve given the decks a
makeover.
4. I found this gem in the back. Maybe it’s thrown in with closing costs?
1. In the backyard peonies are in full bloom.
2. The kitchen is small but efficient. That door goes to the basement.
3. There’s the door to the back deck. I’m in love with the fact that the cupboards go all the way to the ceiling. I’ll need a ladder to get up there!
4. The kitchen has a lot of potential…but it’s so dark! We’ll have to change that.
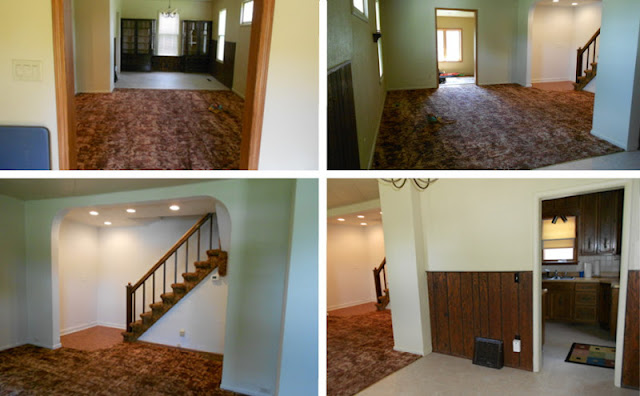
1. This is the view from the front sitting room. That’s the
living room with the
brown carpet, then the dining room beyond that.
3. LOVE the open stairway. I’ve already given that
a redo. All that can lighting is just begging for a gallery display on the wall there.
4. Looking into the kitchen from the dining room. What would a house be without some wood paneling?
Here she is. The basement.
1. Stairs coming down to the basement from the kitchen.
2. Past a makeshift wall looking back toward the freezer from photo 1.
3. Looking toward the base of the stairs…To our “laundry room.”
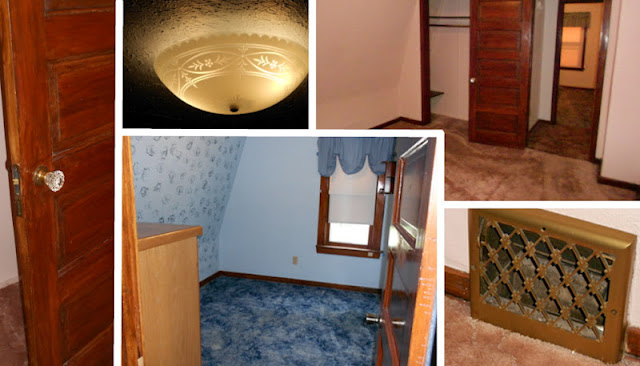
Now let’s venture upstairs. There are three bedrooms and a bathroom up here. But they were hard to photograph. I didn’t want to post just photos of empty corners of rooms. So I’ll give you a few highlights.
1. Some of the doors have the original crystal knobs!!
2. While the house needs lots of updating, there are definitely lots of charming features, like these vintage ceiling lights.
3. Looking from the master bedroom across the hall to another bedroom.
4. Vintage vent covers are beautiful.
5. Another bedroom. Don’t ask about the paint job. The plan is to tear down the wall that joins this room to the master bedroom to make one large suite. Then we’ll add a third bedroom to the basement…stay tuned!
Oh, and one last thing. Did you notice the carpet? This is a classic shot of the flooring in this house. In the living room these three outdated flooring piece come together to form one nasty trifecta. As of yesterday the last of the
brown flooring on the first floor is history.
Yes…there is a different dark brown carpet running up the stairs and in the living room. And yes…that is linoleum and the landing…
More later!
Amy
by Amy | Jan 7, 2013 | Blog, The Art of Projects, the house
If you saw the Facebook post I made last night…you know I was up to something.
Here’s the thing. Derek went to a friends house to work on a project for a while. Ever since the Christmas hubbub came to an end I’ve been itching to do a project. Not a craft {I did plenty of those leading up to Christmas time} but a real, serious project. And I had my eye set on a certain, brown, shaggy, smelly prize.
I have been threatening Derek for a week now.
“I’m going to do it. Don’t test me. You’ll come home and that carpet will be gone.”
And guess what. Last night I did it.
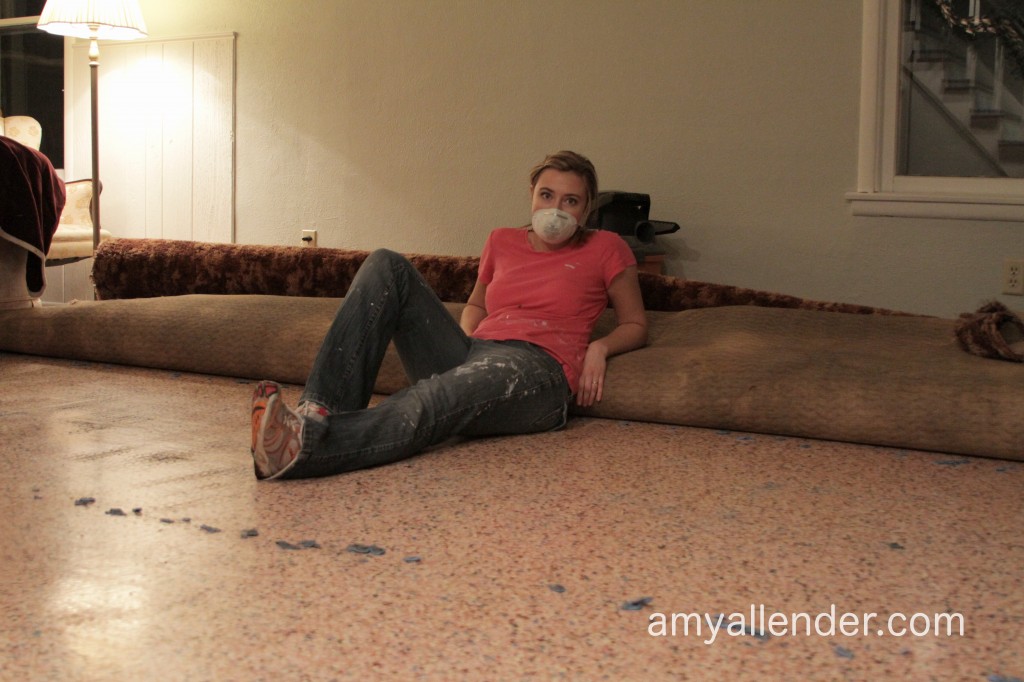
At 5:30 I got off the couch. I had just watched the season 2 finale of Downton Abbey in preparation for the season 3 premiere last night. A friend was going to come over for Revenge at 7:30. Two hours is enough time to rip up carpet and padding, remove a few staples and drag it all to the dumpster, right? Sure. So I went for it.
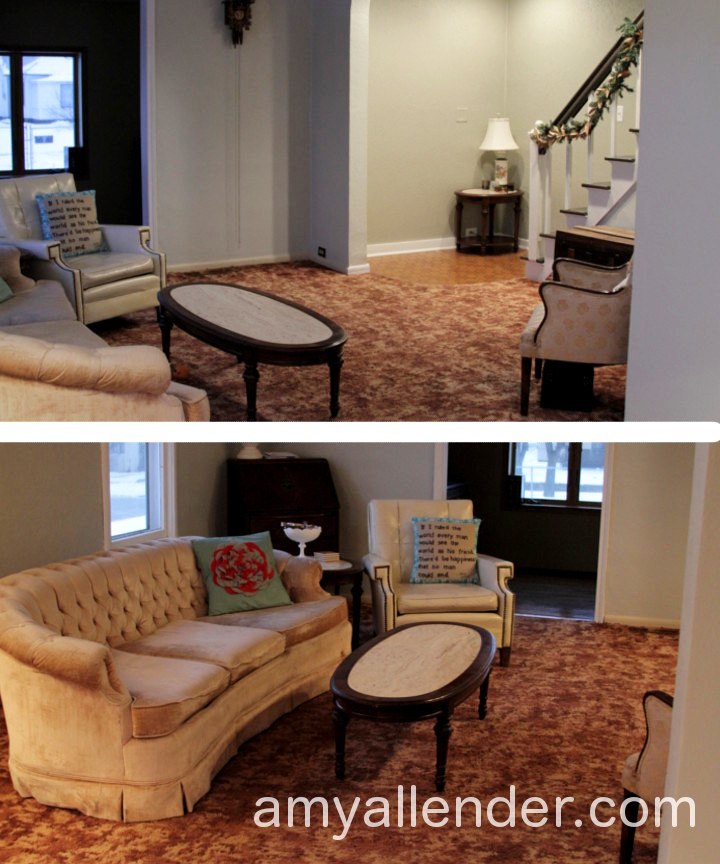
Here is where the house started last night. If you really want to know why I hate this carpet…look all the way back to this post. Where I show off our many shades of nasty brown carpeting.
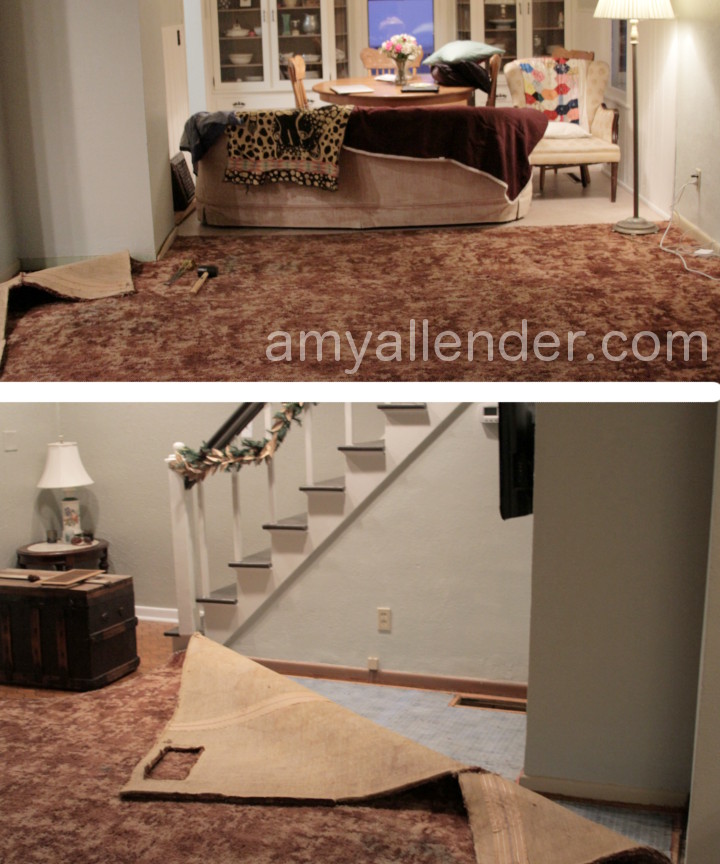
First I moved all the furniture out and covered things up. I have this fear of old dust. It’s rooted back to my studies of the crew who opened King Tut’s tomb. They breathed that ancient dust and got real sick-like. I realize this isn’t ancient Egypt. But caution never hurt anyone.
Then I started tearing it up. Which, honestly went very quickly.
Once the shag was up I was simply disgusted at how NASTY the padding and belly of the carpet was. No wonder it has been smelly.
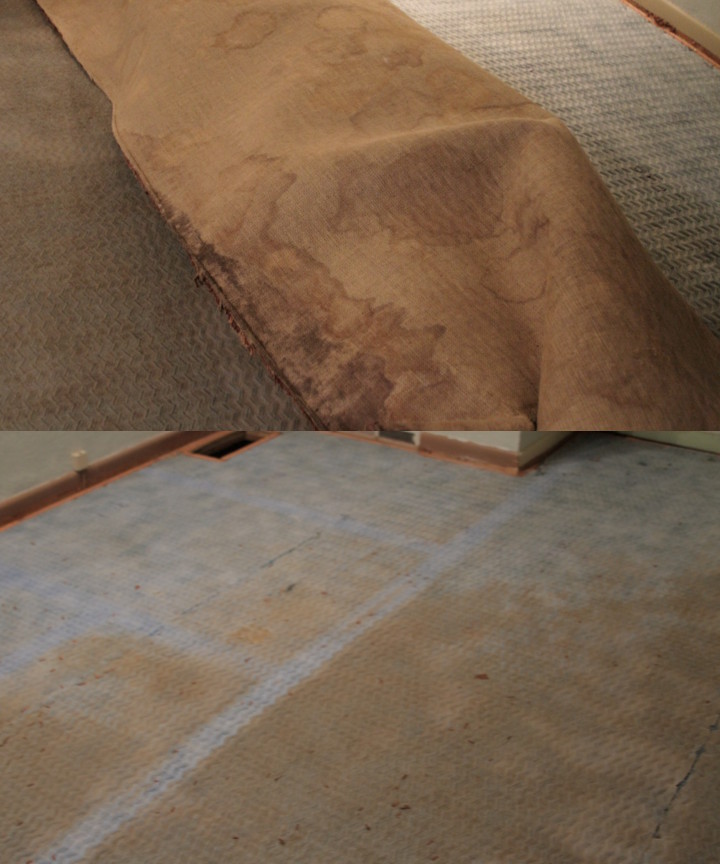
Next I rolled up the padding…and took all of it to the curb for garbage pick up. Finally, I rolled the carpet as good as I could. Then I started working my way toward the door. And here is where things got tricky. Carpet is heavy. And this stuff all came up in one piece. So I was dragging it through the dining room out the kitchen door, onto the deck. I got it about a full foot through the door when it got stuck. After pulling and pushing, grunting and cursing I resigned myself to the truth that I couldn’t budge it. Either way. You just can’t make this stuff up.
I couldn’t get it back inside. Or further outside. So I sat down, all sweaty…letting the cold breeze blow through the door that wouldn’t shut. Then, miracle of miracles…Derek got home. It’s funny how much easier it was with two people.
And there you have it. The brown carpet is simply a memory. Remember when we moved into that house in Minot and it had terrible brown carpet? Ahhh…I’ve been waiting so long to use past tense when talking about that wretched stuff.
But now…present tense. My living room is covered in bubble gum pink linoleum. Woof. Gross, yes. Up I still consider it an upgrade.
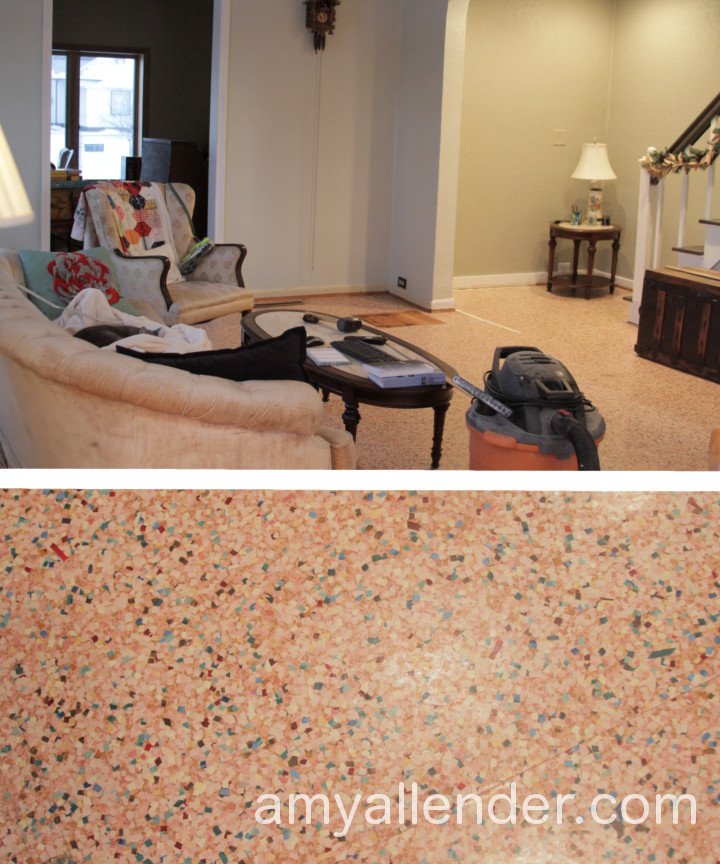
The project continues. I promise, some day soon I will have flooring from this millennium.
by Amy | Jan 3, 2013 | Blog, The Art of Projects, the house
The light in our basement went out the other day. Our basement is very unfinished. The previous light was a fluorescent fixture that hung from a couple of ducts and plugged into the wall above the dryer. It’s just one of several very ghetto-rigged lights down there.
So, we need a new light. But until we get one Derek took one of our end table lamps and sat it on top of the dryer. When we flip the switch it comes on and illuminates that little dingy corner with warm soft light.
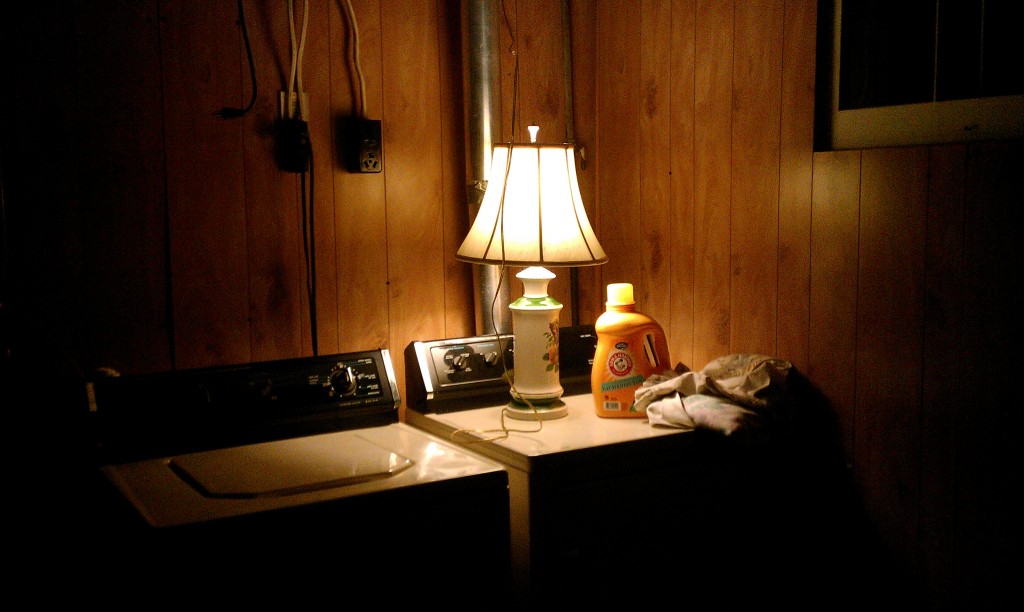
{Don’t be fooled by the paneling. It’s just those two sheets. Then concrete all around. Pretty shady.}
Derek told me to start thinking of what kind of light I’d like above the laundry station. And I will. Because in 2013 we’ll start {maybe finish?} working on the basement. The finished product might be a long, loonng way off, but each time I flip on the switch to feed Panda, or grab something out of the freezer, or fish out some craft supplies…I see the lamp, and I can see where we are moving. Our basement won’t always be dirty and dingy. Eventually it will be the kind of place where guests sleep and pretty lamps live.
It’s a reminder of where we are headed. Where I’m headed. Where things are headed. I love it. It got me thinking…what are other little changes I can make in my life and my house that will remind me of where things are going? It’s wild how sometimes a small change can shed some light and bring a little hope.
What can you do to remind yourself of the hope this year will bring?
Amy
by Amy | Dec 13, 2012 | Blog, Crafts, The Art of Design
Hi guys. We’ve had a little COP. {Change of plans.} Today I’m giving you six…count ’em SIX free printable gift tags for all your wrapping needs. They were really fun to make. I like to punch holes in the top and string them on to packages. But they are just as cute taped on. Enjoy!

I’ve put all these tags into individual Google Docs. Just save the files you like and print them out. You can save paper by arranging more than one tag onto a Word document. The tags measure 3″ x 1.75″ but the files are high res…so you can make them a bit larger if you like. And, yes…they are free! All I ask is that when friends and family compliment them…you tell them that you got them here, at the very-fun-and-awesome Amy Allender blog.
Here is the Peace Love Joy tag…You’re Gonna Love This…Santa Asked Me…and the Something Awesome tag

And here are links for the You’ve Been Nice tag…You’ve Been Naughty…Ho3…Special Delivery
Merry Christmas. Now, I’ve got cookies to make!
Amy
by Amy | Dec 12, 2012 | Blog, The Art of Projects, the house
These weeks before Christmas always take a toll on me. You too? Most likely.
Because in all the holly-jollyness there are about a million things to do. Food to buy, gifts to wrap, crafts to make. Last night I crafted up a storm. Today I’ve got to fill empty cupboards and pick up a few last gifts {yuck…that means a trip to Wal-Mart.} Honestly, I feel like my house is in a constant state of chaos lately.
The upside is that it is frightfully cold outside. Which means that the thought of being outside is not too appealing at the moment. But we still have to go out to shovel.

It’s 10:30 a.m. and it’s -3 degrees outside. The windchill makes it more like -7. Oh. My. Goodness. But you know what? It’s beautiful. I love it here. Even though it’s cold. {Really cold. Nostrils sticking together cold.} I really do love it. I love the people. My house. The community. I’m quite smitten with North Dakota, Practically Canada. And I’m quite smitten with warm mittens too.
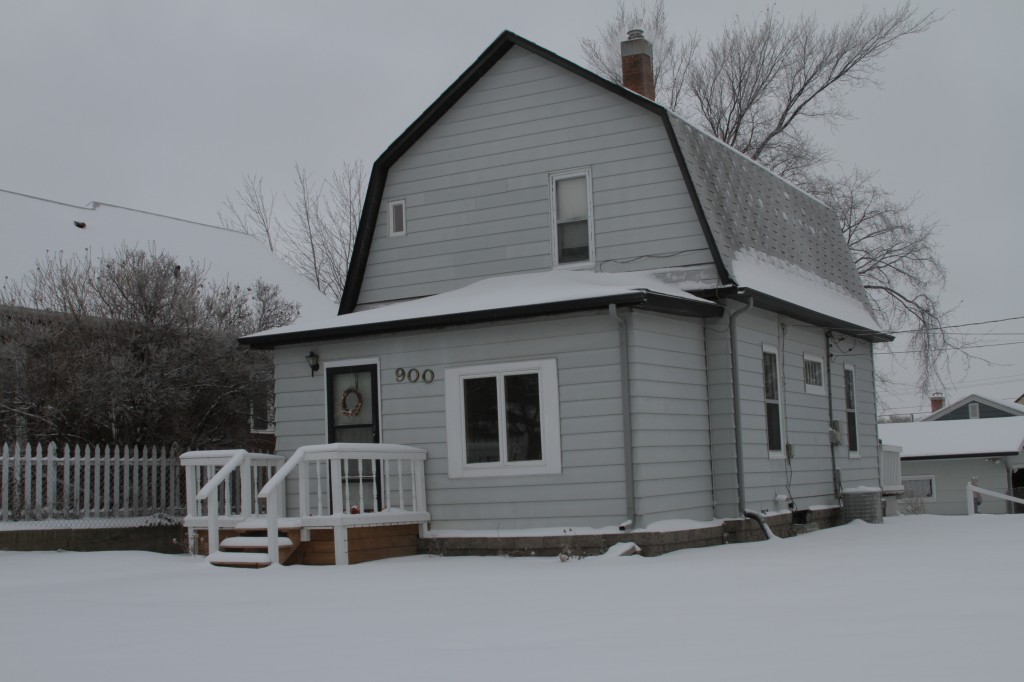
{We’ll see how I feel about this cold after it’s been below zero for a few months…}
See you tomorrow. Get excited…I’ll be showing you the latest progress in the living room. A super awesome solution for our cords and media equipment. And later…printable gift tags just in time for wrapping madness.
Amy


