by Amy | Oct 19, 2012 | Blog, The Art of Gathering, The Art of Projects

It’s that time of year again. Time to hit the Goodwill at the last possible second to throw together a costume for a last minute Halloween party. If you are like me…which I think a lot of you are…you like the costume, but you don’t like the work and you don’t like spending the dough. So don’t worry. As usual, I’ve got your back. Here is a collection of costumes you can make in one afternoon with things from the local thrift shop. Some I’ve done, some I’ve laid out how they can be done…take a peek, I know you’ll be inspired.
Now, without further ado…enjoy 13 unique DIY costumes that will be the hit of the party!

My favorite costume of all time. In 2010 Derek and I dressed as the Spartan Cheerleaders. Make it yourself. Here’s what you need: Two black tank tops | a white skirt | White headband | Red athletic pants | Two old white t-shirts | Red felt.
Cut up the white shirts into sashes, then outline them with red felt. Outline the sashes with red felt. Cut out letters in felt and hot glue, glue, glue! (more…)
by Amy | Oct 11, 2012 | Blog, The Art of Projects, the house
You all saw the B&A of my dining room/living room project, right? Well, that took several good days of painting. Over the years, I’ve become pretty savvy with a brush and roller. Here are a couple tricks I use every time…and a big awesome tip I just learned.
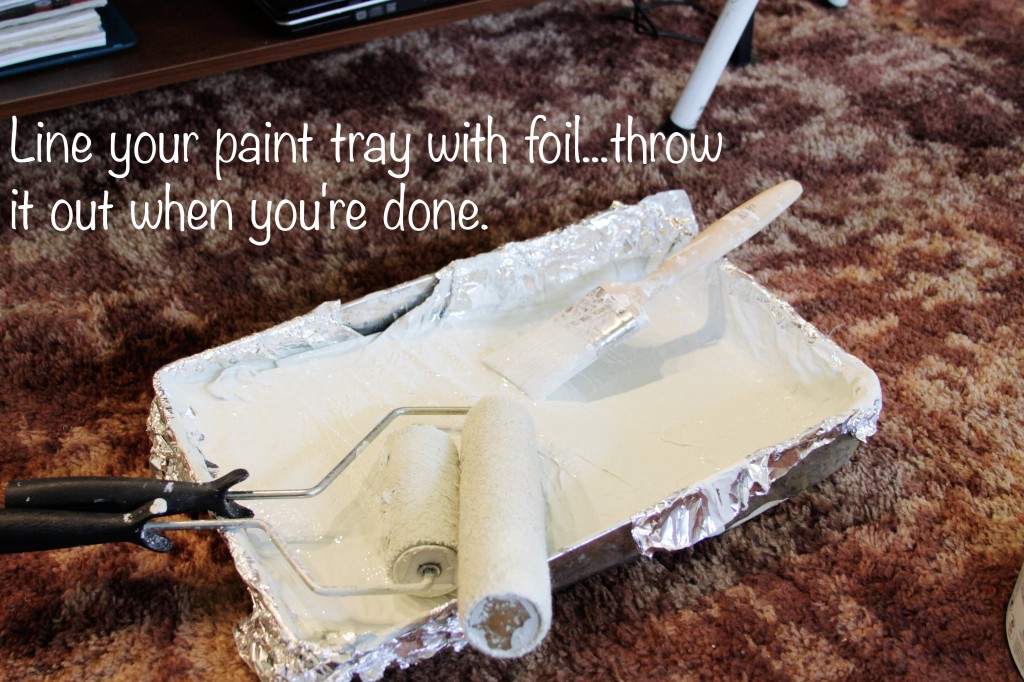
Trick #1
Yes, I know paint tray liners are only a couple bucks. But I always seem to be out right before I start a project. And the last thing I want to do when I’m rearing to slap the paint on the walls is make ANOTHER run to the hardware store. So I don’t. Instead, line your tray with foil you already have in your kitchen. It works great and crumples up really small…so it saves space in the trash can too.
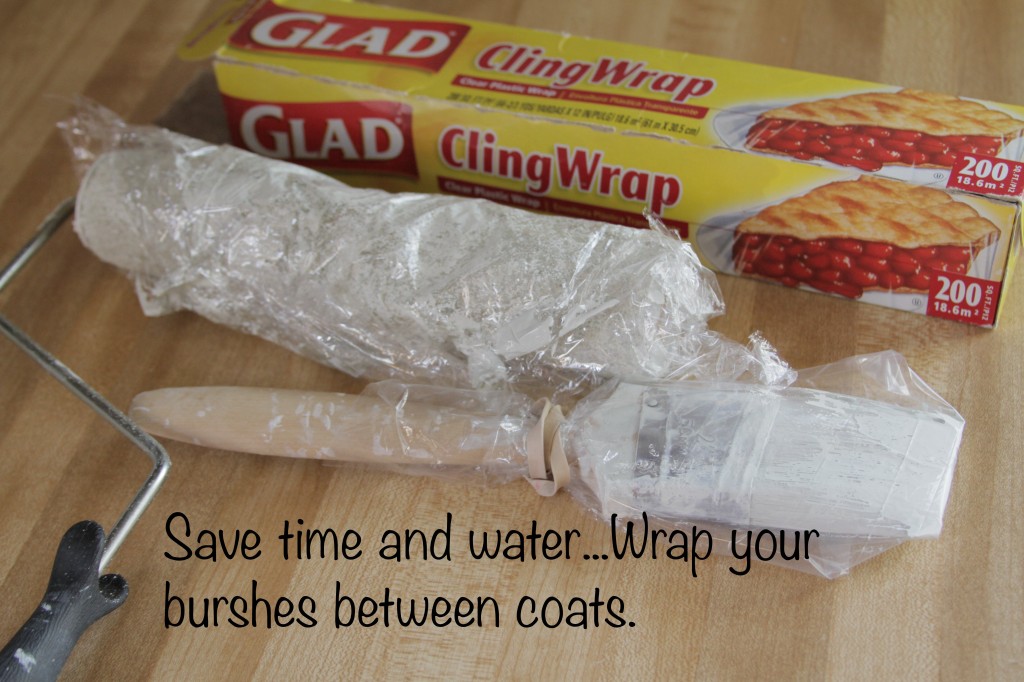
Trick #2
I used to wash my brush out every time I stepped away. Dried paint in a brush or roller is a sure fire way to wreck it. But the problem I ran into was…when I was ready to paint again the brush would still be wet. Now, instead of washing them between coats or if a job gets interrupted {usually for a fro-yo run…} I wrap my roller in cling wrap and my brush in a sandwich baggie. It works great and saves you a washing. This will keep your brush moist even over night.
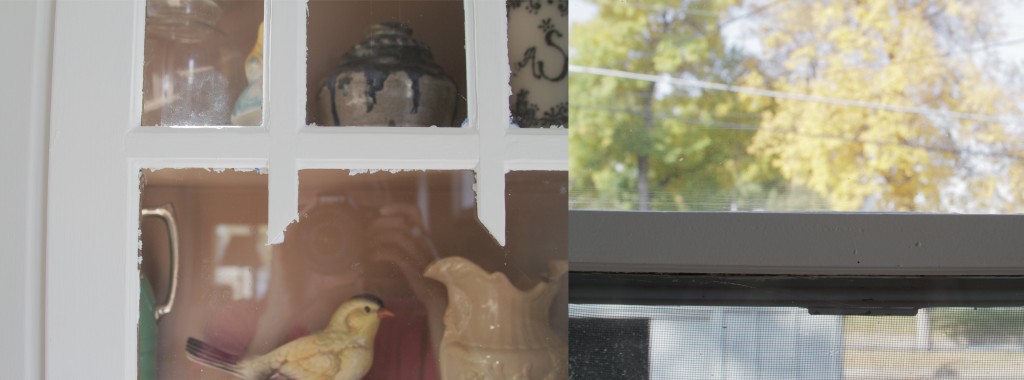
Who can spot the difference here?
Well, besides being two totally different images, it’s pretty obvious that the difference is that there is paint slopped all over the glass on the left. I made this mistake while painting my built in hutches. Don’t be like me. Do this instead:
Trick #3
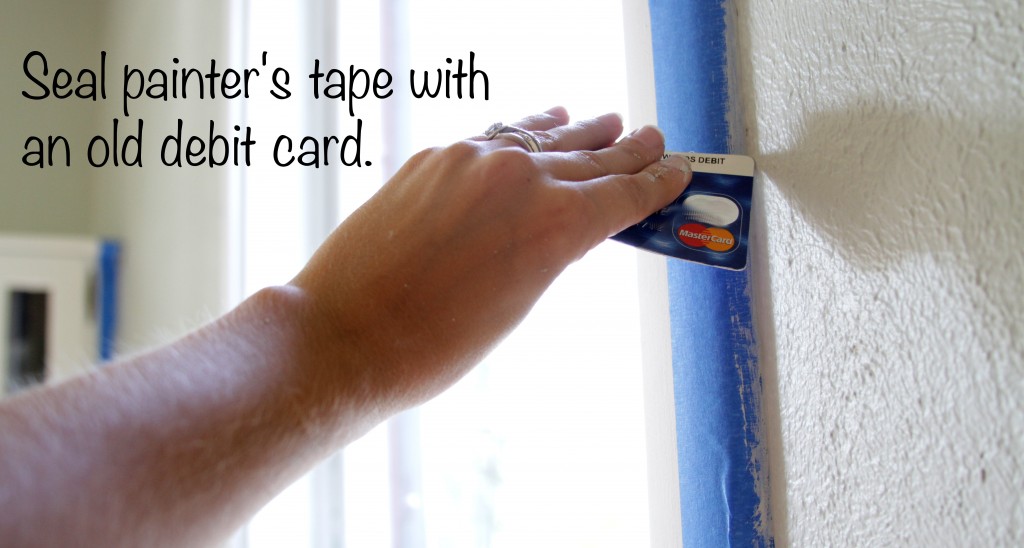
After applying your tape, run an old debit card down the edge to seal the bond. I taped off the glass panes of my hutches…but as you can see from the photo above, taping alone can still leave a messy edge. On my windows I sealed the tape {photo above right}. I couldn’t even believe how crisp the line was. And this tip isn’t just for glass…it works with any surface.
Overall this is the trick that saved me the most time. Going back and gently scraping the messy edge of the hutches took an hour of meticulous work. Boo for that!
I hope this tricks come in handy for you. What tricks to you use when you paint? I’d love to hear them!
This thrifty list is partying at Home Stories, My Uncommon Slice of Suburbia, Savvy Southern Style, and these other great parties.
Amy
by Amy | Oct 2, 2012 | Blog, The Art of Projects, the house
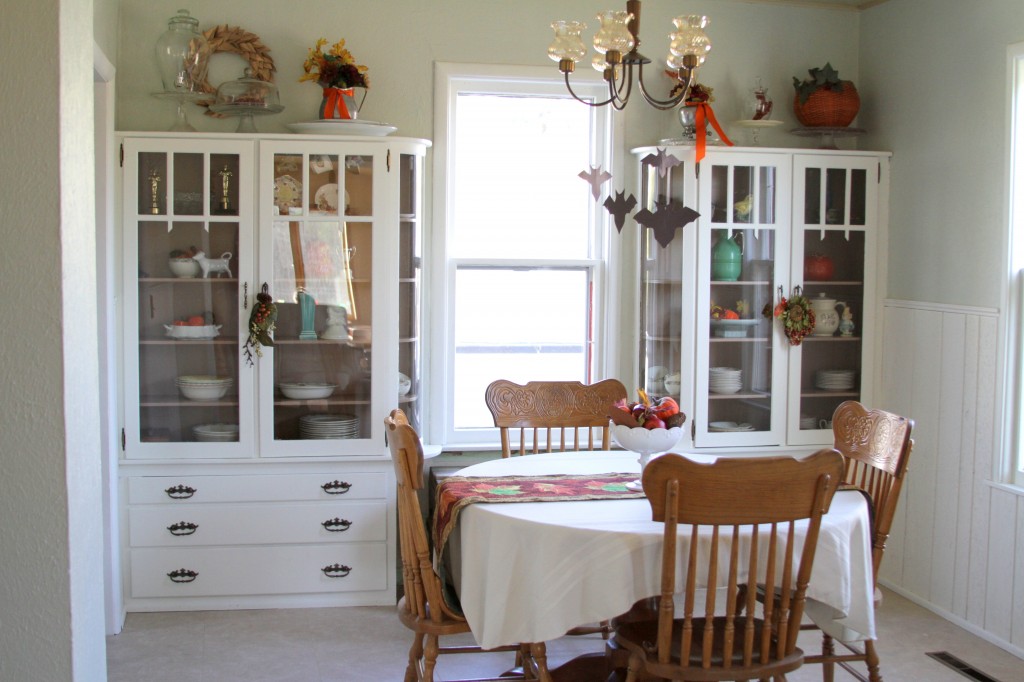
I’m thrilled to show off the {somewhat} finished product of our dining room/living room makeover. I love the way it turned out. Last night while Derek watched the Bears-Cowboys game I even got out the Halloween decor. That always makes me happy.
We used Dutch Boy washable paint from Menard’s for the cabinets and trim. It’s in White Lullaby. And it was okay…but no where near as awesome as the Emerald Brand paint we bought from Sherwin Williams. It was a bit more pricy, but when purchased on sale for a whopping 40% off…it only cost as much as the Dutch Boy. And let me tell you, it was worth it. I’ve never painted with really nice paint.
There is a difference.
That’s the biggest thing I learned during this project. Quality counts. The Emerald paint was thick and bold, it only took one coat to get the job done. The living room and dining room walls are in Sherwin William’s Filmy Green. The stairway is painted Gateway Grey.
Now, let’s check out those B&A’s.
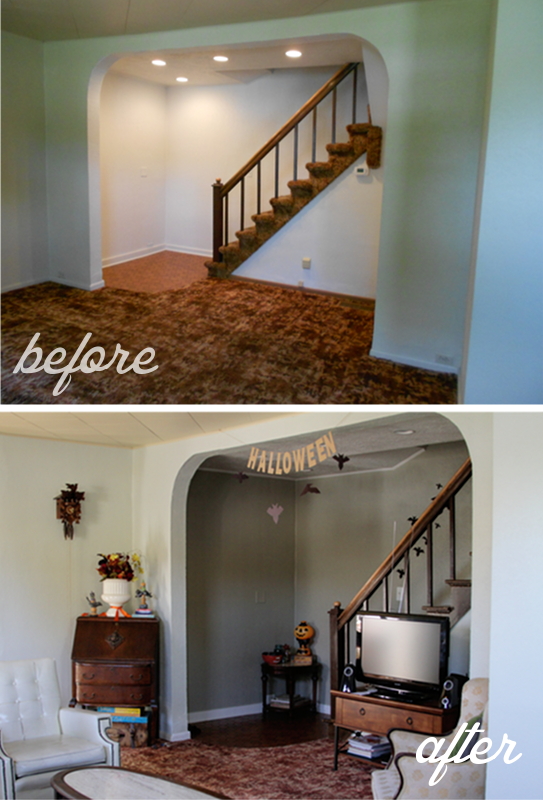
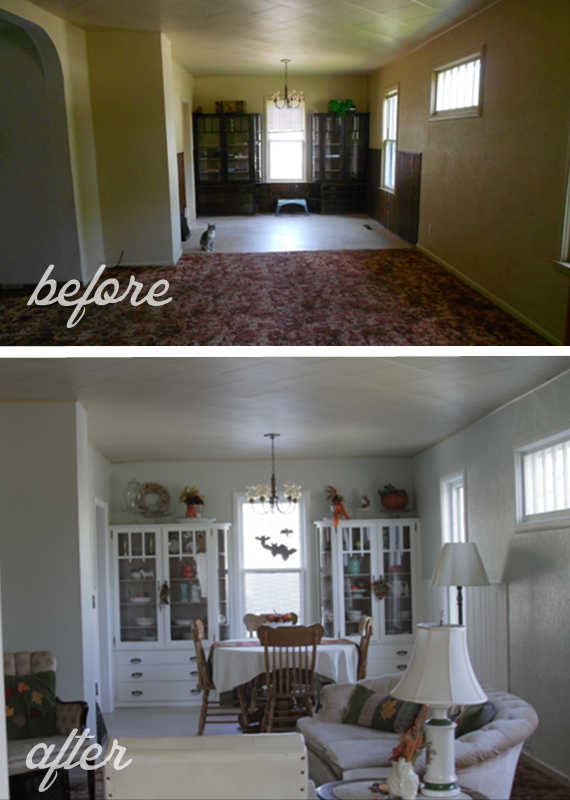
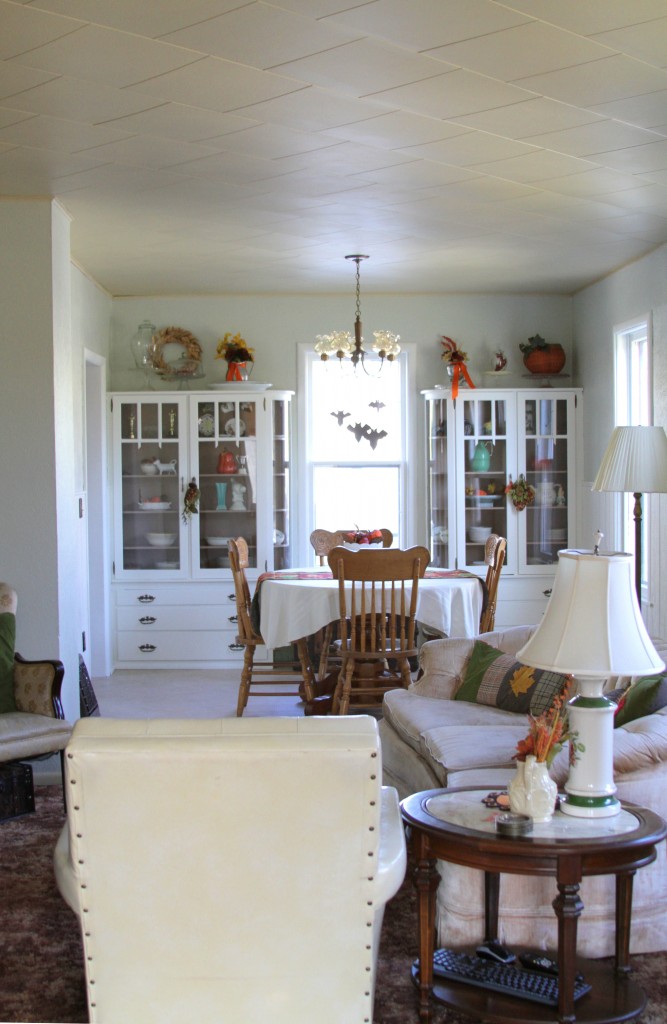
Now the brown carpet looks even more out of place. Well…we’ll get to it eventually. Isn’t it nice when a project turns out well? There is no better feeling.
Amy
by Amy | Sep 26, 2012 | Blog, The Art of Projects, the house
I like progress. I love to be able to see results. That’s probably why I’m so obsessed with B&A photos.
The dining room/living room paint job is still a ways from being totally finished, but it’s coming along quite nicely. The white is all up {save for one window casing and a door frame I haven’t made my mind up about} and tomorrow I’ll start in on the color. Ideally, this whole thing will be done by Sunday. I’d really like my table back.
Here’s how it looks now.
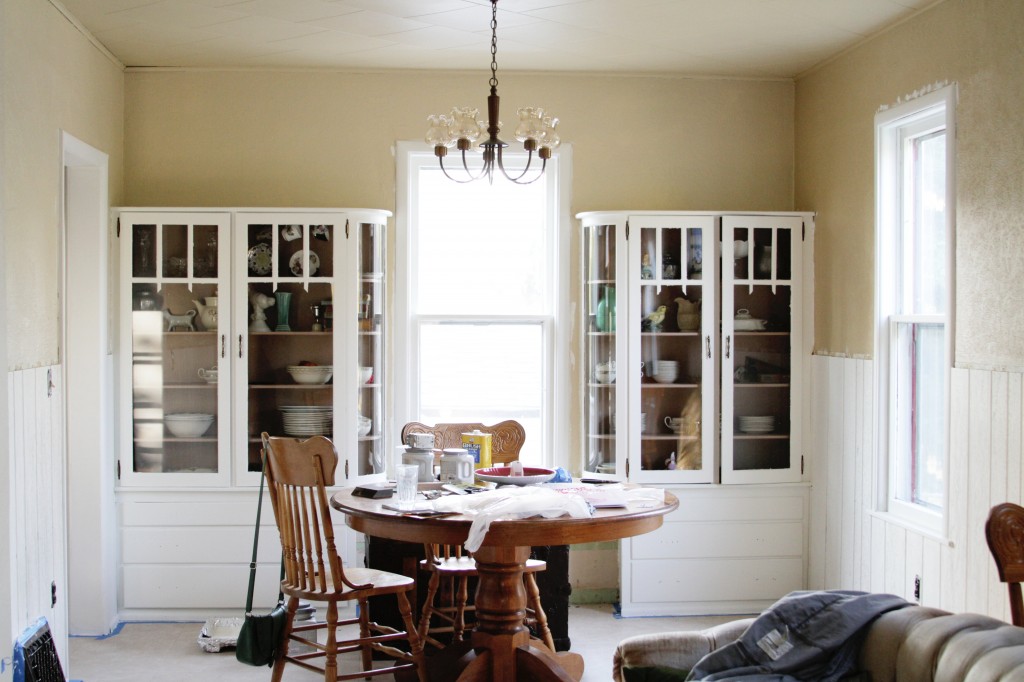
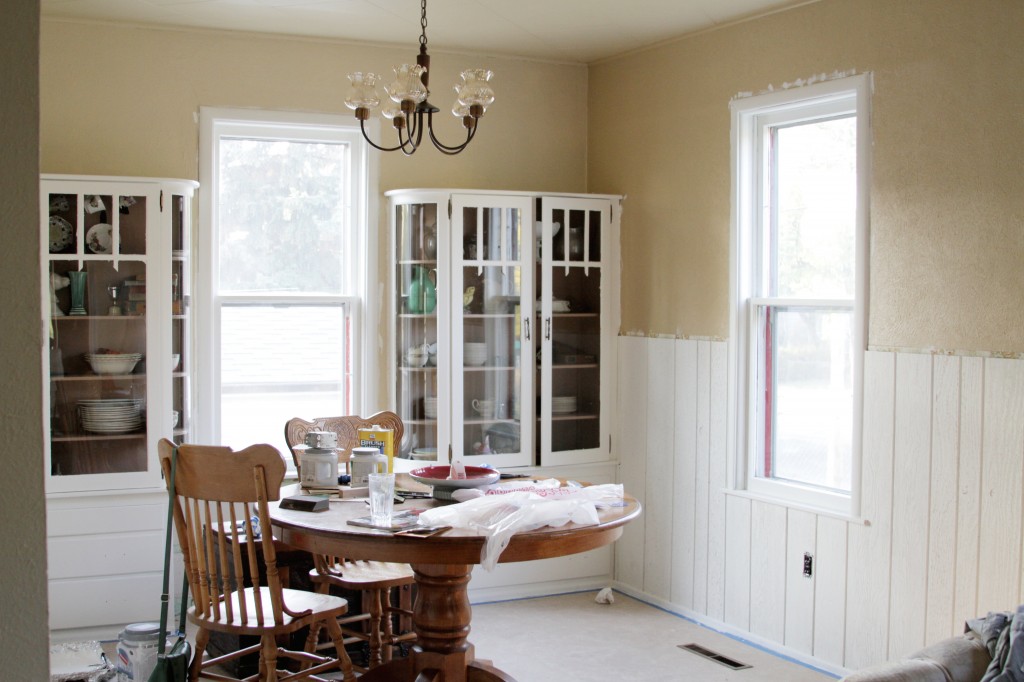
Just to refresh your memory…here’s where we started.
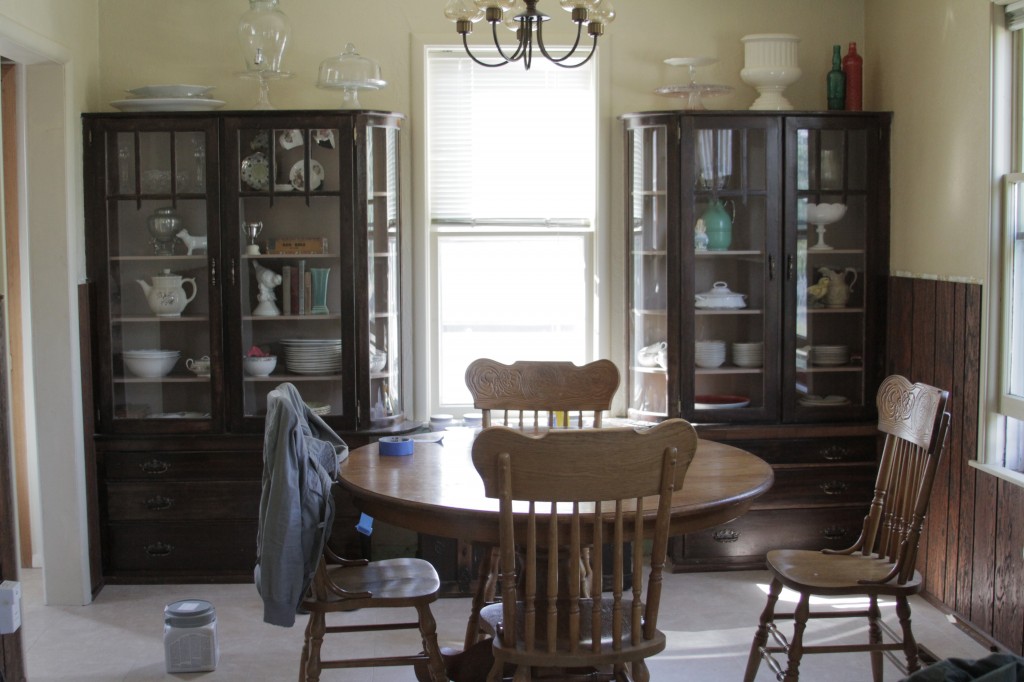
Yes, I realize that that’s a sloppy job and that I’ve splattered white all over. But here’s the beauty..the wall color will cover all that. The downside? Tomorrow I pull out the big roll of blue tape and start quarantining that pristine white from being tainted by a color called “Filmy Green.”
It’s prettier than the name implies.
Amy
by Amy | Sep 18, 2012 | Blog, The Art of Design, The Art of Projects
You remember the garage sale, right? Well, after it was all said and done we still had a few goodies left that we didn’t want to haul off to the thrift shop. A few things we thought just might sell on Craigslist.
So after giving myself plenty of time to procrastinate, I finally listed. them. I thought you might like my ads. First the ad for my sweet poker table.
I wish craigslist had a category in ‘for sale’ titled “Awesome.” Because this table is awesome. It was my grandfather’s. He played a lot of poker in his basement in the 1960’s. I inherited it. Then I moved to Minot…where housing is hard to find and very expensive once you do find it. And alas, there is no space in my humble abode for this sweet piece of man-cave-must-have.
The table comes with four chairs. There are eight place settings, each with a tray and cupholder. And who cares if you don’t play poker. Use it for game night. Any way you cut it this is a good deal. There is a small crack near one of the cupholders. I’m not shady…I’ll tell you how it is.
The legs collapse and the chairs fold up so you can store it easily. Email me or text me if you’re interested.
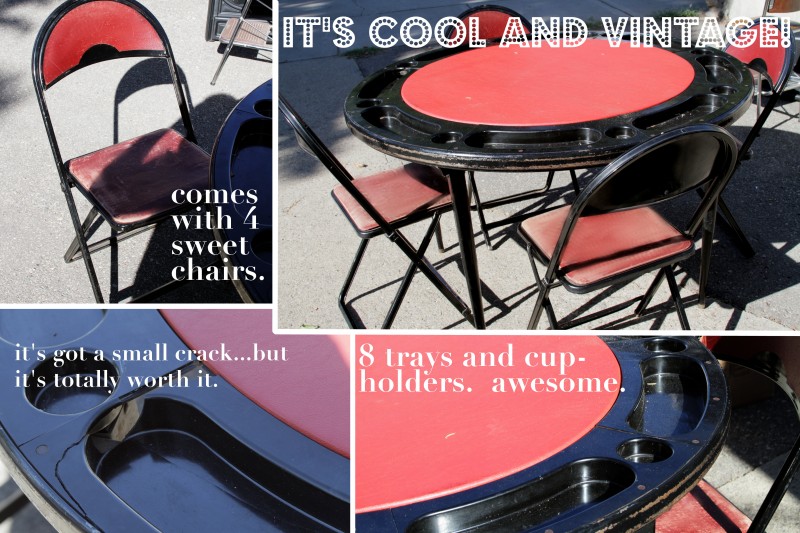
Now, let me tell you the best part. I listed this bad boy for $30. Now even 24 hours after I slapped it up, I got an offer. Then about 10 seconds later I got another offer. We ended up selling it for $40. Amazing, right? I’m so sad I had to sell it, but the couple who bought it was young and cute, so I know it’s in good hands. Well…better hands than just living in my basement.
Here’s my second ad. It’s for my winter coat. Which I love, but would really like a new one.
This is a wool Hollister coat. Women’s size small. It’s super cute. It’s been worn, but is still in great shape. I’m a clean person. I don’t smoke. And I don’t have unruly BO or anything like that. This coat is clean and darling, but I’m ready for change. I would love for you to have it. It’s not just for looks. It’ll keep you legit warm.
Email me if you’d like to make an offer.

And finally, the ad I made for a set of retro casserole dishes.
I have two lovely casserole dishes for sale. We’ve all seen these. They are classics. And they don’t call them classics for nothing. There’s a reason your grandma always used them. These babies rock. Safe for oven use. Safe in the dishwasher. Convenient for fridge leftover storage.
Now, I know what you’re thinking…if they are so awesome, why aren’t you keeping them. Well, I’ll be honest with you. I’m a glassware hoarder. I’ve got casserole dishes and cake stands coming out my ears. So the hard decision had to be made. And I had to let go of a few. I hope you’ll give them a good home. They won’t let you down.
Email me if you have questions or would like to have them for your own.
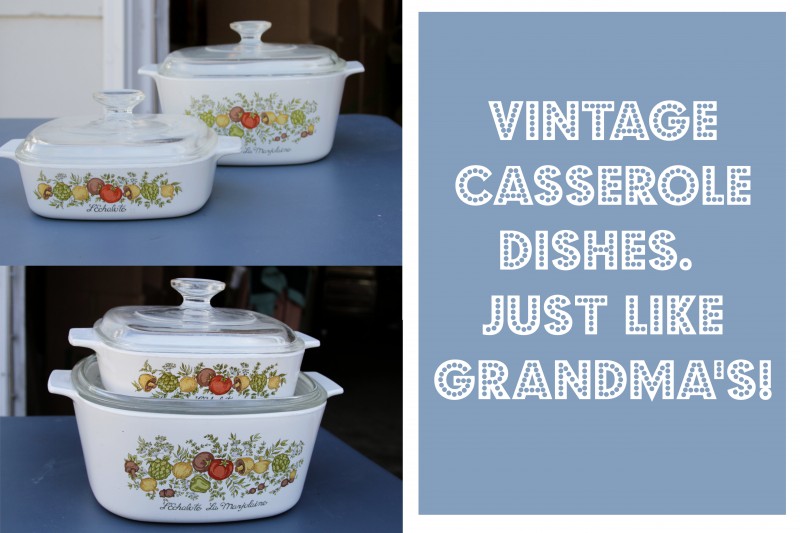
Now, will the coat and casserole sell? Honestly, I don’t know. But it was worth a shot, right?
At any rate, I hope you got a good chuckle out of my lame antics. As you can see…Minot, ND is not a very happening place. {Making these ads was the highlight event of my Friday night.}
Amy
by Amy | Sep 16, 2012 | Blog, The Art of Projects, the house, Uncategorized
You know I’m a bit of a color-phobe. The one color I’m not afraid of?
White.
It’s fresh. It’s clean. It’s timeless.
When something is dated beyond repair, the first thing I want to do is paint it white. I like color on my walls, but I adore a room framed in pretty white. It’s so crisp and neat looking. Like a well ironed tablecloth.
So, we’ve started sloshing white around the living/dining room. Starting with the dark, sloppily stained built in hutches in the dining room. I know, it’s a rough preview…but it’ll have to do. And as Der-Bear and I like to say…”There’s no going back now.” The white is officially on and we are only going up from here. Our next victim? That wood paneling!
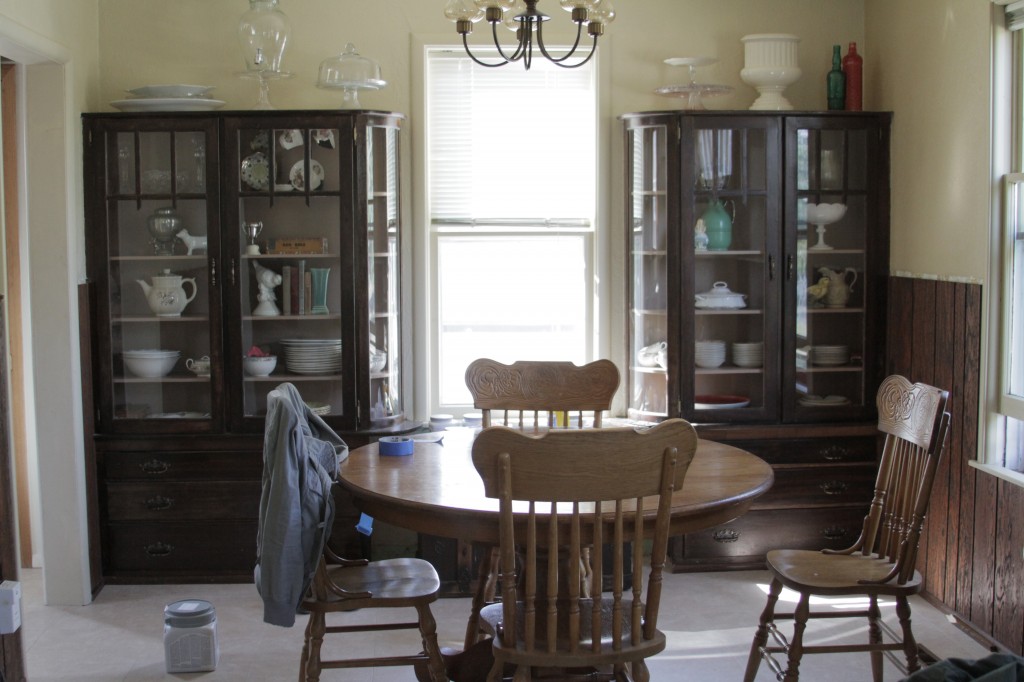
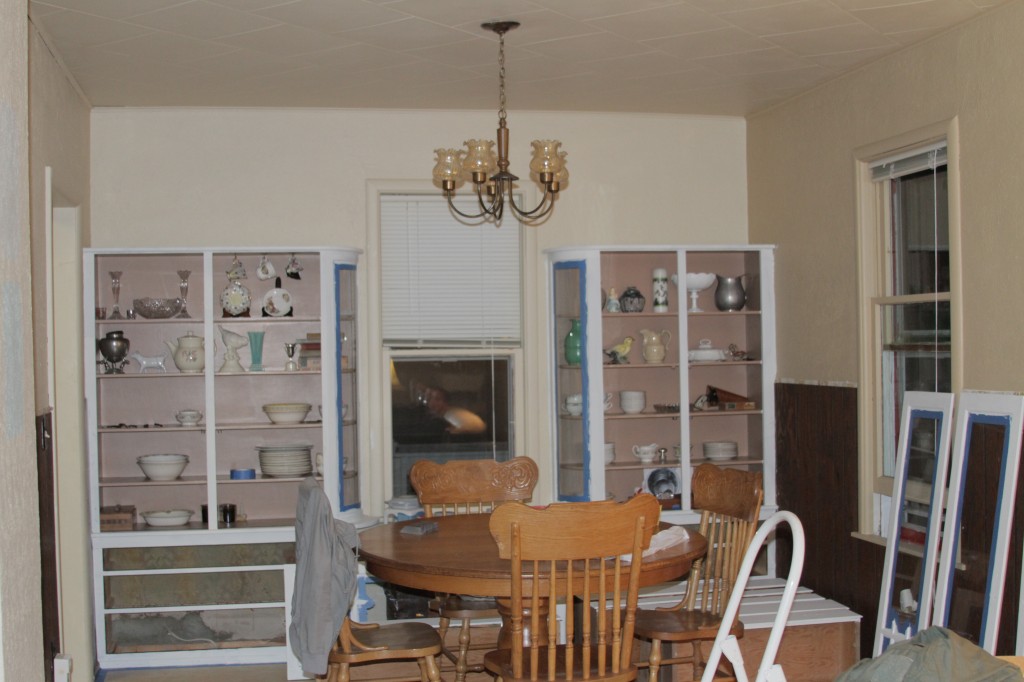
This project will be on hold in DIY purgatory until next Monday. Why, you ask? Well, friends…let me tell you. I’m lucky enough to have two wonderful friends who live in California and let me come visit. I leave today. I’ll be home in a week. I can’t wait for all the adventures in store. With this girl.

And this guy.

I’ll be posting on and off, but forgive me if I’m hit and miss this week. I really will miss you dearly.
Amy
by Amy | Sep 14, 2012 | Blog, Crafts, The Art of Projects
I have about a million of those re-useable grocery bags. My problem? I get to the store and realize they are still in my basement at home. Then I’m asked the question. The big question:
Paper or plastic?
Kill a tree. Or get my groceries in a bag that will never really decompose. It’s a lose-lose.
About a year ago I first showed you this project over at Aprons & Ambitions. It’s a super easy wreath you can make using just a paper grocery sack, an old box and some hot glue. I’m revisiting this tutorial today. It’s a bit updated, but still as easy and thrifty as ever.

Here’s what you do:
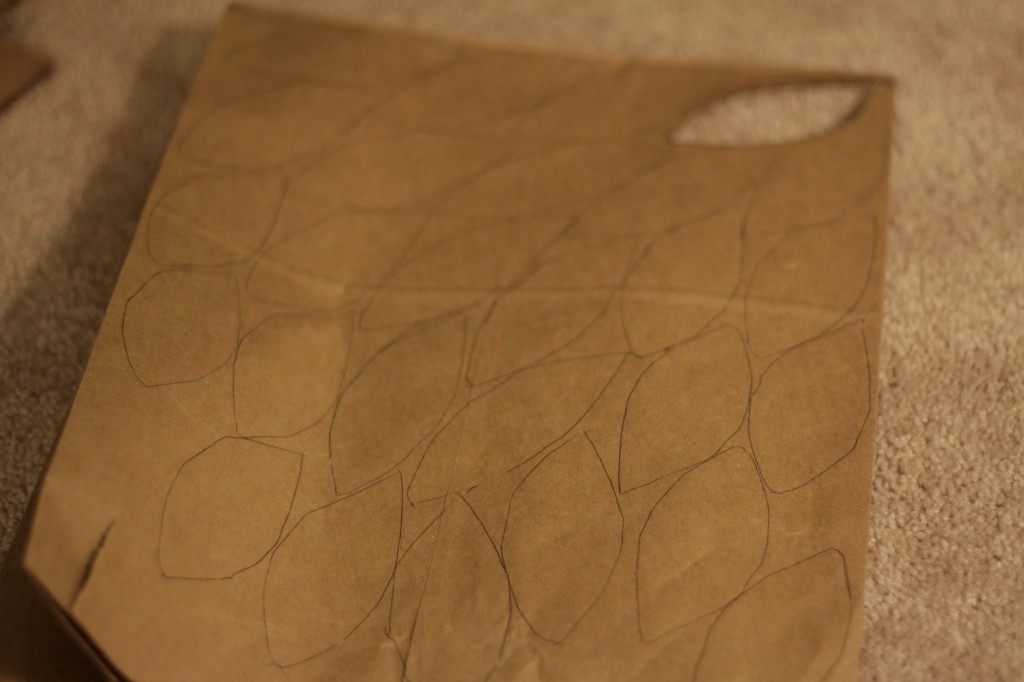
Draw a leaf shape on your bag. Mine is about 3″ long and 2″ wide. I cut one out then trace it over and over so they are all the same size. Then cut then all out. One bag full of leaves is enough for one wreath.
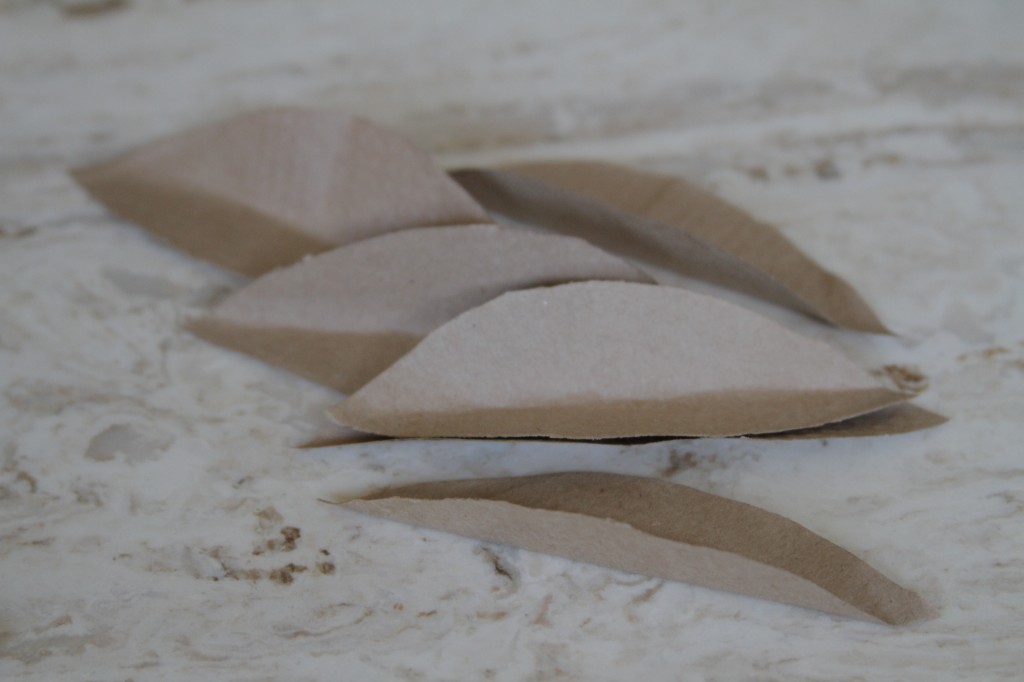
Once your leaves are all cut out crease them in half. Like so:
Next…make your wreath form. You can cut it out of an old box…or use up some more paper bags. For the one I made yesterday I used bags and a cereal box. The point is to make a form that is fairly stiff to glue your leaves to.
To make your form from bags do like this:
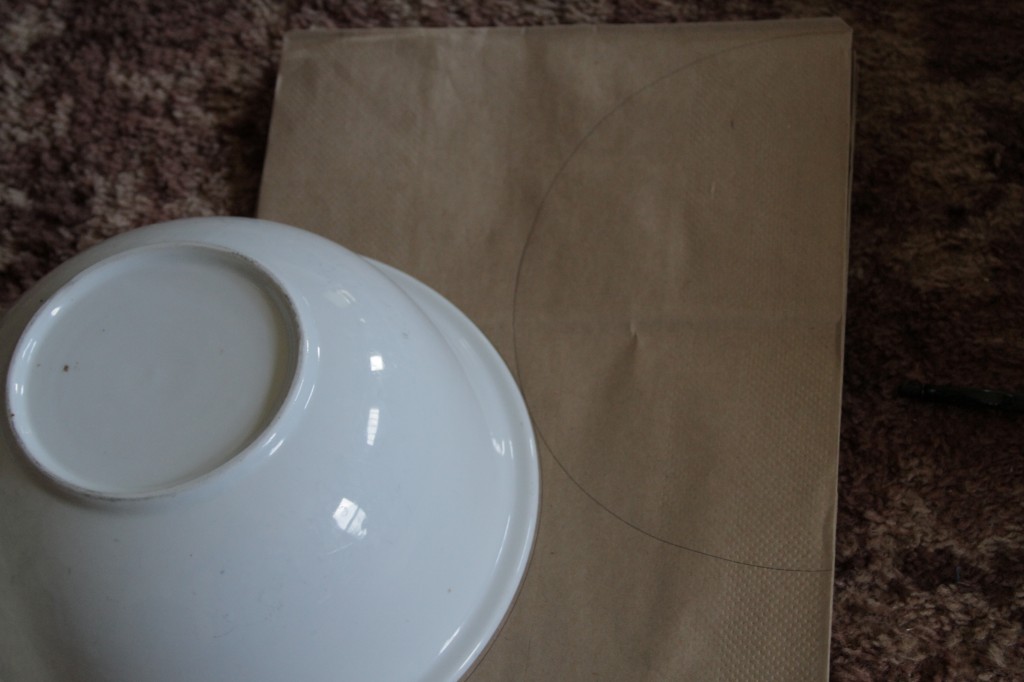
Use a big mixing/salad bowl to trace half a circle on your bag. If you are making a bigger wreath you may only be able to fit half on one bag. Use a smaller bowl to make an arc about 2″ wide. Cut them out of four bags. Trace your arc twice on a cereal box and cut those out too. Sandwich all your arcs together to make a full circle and hot glue them all together.
Then it’s time to glue on your leaves. Please don’t be too repulsed by my hideous carpet. You know how much I hate it. It’s days are numbered.
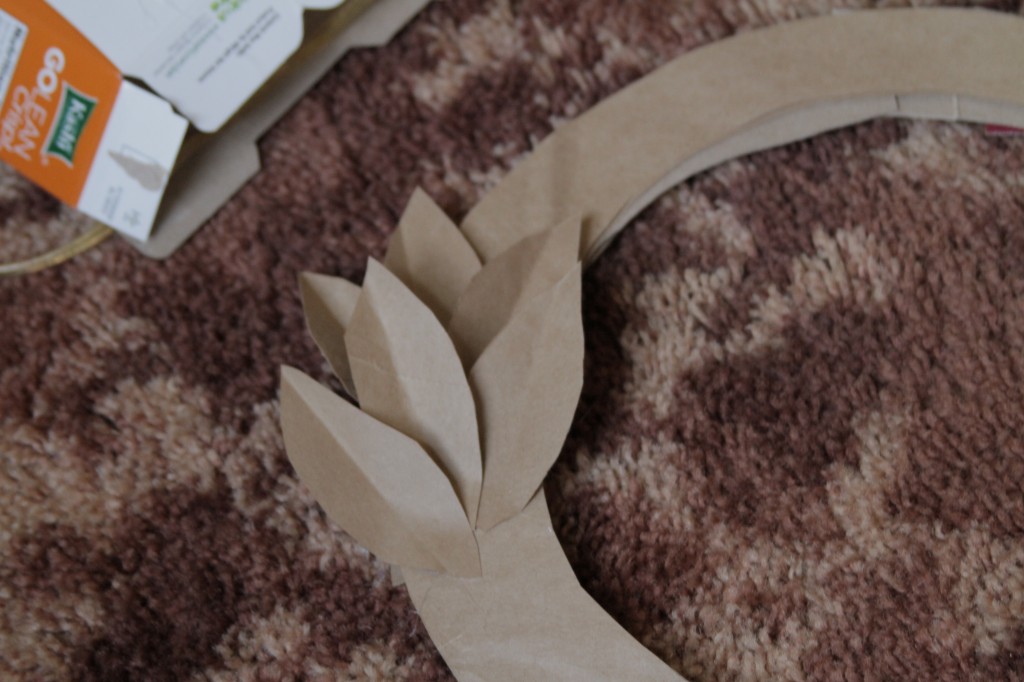
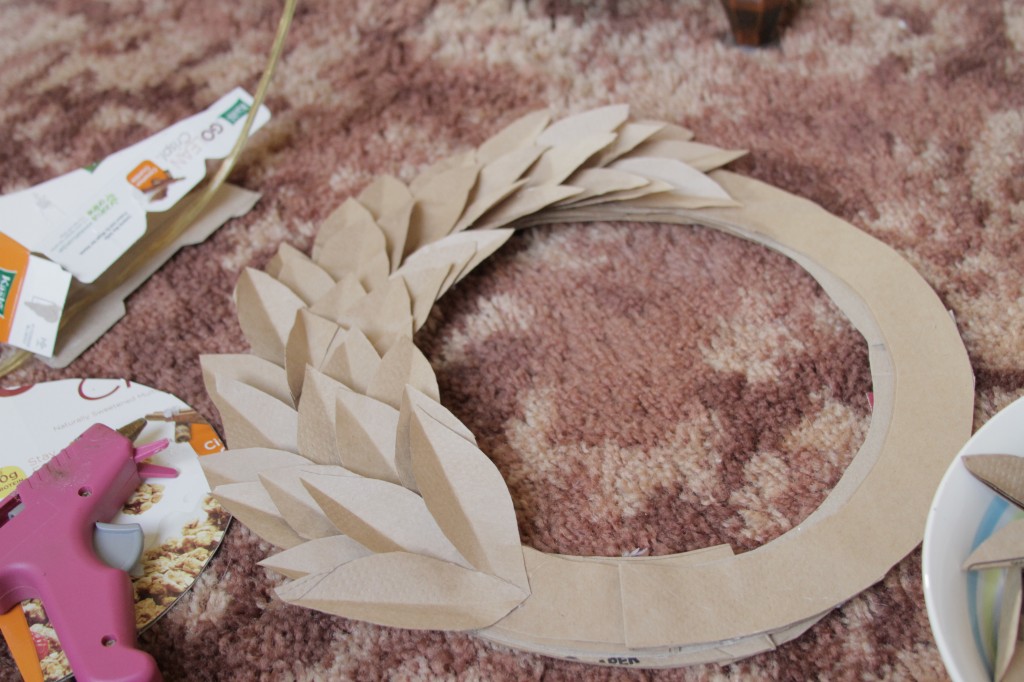
Glue them on in small clusters until you’ve gone all the way around. Finish it off with a dusting of gold spray paint. I usually get mine out in the fall…but it’s a super versatile wreath for all year.
And…I know Christmas is still a long ways off, but while you are at it, you can easily whip one up for Christmas. Follow the same instructions, but spray paint it green and add some paper bag poinsettias. The tutorial for those is on the old blog. See it here.

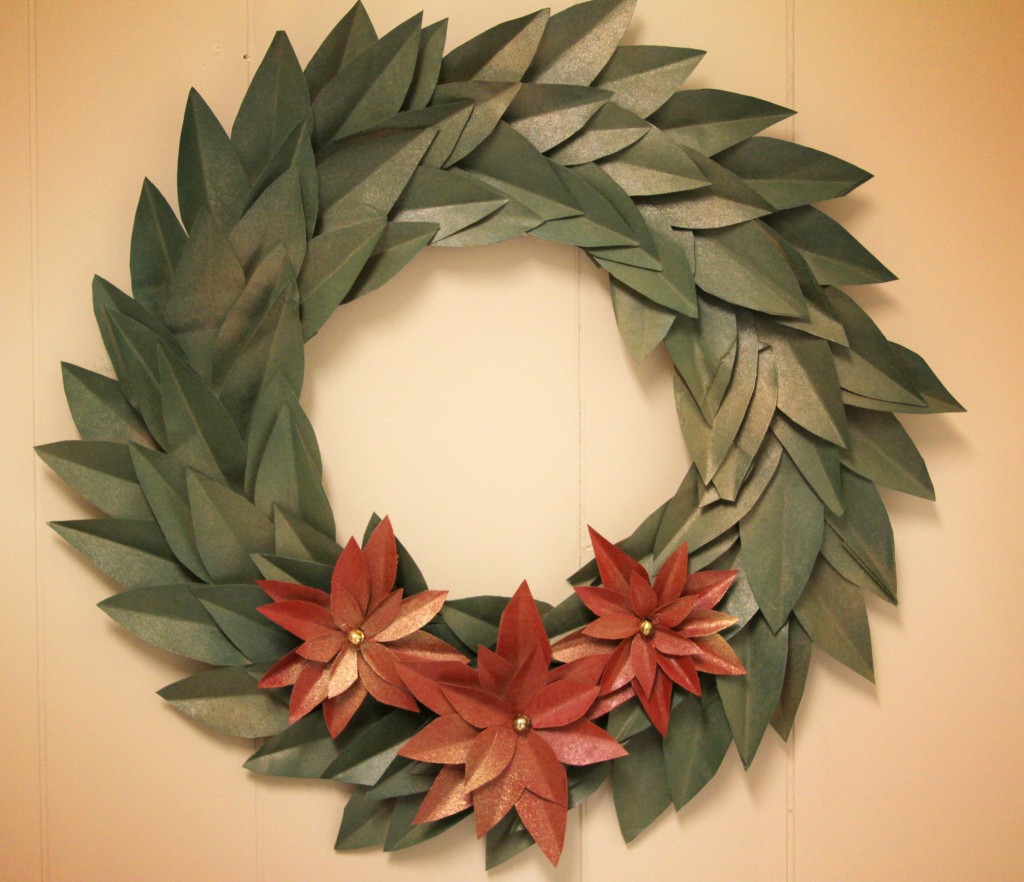
Happy Crafting!
Amy
PS…This post is partying at Sew Can Do…and these other great linky get-togethers.

by Amy | Sep 12, 2012 | Blog, The Art of Projects, the house
The other night I was talking to my dad about my carpeted stair situation. He said something that kind of scared me: “Well, if there’s one thing I can say about carpet….it’s that it’s usually hiding something.”
And it was. Brown stairs, a broken tread, a million staples, and some nasty wallpaper.
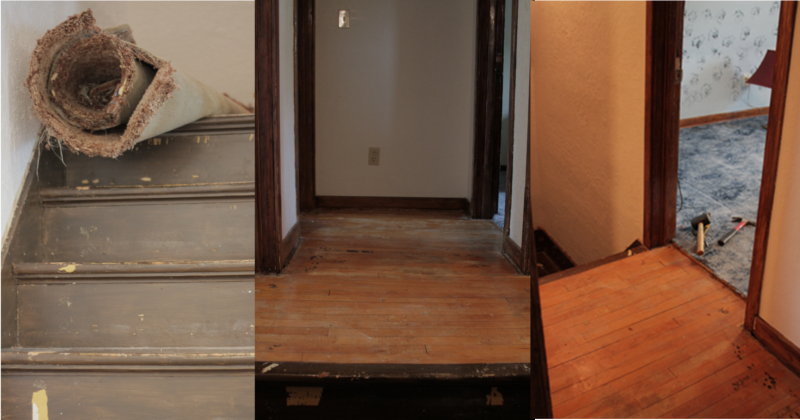
But it was also hiding something else. A pleasant surprise, in the form of nice, warm wood flooring in the upstairs hall.
I finished ripping up the stair carpet today and it led all the way up to the hall. So I figured it might as well go too. And I’m glad it did. Not only did I find these gemly {is gemly a word…as in h”like a gem”?} wood floors, I also took out a lot of gross smell.
Since day one in our house I’ve noticed a smell. And I think I know where a lot of it is coming from. These shag carpets. They soak up bad smells like a Sham Wow. I would be lying if I said I didn’t dry heave at least a half dozen times while tearing up the hall carpet and pad today. It was bad. I cleaned the wood and things smell much improved.
Now, on to the second order of business. I wanted to paint this week…but that is going to be put on hold. It turns out that Sherwin Williams is having a 40% off sale the weekend of the 21st. To me {queen of the cheapskate clan} a savings of 40% is well worth the wait. Fo-Real. So I’ll take it easy on the prep.
I did, however, bring home these sweet paint samples. Tell me what you think.
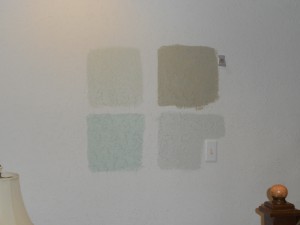
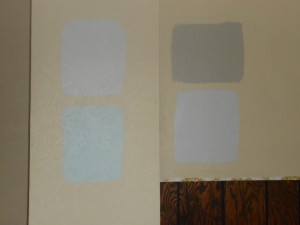
Now, before you ask…yes this is a photo of the same colors. They are just on two different walls and the light hits them differently. Isn’t it crazy how the colors seem to change?
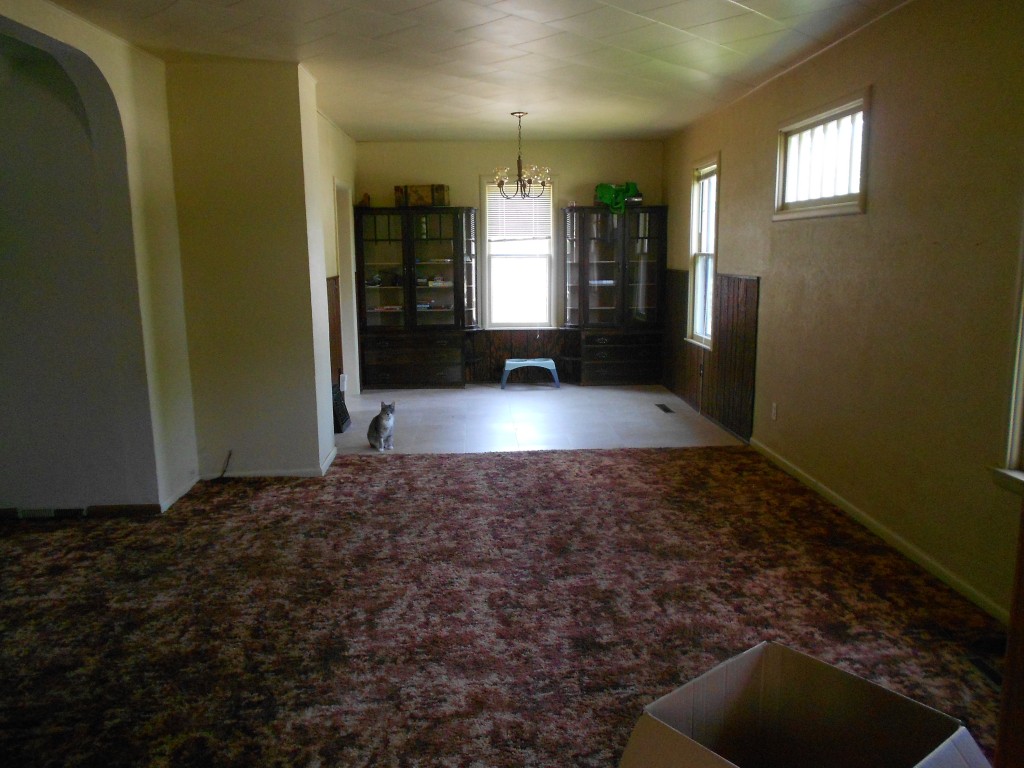
We are putting one color in the nook with the stairway. And a different color in the dining room and living room. All the trim will be crisp, clean white…as will the wood paneling and the built in hutches. Opinions welcome!
Amy


