by Amy | May 20, 2014 | Blog, Crafts, The Art of Projects, The Art of the Moment
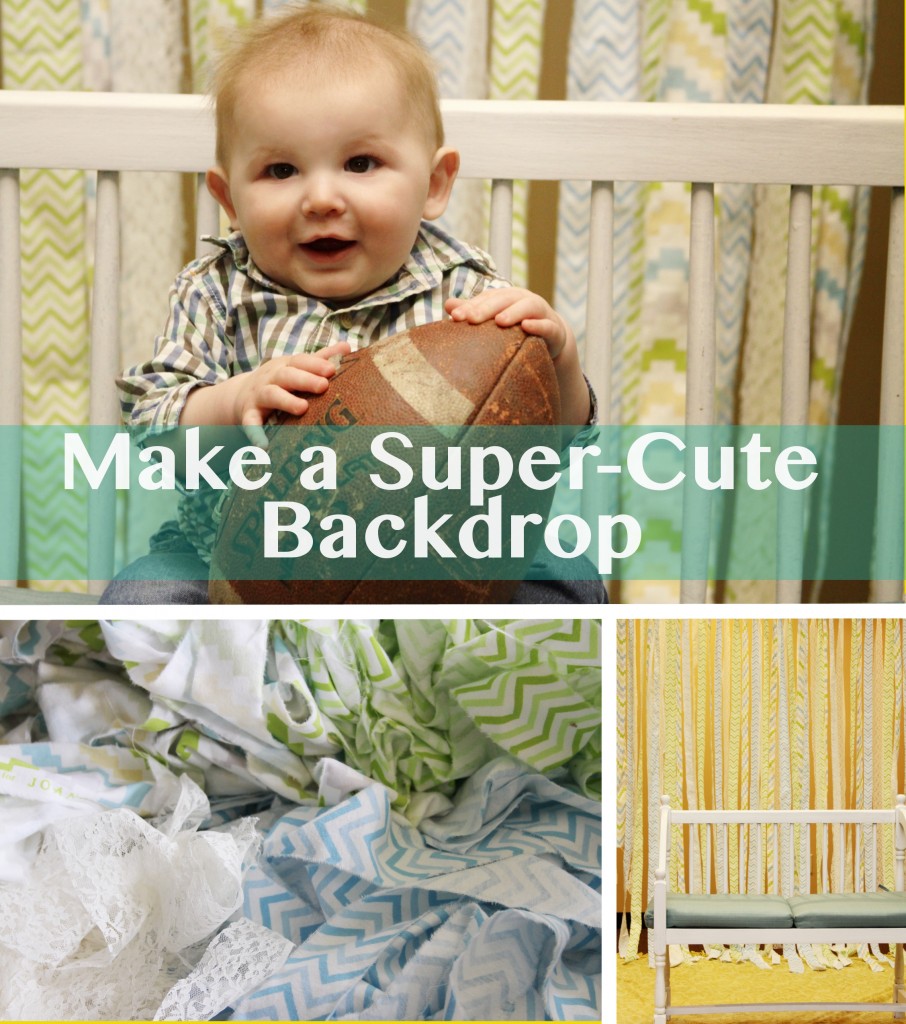
I did some walk in portrait sessions about a week ago. So I made a new backdrop.
Did I have other things I could have used? Probably. Okay, fine…yes. But I was in the mood for something new, something reusable, and something versatile. So I made a the backdrop you see above. It was insanely easy. Insanely. Let’s go.
You’ll need:
- 2.5 yards of fabric in 3 patterns
- 2.5 yards of lace {if you want it}
- Rope
- Scissors
First, find yourself a good episode of Dateline or Call the Midwife to watch while you are doing this. It’s easy…but a little mindless…so obviously, I like the TV on.
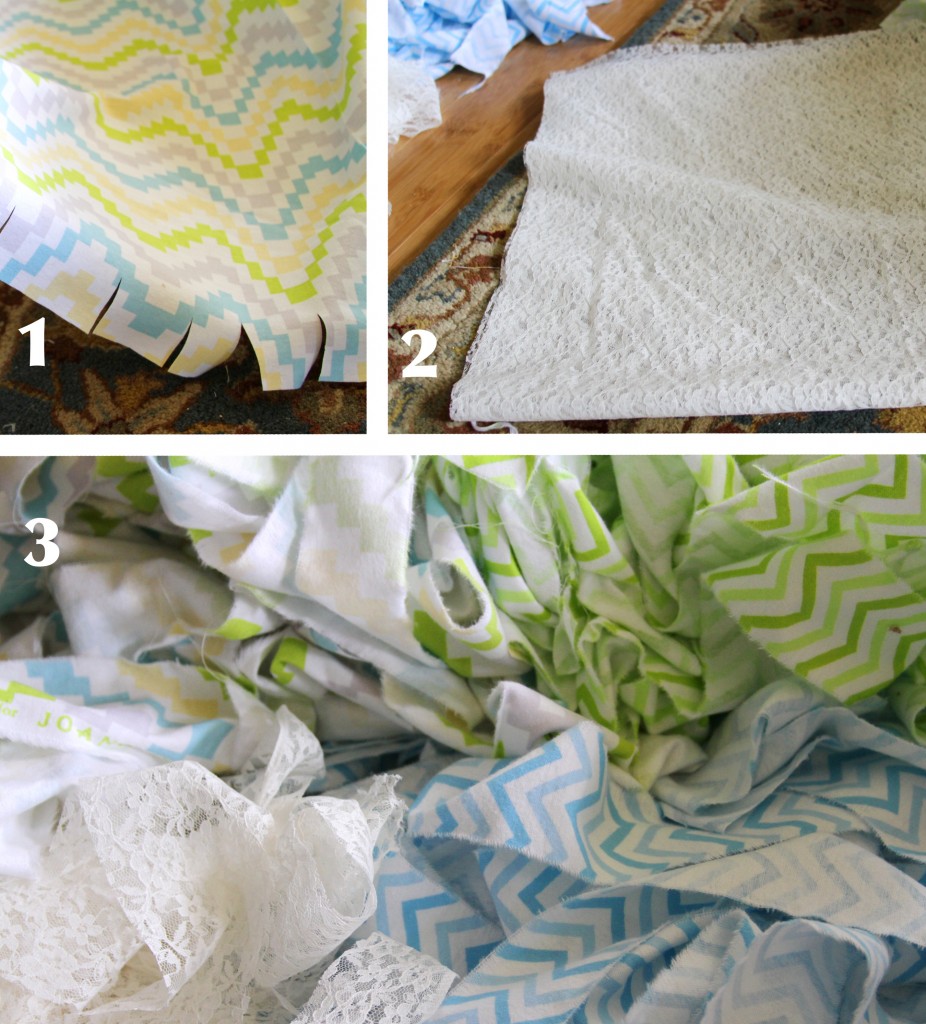
Next, unfold your first cut of fabric. I used flannels since they were on clearance the day I shopped, but any cotton weave will do. Snip along the short edge, making cuts every couple inches. I varied mine a bit to give the finished product a little variety.
After that, pull our your muscles and start ripping. That’s right. Just tear the fabric into strips, starting where you snipped.
Repeat on all your fabric.
For the lace, I accordion folded it a few times, then cut it into strips. You want all of your strips to be 7.5′ long…so be sure you are making strips that extend down the fabric…not across the short side.
You’ll be left with a pile of fabric strips. Take those and tie them onto a piece of rope. I just tied them once…no fancy knots here. This amount of fabric will create a backdrop that is 7′ tall and up to 8′ wide…more if you don’t mind sparse streamers. Once all your strips have been tied on, you can hang the ends from anything that is convenient. Whether that is a backdrop stand {if you are really legit}, a drop ceiling {that’s what I did}, or something you have laying around your house is totally up to you. I just wouldn’t use it outside on a windy day.
Then, keep your eyes out for clearance fabric that would make a good backdrop. These are a little addictive.
xo
Amy
by Amy | May 16, 2014 | Blog, The Art of Projects
by Amy | May 16, 2014 | Blog, The Art of Projects, the house
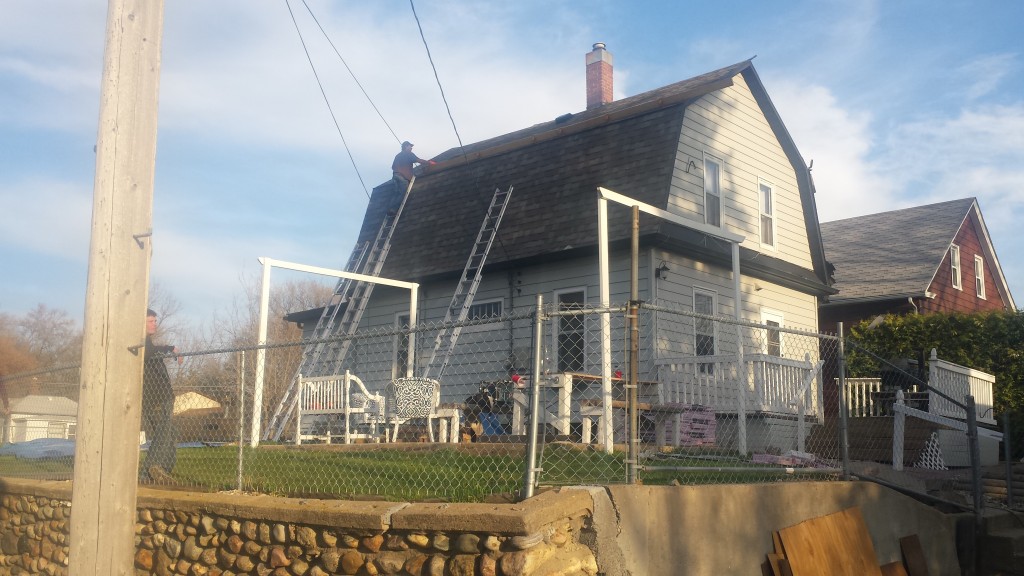
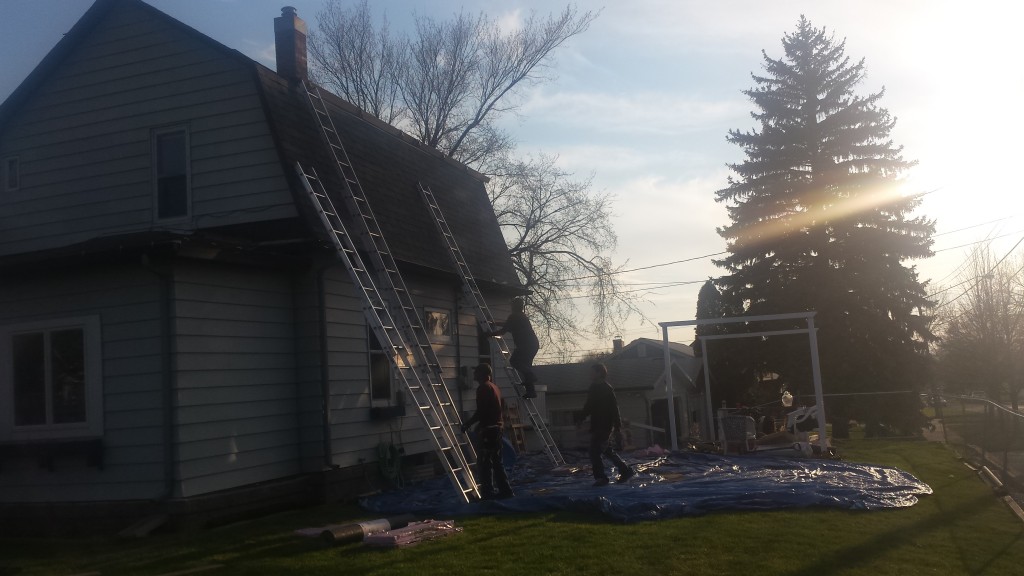
In all the commotion of telling you about the what’s been going on underground, I almost forgot to mention what’s happening above ground. We are getting a new roof. This, however is a project we felt better left to the professionals.
So, the last few days we have had a yard full of…professionals.
They seem to be good at their job. The job is getting done. There is also a fair amount of smoking, throwing cigarette butts in the yard and taking breaks on the patio going on. But who am I to judge the work of fine artists? All I know is, the shingles are going on…and these guys are braver than I am for climbing up those insanely high ladders. Oh, and I do know that their work is guaranteed–so that is in our favor {no matter what happens to their lungs, I know our roof won’t be leaking any time soon.}
They say it’ll be done tomorrow.
I’m really glad to have the basement underway that the roof almost finished, but somewhere deep down, I’m also a little bummed. While extremely necessary, these aren’t the “fun” projects. I can’t help. I don’t participate. I just sit back and let the pros work. Oh, and scrimp and save until we have the budget to take another step toward a cozy, finished, livable basement. {Projects cost money, you see.}
On another note, the weather here has been sweet.
by Amy | May 13, 2014 | Blog, The Art of Projects, the house
When we moved up to Practically Canada we had a few home options in mind. Derek moved up before me, so he visited properties and acted as our eyes and ears and gut instinct. I did the searched online and sent him addresses to check, names to call, places to scout. We knew we wanted another fixer-upper, and we found this place. So we bought it and moved in.
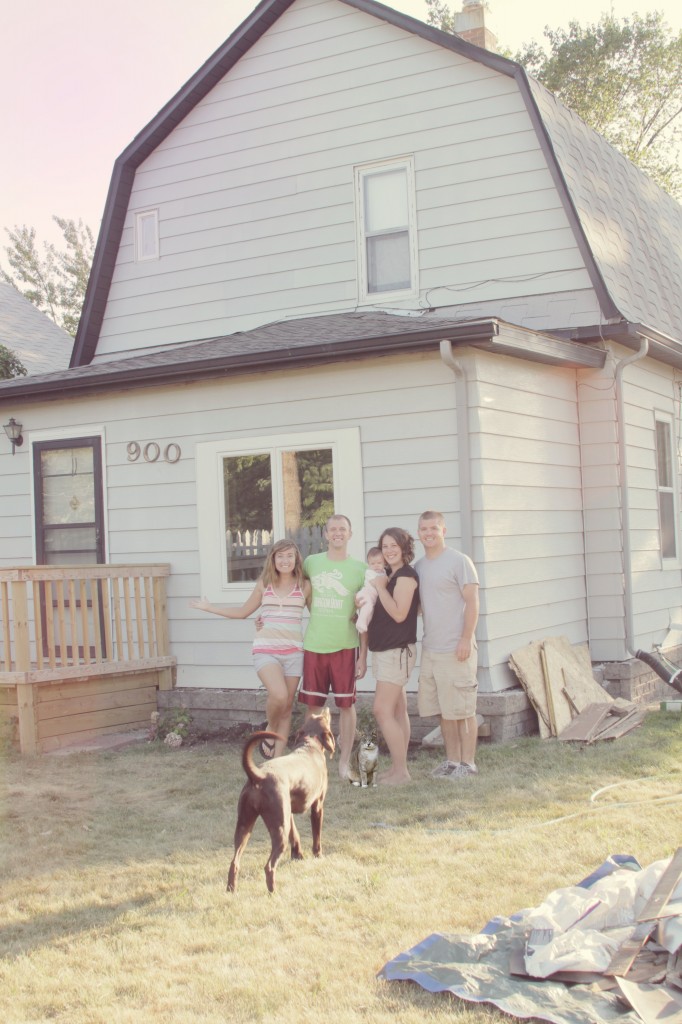
It had a lot of good features, no wall paper to remove, it was out of the flood plane and was settled in a nice, safe neighborhood. Sure, it only had one bathroom, offered only 1150 square feet of finished living space and needed a lot of updating…but all that aside, it had an ace in the pocket that we couldn’t ignore: a full, unfinished basement. {Click here for all of our house’s before photos.}

So we started small with painting. Then we moved on to other things that made the main floor look presentable. Last summer, I renovated the second floor and did a lot of work in the yard. Which means we are finally ready {and have money saved} to start on the basement. The big goal here is to add a couple hundred more feet of living space, which will include a second bathroom…yay!
While the beginning stages of this giant undertaking are not my idea of fun, I know it has to be done to get down to the parts that I actually enjoy. First thing that needed to happen: clear out everything.
Gross. I mean, there’s a reason I left all that stuff stored in the basement. It’s like, I like that stuff, and I don’t want to get rid of it, but I don’t want in the part of my house that people see all the time, and I like, need some it of, but I don’t want to take the time to go through all of it, and I just hate looking though boxes, and couldn’t we be watching an episode of Dateline right now? You know what I mean?
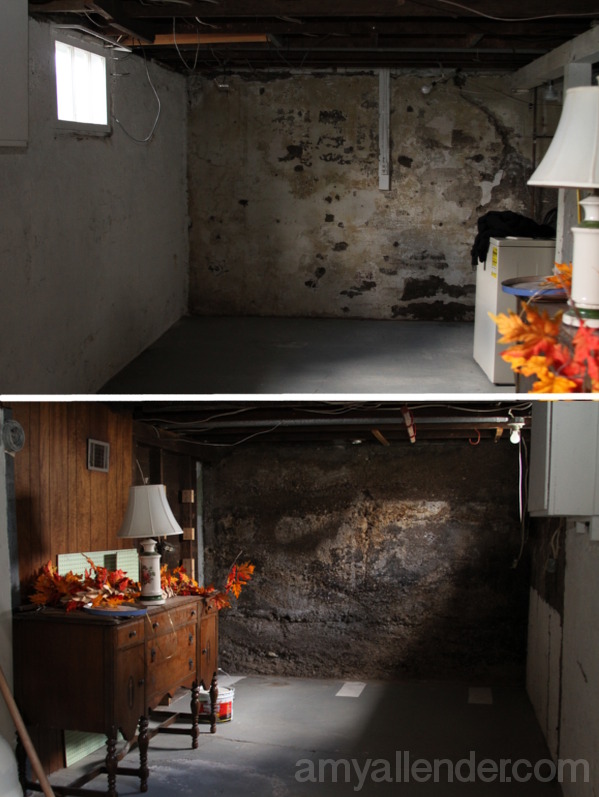
But it had to happen. So slowly we’ve gone through everything in the basement. And like any good “start of a project” post, I’ve got oodles of before photos to record this occasion. Before you start judging the hot mess that you see before your very eyes, let me explain. I took these when we had started sorting through and clearing things out. All good organizers know that the mess will usually look worse before it looks better. So, yeah.
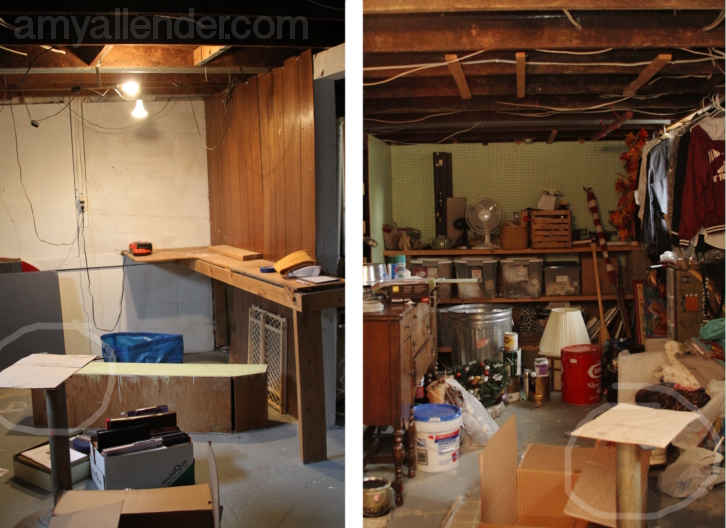
To give you an idea of size…I circled an object that appears in both photos above. It’s the same half of the basement, just from two different sides.
The basement is pretty small. But there are a lot of weird things down there. Let’s see…we’ve got faux wood paneling on the walls, some other wood nailed right into the cement on other walls, a make shift closet that Panda chose to use as a litter box for a while last summer {that was a nasty surprise to find}, a couple weird work benches that have been attached with a combination of nails/screws/bolts {yes, bolts}, not to mention the most precarious electrical work I’ve ever seen. All that stuff had to come out too.
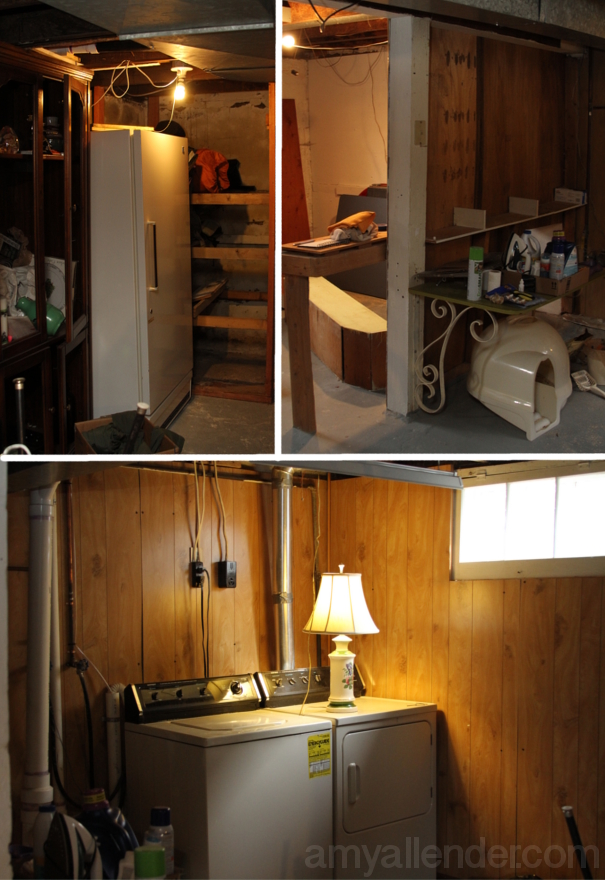
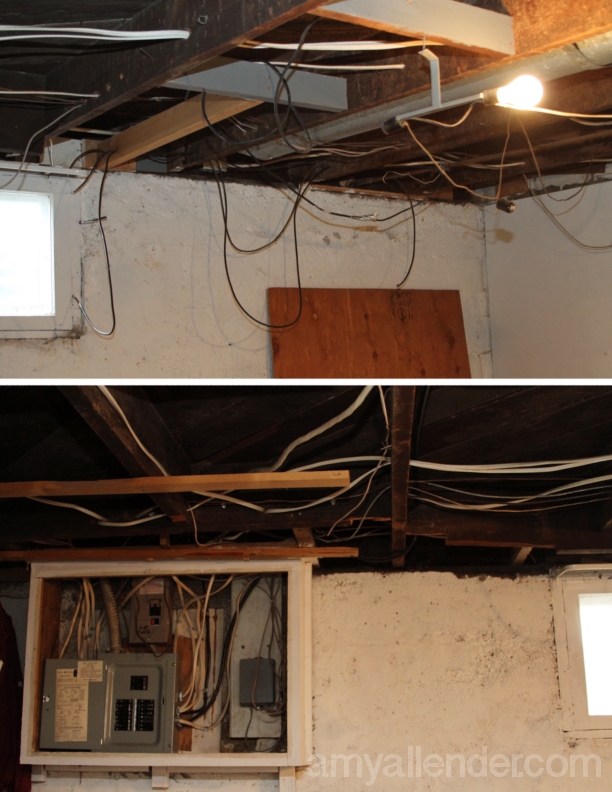
We started sorting through our things about a month ago. At that point I hadn’t gotten any results back about my back from an MRI or anything like that. I held to the philosophy that if I hadn’t been shown proof that there was something really wrong, I could work through the pain, no big deal. Well…turns out the MRI did show some nasty news and I’ve since been ordered to refrain from all lifting, twisting, and lots of stair climbing. So while Derek has been doing the fun part of the job, ie: tearing out walls, ripping down paneling, and being awesome–I’ve been upstairs finding new NPR apps to download and working on some computery projects. {Being useless is so lame.}
We’ve contracted a company to do waterproof the space. That’s something we don’t know how to do ourselves, and it seems like a better investment to let someone else do it, who will guarantee their work. In order for them to come get the job done everything has to be off of the walls. As you can see, what we found behind the weird paneling was not the prettiest thing in the world. Damp, cruddy, yuck walls.
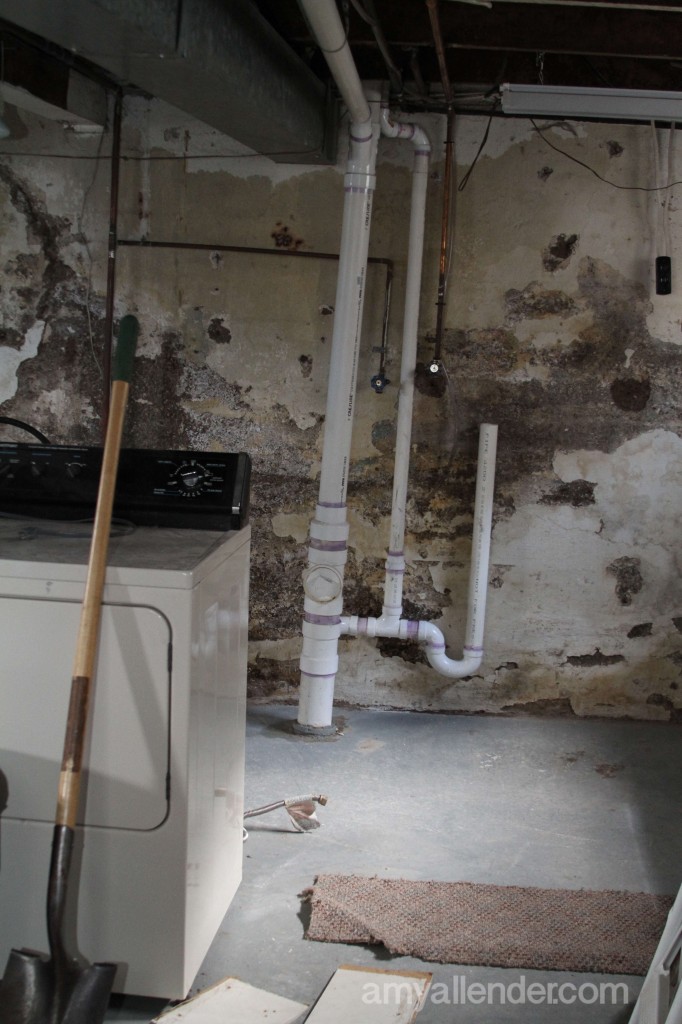
Even the stairs had to be taken away from the wall. That proved to be the hardest part of the prep stage. Our stairs run right down the side of the foundation, but the pros told us they’d have to be moved. So Derek set to it. Naturally, he found a few ancient layers of linoleum under the carpet. But he also found the most jimmie-rigged staircase I’ve ever known to exist. Tiny pieces of wood all nailed together, stacked on top of each other, all to fill in a small gap. Tiny nails barely holding anything in place. Long screws holding a scrap of carpet in place.
All these pieces of wood were stacked on top of each other in this little gap.
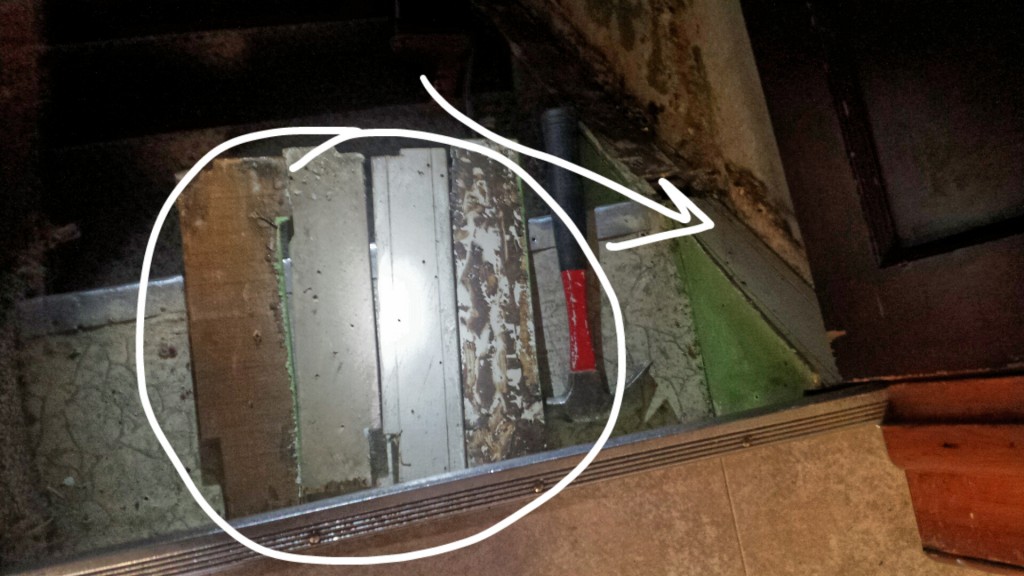
Really, it boiled down to two 3″ nails toe-nailed into the rafter at the top of the stair case.
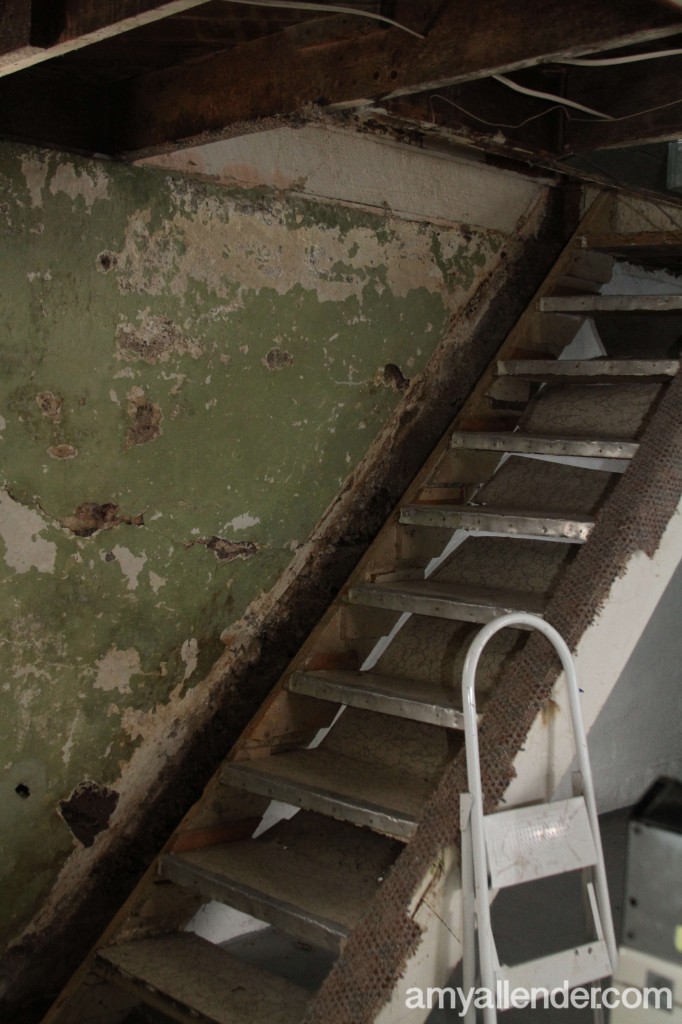
Like I have told you before, Derek is awesome. So of course he got the stairs moved.
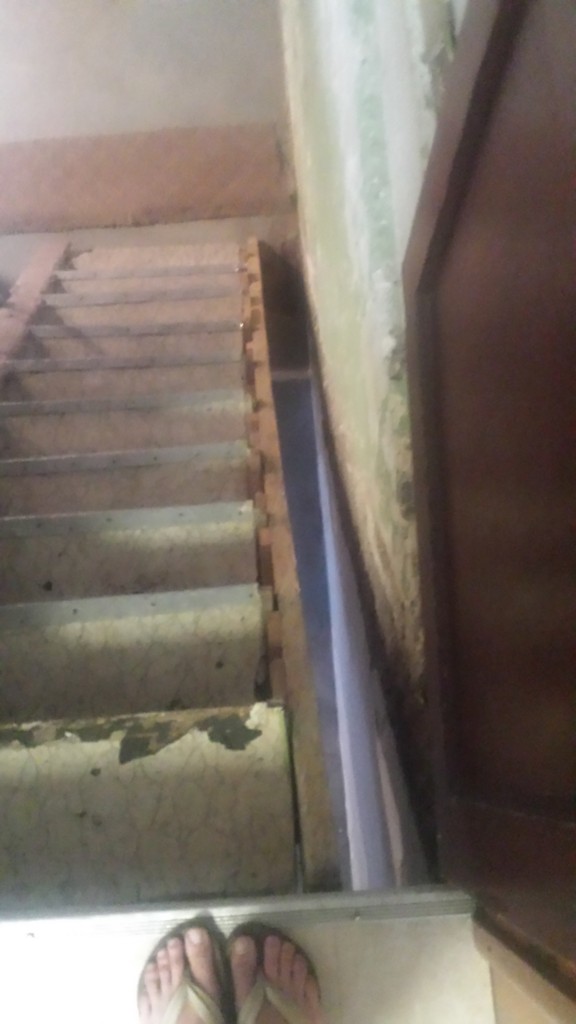
But it came at a price.
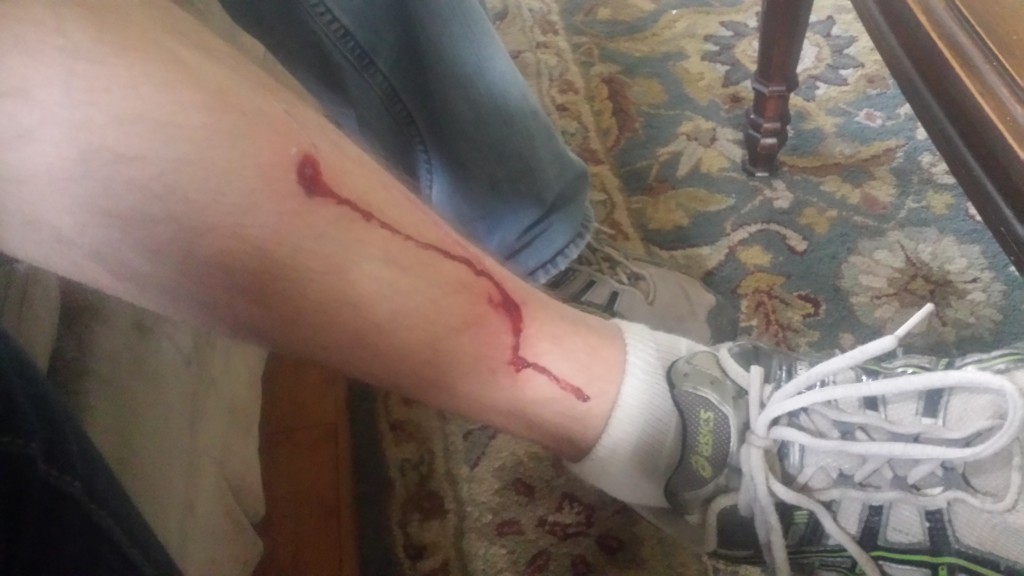
The first casualty. Every good project comes with one. Like this.
I heard a crash and came running to the basement doorway, only to skid to a halt, just shy of stepping off of the kitchen floor and down onto the basement foundation. The stairs weren’t there. They had fallen down…apparently with Derek on top. Yikes. He walked it off. No stitches, really he’s okay. The stairs have since been secured more safely–out just a few inches from the wall. I’m sure this is just the first of many odd stories to come from this very large endeavor…
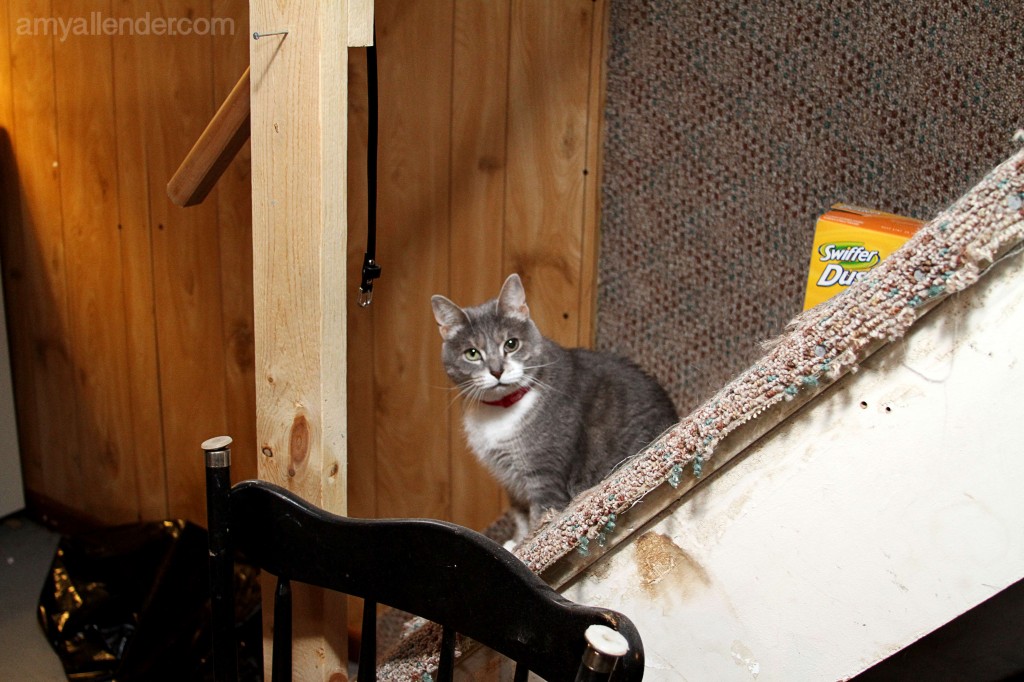
Wish us luck. Especially Panda. All this construction noise is very scarey for her.
xo
Amy
by Amy | Apr 10, 2014 | Blog, The Art of Projects
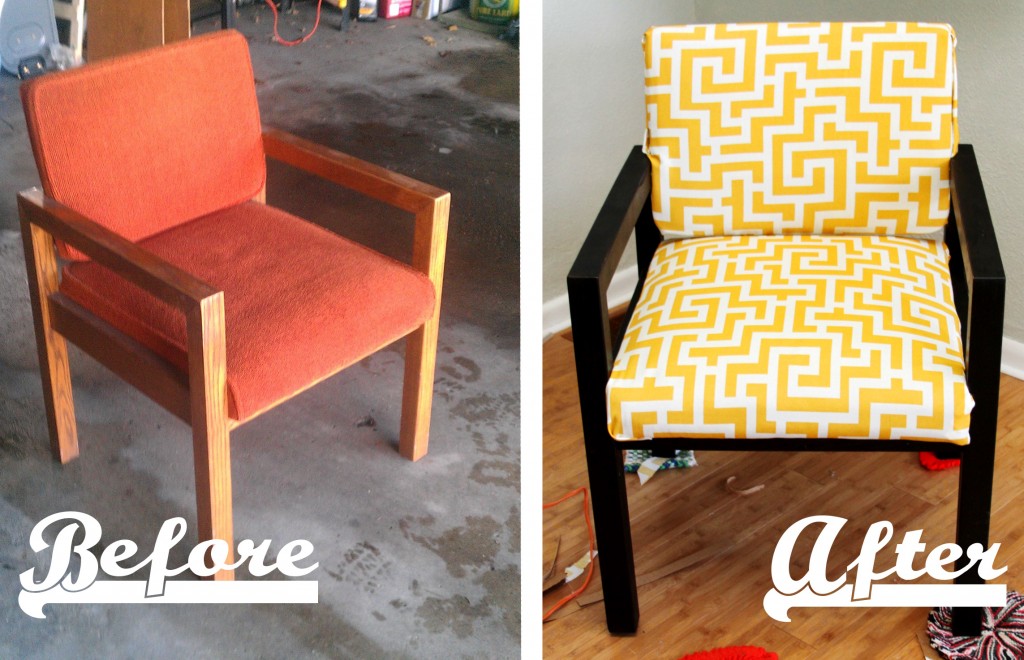
If you follow along on Facebook {which I hope you do…} you may remember a while back when I posted a photo of this chair on the left. Well, tonight on our very first “Art of Projects” post, I’ll be showing you how I did it.
And let me add this. When it was all done and moved into the office I created it for, a youth pastor’s work space…one of our church’s teens came in and said, “You got that at Target, didn’t you?”
Nope.
See, he works at Target, and could have sworn he saw a chair just like it in stock. Jokes on him. I bought a pair of matching {ugly} orange office chairs and gave them a giant-botox-apporoved facelift. The chairs cost $15 each from a second hand furniture shop {Sean’s Used Furniture, for those of you up here in Practically Canada.} The fabric is outdoor grade {read: durable and wipeable} that I picked up at JoAnn’s. The whole makeover took about an hour per chair, not including dry time for the paint.
Now, before I show you how I did it, let me say that I get asked all the time, “How do you do it?” Or, “How do you learn to do those things?” The answer is simple. I try them. What’s the worst that will happen? I’ll end up with a chair uglier than what I started with? Not likely. So just try. Start with something easy, like this chair. It’s an easy recover because it has a nice boxy shape and a sturdy frame. Something similar will be a great first project for you. And really, at the root of it all…recovering furniture is no more difficult than wrapping a gift. But you get to use nails and glue, so it can look a lot neater. Okay, so let’s get started:
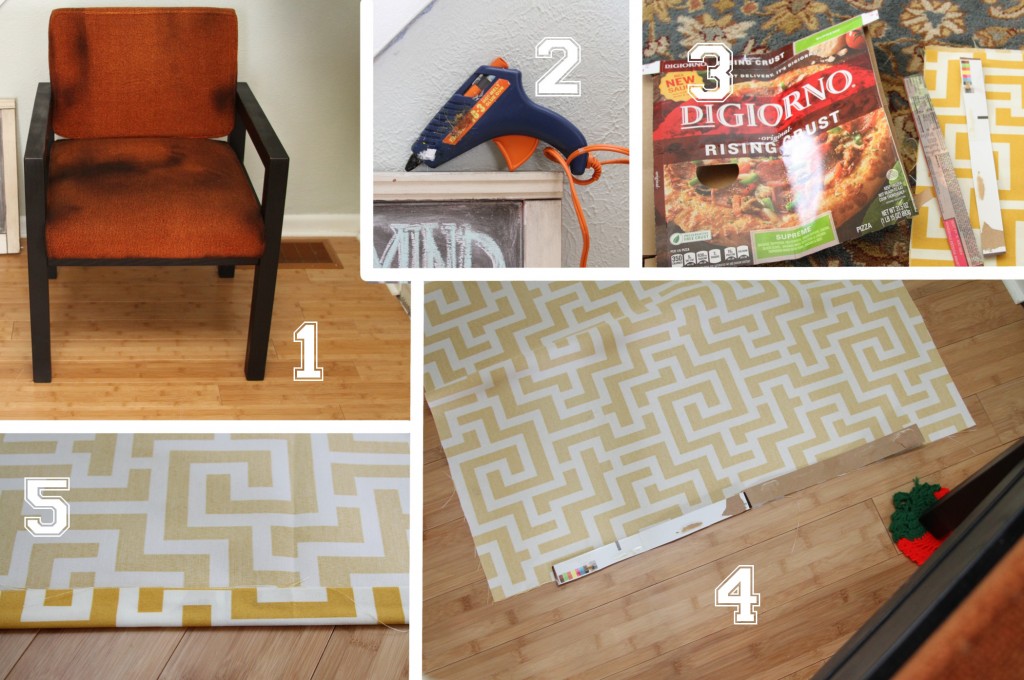
1. I spray painted the arms and legs of the chair black. I used a matte finish paint that was created to be pretty durable.
2. Get your glue gun out. This one is a “high heat” gun for heavy duty projects. If you have more of a “craft” glue gun, you should also invest in some upholstery tacks. Nail a few in in addition to adding the glue. It’ll ensure your hard work lasts.
3. In the fancy world you might buy what’s called “tacking strip” for this next part. At my house, I cut up an old frozen pizza box. Really any thin cardstock/cardboard will do. Cut a few strips, about 1/2″ thick.
4. Next I draped the fabric over the top half of my chair and cut enough that it would wrap around. Lay your fabric out on the floor, and glue a couple of your cardboard strips in place. You want the strips to be the width of the chair, but not the sides. You’ll get the idea in a minute.
5. Then, fold the strip up, so fabric is completely covering it and glue that in place.
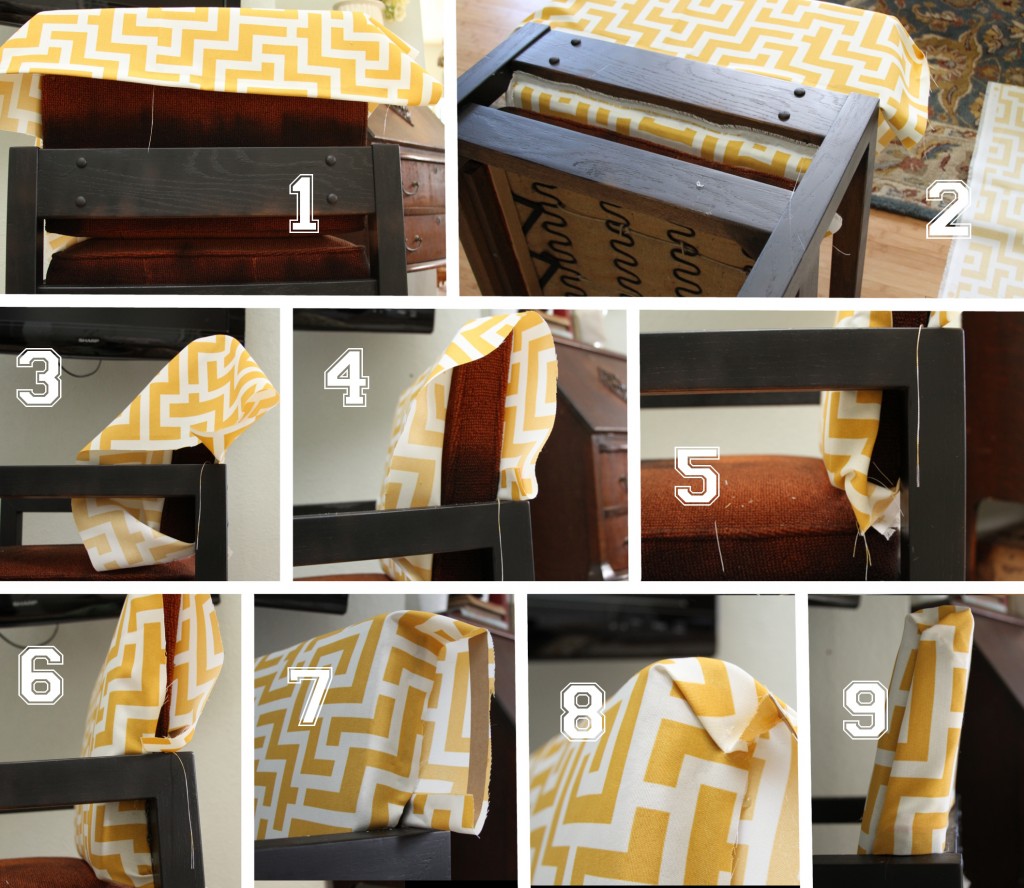
1. Once your “tacking strip” is set up, drape the fabric over the top of the chair. Glue/tack the straight, hard edge of the fabric in place, right along the frame.
2. Pull the fabric through, under the backrest of the chair. Pull it really, really tight. Glue/tack that edge to the wooden frame.
3. Now the sides. Trim any excess fabric from the sides. You need enough to cover the edges, plus about 1.5″.
4. Trimmed up!
5. Now it’s pretty much like gift wrapping. Pull the front fabric toward the back of the chair. Glue/tack it in place below the armrest first.
6. Repeat above the arm rest.
7. Put a tacking strip in place at the edge of what is left sticking out from the back side of the chair.
8. Fold the top down {like when you wrap a box.}
9. Fold the fabric in around the tacking strip and glue/tack in place.
If you mess up, or it’s not looking neat, just try again. The key is to pull everything super tight. The tighter it is, the neater it’ll look.
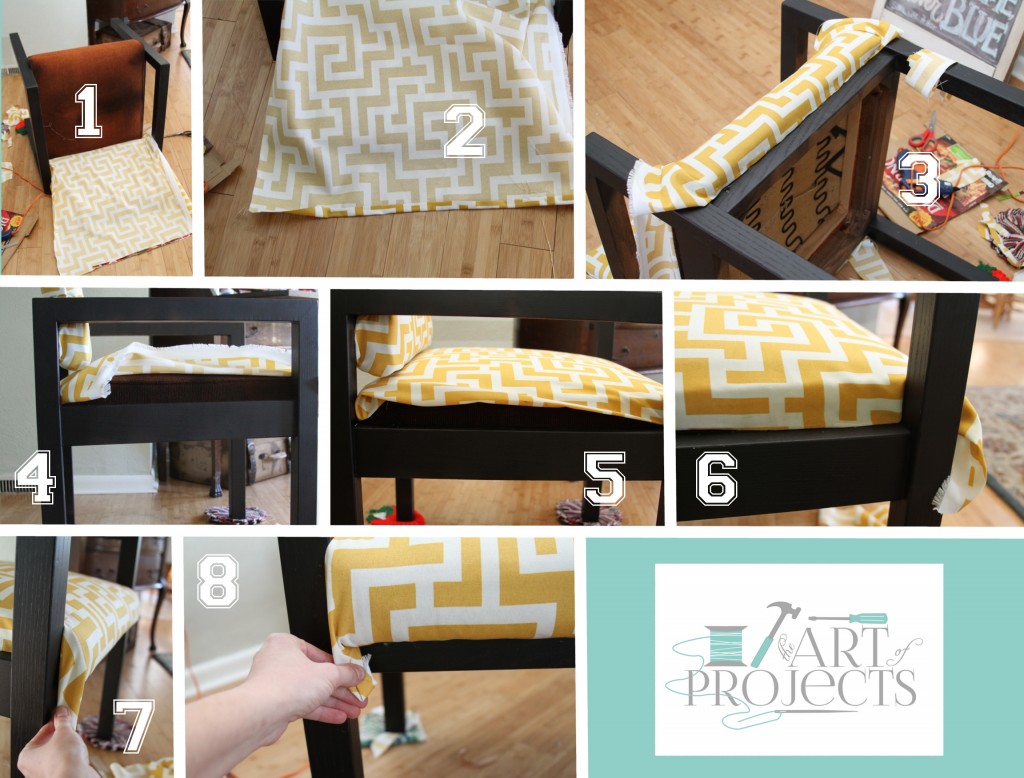
1. Now the bottom. Cut a piece big enough to cover the chair seat. Lay the chair on its back. Tuck one end between the seat and back rest.
2. Make a tack strip the width of the chair seat, just like you did for the back rest.
3. Glue/tack it in place under the seat, right to the chair frame.
4. Repeat in the back. Remember…get it tight! Then fold the fabric near the back rest forward and glue it to the frame.
5. Fold the raw edge of the fabric under, back up against the original covering.
6. Glue the folded edge to the chair frame.
7. Now you’ll probably have a weird little piece left over.
8. Trim it down, and glue/tack it anywhere that’s hidden and out of the way. Because, that’s how not-legit your upholstery skills have to be.
Okay, fans. One more look. In the near future, I’ll show you a full before and after of the youth office that these chairs now call home. But for now, we are still waiting on new carpet, so we’ll have to wait on the full reveal.
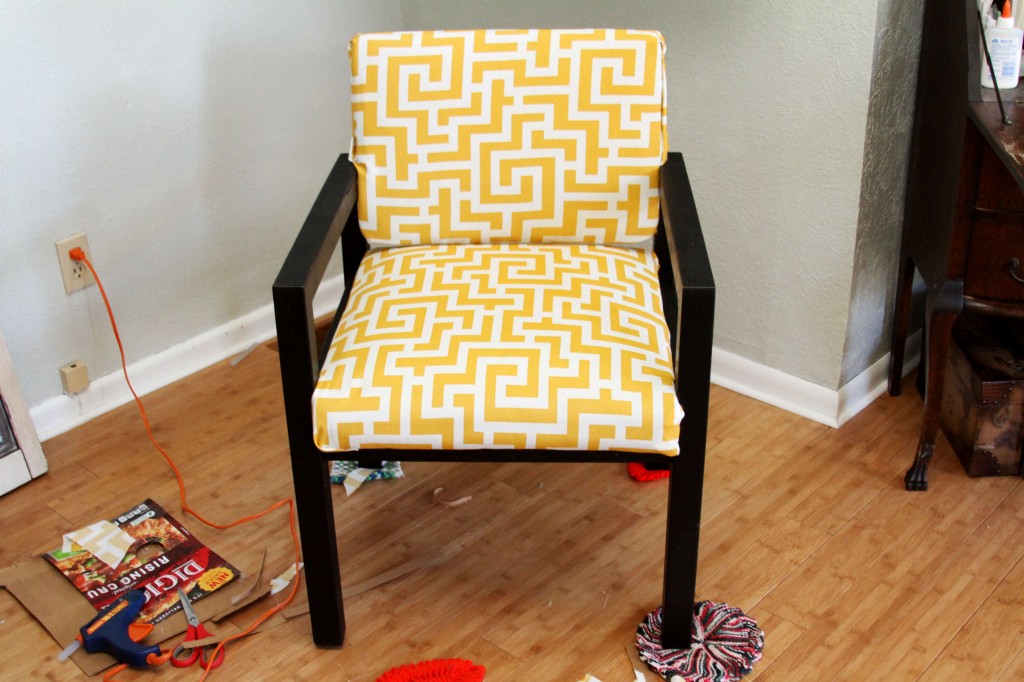

xoxo Amy
by Amy | Mar 7, 2014 | Blog, The Art of Living, The Art of Projects, The Art of the Kitchen

This week, a friend’s husband headed out for a six month deployment. She asked if I had any ideas. Here’s the truth. When it comes to mailing packages…I’m totally lame.
So I scoured the Internet and found a bundle of folks who are doing the care package thing right. I think we all know someone who could use a care package, whether your spouse is deployed or not. Hopefully this creative list will inspire you next time you need to ship some love via post. (more…)
by Amy | Feb 22, 2014 | Blog, The Art of Projects
Waaaay back before Christmas our church’s youth pastor {who is also really cool and I also consider a friend} asked if I’d help him remodel his office a bit.
Ummmm. Lemme see. Yep.
It took a while to get off the ground because of all the holidays, but over the last few weeks we’ve really gotten things turned around. See, I’m just about out of things to make over in my own house, so this was a perfect opportunity. Not to mention he’s a youth pastor who described his style as “bold, modern and colorful.” That’s pretty much the opposite of my style at home. I’m terrified of color, white is my favorite accent choice and 90% of my furniture belonged to my {or Derek’s} grandparents.
This has been a way fun project.
It’s not done, but I’ve just been itching to show it off to you. So here’s the progress.
I wish I’d taken better before photos. But I really dropped the ball. Originally there were huge, dated cabinets {upper and lower} and a counter along the side wall. Those were removed because the storage just wasn’t necessary. We painted with poppy colors and I {with the help of some handy teen girls} built a new shelving unit from galvanized pipes.


The remaining cabinet got an accent treatment and some sweet framed-out chalkboard doors.

But my pride and joy is this architectural accent shelf. I dreamed it up and built it with my own two, girly, winter-chapped hands. It took about six tries, but I finally got it right and anchored it up today. Pretty cool, huh?

I can’t wait to show you more in the coming weeks! Furniture is coming, as is new carpet and some cool wall art. Oh, and a mini fridge too. If I was 16, I’d totally want to talk to the person who works in this office.
by Amy | Feb 1, 2014 | Blog, The Art of Projects, the house
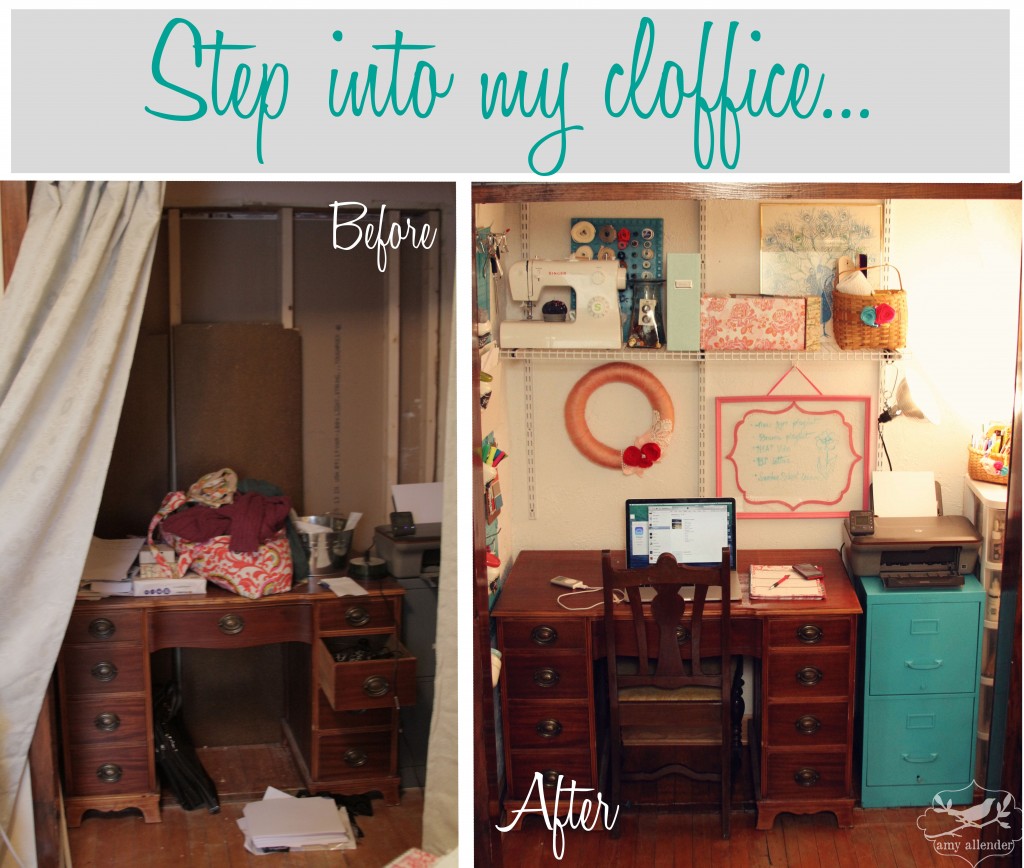
Remember 2014’s first project? Yes, that hideous closet that I left untouched after completing the bedroom remodel…that’s exactly what I’m talking about. Well, it’s done. And I even had a day or two to spare. It might not be as lavish as other cloffices floating around the Pinterest world, but it’s functional, I think it’s pretty, and it’s a heck of a lot more productive than working from the couch.
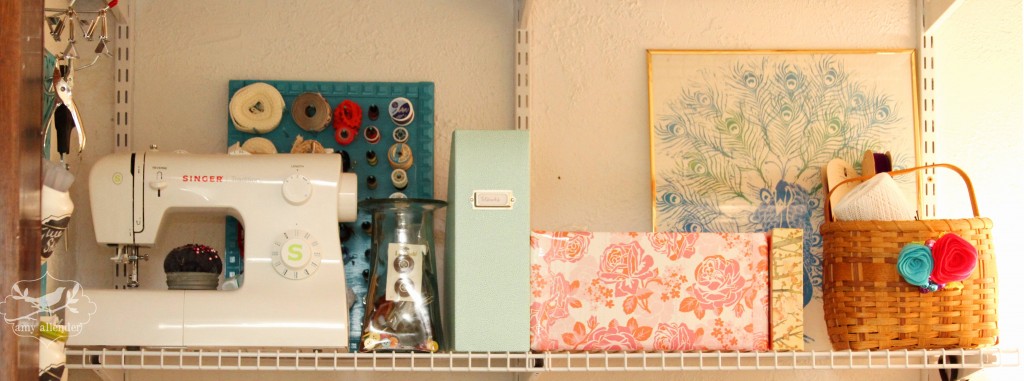
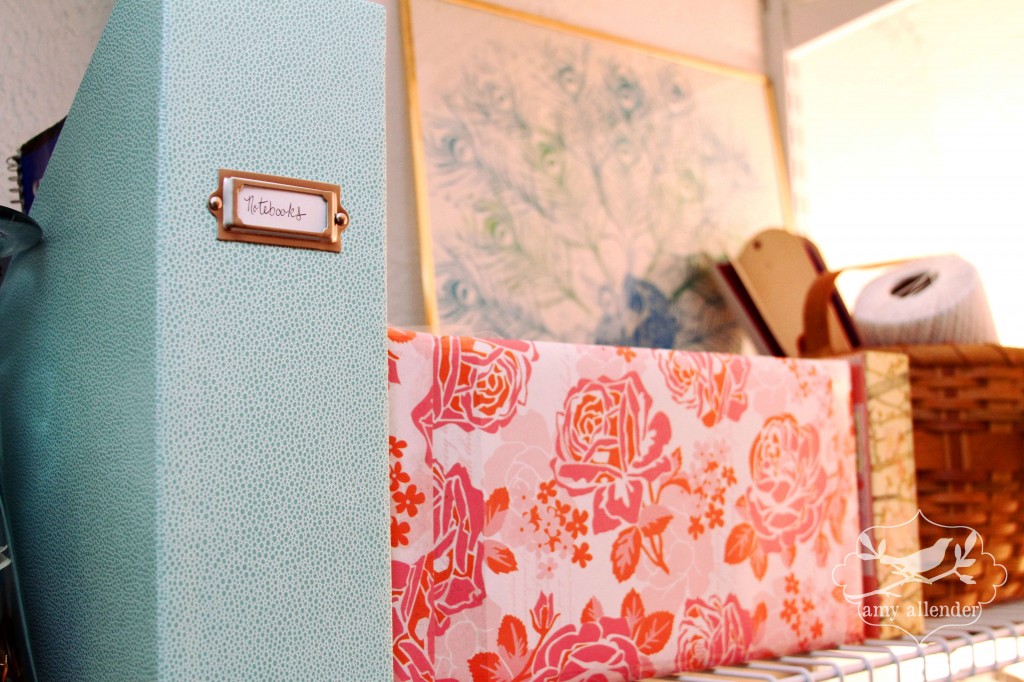
The next big house project we are planning to tackle is the basement. Task number one of that job is getting all our stored stuff out of there. Which means, my craft supplies. Honestly, I was all too happy to go through my things and move them upstairs to a well-lit, cute space. It’s nice to have {almost} all of my go-to supplies in a location that isn’t shared with Panda’s litter box.
I sorted out all my string and ribbon and stored it in a basket. And I used a box left over from Christmas, covered in scrapbook paper, to organize all my writing/drawing/doodling supplies {chalk, charcoal, markers, crayons…} Buttons, which I rarely use but seem to have an abundance of, are stored in a vase that came with some flowers from the florist. And my stack of unused notebooks for list making are finally all together in a bin from Martha.
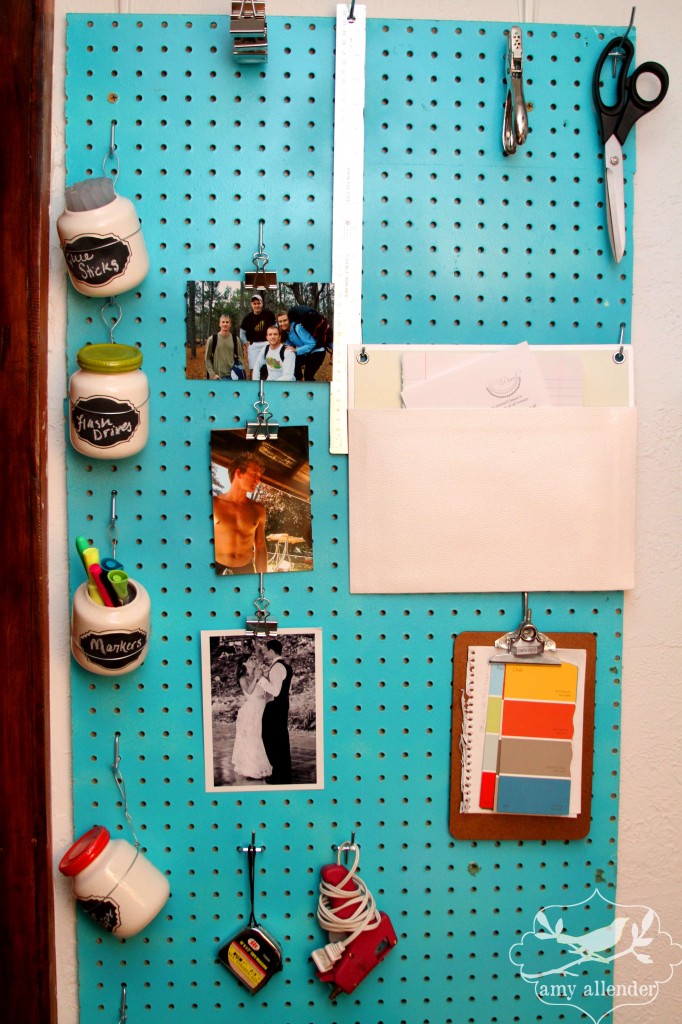
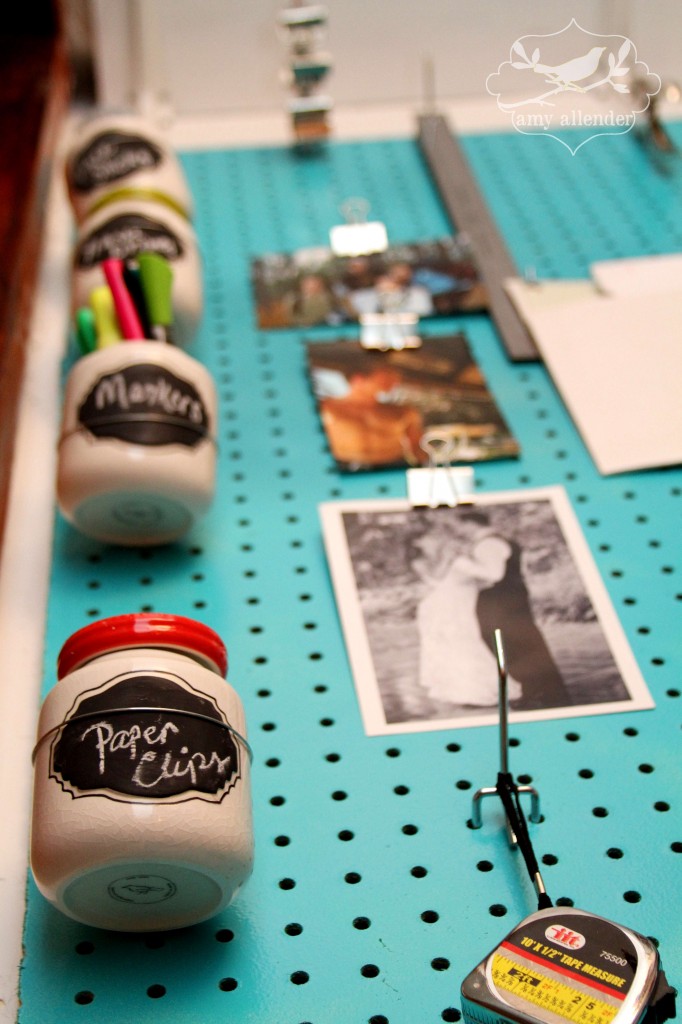
The basement is currently unfinished except for a few “walls” made of peg board. It’s all going to get torn out soon, so I salvaged a chunk, gave it a coat of spray paint, and made it into a vertical desk. I had a hard time finding pegboard hooks, so I’ll tell you where I finally bought them: Menard’s. Really any big-box hardware store should have them. Insist that they find them for you. At Menard’s I asked three employees before one knew what I was talking about. In the end they were by the closet stuff.
In days to come I’m sure I’ll have more things to pin up, but in the mean time I clipped up a few old photos that I came across while sorting through the desk. They make me happy.
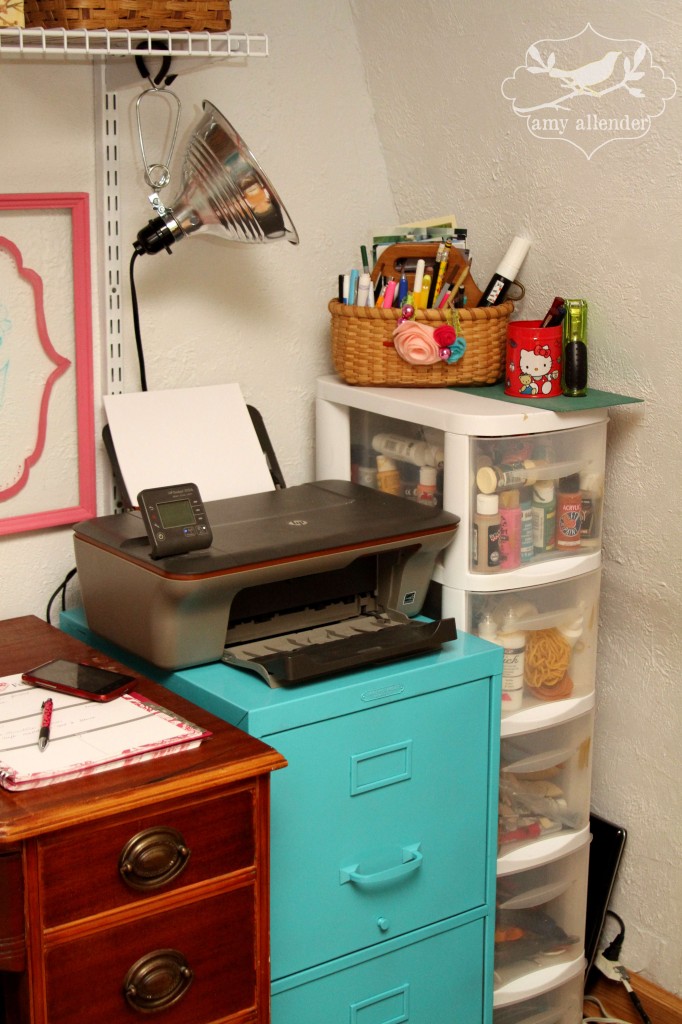
I took the same can of paint that I used on the pegboard and sprayed the old, ugly-gray file cabinet as well. Much improved!
We had that silver utility light in the basement. I bought it once upon a time to use in dim photography settings. I haven’t used it in a long time and it’s perfect for the desk space. I love that it clamps onto the shelf so it doesn’t take up {precious} desk or floor space.
Eventually this closet will return to an actual clothing closet. With that in mind we installed all the shelving on a closet kit from Rubbermaid. The shelves are adjustable and you can buy additional accessories to add hanger rods or additional shelving. It was easy to install. Derek helped with this one, but I used a similar kit in the bedroom and put it in myself.
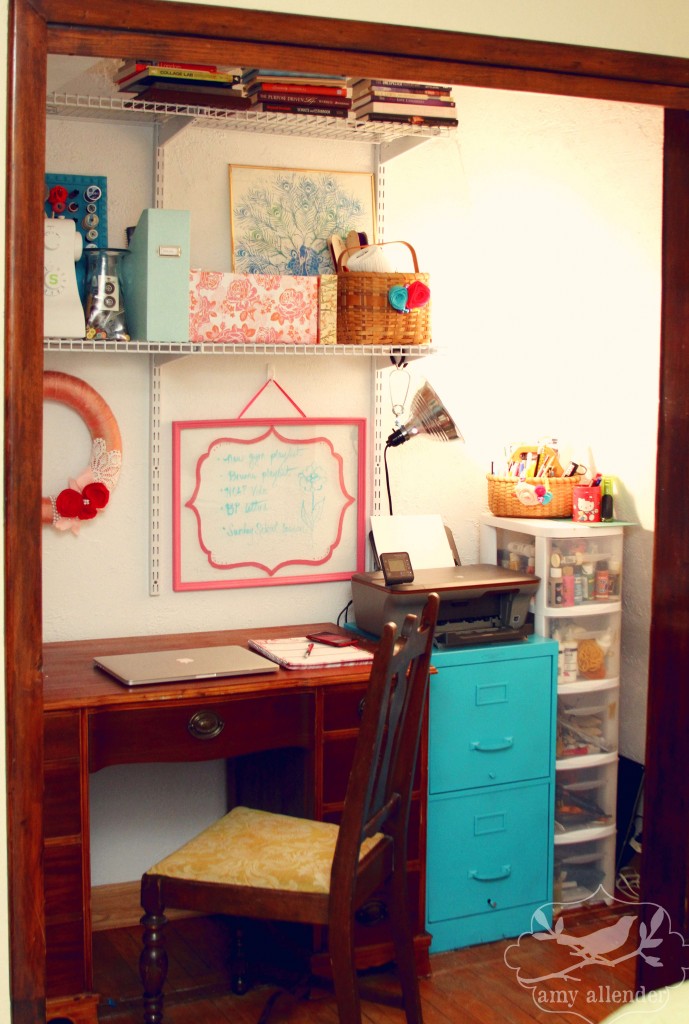
I’ve already been more productive the last few days since this has been finished. It’s really amazing how having a dedicated space that you actually enjoy coming to can change your attitude about work. This project also serves to show that with organization and creativity, even a small, overlooked space can be transformed into something useful.
Amy
PS…In case you missed it, here’s how I made that cute dry erase board. And going even further back…here’s how I made that wreath.


