by Amy | Jan 3, 2013 | Blog, The Art of Projects, the house
The light in our basement went out the other day. Our basement is very unfinished. The previous light was a fluorescent fixture that hung from a couple of ducts and plugged into the wall above the dryer. It’s just one of several very ghetto-rigged lights down there.
So, we need a new light. But until we get one Derek took one of our end table lamps and sat it on top of the dryer. When we flip the switch it comes on and illuminates that little dingy corner with warm soft light.
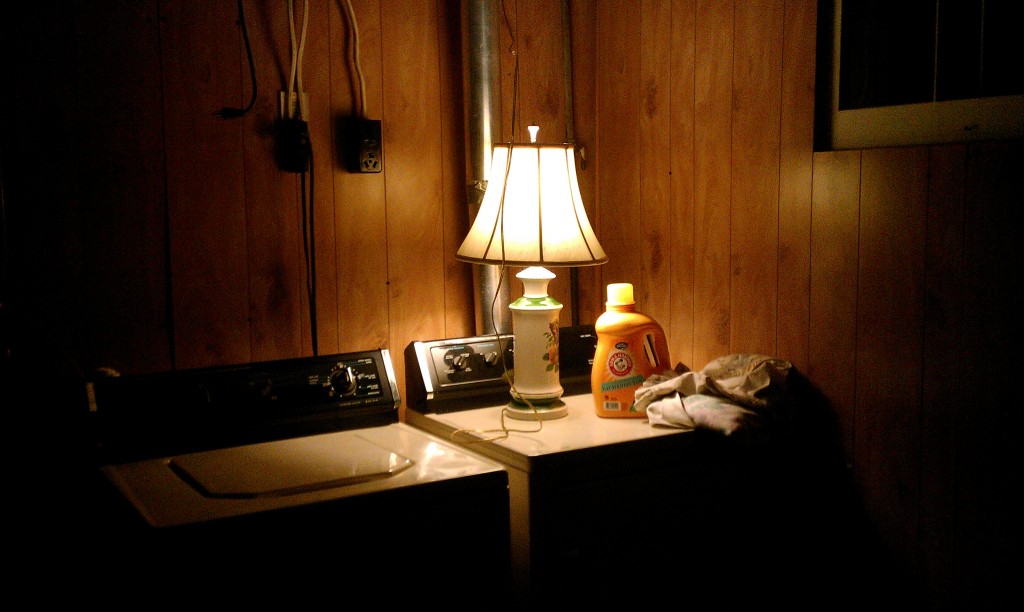
{Don’t be fooled by the paneling. It’s just those two sheets. Then concrete all around. Pretty shady.}
Derek told me to start thinking of what kind of light I’d like above the laundry station. And I will. Because in 2013 we’ll start {maybe finish?} working on the basement. The finished product might be a long, loonng way off, but each time I flip on the switch to feed Panda, or grab something out of the freezer, or fish out some craft supplies…I see the lamp, and I can see where we are moving. Our basement won’t always be dirty and dingy. Eventually it will be the kind of place where guests sleep and pretty lamps live.
It’s a reminder of where we are headed. Where I’m headed. Where things are headed. I love it. It got me thinking…what are other little changes I can make in my life and my house that will remind me of where things are going? It’s wild how sometimes a small change can shed some light and bring a little hope.
What can you do to remind yourself of the hope this year will bring?
Amy
by Amy | Dec 12, 2012 | Blog, The Art of Projects, the house
These weeks before Christmas always take a toll on me. You too? Most likely.
Because in all the holly-jollyness there are about a million things to do. Food to buy, gifts to wrap, crafts to make. Last night I crafted up a storm. Today I’ve got to fill empty cupboards and pick up a few last gifts {yuck…that means a trip to Wal-Mart.} Honestly, I feel like my house is in a constant state of chaos lately.
The upside is that it is frightfully cold outside. Which means that the thought of being outside is not too appealing at the moment. But we still have to go out to shovel.

It’s 10:30 a.m. and it’s -3 degrees outside. The windchill makes it more like -7. Oh. My. Goodness. But you know what? It’s beautiful. I love it here. Even though it’s cold. {Really cold. Nostrils sticking together cold.} I really do love it. I love the people. My house. The community. I’m quite smitten with North Dakota, Practically Canada. And I’m quite smitten with warm mittens too.
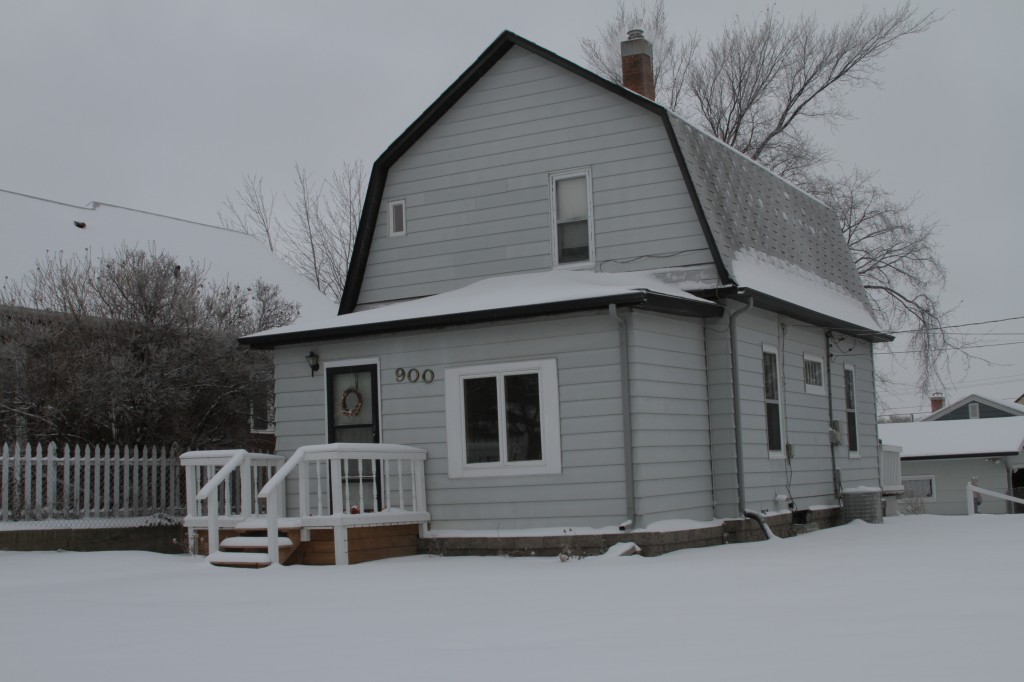
{We’ll see how I feel about this cold after it’s been below zero for a few months…}
See you tomorrow. Get excited…I’ll be showing you the latest progress in the living room. A super awesome solution for our cords and media equipment. And later…printable gift tags just in time for wrapping madness.
Amy
by Amy | Nov 14, 2012 | Blog, The Art of Projects, the house
Are you familiar with the phrase “Oopsie poopsie.”
Probably not. I think it’s a phrase my sister made up.
Well. Let me show you what an oopsie poopsie looks like. It looks like this:
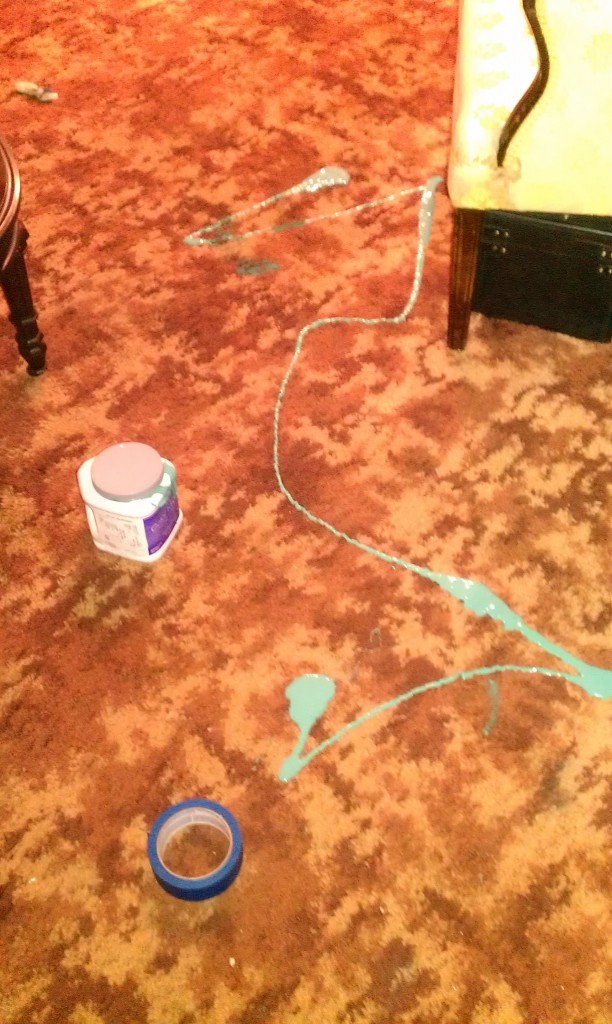
They come in all shapes and sizes. But tonight I made a major oopsie poopsie. After working on a small project I screwed the lid on my Sherwin Williams sample jar and picked it up to put things away before dinner. Well, the lid was screwed on…crooked. I realized something had gone horribly wrong when I stepped in something cold and wet.
But alas, it was too late. The damage had been done.
Friends tell me that the bright side of brown, splotchy carpet is that it will hide everything. Turns out, the one thing it doesn’t hide so well is aqua paint.
Most of it came out. I’ll call it, well seasoned. Looks like the living room floor project just moved up the to-do cue.
I hope you’ve had an oopsie poopsie free day.
Amy
PS–Free photo elements tomorrow!!
by Amy | Oct 31, 2012 | Blog, The Art of Projects, the house, Uncategorized
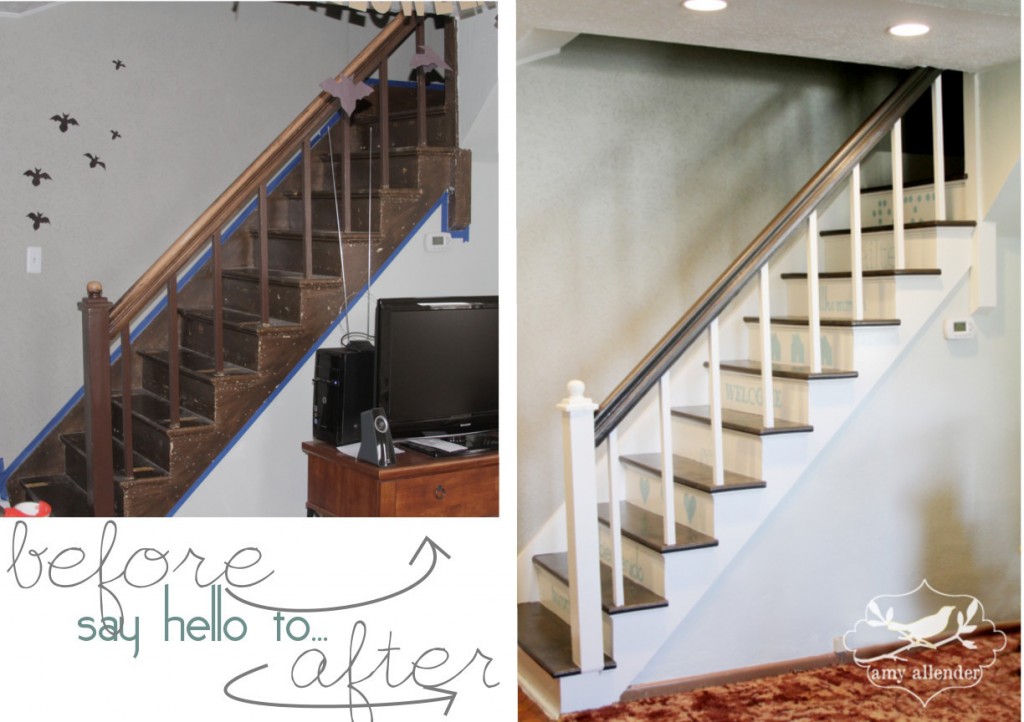
So, yesterday I showed you the finished product of my weekend of hard work on the stairs. I just couldn’t resist putting together one more B&A photo. Today I’ll give you the skinny on how I did it.
The first thing you need to know is that I’m not especially skilled. If I can do it, you can do it.
All it takes is some elementary school craft skills, painter’s tape and a little patience. (more…)
by Amy | Oct 30, 2012 | Blog, The Art of Projects, the house
Are you ready?? Some of you may know that I was remaking my stair case while Derek was out of town over the weekend. This project started a month ago when I ripped up the nasty brown carpet covering the stairs. And it is now complete…ready to be crossed off the list.
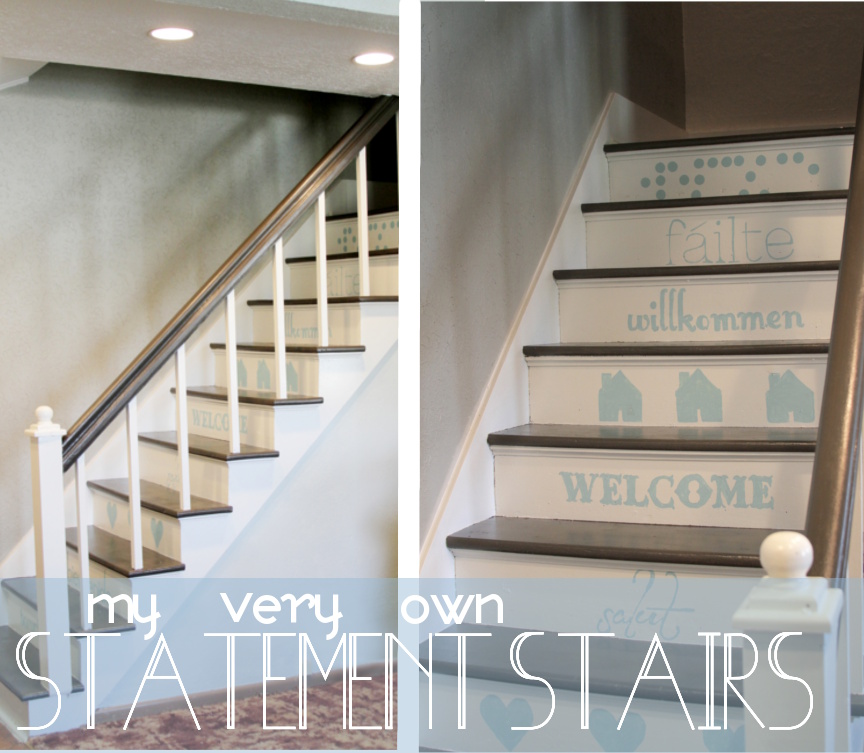
So, yes. Between being locked out of the house and locked into the garage…I made my staircase look like one fit for a dollhouse. I’m impressed with myself. I knew I wanted them white with dark treads. Then I took it a step further {after spending some time drooling over this statement staircase} by making a statement. Hospitality is deeply important to Derek and me, so I painted “welcome” on the risers in different languages. {The top riser is braille! Fun, right?}

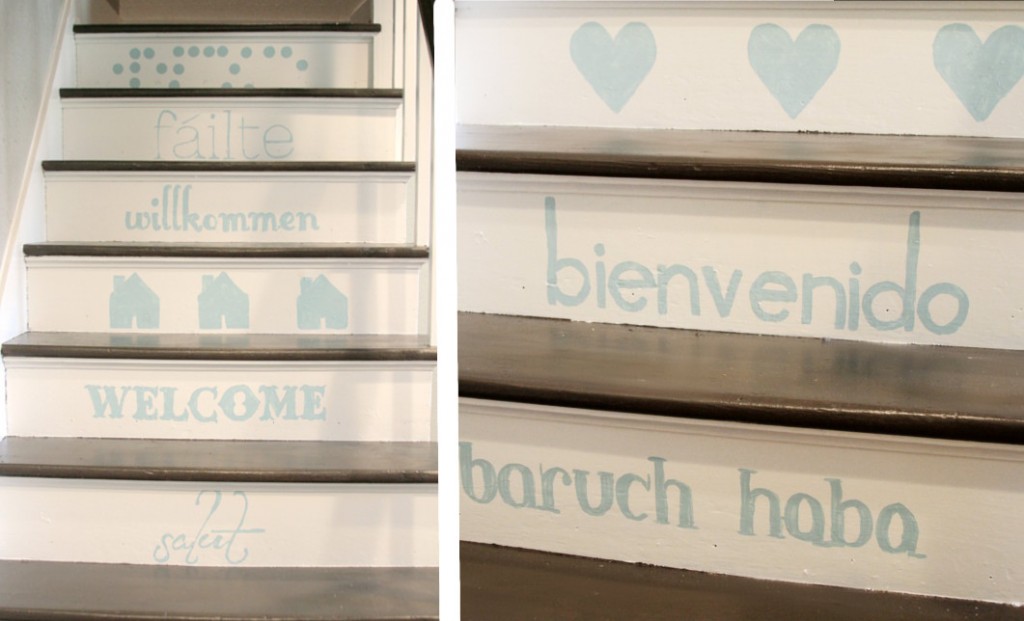
Want to know how I took the gross brown steps circa 1975 and turned them around? Look no farther…just click here!
And now I’ve got candy to make. {Another something you’ll be seeing in the coming days.}
Amy
Linked up at Home Stories, Savvy Southern Style and these other awesome parties!
by Amy | Oct 21, 2012 | Blog, The Art of Projects, the house
Hi all. I hope this weekend finds you well. Derek and I have been super productive around the house….which is always a good thing. Unfortunately, that means I haven’t been so productive in the kitchen and we will be ordering a pizza to eat while we watch our Sunday night line up {Once Upon a Time, Football, and Revenge!!}
Anyway, I’m simply stoked to show off our new light fixture. I saw it a few months back at Menard’s and fell in l-o-v-e. Seriously. Love. Like Valentine’s Day love. The price, however…I did not love. So, I snapped a photo of it on my phone to remember it by and went on my way.
As fate would have it, I just happened to look up my precious lighting fixture online…only to discover…it had gone on sale!! Now it is mine. All mine. {And a little bit Derek’s and Panda’s too.} Here’s a link to the product…in case you love it so much you have to have it too!
Gorgeous, right? I’m seeing the almost-finished-dining room in a whole new light. {I love a good pun.}
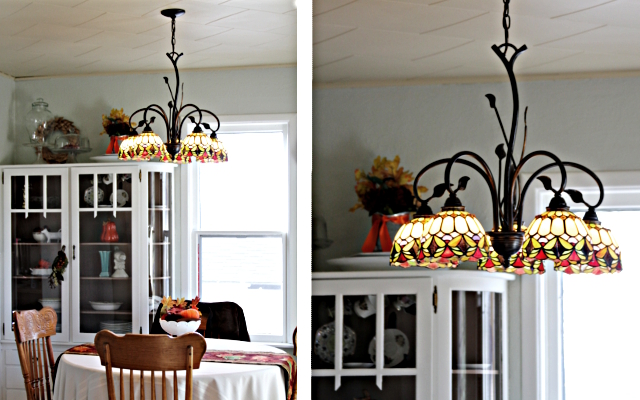
Besides hanging the new chandy I finished patching some dry way I severely damaged while removing an awkward piece of faux wood panelling. It looks good. Sanded…painted…no giant cracks or gouges in sight.
Meanwhile, upstairs…Derek is hard at work whipping up a built in cabinet for our towels and sheets. The current system is a hot mess. But that’s a tale for another day. So I’ll leave you with this. And a promise to show it off when it’s all done.
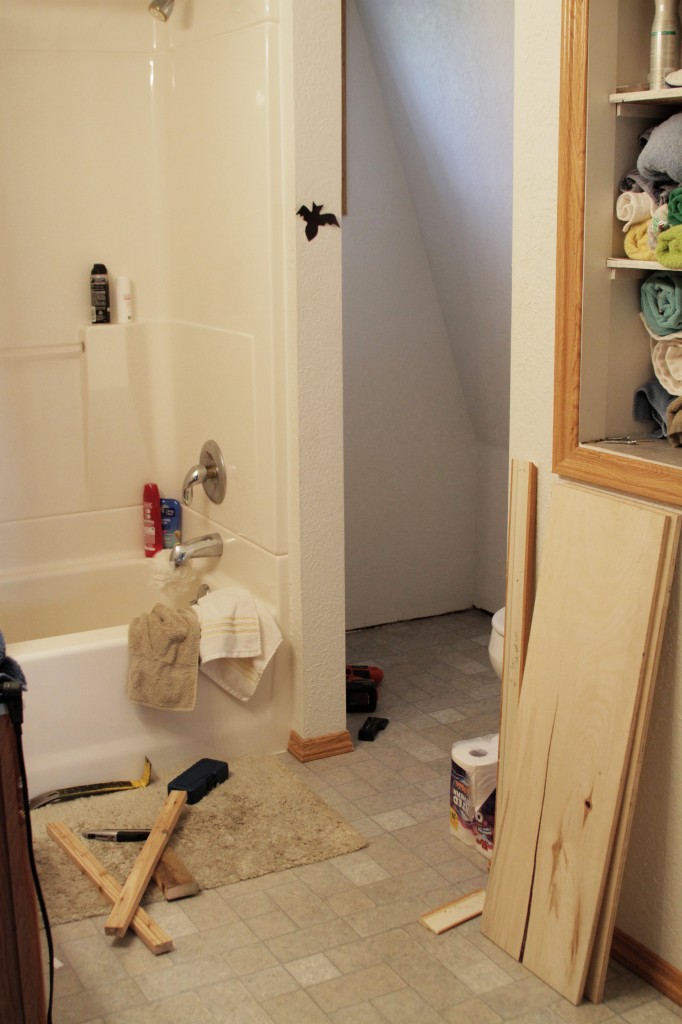
I strive to be a project finisher. And boy does it feel good when things come together.
Amy
by Amy | Oct 11, 2012 | Blog, The Art of Projects, the house

You all saw the B&A of my dining room/living room project, right? Well, that took several good days of painting. Over the years, I’ve become pretty savvy with a brush and roller. Here are a couple tricks I use every time…and a big awesome tip I just learned.
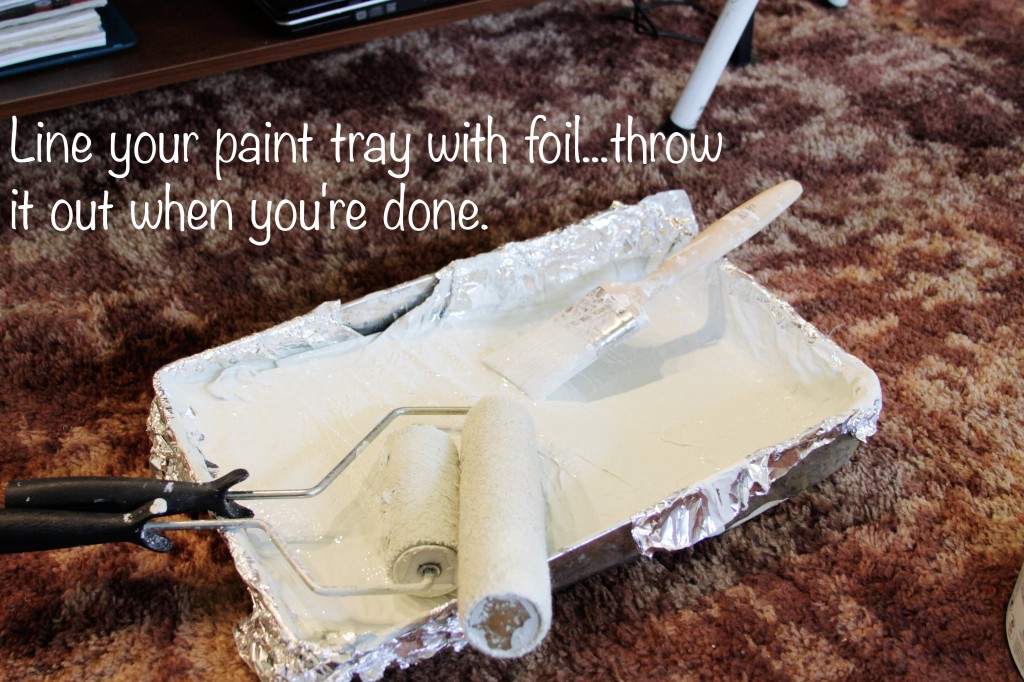
Trick #1
Yes, I know paint tray liners are only a couple bucks. But I always seem to be out right before I start a project. And the last thing I want to do when I’m rearing to slap the paint on the walls is make ANOTHER run to the hardware store. So I don’t. Instead, line your tray with foil you already have in your kitchen. It works great and crumples up really small…so it saves space in the trash can too.
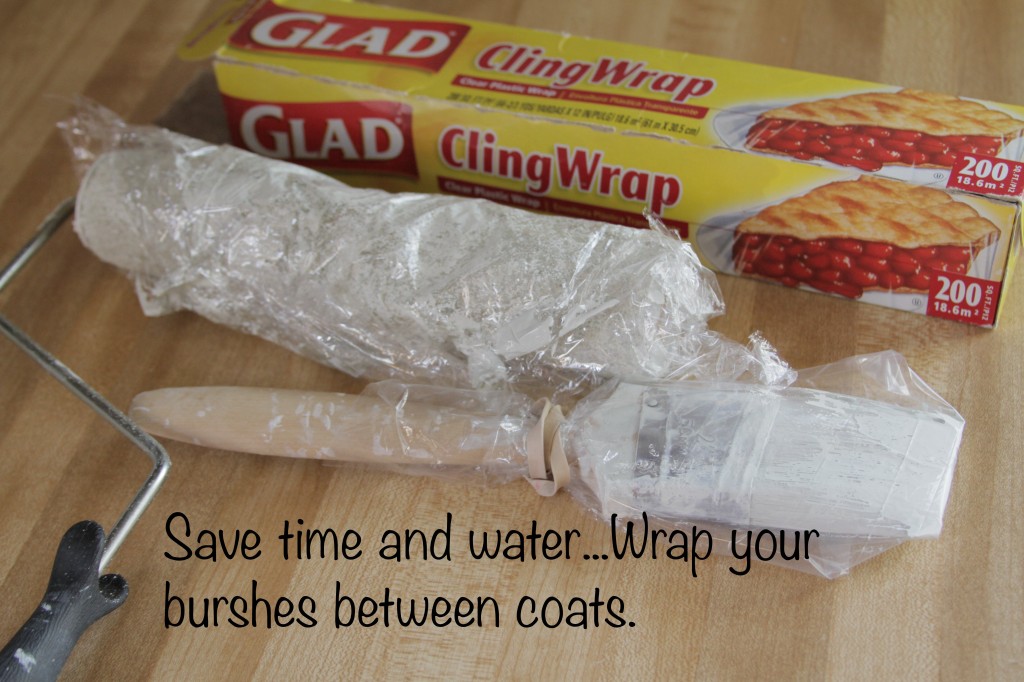
Trick #2
I used to wash my brush out every time I stepped away. Dried paint in a brush or roller is a sure fire way to wreck it. But the problem I ran into was…when I was ready to paint again the brush would still be wet. Now, instead of washing them between coats or if a job gets interrupted {usually for a fro-yo run…} I wrap my roller in cling wrap and my brush in a sandwich baggie. It works great and saves you a washing. This will keep your brush moist even over night.
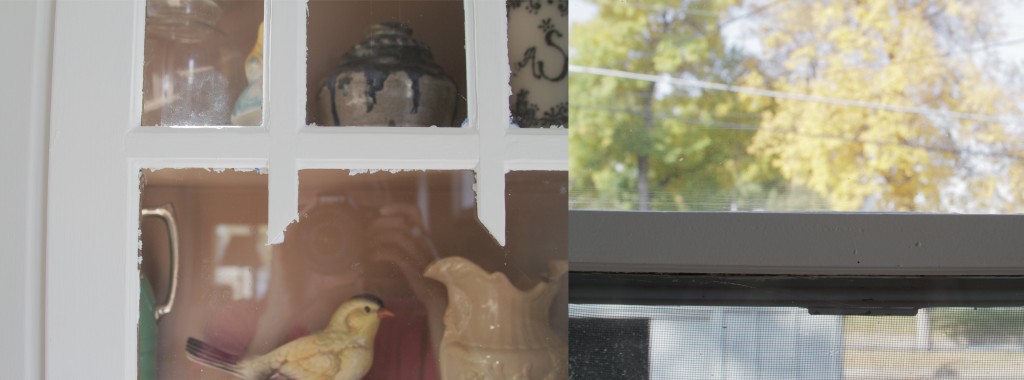
Who can spot the difference here?
Well, besides being two totally different images, it’s pretty obvious that the difference is that there is paint slopped all over the glass on the left. I made this mistake while painting my built in hutches. Don’t be like me. Do this instead:
Trick #3
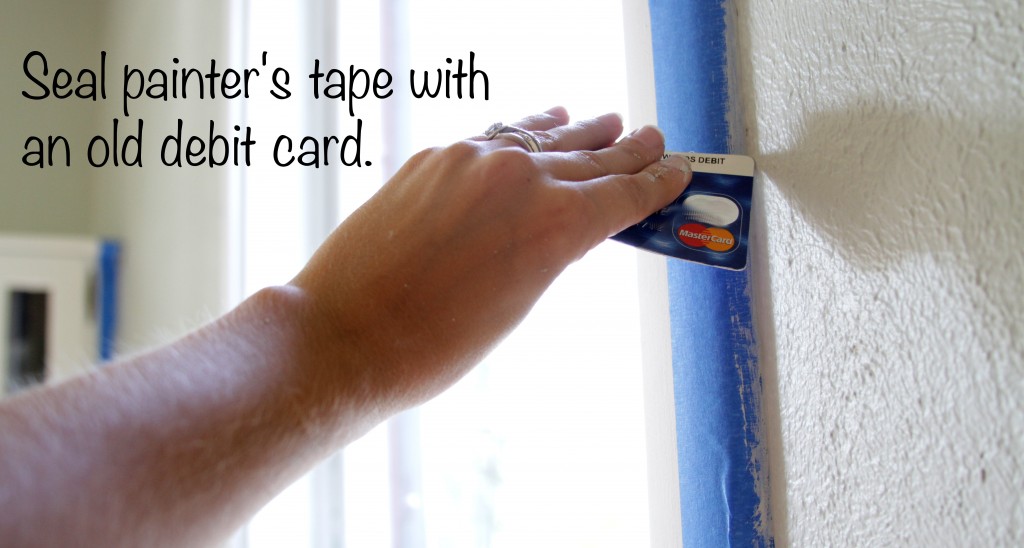
After applying your tape, run an old debit card down the edge to seal the bond. I taped off the glass panes of my hutches…but as you can see from the photo above, taping alone can still leave a messy edge. On my windows I sealed the tape {photo above right}. I couldn’t even believe how crisp the line was. And this tip isn’t just for glass…it works with any surface.
Overall this is the trick that saved me the most time. Going back and gently scraping the messy edge of the hutches took an hour of meticulous work. Boo for that!
I hope this tricks come in handy for you. What tricks to you use when you paint? I’d love to hear them!
This thrifty list is partying at Home Stories, My Uncommon Slice of Suburbia, Savvy Southern Style, and these other great parties.
Amy
by Amy | Oct 2, 2012 | Blog, The Art of Projects, the house
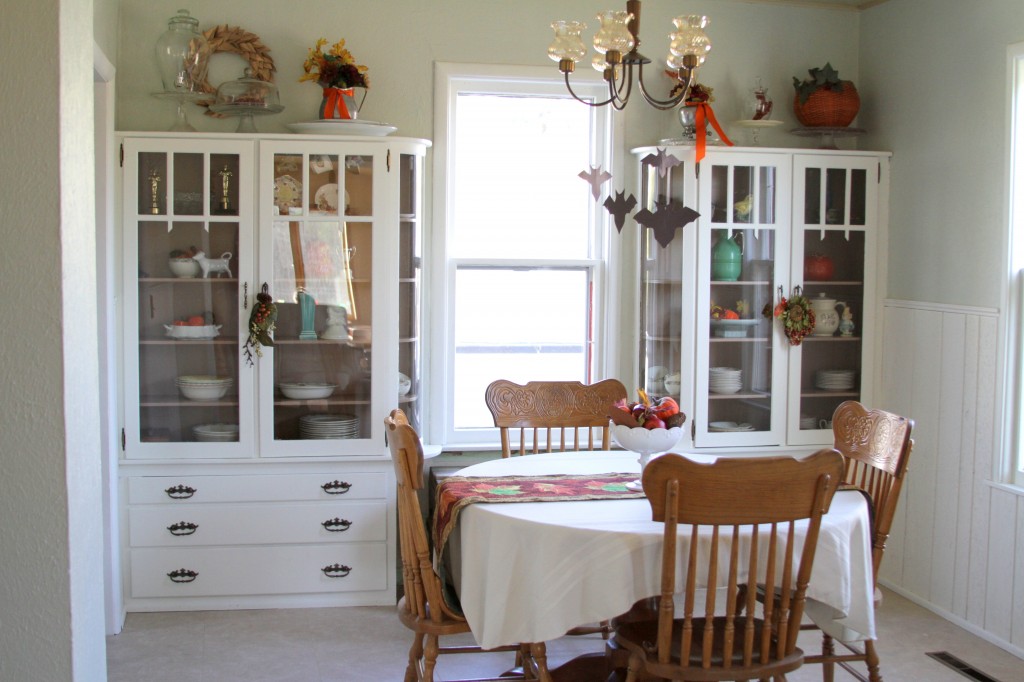
I’m thrilled to show off the {somewhat} finished product of our dining room/living room makeover. I love the way it turned out. Last night while Derek watched the Bears-Cowboys game I even got out the Halloween decor. That always makes me happy.
We used Dutch Boy washable paint from Menard’s for the cabinets and trim. It’s in White Lullaby. And it was okay…but no where near as awesome as the Emerald Brand paint we bought from Sherwin Williams. It was a bit more pricy, but when purchased on sale for a whopping 40% off…it only cost as much as the Dutch Boy. And let me tell you, it was worth it. I’ve never painted with really nice paint.
There is a difference.
That’s the biggest thing I learned during this project. Quality counts. The Emerald paint was thick and bold, it only took one coat to get the job done. The living room and dining room walls are in Sherwin William’s Filmy Green. The stairway is painted Gateway Grey.
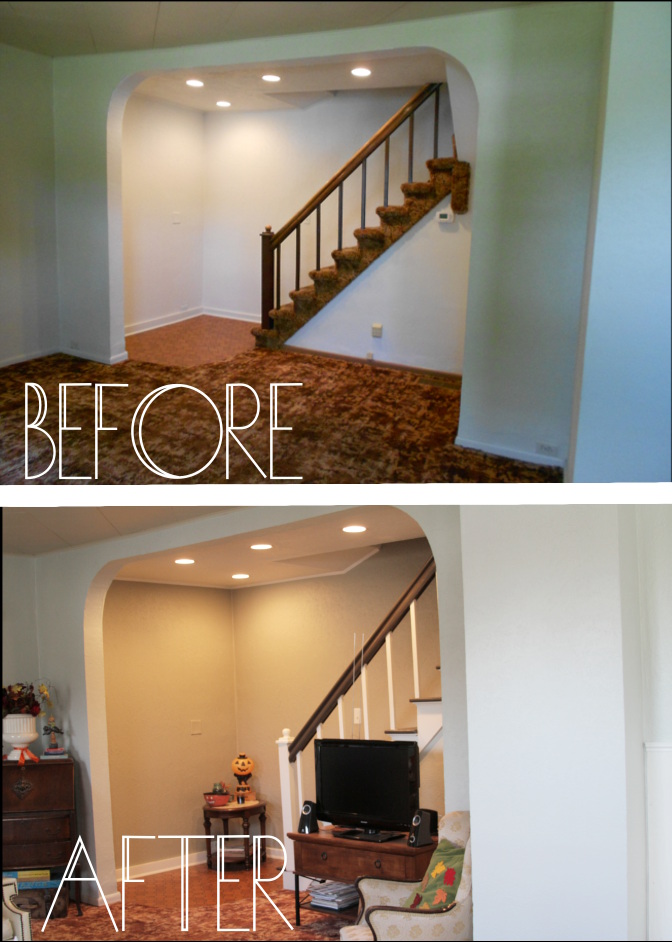
Now, let’s check out those B&A’s.
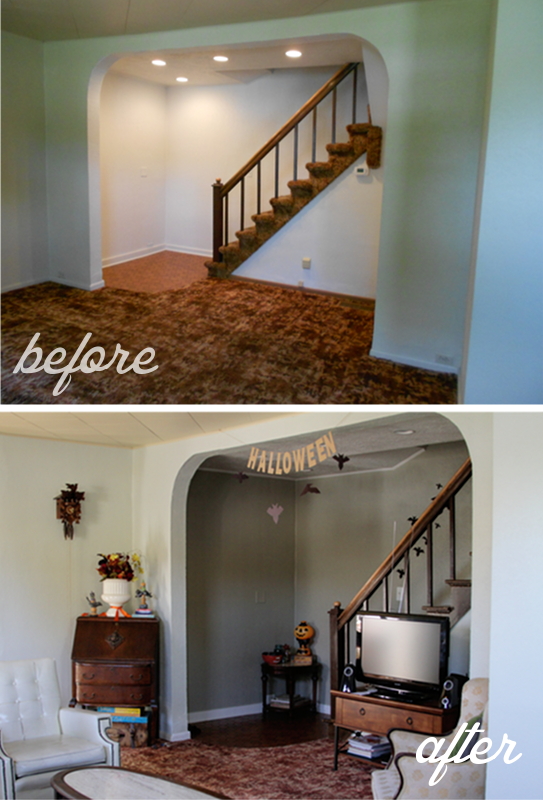
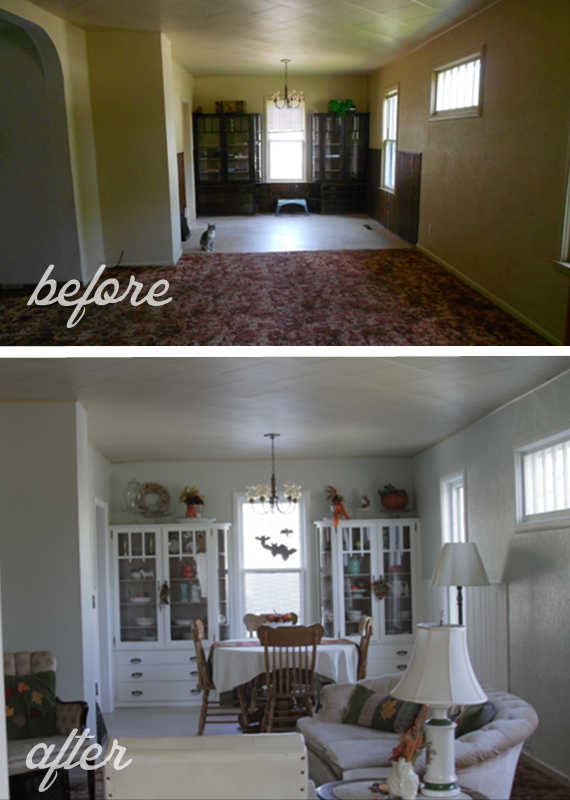
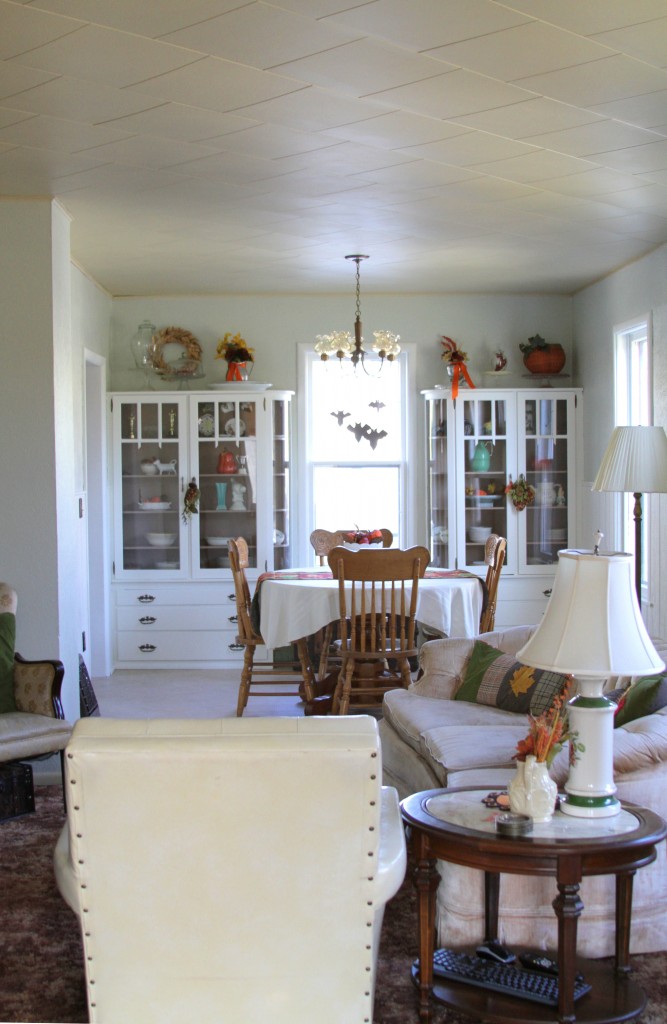
Now the brown carpet looks even more out of place. Well…we’ll get to it eventually. Isn’t it nice when a project turns out well? There is no better feeling.
Amy


