by Amy | Oct 2, 2015 | Blog, The Art of Projects, the house
Sometimes projects are just too big to handle alone. No matter how much I wish I could learn every skill in the whole world, it’s just not feasible. So…when that happens you call in back up. Last time I wrote about the basement I talked briefly about our process of finding contractors. Tonight I’m going to tell you about our plumbers–and one of the most awkward things I’ve done over the last calendar year.
But before I get to that…let me just say that making a bathroom from scratch is a lot of work. And it’s complicated. We tried to tell ourselves that part of it was ready…since there was a floor drain. Okay, maybe that was just my wishful thinking. The reality was that drain in the floor or not, making a bathroom where there was formerly only a cement floor and cement walls was a real challenge.
So the weirdness begins. Derek and I are not architects. {Even though in my restless college years I did a semester as an interior design major…so I’m somewhat savvy with drawing up floor plans. Somewhat.} However, we drew up our own plans, on graph paper, to a very rough scale. We went to the hardware store and looked at tubs and toilets and sinks. The whole shebang. Then came home and figured how it would fit in the space we had. We made a plan.
Then the plumbers showed up.
They’d already come for the estimate and a second visit–when Derek was actually able to be home–to go over details. So on the day they arrived ready to jack hammer up the floor I thought everything was already in order.
But they had questions. And suddenly there was an issue with putting a tub in. And there was a question about how far the pipes could reach. And it would all end up costing more money than planned. And did I really want that? And how should they proceed? And how big is the exact unit that was going in?
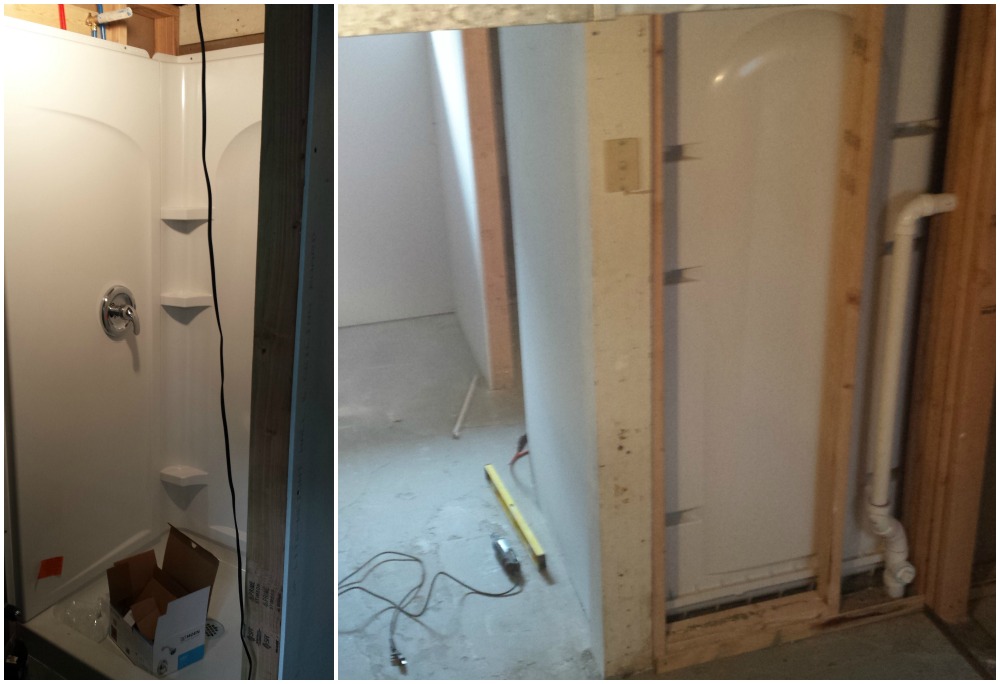
I dug out the highly accurate floor plan we had made up–but the questions still remained and Derek was at work. So, I made some choices. I changed the plan. This was one of the most stressful mornings of my recent life. I axed the bathtub and shower combo, instead opting for a shower stall…which seems very small in theory.
While they tore up the floor, I stewed upstairs hoping that Derek wouldn’t hate the choices I’d made, and that a three foot shower would be big enough to hold a grown-up-sized showerer.
When they left, there was a hole in the floor and our job was to fix it–which you can read about in the last basement post.
In the end, it all ended up just fine. After the floor had been cured and we’d added studs for an additional wall–the downside of my choice for a shower stall…one more wall to frame–they plumbers came back and put in the shower. Derek is a genius, so he installed the toilet and sink for us. Things were really starting to look finished–then we turned on the shower.
As great as the plumbers had been, they made one little mistake. The shower faucet didn’t work properly. The “on” was “off”, the middle of the temperature gauge made the water hot…while cold was warm and hot was cool. Weird. A simple phone call and they offered to come back and fix it. Which leads me to a very. embarrassing. morning.
When I got on the phone with the man in charge of our project, he told me the crew would be by mid-morning–probably around 10:30 am. Cool. That’s great.
I wake up on the morning of the appointment. It’s 8am. I get up, throw on some grubby gym clothes. Stretchy pants and an athletic, long sleeved t-shirt. It’s purple {you know how I am with purple clothes.} It’s the kind with a weird athletic hood. You know, with a perfect circle for your head to go through–very effective for outdoor running, very stupid looking in real life. To paint a perfect picture, I need to tell you that I typically go to bed with wet hair. I sleep on it and it gets crazy and wavy overnight. In the morning I tame it down…but first thing in the morning, it’s a curly, beach-head mess.
So I throw on the t-shirt. As I pull it on, the hood catches up over my head. Totally fine, because I’m cold anyway, and no one is in the house to mock my appearance.
Since I’ve got some time, I clean the bathroom upstairs and get laundry together. Meanwhile, Panda {the world’s most precious baby angel cat} is meowing, meowing, meowing. Because, although she is adorable and my BFF, she’s also addicted to food–and in the morning she demands her breakfast.

I finish rinsing the sink, flush the freshly scrubbed toilet and grab two laundry baskets stacked on top of each other filled with clothes. Hood still up, hair still a mess, I head downstairs. It’s 8:30am.
As I descend the stairs I loudly declare in a sing-song voice, “It’s breakfast time for babies!” I’m obviously talking to Panda. She’s a baby angel, after all. And that’s just kind of how I talk to my cat–whether I’m alone in the house or not. I can’t help it. I’m weird. And in this moment, I looked really weird too. Like a purple scuba diver without a mask. Then it happens. From the kitchen I hear,
“Hello?”
It’s a man’s deep voice and it’s not Derek. For a split second I freak out. Then I see who it is. The plumbers. One standing on my kitchen mat, the other just outside on the deck.
“Mrs. Smith?”
Oh. My gosh.
Quick. I pull the hood off my head, run a hand through that crazy mane and sit the basket of dirty sports bras on the table.
“Hey, yeah. Morning…I was just, uh…”
“We knocked and knocked but you didn’t answer. Sorry for trying the door. It was unlocked.”
Ahh, yes, knocking while the water was running and the toilet was flushing. “I was just talking to my cat.”
“What?”
“What? I mean…I need to feed my cat. But that can wait. She’s too fat anyway.”
Blank stare.
“Nate said you guys wouldn’t be by until mid-morning.”
“Nope this is our first stop.”
“Okay…well, let’s go downstairs…”
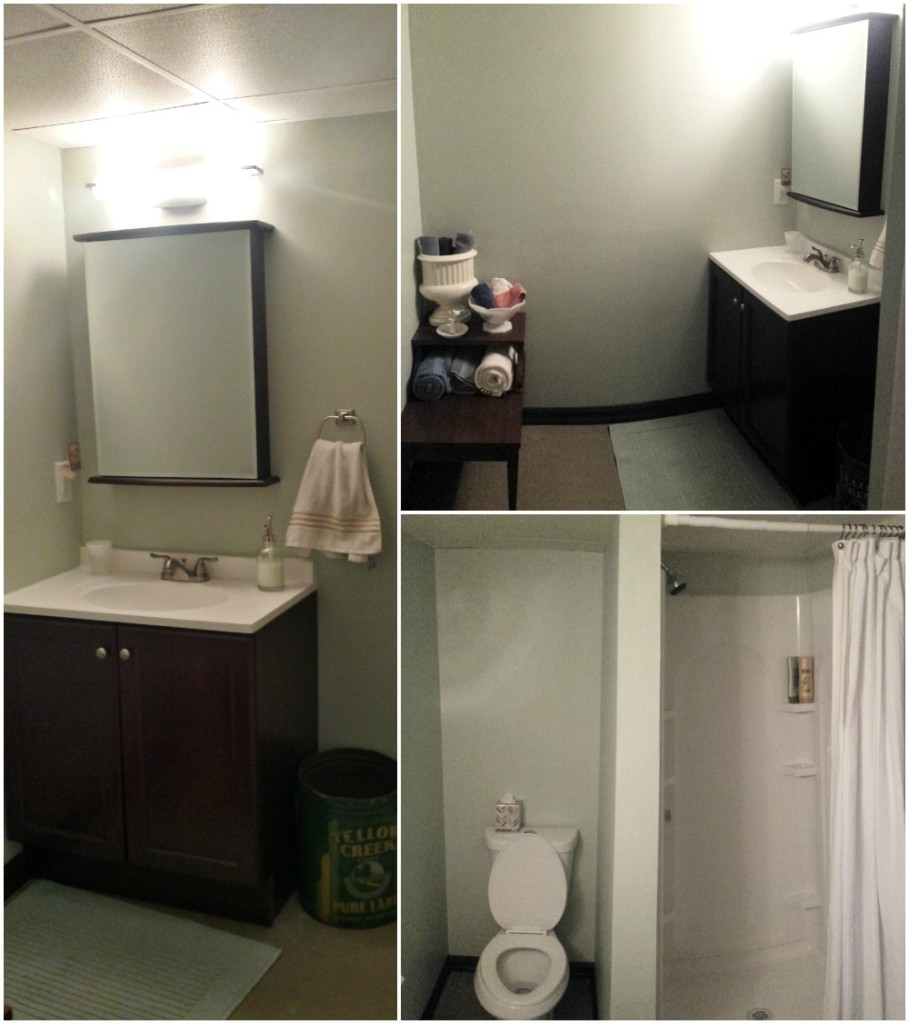
Happy Friday. Try not to be too awkward this weekend. The bathroom is hard to get in a picture, but I did my best. Better, non-phone photos are coming next week.
Amy
by Amy | Jul 14, 2015 | Blog, The Art of Projects, the house
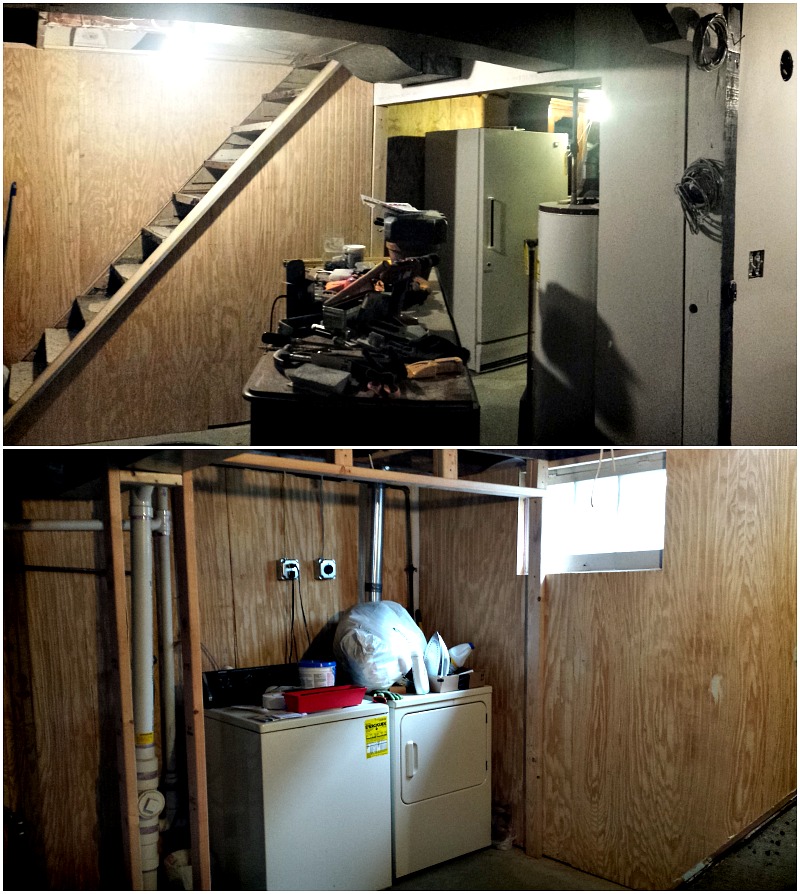
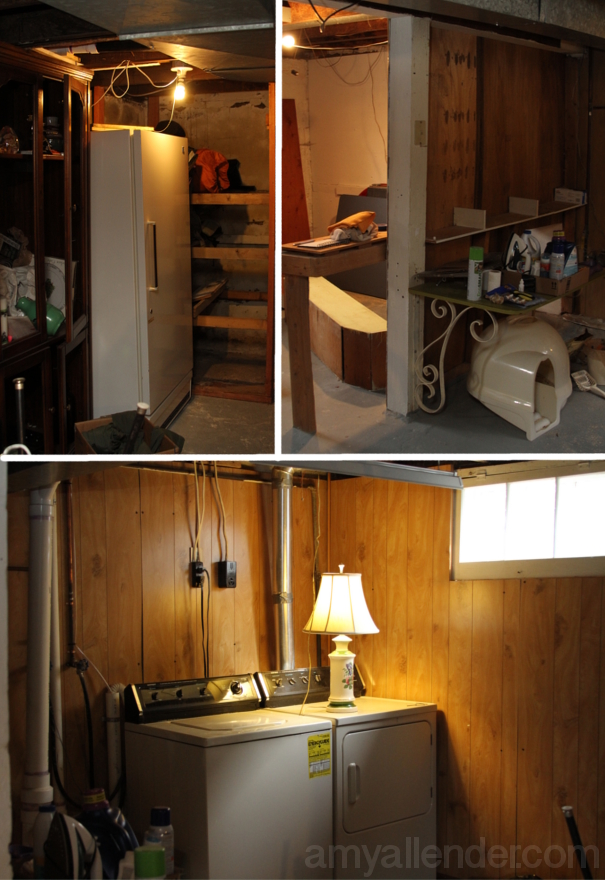
I’m kind of a hypocrite. I have a very strong dislike of wood paneling. But if I call it bead board and plan to paint it white…suddenly it’s chic to me. I can’t explain my thought process. At any rate, the stairs and laundry center are lined with bead board. And I like it.
For me, one of the hardest parts of a project is outsourcing the stuff we can’t do ourselves. It’s not a control thing. I like skills…but really, I don’t have a desire to be a master plumber or a wiring guru. It’s definitely not that I think I could do better. Some things I would gladly leave to the pros. Maybe it’s the money. Maybe it’s that I don’t know enough about construction to know what is fair or what is necessary–so I get flustered. It’s just hard.
But, there comes a time on every major project that a contractor is needed. So, after the studs were up and the walls were framed in…it was time for me to make some calls. I guess that’s the other hard part about contracting jobs out: the calls. I don’t know who to call. Half the time I don’t even know where to start. And after a terrible experience with an electrician during the bedroom remodel…I’ve been a little wary that I’d get another dud.
When I look for a contractor here’s my basic process. Step 1. Ask for referrals. From real people. That I really {at least kind of} know in real life. The Internet is good for reviews, but I trust a face to face review over five stars on Google. I ask around at church, the gym, the coffee shop…basically anywhere I can get a small-talk conversation going about my latest project.
Step 2. Internet. I like to cross check word of mouth referrals with the what people are saying online. If asking around didn’t yield any results I go to Angie’s List. It’s a bonus if they are registered with the BBB.
Step 3. Call at least three. Get them to come out and give you a quote. See what they think would be best for your project. I give preference to contractors that don’t look at me like I’m an idiot when I explain that we’d like to do part of the work ourselves…and who don’t seem judgy that a girl is lining up the project.
We got three quotes on electric and three quotes on plumbing. And as luck would have it, they were able to come during the same week. That was really nice because once the studs were up there really wasn’t much we could do ourselves until the fancy stuff was taken care of.
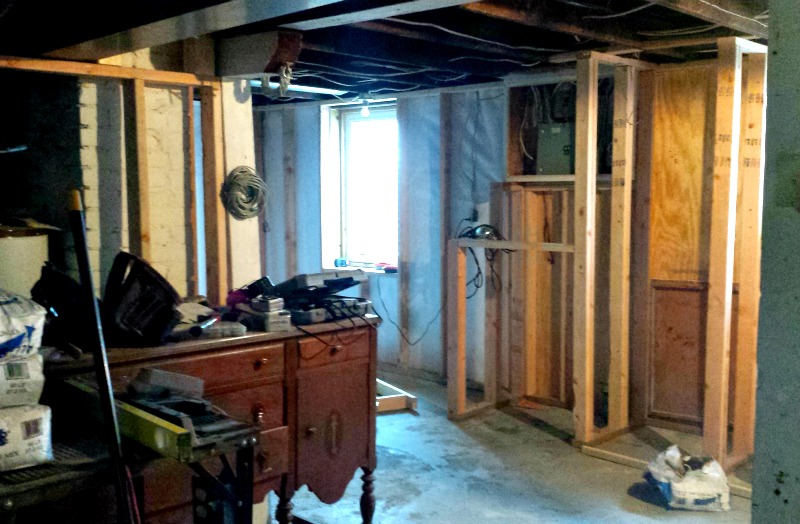
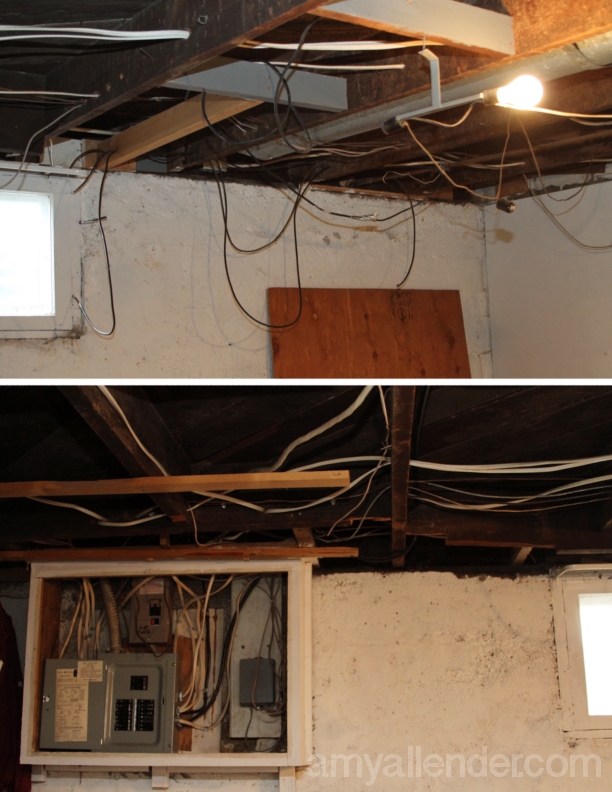
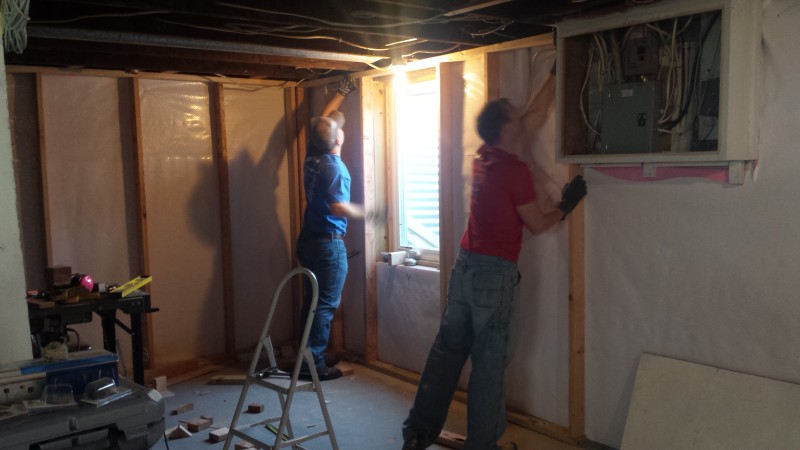
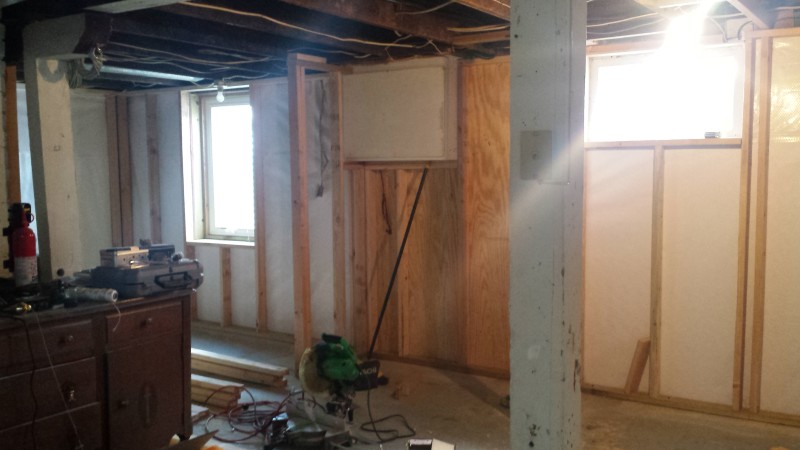
During their estimate visits, the electricians brought a slight code violation to my attention. Turns out you can’t put a circuit panel in the back of a closet…awkward. Really, it makes perfect sense…but we hadn’t thought about it. As to prevent a fire hazard…we changed the layout of our closet.
You can see the closet in the photo below. The panel is that open boxy thing right under the joists to the right of the window. Originally the closet would have gone all the way to the ceiling and been flush with the side of the circuit housing. To leave it exposed we created a shelf/cubby closet next to the full height closet. Make sense? I don’t look at it as losing closet width, but gaining a cubby and a shelf. {Lemonade, am I right?}
The electricians came and did their preliminary work and told us to call them back to the job once we had the drywall and ceiling in place.
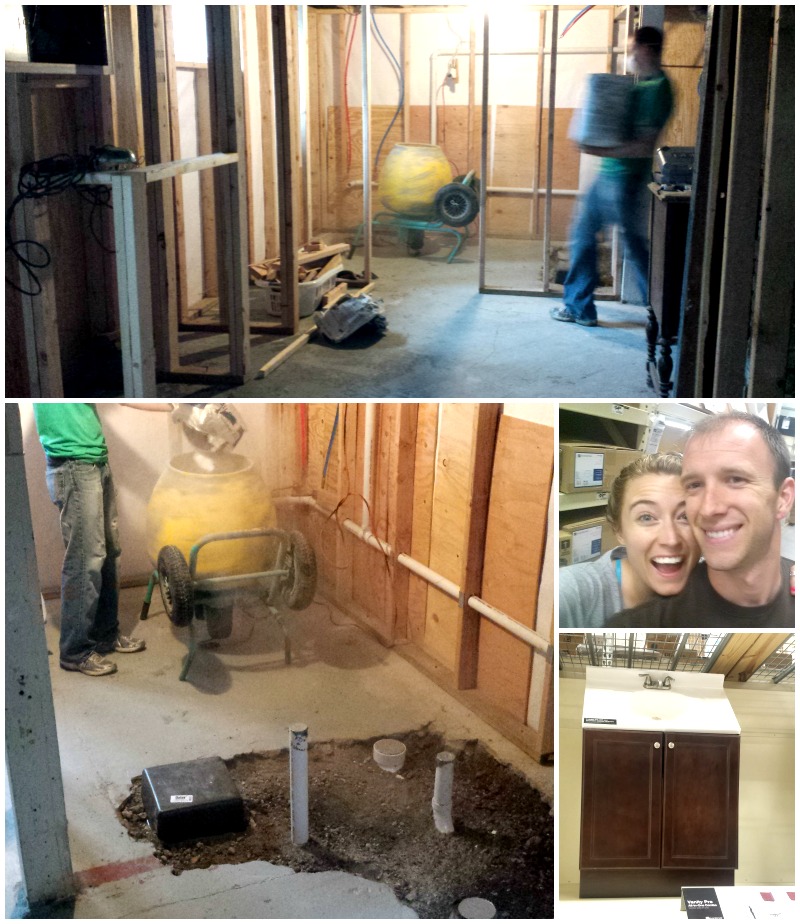
The plumbers came and did something similar. They roughed in the basic set up then came back to finish. This meant we got to go shopping for the fixtures we wanted. After weeks of 2×4’s and toe nailing getting to even think about shower stalls and sinks made it feel like we were getting places.
The plumbers were kind enough to let us fix the concrete that they had to jack hammer up in their process. It took an afternoon for Derek to get it done…but in the end we saved about $300 by doing it ourselves! {And it was pretty easy with the help of that darling baby cement mixer we rented for $20! Notice the girl with the bad back…who was unable to lift or help in the concrete process at all was calling it “easy”…}
Next time I write about the basement I’ll show off the bathroom {it’s nearly done now!} and I’ll tell you a very embarrassing story. But right now, I’m off to sort some more senior photos and cut some door casing.
Amy
by Amy | Jul 10, 2015 | Blog, The Art of Projects, the house
Things fell off the blogging cliff for a while here. It’s amazing the things you’ll cut out of your life when you are under a mountain of stress and deadlines. Showering and leg-shaving are always among the first time suckers I cut out when I need a little extra work time. {Don’t judge me.} But at a certain point other things get cut too…and unfortunately over the last few months, blogging about our basement project has been one of those things.
Today that changes.
Partly because some of you have asked. Partly because some of my family probably will never see this amazing redo in person {due to an impending move}. Partly because I’m crazy impressed with the skills Derek and I have shown. It’s been like living inside HGTV. {That’s still a thing, right? It’s been years since we’ve had cable.} Maybe I should say it’s been like living inside This Old House Magazine. {My current fave reading material.}
As to avoid sensory overload, let’s all refresh our memories on where we started. When we moved in, we loved our house. There isn’t an abundance of square footage, but that’s okay–it’s just two people and a cat–so we don’t need too much space. But from the get-go we knew we planned to finish the basement to add a little more living space and a second bathroom.
We got settled and for the first 18 months of life in Practically Canada used the basement for storage and laundry only. A lot of storage. Storage of all the things I just couldn’t part with–even though they wouldn’t fit into our 1200 square foot abode…because “Someday we’ll have more space and I know we’ll be happy we saved __________.” Storage of my vast collection of seasonal decor and craft supplies. Vast. It looked like this.
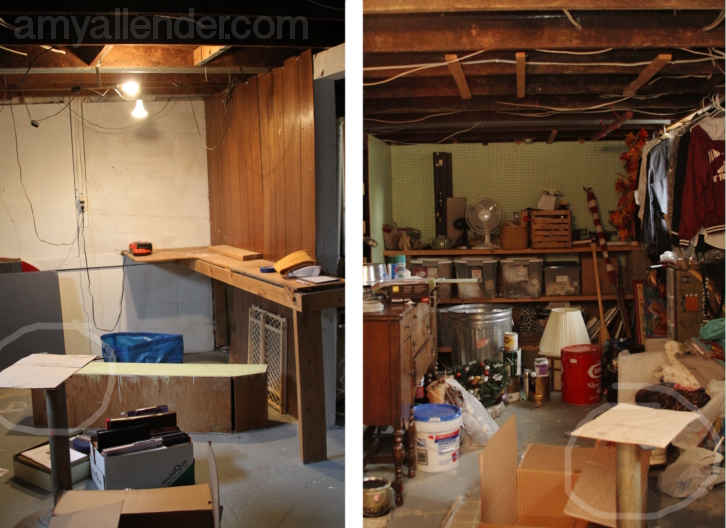
It’s embarrassing to show this to you. But we did the best with what we had–and I’m pleased to admit that I’ve parted with/used up quite a bit of what you see in the photo above.
There were a few weird walls up, some wood paneling, crazy wiring and two “work benches.”
We didn’t get lots of water in our basement…but on occasion {after heavy rains or when all the snow finally melts in spring} we did get a little flooding around the edges. So. We cleared everything out and took down all the walls to expose the foundation. Then we hired Innovative Basements to do some waterproofing for us. We have been so happy with the results–pricy but worth it. Totally worth it.
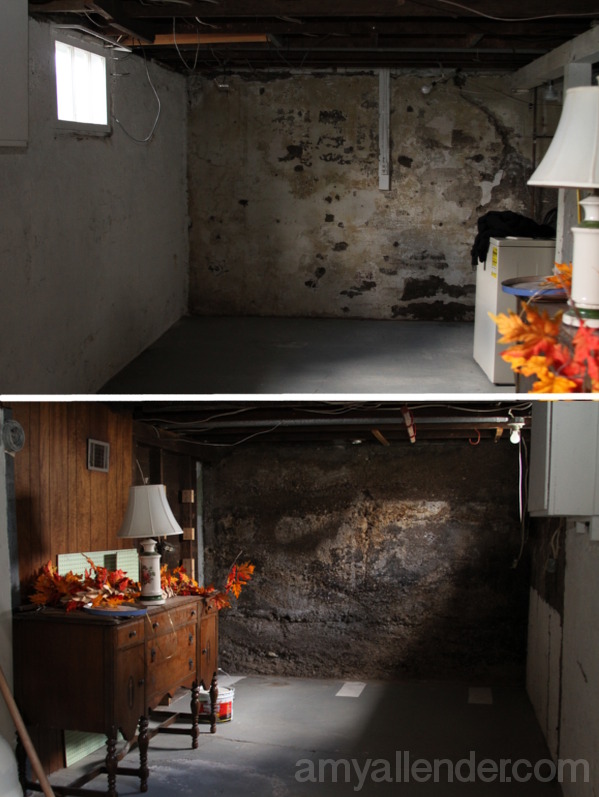
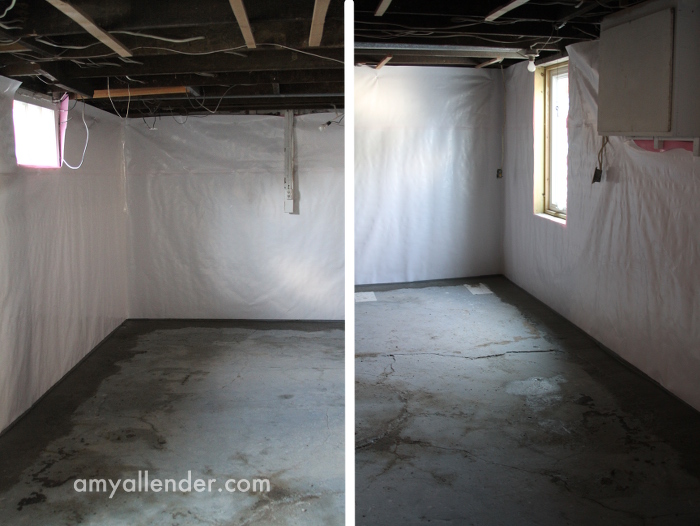
Innovative basements puts a drain around the edge of the foundation {jack hammered and placed into the floor}. Then they cover the walls with vinyl-plasticy sheeting. If water comes in, it drips down the plastic, into the drain and is pumped out.
This all happened last summer. {Yes, a full year ago.} Really we wanted to be working on this sooner. But there was that whole back surgery thing. Followed by the need for a new roof. Having a finished basement will be nice–but we refuse to go broke over home improvement. So we put this project on hold until we saved up a little more money and gave me some time to heal.
Flash forward. While I was still struggling with a back that just refused to feel better–we started in on the basement. I helped plan. Derek did the heavy work. I pulled out nails and staples. Derek and manly friends started framing walls. Sometimes I held a stud in place. Sometimes I got really cranky because I wanted to help–but couldn’t.
Through medical and spiritual intervention, my back has {finally} started to improve over the last month and a half. {God is good!} So I’ve finally been able to help a little more…not with heavy lifting. But I can do a lot more than before and I’ll take it. I’m so excited to be feeling better that I can hardly keep myself away from the project. I’m currently writing this post from the coffee shop–where I’ve been working all day–because if I were home, I’d be itching to do something in the basement.
I’ve been learning so much through the process of working on this space. I’m collecting skills like 90’s kids collected Beany Babies. Love it.
So there. That’s part one. And I know it’s not the pretty reveal you might have been hoping for. But I’ll post more. Promise. I’m also getting a wide angle lens for my camera so I can get nicer photos of the space. So far they’ve all been snapped with my phone {like that isn’t obvious…} Stay tuned and check back. I’ll relive the stories and awkward moments for your enjoyment.
Have a beautiful Thursday.
Amy
by Amy | Mar 18, 2015 | Blog, The Art of Projects, the house
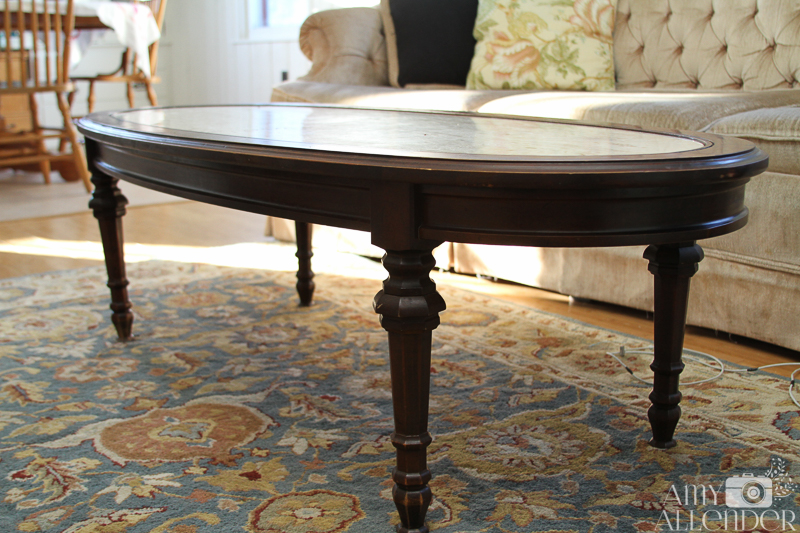
It’s been a few weeks since I told you I planned on refinishing antique tables I inherited from my grandparents. If you missed the “before” post, you can read it here. The original plan was to simply strip off the old finish {the shiny part}, that had been damaged by years of second-hand smoke exposure, multiple moves and age.
I started off by using the deglosser that came with the Rustoleum kit I used on the cabinets–when I redid the kitchen. I thought this might be enough to take off the old finish and allow me to put a new coat of glossy polyurethane on top.
The deglosser did it’s job. I was left with a mostly matte finish on the tables. This would have been perfect if I had planned to paint the tables. I have no doubt that paint would have adhered beautifully to the new, dull surface. However…there was still residual finish on the tables and there was still a good amount of damage left. {Doesn’t that sound weird? A good amount of damage?} Too much damage to proceed with a new top coat. I’d come this far…and I wanted to do it right…so {a little begrudgingly} I decided that the tables needed to be completely stripped before I could confidently add a new finish.
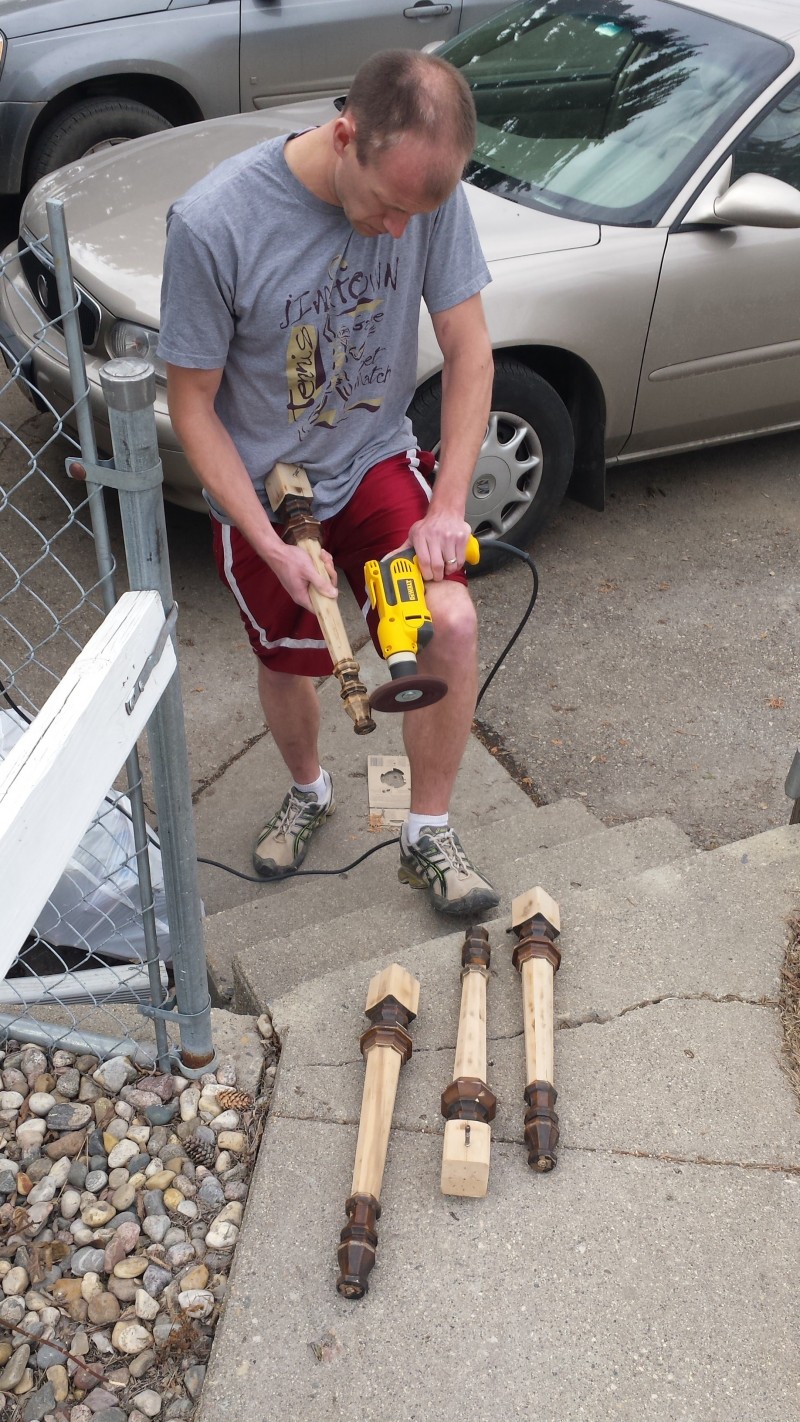
Completely stripping the old finish and stain required a few new tools {hooray!} I’m not the owner of this brand new orbital sander and a Dremel. Do any of you have a Dremel? Do you like it? It wasn’t nearly as handy as I had hoped. It’s like a power tool for Polly Pocket! So tiny!! But it did help a lot on some of the tricky curves. My biggest complaint is that I’ve been going through accessories like crazy. The pieces that work only last a short time. Okay, I’ll go into the exact pieces I used on another post. Long story short…I own a Dremel.

I used the orbital sander on all the flat surfaces and took it down to the bare wood. After losing my mind using just the Dremel on the table legs {and going through loads of tiny accessory sanders}, Derek went out and bought a paint stripper that attaches to the drill. It works wonders! This 3M product, lasted a long time, didn’t chew up the wood and worked efficiently.
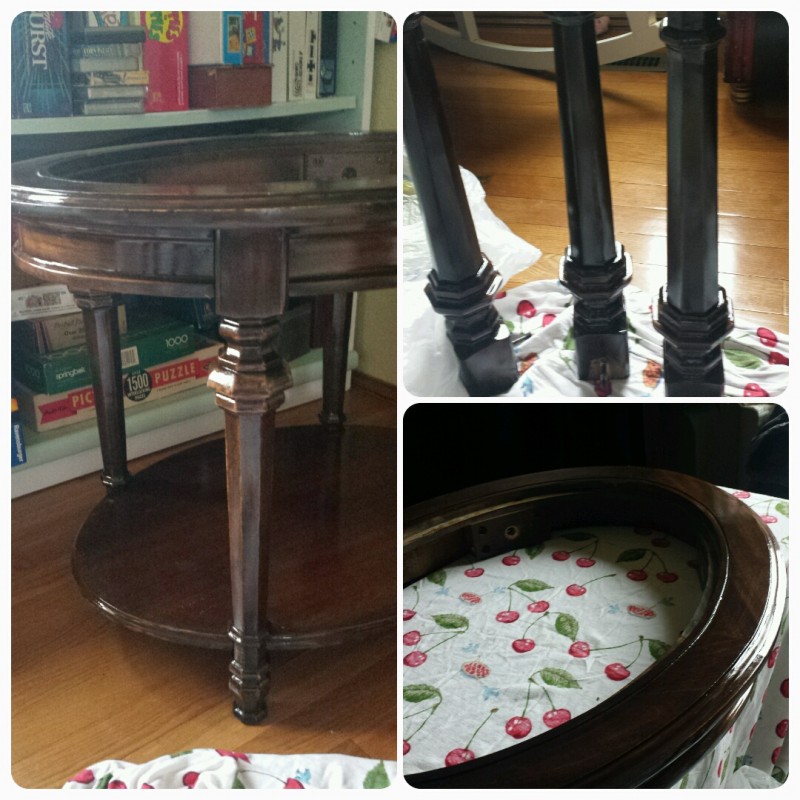
Once everything was naked it was time to stain. If you’ve been reading the blog for a while now, you might know that I’m a color-commitment-phobic. {That’s why I didn’t want to paint them.} I stood in the stain aisle for about 20 minutes…thinking. I walked out with the perfect color. Turns out it’s nearly identical to what I started with. That’s totally fine, I thought they were pretty–they just had a rotten finish on them. The real bummer is that to you, at home, you probably won’t be able to see much difference in the before and after. You’ll just have to take my word on it. The look much better.
I put three coats of oil based polyurethane–I chose Varathane–on each table. Since the weather turned chilly again and I’m still cat sitting {any my guests tend to be on the ornery side} we had to do some of the finishing in our tiny front room…the only space that can comfortably be blocked off from all furry footprints. I could just imagine a perfect glossy finish with cat hair and paw prints embedded in it. But, the crisis was avoided and the nearly-finished products are looking stellar–if not much different.
Once these are all done, we’ll be starting on the coffee table. It’s been a lot of work–lots more than I had imagined from the get-go–but I’ve learned a lot and this is by far the most professional furniture redo I’ve ever done. Color me pleased.
by Amy | Oct 23, 2014 | Blog, Crafts, The Art of Art, The Art of Design, The Art of Gathering, The Art of Projects, the house
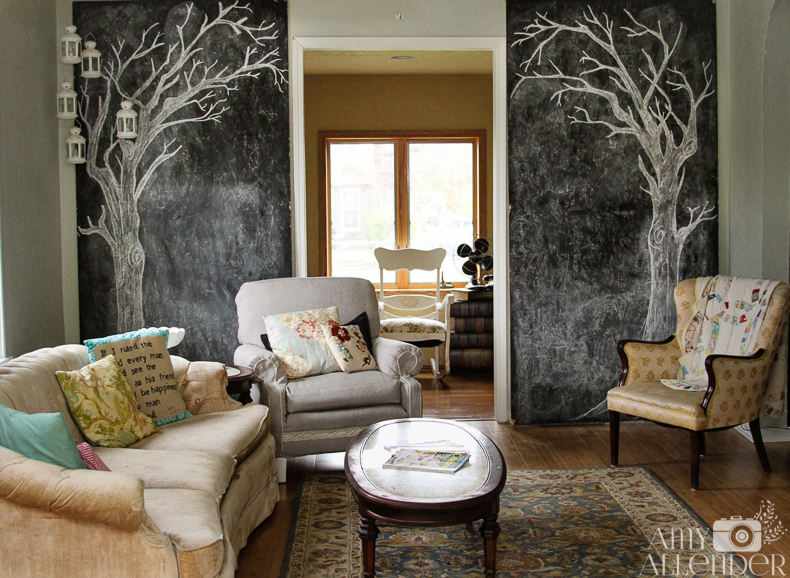
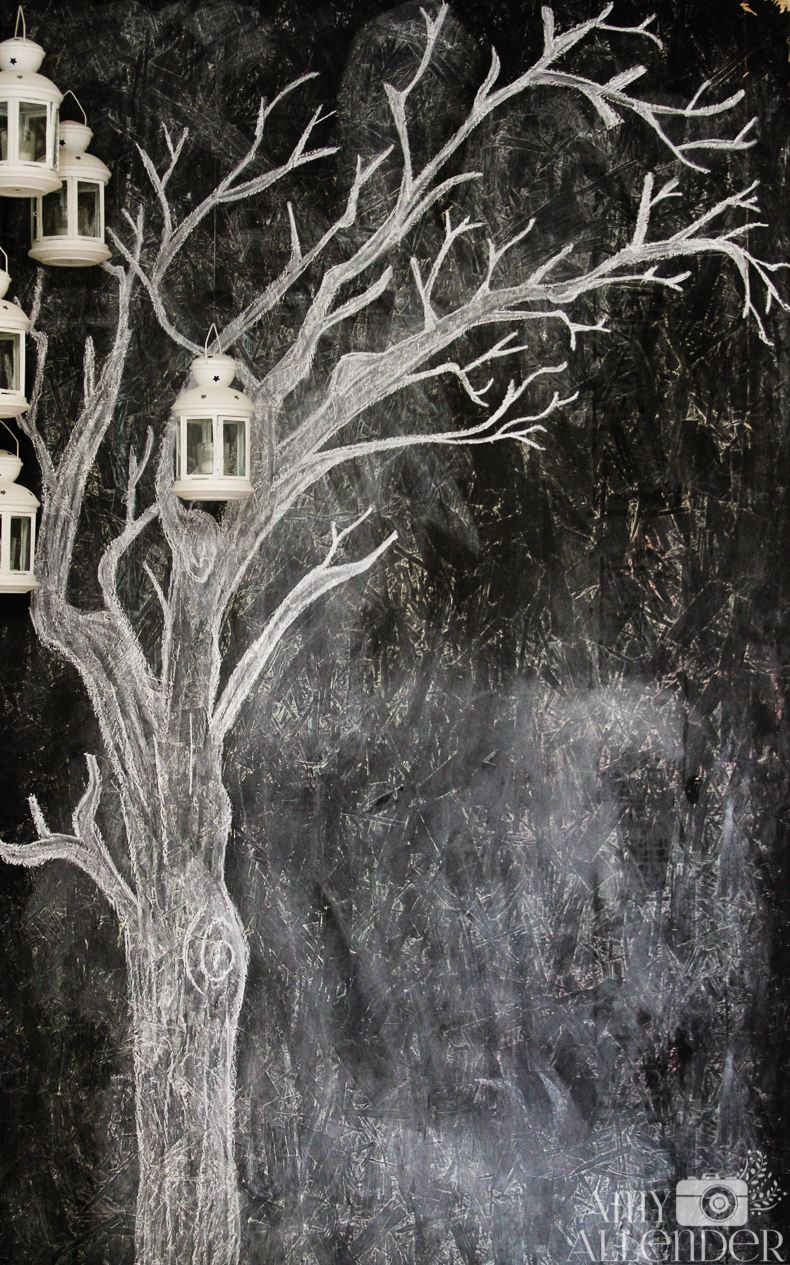
Check out my spooky fall trees! Usually the chalkboard panels only live inside when I’m expecting or shooting photos…but a few weeks ago a client asked if I ever decorate them and leave them up. You can imagine how silly I felt when I told her “No.”
So, one night, while Derek was working late I drew up these spooky trees. I love them. They really put me in a festive, fall mood. Since we’ve had to clear everything out of the basement as we start to make progress on that project all my decor is being stored in the attic and is inaccessible. For the first year I can ever remember, my house was stark naked of fall decor. No leaves, no wreaths, no paper bats, no Halloween candy dishes, no 60’s plastic pumpkin lamp. Nada. I’m still jonesing for that pumpkin lamp, but the chalk trees are doing a good job of holding of a real hate rage.

My question, for you is…if you were me, would you leave these up all the time? Should I leave them through Christmas? Let me know. Comment here {really hoping the glitch is gone from the comment system…} or tell me on Facebook tonight.
On a side note, a couple nights ago some friends of ours hosted a pumpkin carving party. I cannot even start to describe the genius of these people I’m lucky enough to call friends. Look at this spread! Not a triangle-eyed face among them.

Please take special note of Mufassa, the adorable hedge hogs!! Oh, and Grumpy Cat! I’m so stinking impressed with every single one. I carved the spider. Probably my best yet. Even better than last year’s. Derek made the eagle in back. He’s so American.
Obviously, when we got home we snapped one of our self-timed pics we are so notorious for. Again, the trees look awesome.

Oh, and for good measure I nabbed a close up of the Grumpy Cat pumpkin our friend Danica made. Hope she’s okay with me stealing it from her Facebook page…I included it here because it’s so amazing and you all deserved to see a close up.
Be sure to come back tomorrow for more fall fun when I show off my first Artists in the Schools piece that I did today with a group of first graders!
by Amy | Jul 30, 2014 | Blog, The Art of Projects, the house

It’s been a while since I’ve done a project. And I don’t mean a craft. I mean a real, sink your teeth in, work all day, major B&A–project.
Actually, according to medical professionals, not allowed to project like that for another 5 months. So, I’ll bide my time, but that doesn’t mean progress should halt. A few months back, before we got the results of the MRI, before the surgery…before…Derek and I cleaned everything we had stored in the basement out. All in preparation for it to be waterproofed, the first step toward a completely finished, livable basement. {*dreamy sigh*}
You can see that post here.
Well, since I can’t participate, I thought I’d at least show you where we stand now. You may remember me mentioning that when my parents came to visit in June, my dad thought the most fun way to spend his days in Minot would be installing an egress window for us. No complaints from me. I’ve been meaning to ask him to write a guest post about putting it in. So, Dad, if you are reading this–we should chat about that. But I digress…Here is the window going in.
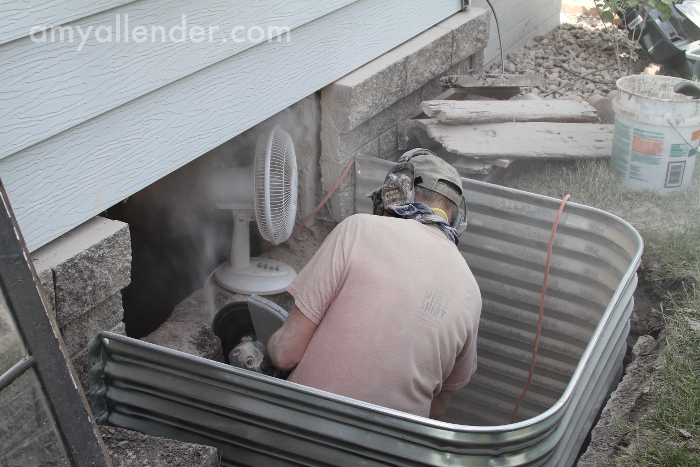
Let’s just say, I don’t trust just anyone to hack into the cement of my foundation. And I trust my dad. So…yeah…
Now I have a light filled basement. Better yet, it’s completely waterproofed. That’s what all the white stuff is on the wall. If you want more info on the system we went with, you can check out Innovative Basement Systems. It’s pricey, yes. But it is also guaranteed, pretty much for all time and eternity. So we felt like it was worth it.
The guys who cant to install the system were a pair of 20-somthing besties. They told me the met on the job and immediately clicked. It was a bromance if I’ve ever seen one. While they worked I could hear their music from the basement. It was like a kareoke party. There was some Frozen soundtrack, some singing along with Taylor Swift, and obviously a little jamming to Journey. Adorable.
I even have a sump pump!!
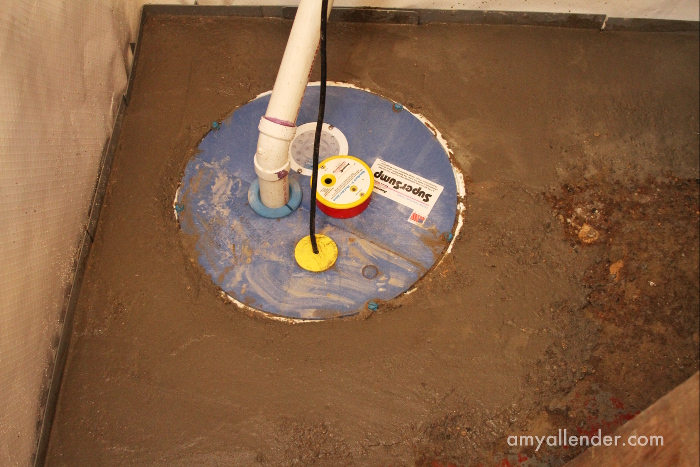
Now, the big question is, “What next?” Where do you go from here. Well, I’ll tell you.
First step, wait 48 hours for the cement to dry.
Next, save more money. The home improvement fund has been tapped out this summer with the new roof and the basement situation…
After that {conveniently in probably about 5 months or so–wink wink} we’ll start installing studs and dry wall. Eventually the vision is to have a bathroom, storage space and bedroom down there. So. Yeah. Someday.
Amy
by Amy | Jul 2, 2014 | Blog, The Art of Living, The Art of Projects, the house

I love having fresh flowers around the house. My gardens are finally alive with color, which has made this the perfect time to start picking lots of blooms.
Tonight I thought I’d let you in on a super easy was to keep your cut stems looking vibrant for as long as possible.
My grandmother told me this. Actually–she wrote it to me during her final months as she battled a cancer that took away her voice box. So when I was visiting she would communicate on little pads of paper. It wasn’t the quickest method. But it worked. She was an avid gardener. I don’t know how it came up, but she once asked if I knew how to keep cut flowers looking fresh. {Obviously not.}
She told me her favorite trick was to pour a little soda–the clear kinds, like ginger ale, Sprite or 7 Up–into the vase. No more than a quarter cup will do the trick. Flowers crave sugar that they soak up from their roots and other parts of the plant. Once cut, they lose that source of sugar. So keeping some in the water will help them thrive in your living room.
I asked about just mixing some sugar into the water {I’m not much of a soda drinker, usually.} She said that is a technique that some people use…but it’s better to use soda. Granulated sugar, even when mixed in, can clog the pores in the stems.
Give it a try. It’s an easy tip to know that will make you look like a gardener extraordinaire.
Amy
by Amy | May 16, 2014 | Blog, The Art of Projects, the house
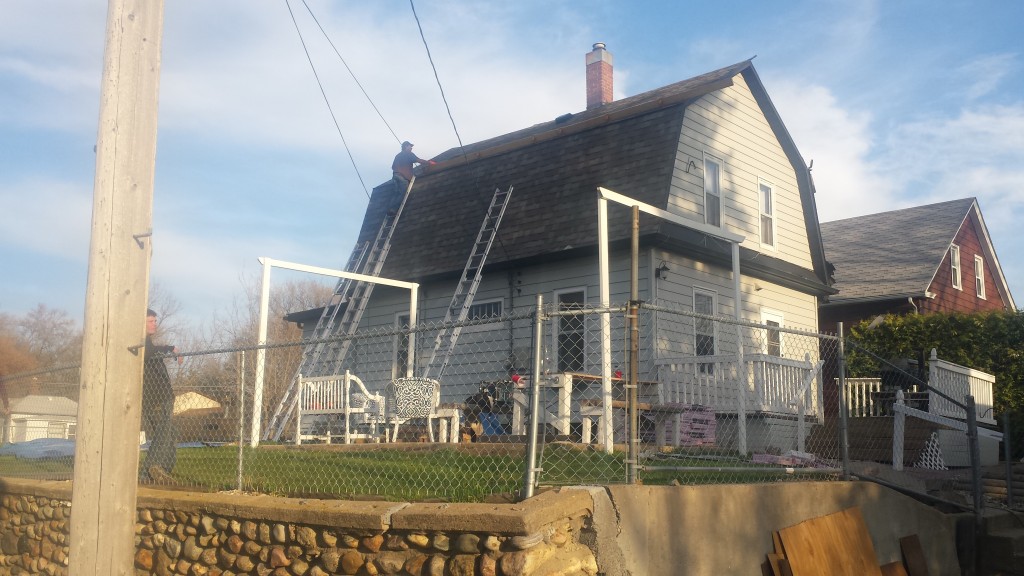
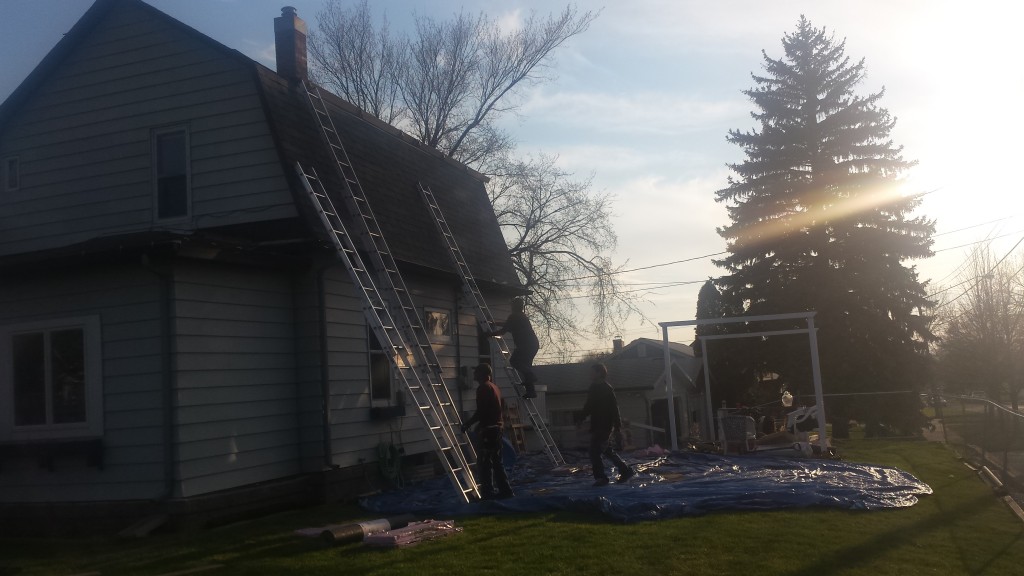
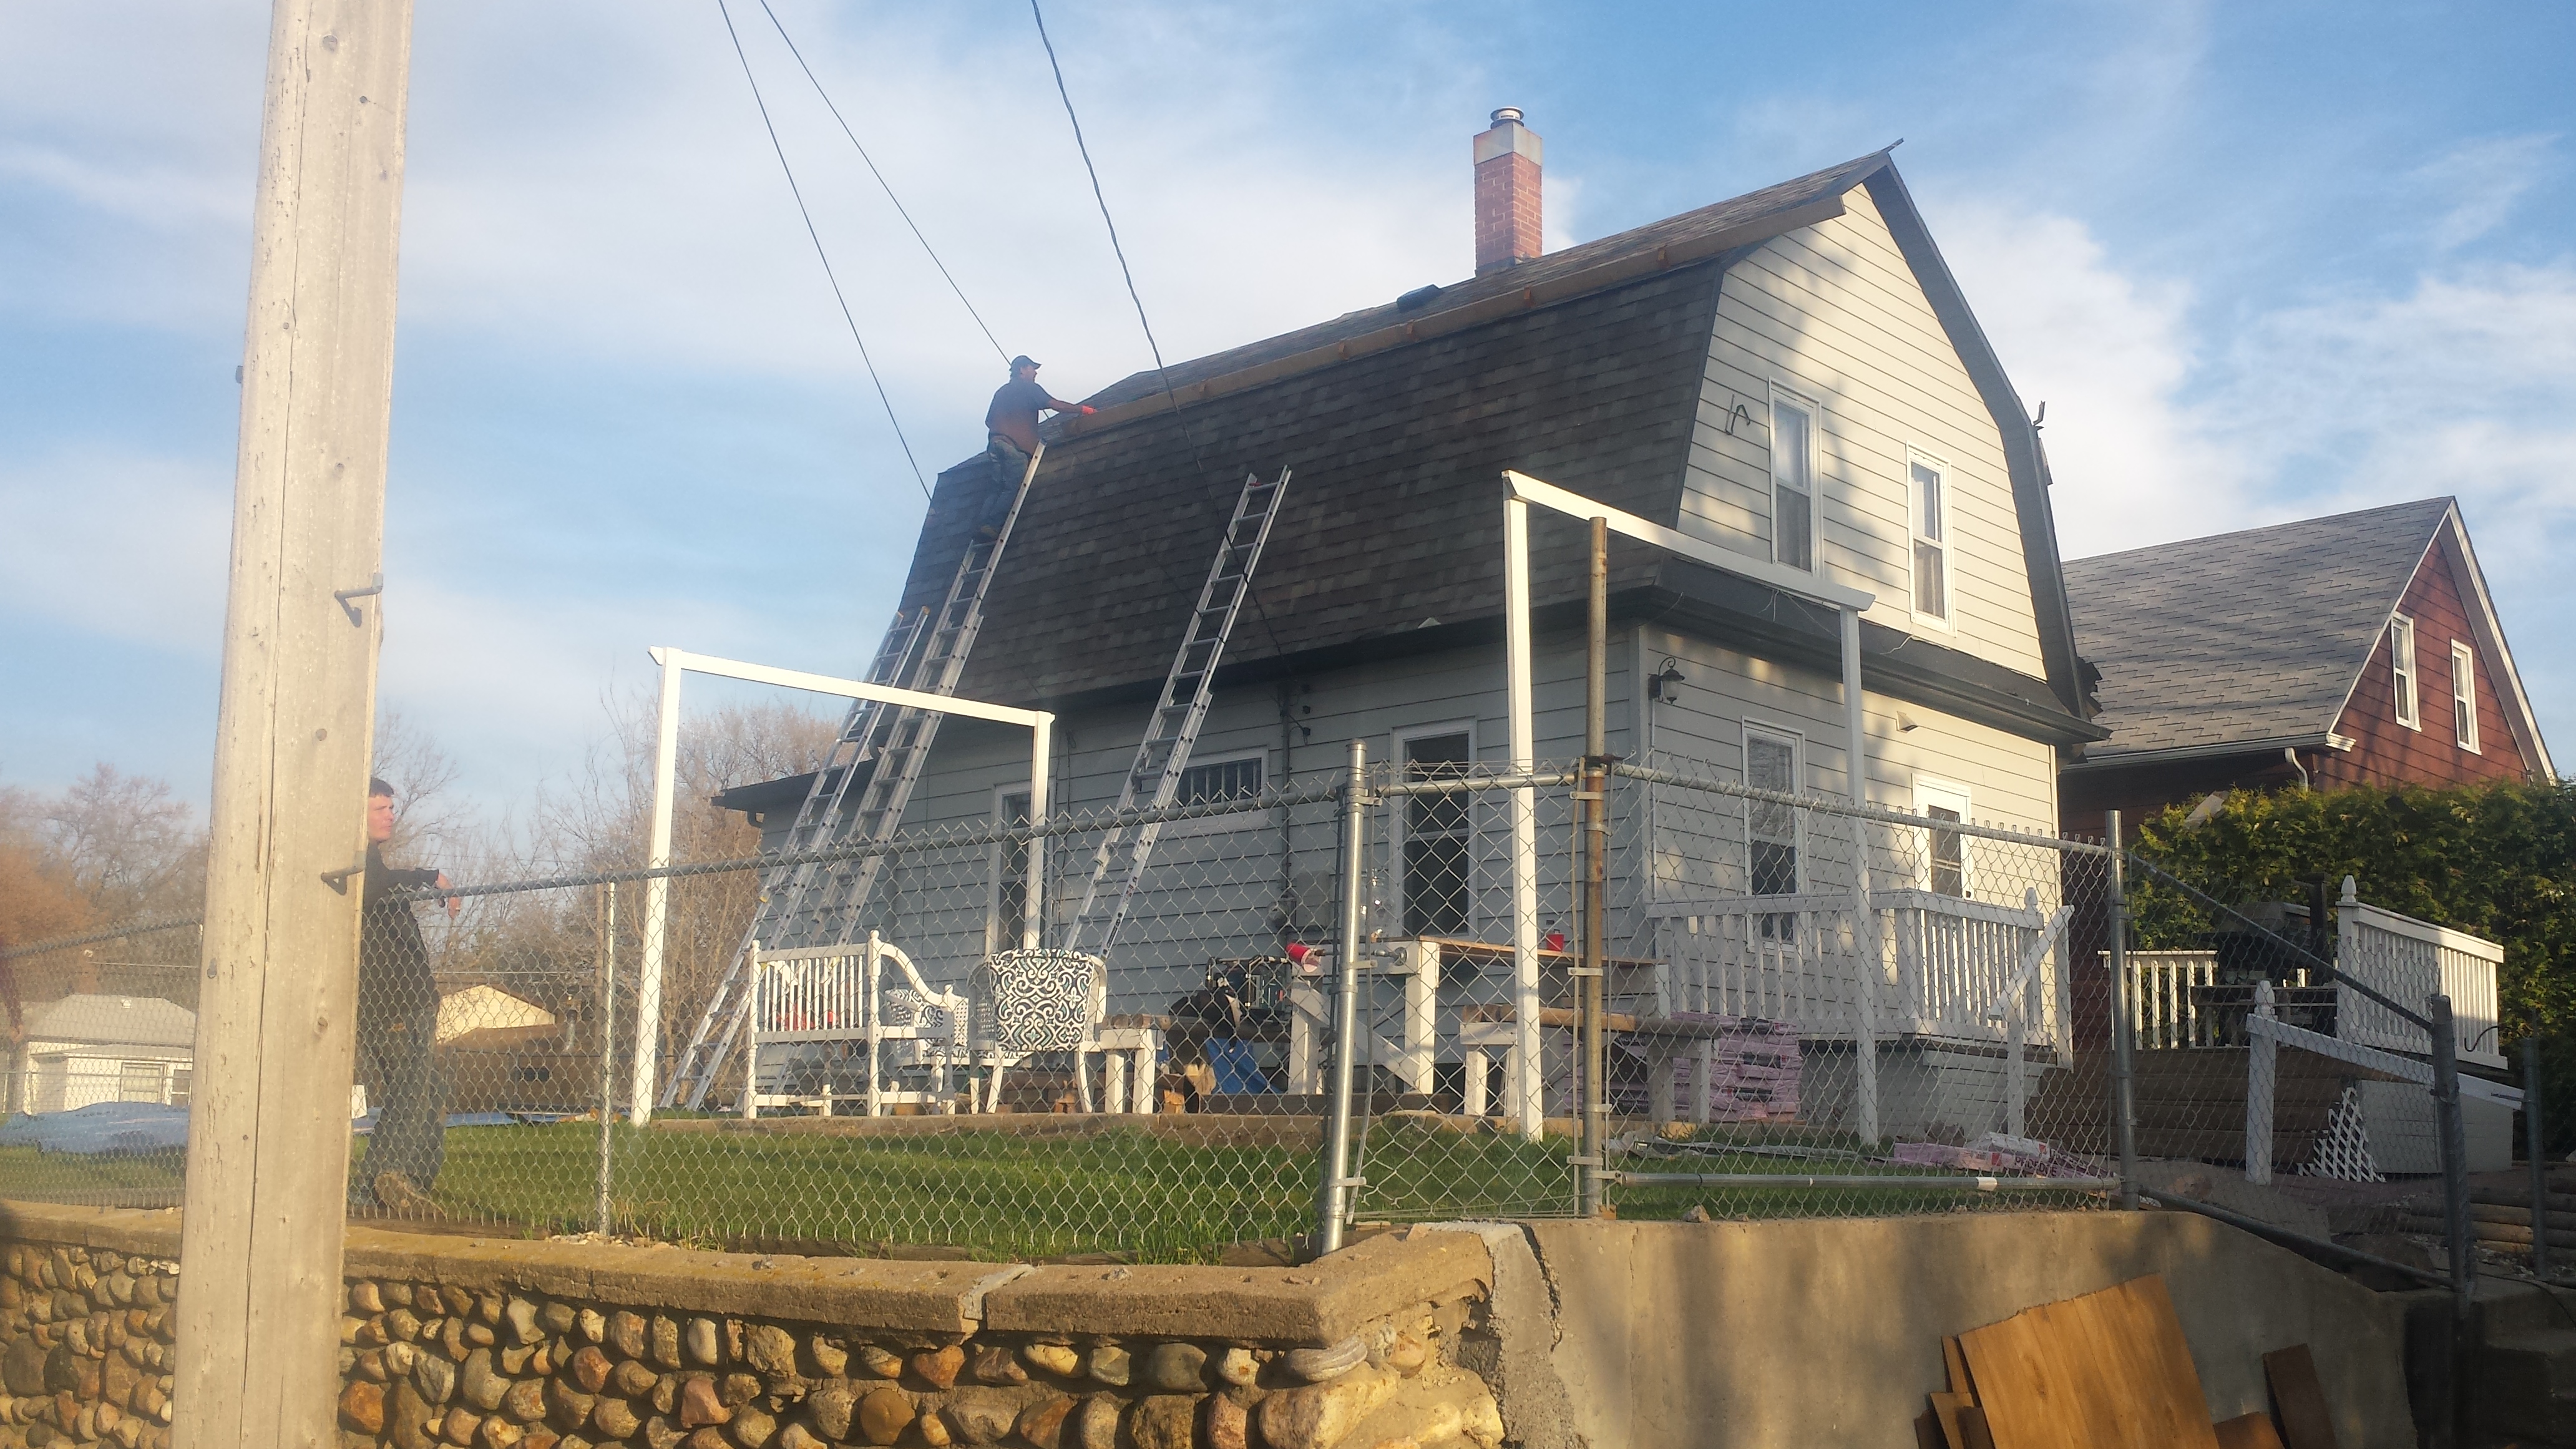
In all the commotion of telling you about the what’s been going on underground, I almost forgot to mention what’s happening above ground. We are getting a new roof. This, however is a project we felt better left to the professionals.
So, the last few days we have had a yard full of…professionals.
They seem to be good at their job. The job is getting done. There is also a fair amount of smoking, throwing cigarette butts in the yard and taking breaks on the patio going on. But who am I to judge the work of fine artists? All I know is, the shingles are going on…and these guys are braver than I am for climbing up those insanely high ladders. Oh, and I do know that their work is guaranteed–so that is in our favor {no matter what happens to their lungs, I know our roof won’t be leaking any time soon.}
They say it’ll be done tomorrow.
I’m really glad to have the basement underway that the roof almost finished, but somewhere deep down, I’m also a little bummed. While extremely necessary, these aren’t the “fun” projects. I can’t help. I don’t participate. I just sit back and let the pros work. Oh, and scrimp and save until we have the budget to take another step toward a cozy, finished, livable basement. {Projects cost money, you see.}
On another note, the weather here has been sweet.