by Amy | Aug 20, 2013 | Blog, The Art of Projects, the house
I can count the number of manicures I’ve ever received on one hand. Heck, I could count them on a Fraggle’s hand. The number is two. Once during a bridal luncheon before a wedding. Once before my own wedding. You know I’m cheap. I don’t fancy spending money on something that I wreck in a day or two. My hands get a lot of use {could you tell…?} and I’m not very delicate with them. All in all, it’s not worth it.
But professional manicures, and a certain friend {Angel McCurdy…awesome name, right?} have taught me all the proper steps to take for a lasting mani.
And I’ve come to the conclusion that refinishing cabinets, or probably any furniture for that matter, is a lot like a manicure.
First, you get out the nail polish remover and buffer. Get all the old paint off and prep the surface for your new paint. That would be the deglossing process I showed you last week.
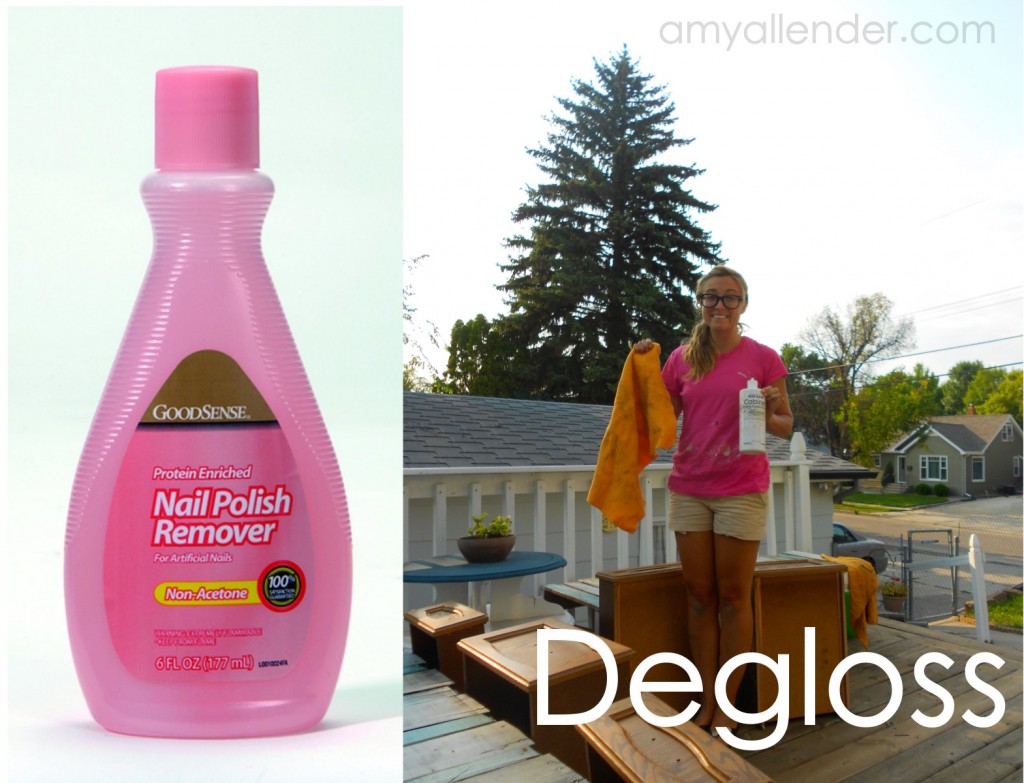
Next put on your base coat. That’s the bond coat I told you about.

Follow that with any embellishments you want to add. Glaze.

Top it all off with a top coat to keep it all in place for a good, long time.
That was the final step in my cabinet project before rehanging them. And since it is a clear, slightly glossy finish…there really isn’t anything to show. It took a day to put the top coat on all the frames, rails and doors. Only one coat {awesome}, but the doors needed to dry 3 hours before I could flip them. Then the whole shebang had to set up for 6 hours {overnight} before hanging them.

So that was Friday.
Saturday afternoon I started the hanging process, which is relatively difficult solo, but I got it done. More than anything it’s awkward to do alone. I started by reattaching the hinges. Then I held the door up to its former home, lined up the screw holes and braced it in place with my body. The lower cabinets were easy. The uppers were a different story. For this stage in the game I’d recommend bribing a friend/parent/family member/spouse with a treat of some kind to help you out.
I should also tell you that my mom and dad were due to come in Sunday afternoon. However, I’m impatient. And when I saw how lovely things looked I just couldn’t wait. I needed those cabinets up. Needed.
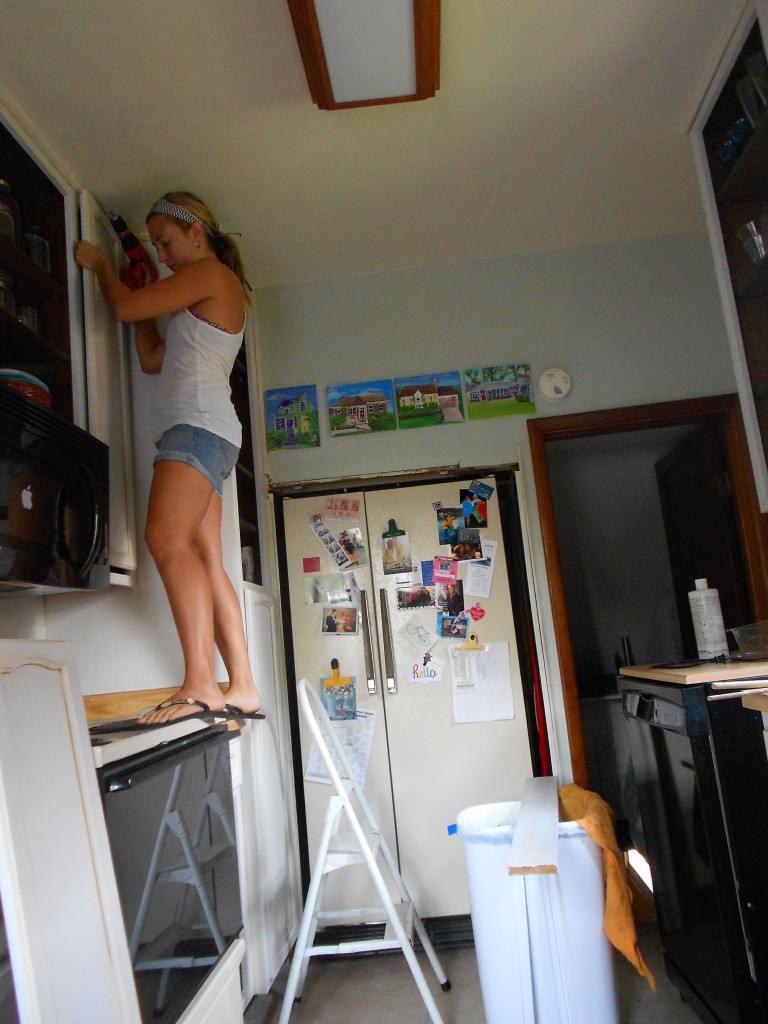
So I hung them. And. It. Looks. Awesome.
Oh, and the best part? If you follow the Facebook page, you saw this when I was at Menard’s shopping. {And if you don’t follow, you should. Then your should tell all your friends to follow too. Because it makes me feel good when I see a new ‘Like’ notification.}
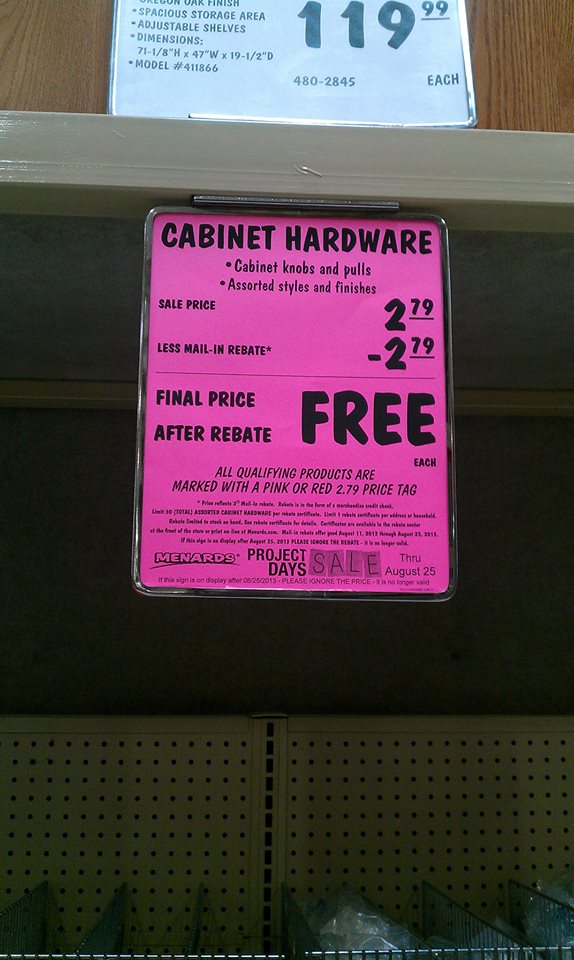
If not, I’ll tell you about it right now. I got all my knobs with a mail in rebate…a rebate for 100% of the price!! After I get my rebate, I will have only paid tax on them. Pretty great, right?
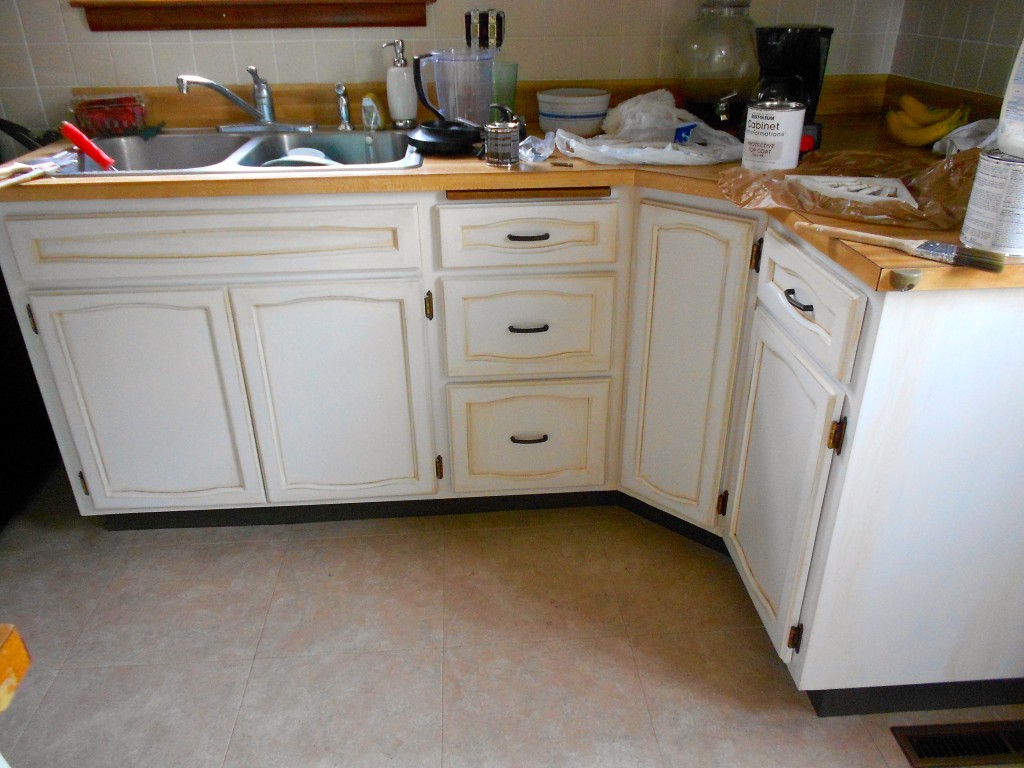
So, yeah…take a look. Tomorrow I’ll have a full B&A along with my final review of the Rustoleum Cabinet Transformation kit. {Hint: It’s going to be a rave review.}
Amy
by Amy | Aug 17, 2013 | Blog, The Art of Projects, the house
Yesterday was about getting things d-o-n-e. Yeah, it was so hard core and awesome I felt the need to spell it out. Because that really proves how much I got done.
Okay, enough explaining why I write the things I do. If I did that I’d never leave the laptop…
Anyway at the end of the day on Wednesday I had the cabinet frames painted {with three coats} and the back of the cabinet doors painted {with three coats.} I ran out of tape…so things were only partially taped off when I headed to bed.
I was a little slow to start, a few late nights of DIY-ing can leave a girl sleepy in the a.m. But yesterday I had a ton to get done in order to stay on my timeline. So, I started by flipping all those cabinet doors over in the garage. Something I forgot to mention is that I filled the hardware holes in with wood filler after deglossing. They were all big, bulky and attached to the center of the doors. I thought it made them look outdated. So i filled the holes in. After flipping them all, I gave the wood putty a quick sand and wiped each door off with a rag to get rid of the dust.
Then I started painting. Paint your cabinet doors fronts like this.
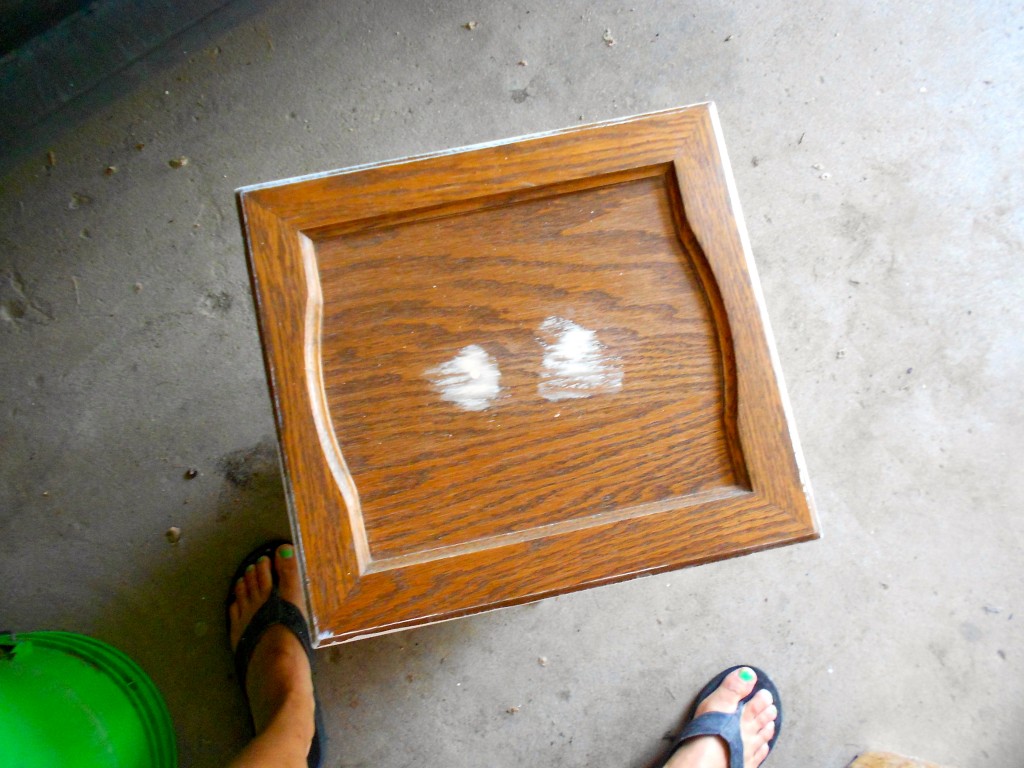
After doing lots of doors, I found this technique to be the most efficient. Start with the outside. Remember to paint with the grain of the wood. Get your brush down into all the beveled edges. All the painting for this project was done with a 2″ synthetic brush.
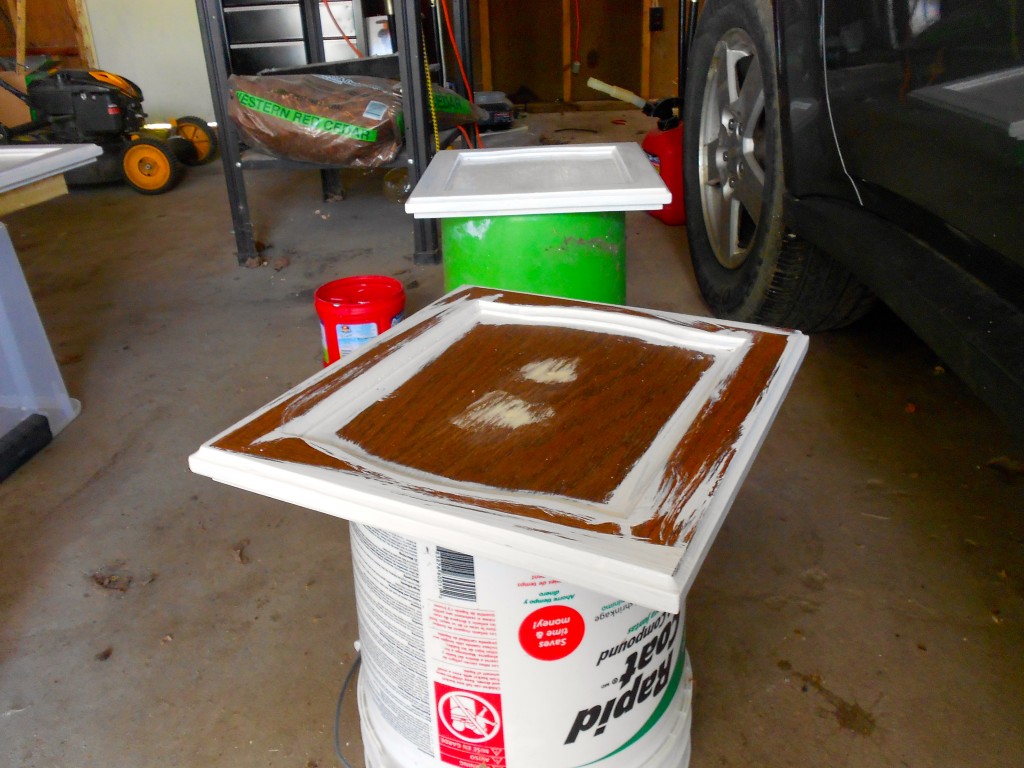
After you’ve gone around the edges paint the vertical and horizontal flat edges. Then fill in the middle.
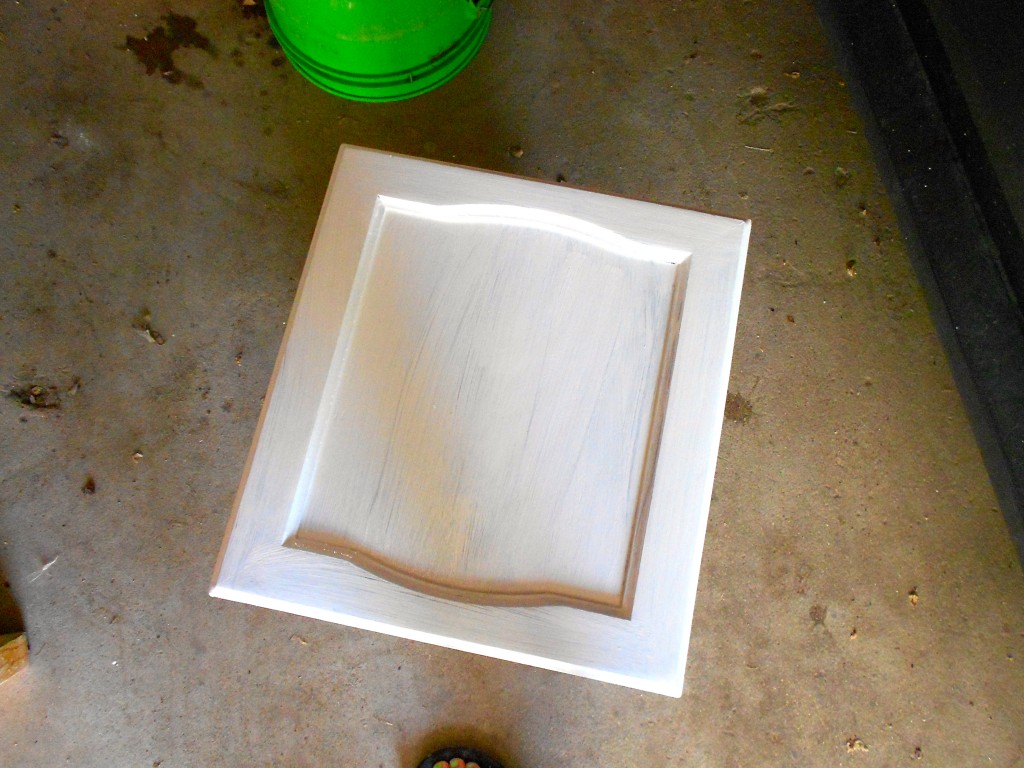
I did a coat on the all the door fronts then went inside to tape off the ceiling trim. I ate lunch, then it was time for coat number two on the doors.
After that I painted the ceiling trim and started in on glazing the cabinet frames. Let me just say that I love this kit more and more every day. It comes with everything you need to make your project look totally high end. I almost opted out of using the glaze that came with the kit. In the DVD and on the box they show a very heavy technique for using the glaze provided. They paint it all {ALL} over the cabinet then wipe it off. That leaves the nice, crisp, white cabinets looking…tan.
Lemme ask you this: Why would I paint my cabinets white just to smear them with a brown stain and leave them looking tan? Why not just paint them tan?
There’s no answer to this.
So instead I made my own technique. I wanted a nice light glaze that really just highlighted the texture of the doors and the lines of the frames. I only applied it to the edges of the frames. Like this:
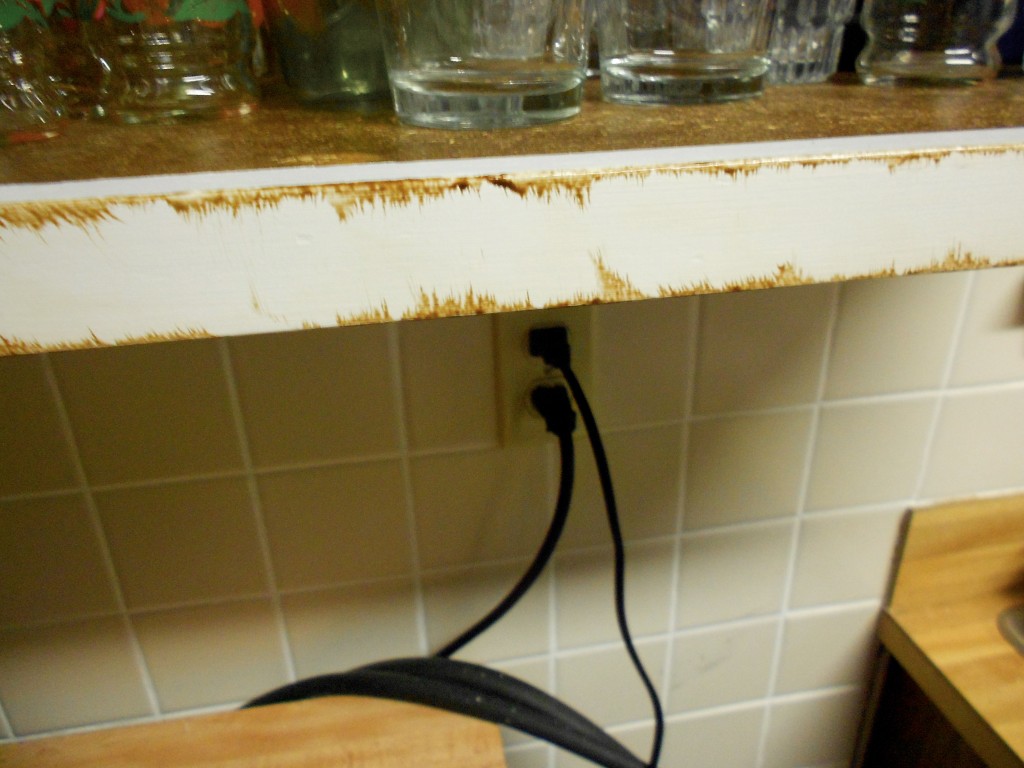
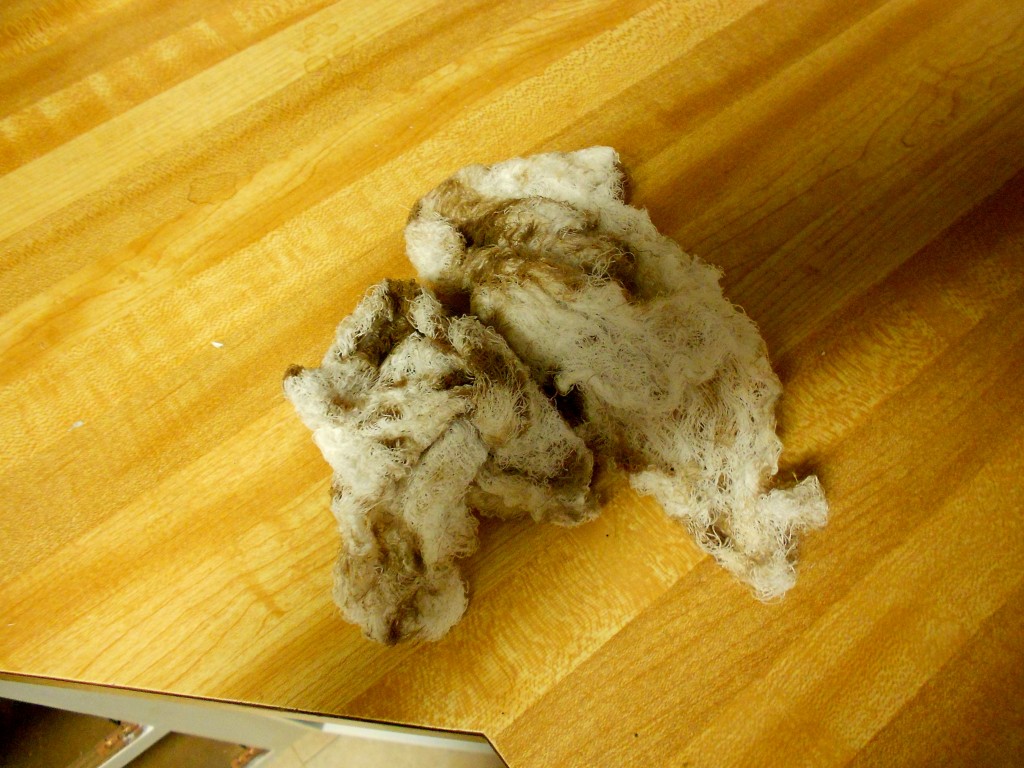
Use your same {but clean and dry} brush to paint a line on the edges of the frame. Then feather it inward. Next, use one of the rags that comes with the kit to gently wipe some of it away. You get lots of these rags. And you’ll use a lot. From here of out we’ll be calling them boogie rags. {That’s a nod to my dad, it sounds like something he’d say. If you know him, I know you’ll agree.}
This is what a boogie rag looks like. Throw it away when it starts to get too stained. You’ll just be wiping more stain on your beautiful cabinets…instead of wiping it off.
After getting about halfway through the cabinet frames it was time for coat #3 on the doors. So I did that. Then it was time for Insanity at the gym. I love those workouts. It worked perfectly because I had just enough time to finish glazing the frames before the dry time was up on the doors. When the 2.5 hours had passed since I finished painting that third coat, I went out to the garage to glaze the doors.
This took a little doing, but eventually I got the look I wanted. here is my most efficient method of getting it done.
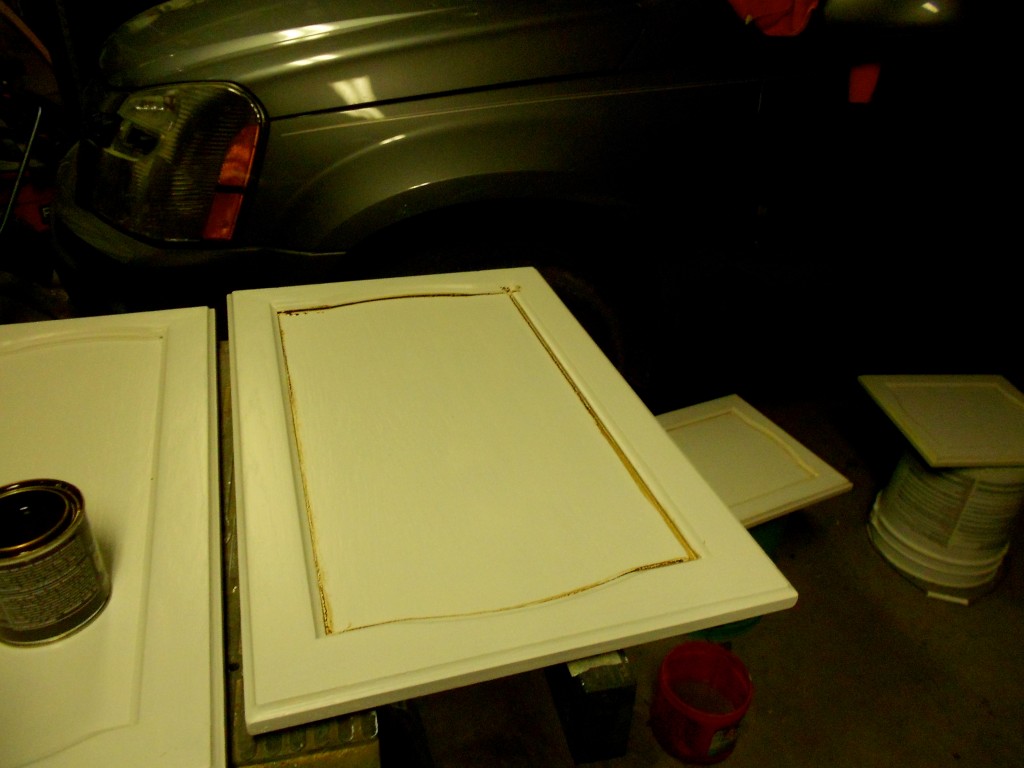
Step one: Put your brush into the crack around the inside bevel of the door. Then wipe away the glaze. Wedge your finger into the edge to really press the glaze into the crack to highlight that line.
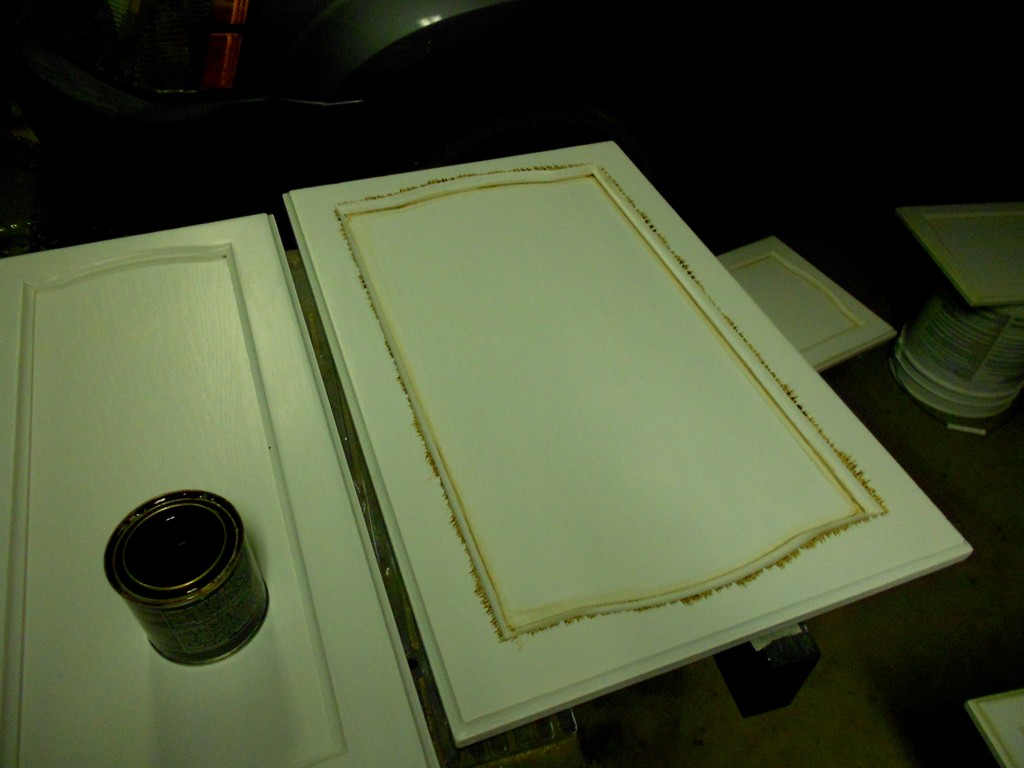
Step two: Just like on the frames, feather your glaze. Drag it out toward the outer edge of the door. Again wipe it away. This time, pinch the corner, leaving a bit of glaze on the edge.
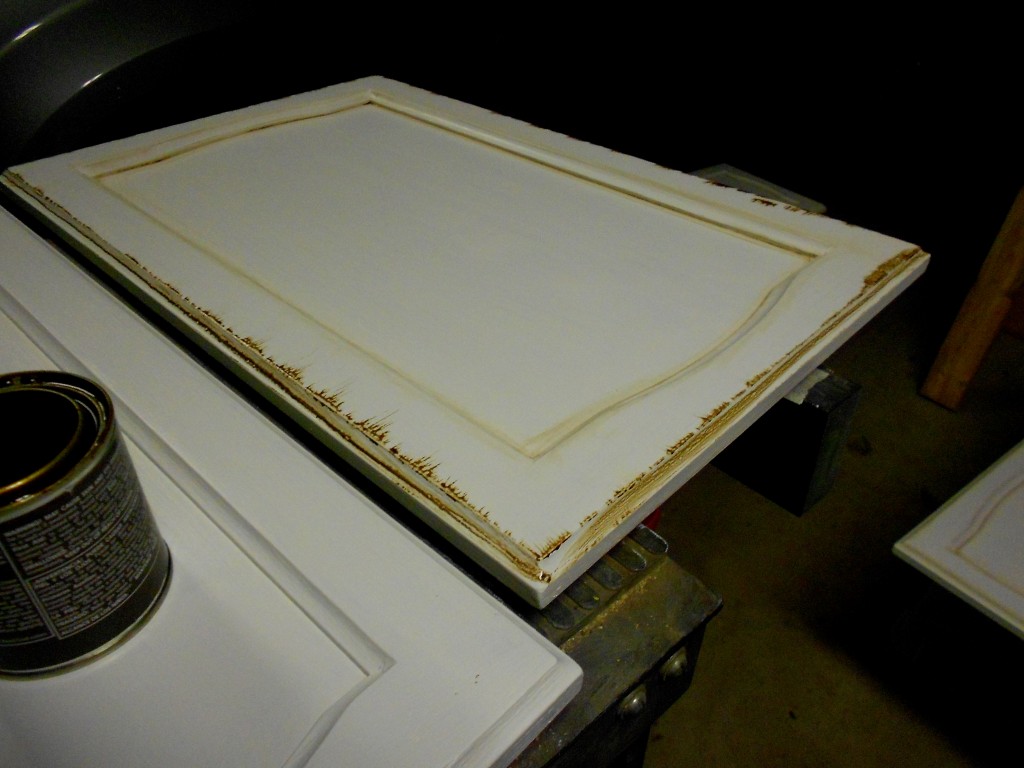
Step 3: Brush a line into the outer edge of the door and feather that inward. You guessed it…next, you wipe it away.
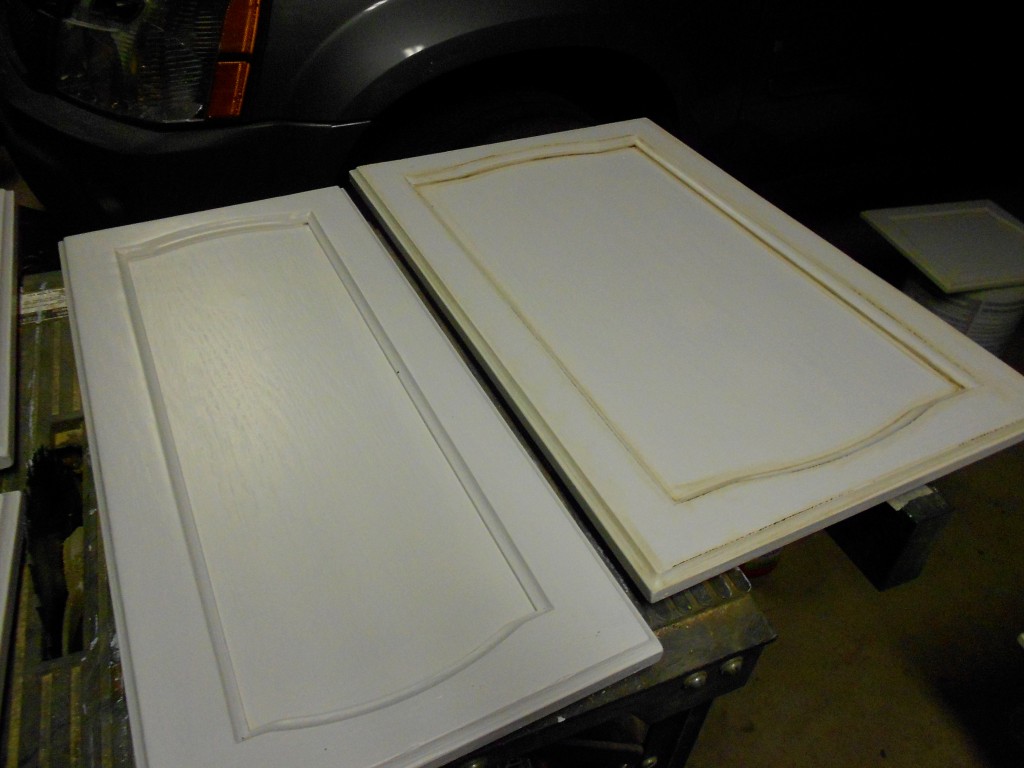
Lastly to add just a tiny bit more emphasis on the edges of the decorative trim I lightly touched the side of my brush {not the tip, this side of the bristles} to the hard edges and dragged it a few inches. Above here you can see the difference between a glazed and unglazed door. Doesn’t it look high end?
The answer to that question is: Yes. But it does come at a price:
Gross hands.
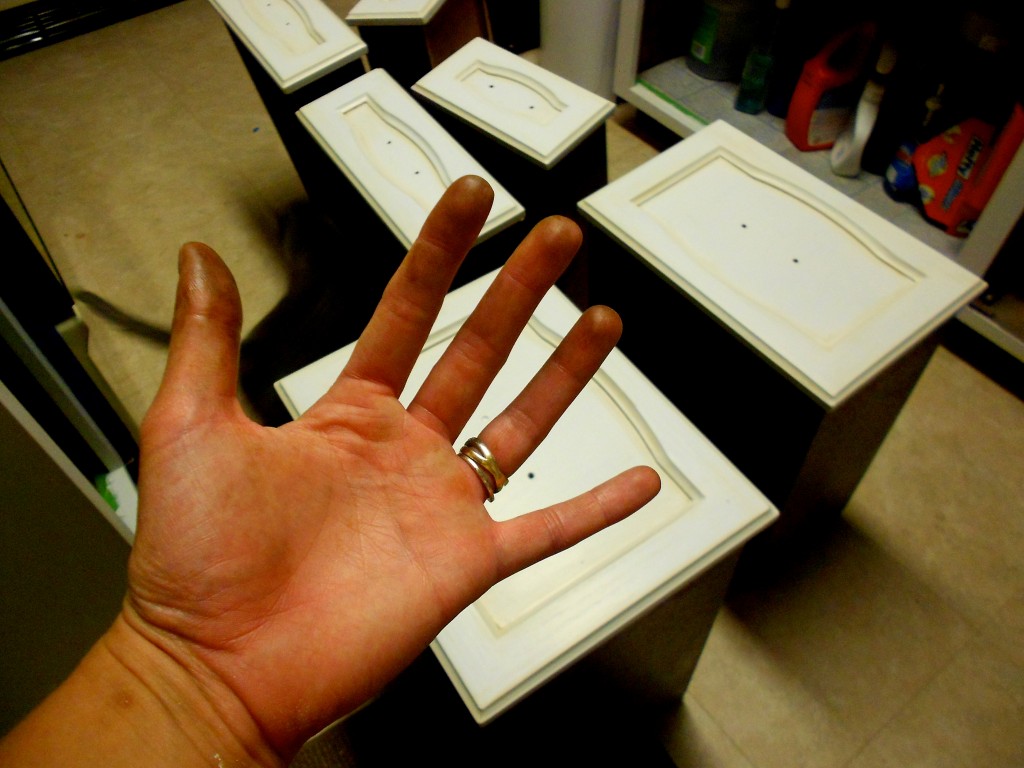
Today I’m happy to report that all the painting is done. But I’ll tell you about that tomorrow. Right now I need a {literal} midnight snack.
Thanks for popping in!
Amy
by Amy | Aug 16, 2013 | Blog, The Art of Projects, the house
Wanna see day one of my Kitchen Transformation? Click here. Want the before photos? Click here.
So…yesterday turned into a bit of a DIY marathon. By now you know me well enough to know that I have a problem quitting, stopping, quieting my mind. When I’m in the middle of a project, especially a project I have set a deadline for this problem with stopping grows even more intense.
Last night I painted until about 11pm. Then I was simply too pooped to take another brush stroke. And if I was too tired for another brush stroke, you can bet your bottom dollar that I was too tired to shower. That’s one of the few perks of having your husband away. With no one else in the house I don’t feel peer pressured to keep my cleanliness intact. But for all wider purposes, yes…I usually shower on a regular basis {kind of} and I believe hygiene is an important aspect of life {even if it is a bit of a drag.}
But now I’m getting off track.
Back to the kitchen. I’d offer you something, but things are kind of a wreck in there.
Yesterday I kicked off my day with a few hours of photo work. {Those two sessions I wrote about on my first project day are now done!} Then it was off to the gym at 10am for a bit of personal training. Home for lunch…then work time.
As luck would have it on my most intense day of painting my dear friend Shea was off work and willing to help me paint. I taped off the places I wanted to protect, then we dove in. So we started around noon. Per the DVD instructions, we started with the cabinet frames. Paint with the wood grain. Vertical on the vertical parts…horizontal strokes on the horizontal rails. They call this the bond coat. I don’t know why…but that’s what it is and I think it’s a cute name. Bond Coat….
Shea and I worked until she had to leave at 4:15. By that time we had two good coats on the cabinet frames, drawer fronts and cabinet backs. The cabinets {PS} are all laid out in my garage on all kinds of makeshift tables. Saw horses, a table saw table, buckets, an old planter, even a couple cardboard boxes are supporting my cupboard doors. It’s janky, but it’s the only way I could get them all laid out.
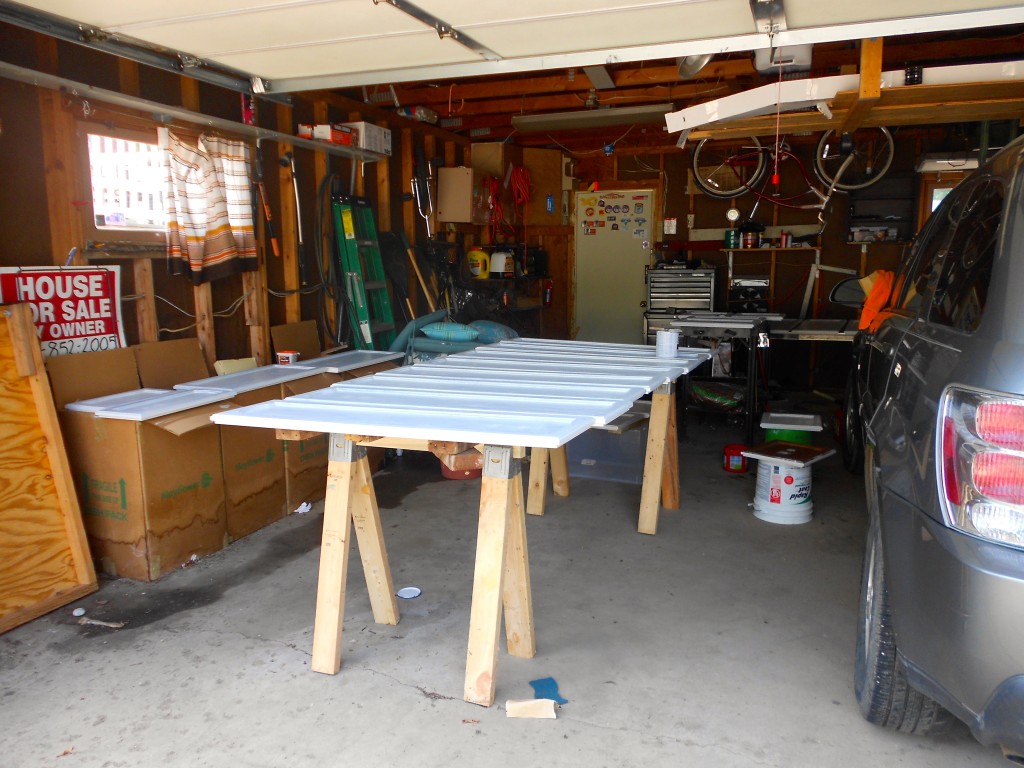
After Shea left I took a little snack break. Upon further inspection, I knew everything would take a third coat. That was a big bummer because the box and DVD said two coats would do the trick. Despite the extra time and work, I want this to look awesome, so I started on a third coat. I hit the cabinet backs once more, then it was time for youth group.
I got home from hanging out with my favorite teens around 9:30…after making a pit stop at Pita Pit for a garden pita. I ate and watched some AGT until about 10. Then I repainted the cabinet frames with a third coat. When I went to bed the kitchen was looking like this.
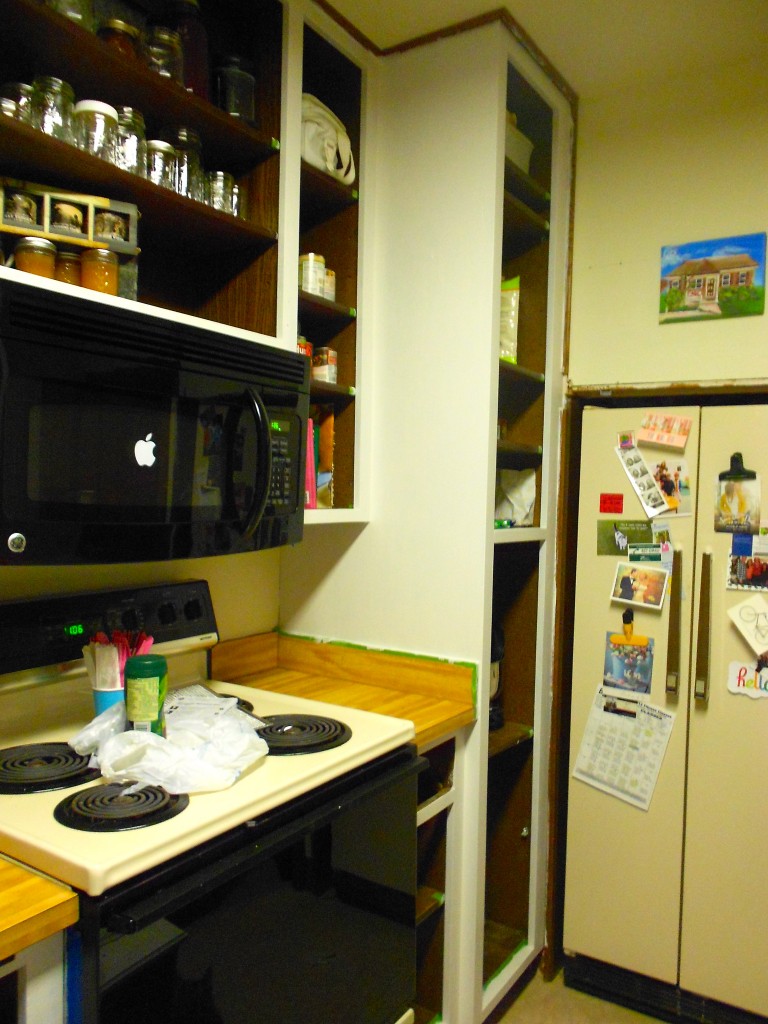
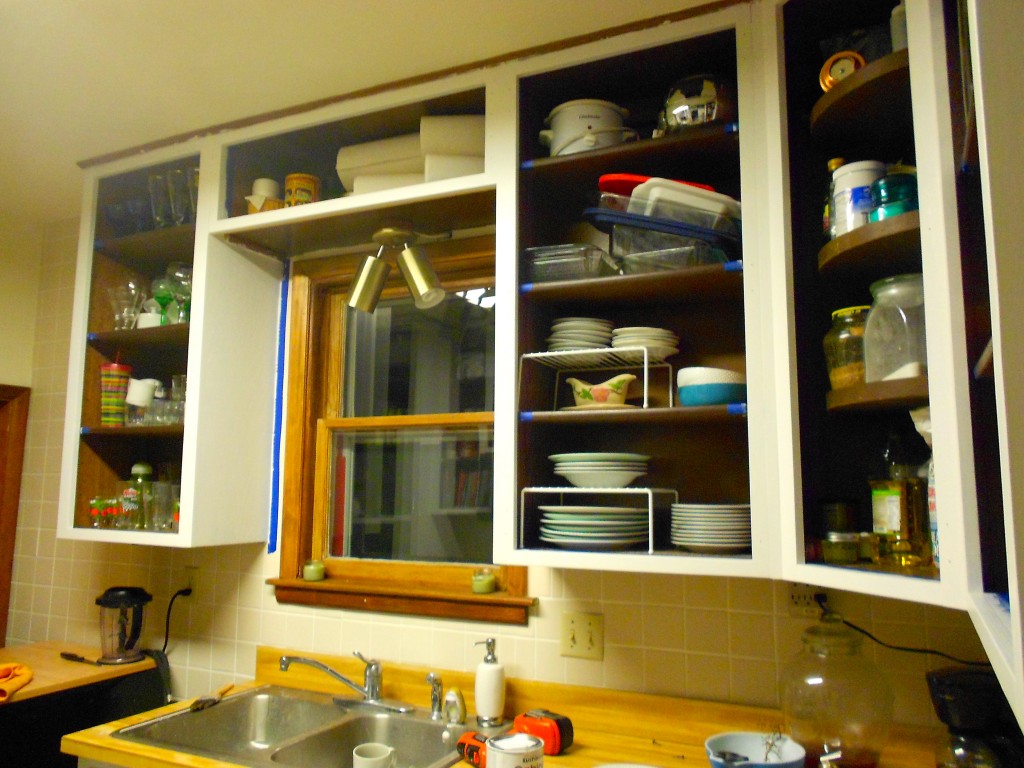
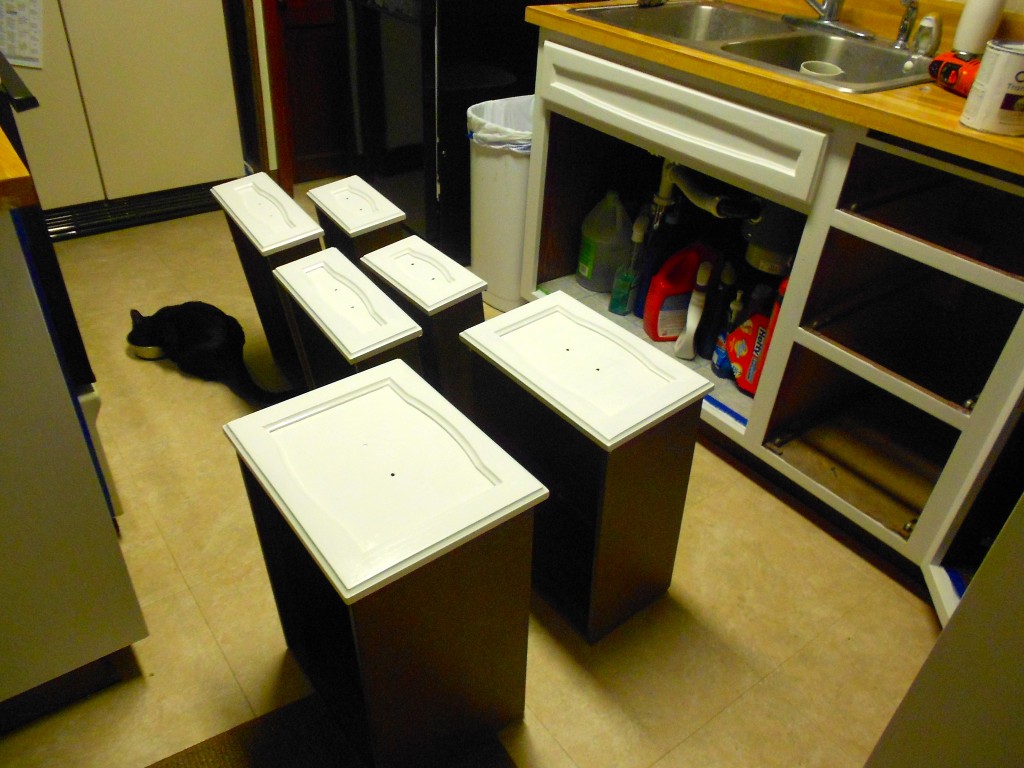
As you can see in the evening I had some extra special help, and he’s eating in the photo above. Yes, that is Panda Kitty’s BFF, Bandit. Well, he’s actually her only cat friend. And they really aren’t that close. He chases her around and she hisses and growls. It’s a unique relationship. I’m getting off topic again.
I’m left with a big dilemma. What color for the walls? And…How fast can I get rid of that over-sink fixture? I’m dealing with those questions tomorrow {or maybe a little tonight…}
I’ll try to take a few more interesting {embarrassing photos of myself} photos tonight to make tomorrow’s update a bit more entertaining.
It’s coming along well, though. You may have caught on earlier when I said I work to the bone when I’m on a deadline. You may be wondering, What deadline? Well friends, my dear mother and father will be here Sunday. So ideally it’ll all be put back together by then. Stay tuned!
Amy
by Amy | Aug 14, 2013 | Blog, The Art of Projects, the house
Usually when I do projects I put off writing a big post about it until the project is all done. Then I show you the whole process. This time, I thought I’d try something different. I get a lot of questions from friends asking how I do it. How I tackle a project all by myself, power through and get it all done in a {sometimes very} short time. So here goes. This week I’ll be updating every day on the progress of the kitchen. So, if you aren’t in to home improvement…hopefully you are into my awkward sense of humor, because this week is dedicated to the kitchen.
Yesterday’s post talked about some of the prep. I got the doors off and moved outside, I bought all the stuff I needed to do the project and moved what I needed out of the cupboards.
Today was even more prep. FYI prep stinks. It’s the worst, most important part of any project. And for this project it took forever. Like all day forever.
I got up at my usual I-don’t-have-to-work-at-the-gym time of 8:30 am. I had some coffee, did some Googling, drank a smoothie and watched the end of last night’s installment of the Harry Potter series. {I’ve been working my way through the entire series in bits and pieces. This morning I finished #6…but I always skip the part when Dumbledore drinks that potion. Too sad.} After that I edited some photo orders….they’re just about done. All that took me to 10 am.
That’s when I started step one of the Rustoleum Cabinet Transformation kit: Deglossing.
The kit comes with a DVD. Which is good for me, because it shows {in theory} what every step should look like. But here is the difference. In the video the girl doing the demo looks like this:
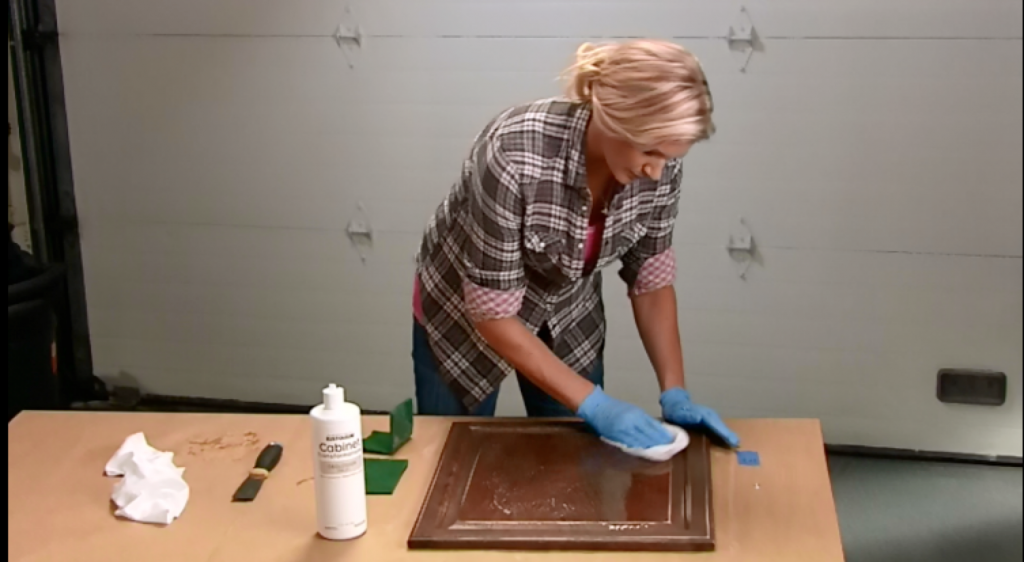
Cute hair, nice outfit. Basically DIY chic. Here’s what deglossing looked like at my house:
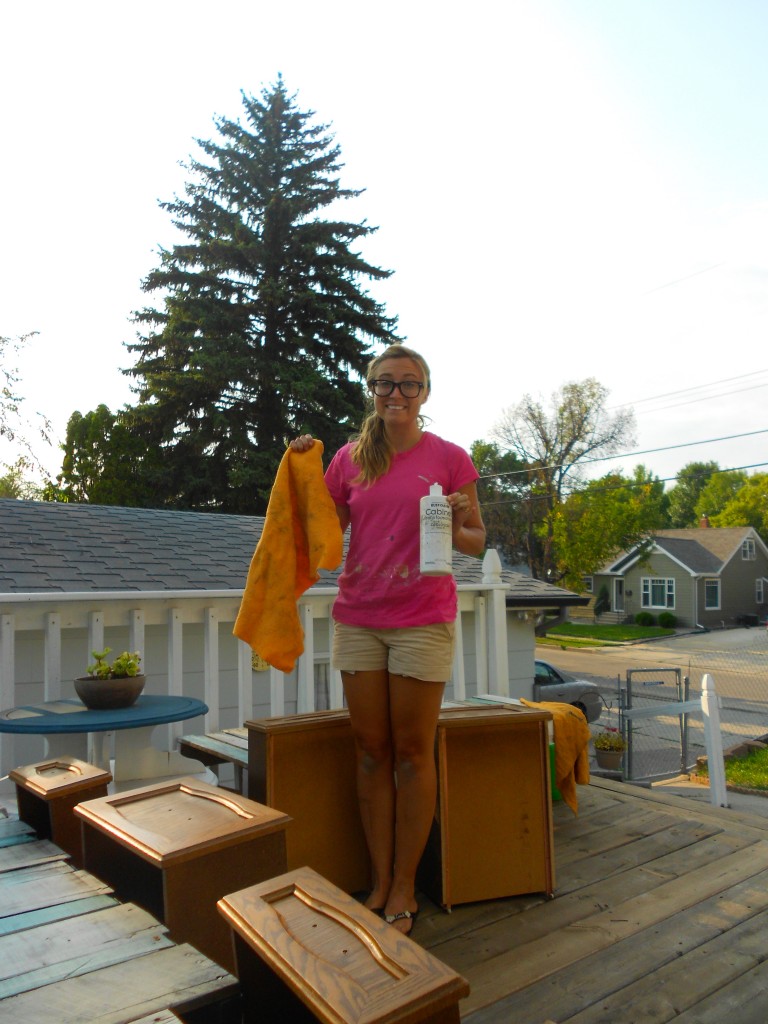
Khaki shorts that were nice until I sat in paint a few days ago, a million Sham-wow’s, glasses {AKA protective eye-wear}, dirty legs from sitting on the garage floor. Yeah, it’s a different look.
Okay, despite what it looks like, deglossing is a big deal. You squirt this stuff on a scouring pad, wearing latex gloves {I did wear them, pinky swear} then scrub, scrub, scrub. I spent about 3-4 minutes on each cabinet surface {front then back}. That really adds up. My wrists were sore, I was sweaty, my elbows were starting to crack. I started inside with the cabinet frames. Then I took a short break to write a few emails and edit a few more photos. Then the cabinet fronts. Then break for an episode of the Office and a few more photos. Then the cabinet backs. I started to get really sloppy because I was getting so tired, hence the breaks.
All in all this took me the entire day.
I was nervous about not having enough deglosser for all my doors. But that proved to be a silly fear. I had plenty. So much, I even went back over a few pieces that I had skimped on the first go around. I still had some left at the end of the day {which today was around 6:30 pm}.
After I absolutely could not get any more gloss off of the frames, doors or drawers I filled the handle pilot holes with wood putty and called it quits. I watched the next segment of the how-to DVD. Then I took a shower, posted some youth group photos on Facebook, and headed to a friend’s house for an evening showing of the 2000’s classic….”Summer Catch.” Yep, the one with Freddie Prinze Jr and Jessica Biel. While watching I’ve written this post, sent some more emails, snuggled one of the world’s cutest babies and Skyped with Derek. When I get home tonight I’m going to put up painter’s tape. Tomorrow I’ll start putting the paint on. That’s the exciting part.
So that’s how I did it today. I won’t lie to you. Today really blew. I was so sick of scrubbing I could have screamed. It was hard, but not…hard. Physically demanding, but anyone, even you can do it. {And as a side note, Mary Jo…Mom told me you are thinking about doing this up at the lake house. You totally could. But wait until I finish so you can benefit from all my mistakes…} Tomorrow I’ll have some more visible progress for you. For now, it’s official, I’m past the point of no return.
See you tomorrow.
Amy
by Amy | Aug 13, 2013 | Blog, The Art of Projects, the house
Derek doesn’t read my blog. Well, I shouldn’t tell you that he never reads it. He does sometimes. Just not often. He doesn’t really need to. We talk, he sees me, he lives with me {well, most of the time} for goodness sake. Basically he knows all there is to know about my goings on. There is no need for him to spend time reading a recap of what he witnessed first hand. He lives the adventure…and gets bonus features. Like all my lame jokes, seeing the awkward unfold before his eyes, and putting Band Aids on all my mishaps.
Between you and me, I think he gets enough of my madness as is.
All that to say…I’m pretty sure I can safely write to you about my next project without Derek finding out.
He will find out, of course. Unless he decides to stay away forever…Which I know he would never do. So yes, he will eventually see the results of my latest effort. So that begs the question…why does it matter if he reads about it or not?
Two words: Painting. Cabinets.
You see, most boys aren’t fond of the idea. And Der-Bear is no exception. But you know what I’m not a fan of? Cooking in a dark, ugly closet. And that’s pretty much what my kitchen is/was like. Derek’s big objection is that the cabinets are real wood. They are very nice, very heavy. They’ll still be wood even after they are refinished, right? Right. I know in my heart of hearts it’ll look loads better when I’m done. Derek will agree too. I just know it. Sometimes, though, it takes a little beyond-the-point-of-no-return convincing.
Let’s me honest. There isn’t a lot Derek can do to stop me if he isn’t home. Which, in my eyes, makes this the perfect time to tackle this project. That way he can’t talk me out of it…
Here’s what I’m talking about. This is the kitchen before.
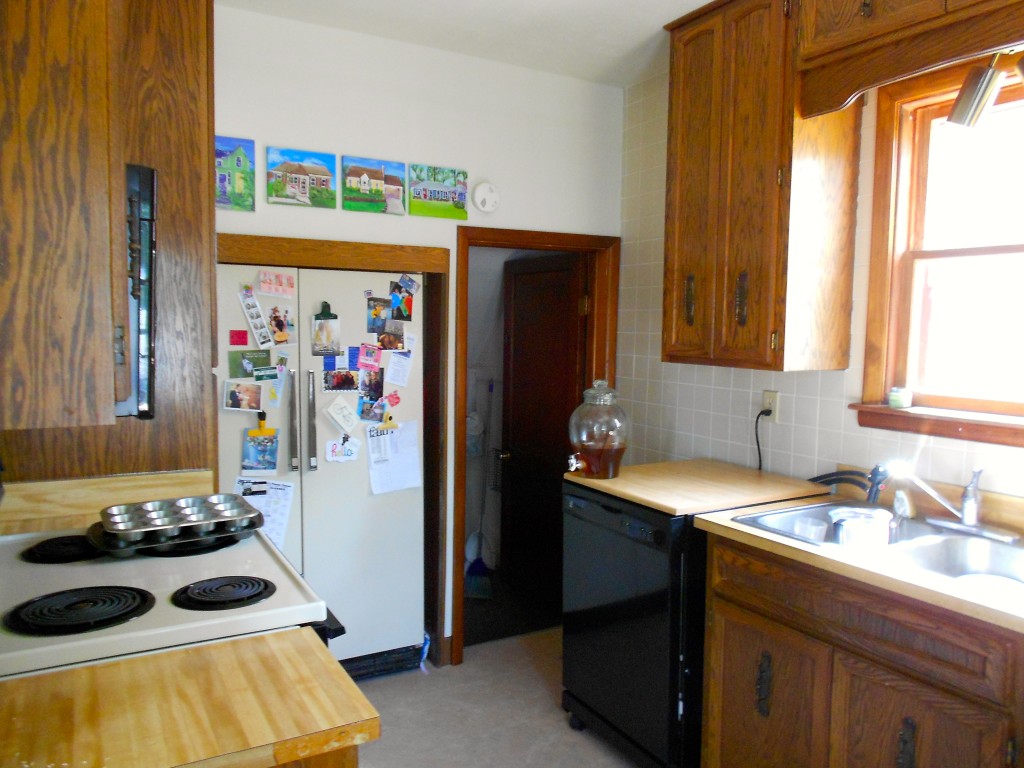
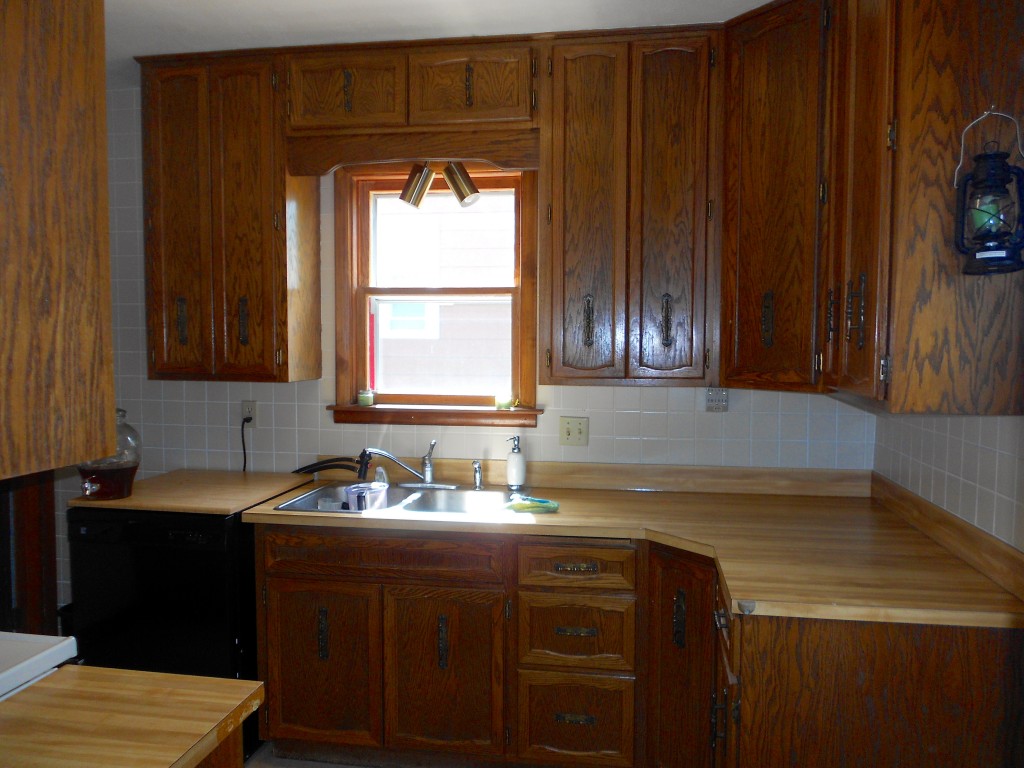
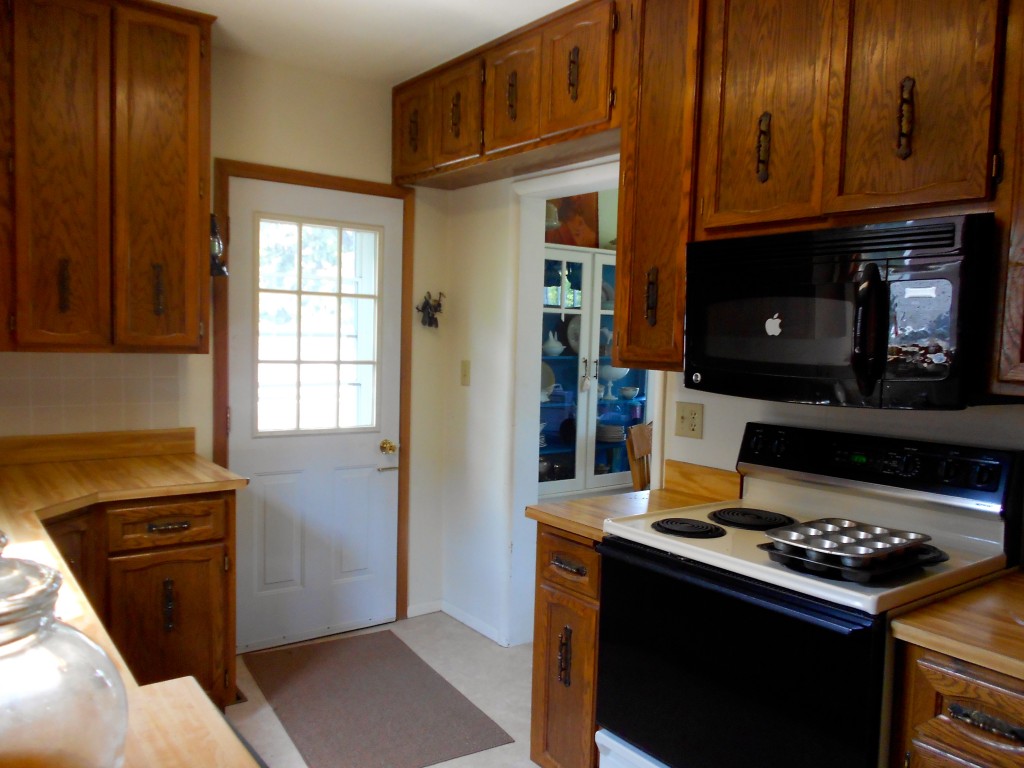
As of this very moment the kitchen is looking like this: Doors off, drawers out, hinges removed.
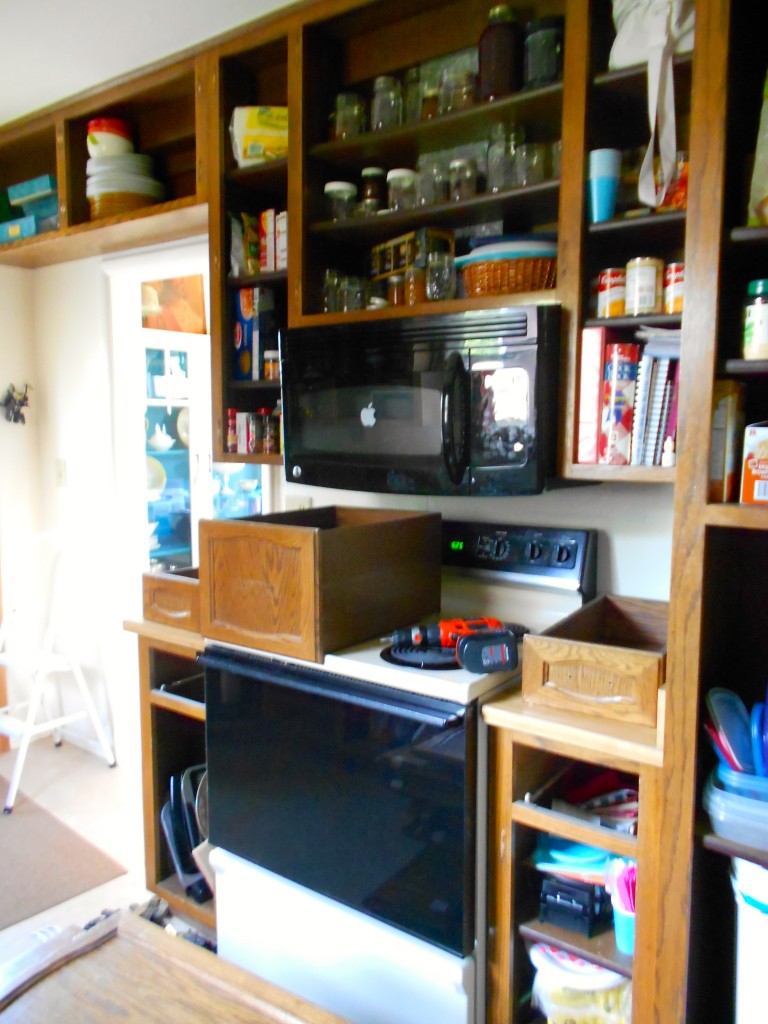
And just look at this pile of hinges and hardware. For such a small kitchen there are so, so, so many doors.
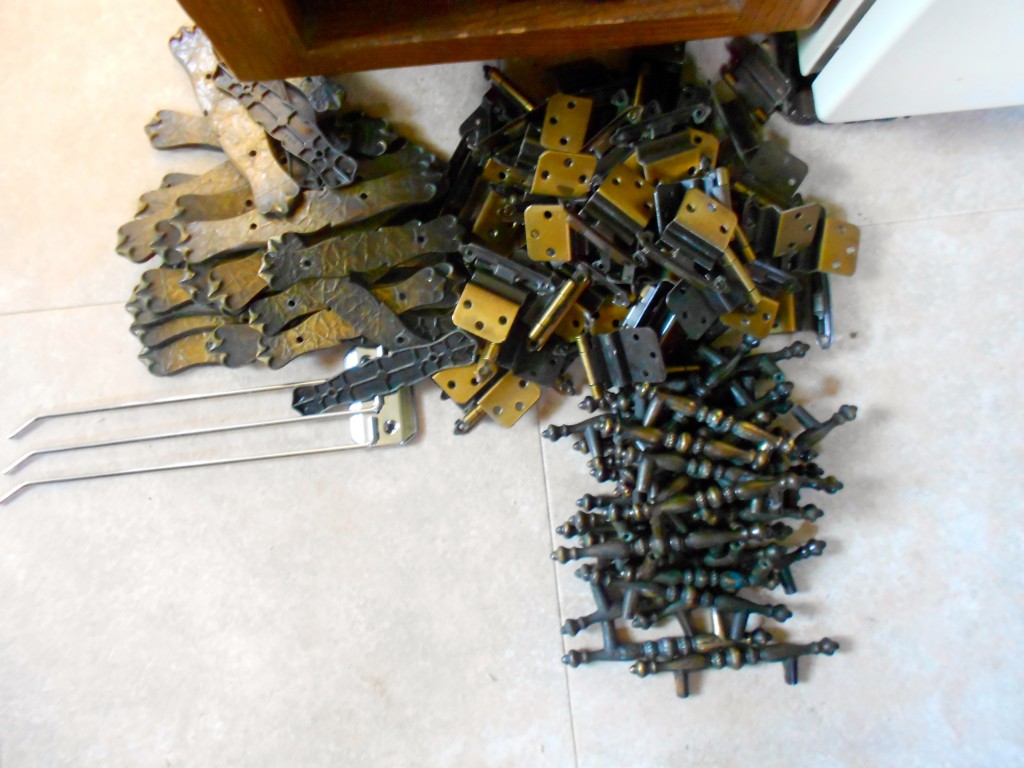
Tomorrow {or tonight if I get a second wind} I’ll be deglossing and prepping the surfaces. I’ll be using Rustoleum’s Cabinet Transformation box kit. I love the Rustoleum products…so I’m anxious to give this a whirl. More on that later. Now a snack.
Amy
by Amy | Aug 1, 2013 | Blog, The Art of Projects, the house
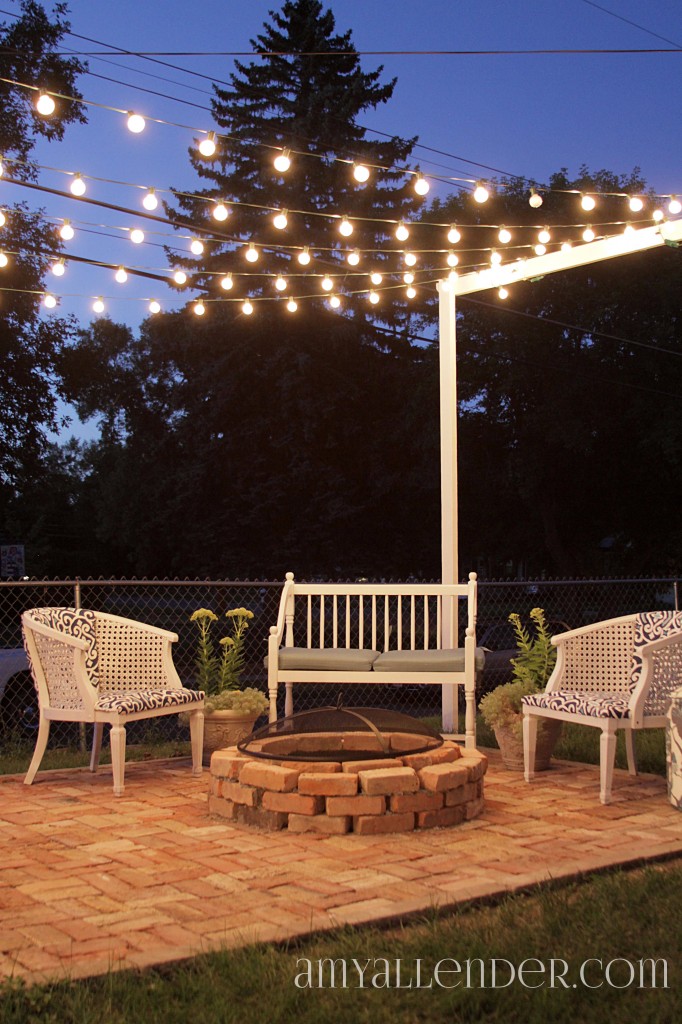
Okay folks. Today is the day I show you how I made my outdoor room dreams come true. I’ll tell you what I did, what I bought and where I got it. Heck, I’ll even tell you things that I got wrong so you can get them right. Now, I know you’ve seen this photo a million times…but here’s the shed. This is what I started with.
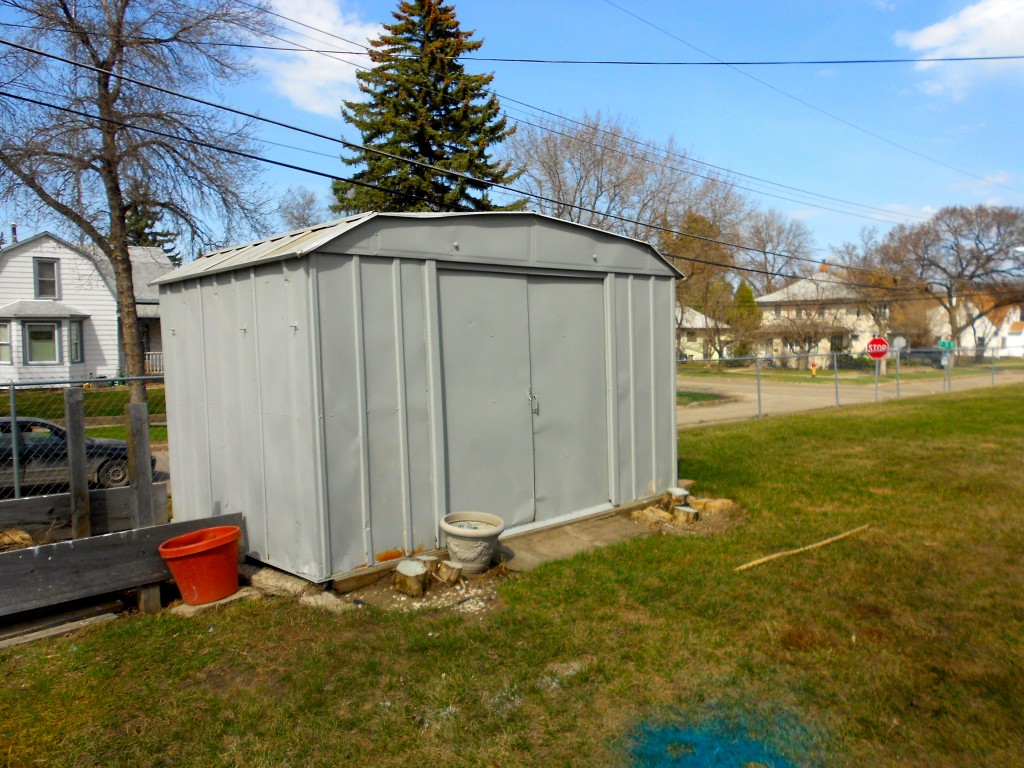
The first challenge was getting rid of that thing. Originally I had thought the toughest part of getting that out of the yard would be convincing Derek that it was a good idea. But, well, then he had to leave for a bit. And there is very little he can do to stop me via Skype. So I made sure all our stuff had a home in the garage or the garbage can and listed this bad boy online.
A nice gentleman and his wife wanted it. They came, dissembled it and hauled it all away. Then I was left with this…Which, according to the neighbors, was already an improvement.
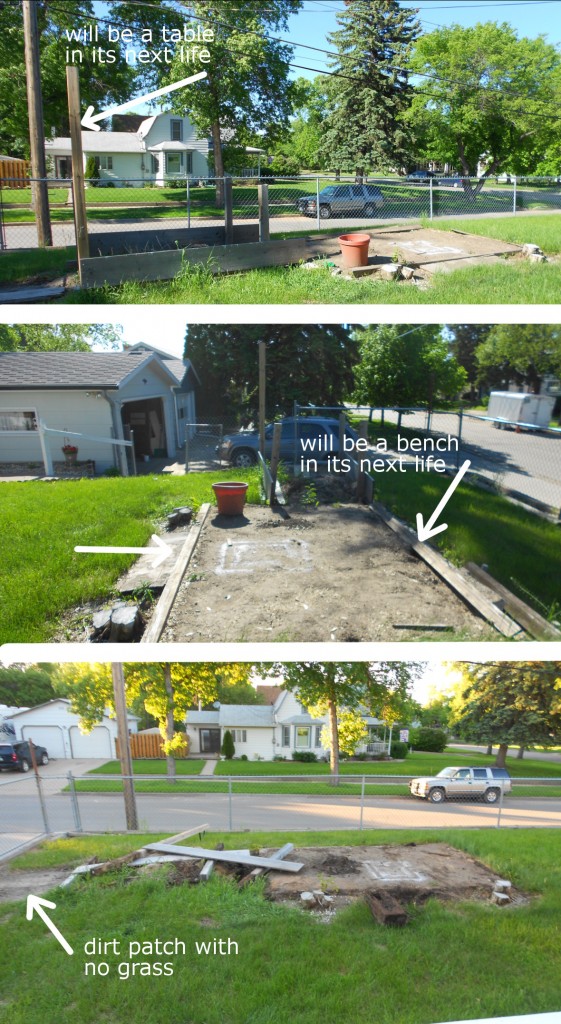
There are a couple things you can note from these images. First of all…I used the packed dirt where the shed had been to do a little spray painting. That’s from a frame I repainted for my gallery wall. Next you can lay your eyes on all the other junk trash usable materials without the shed to distract you. At the time I didn’t know if or what for I could use all that weathered wood, but I decided to keep it on hand…just in case. It was all pressure treated, so despite it’s color it was actually pretty good quality.
In the end, keeping it proved to be a good choice. Now I have a table and benches to match.
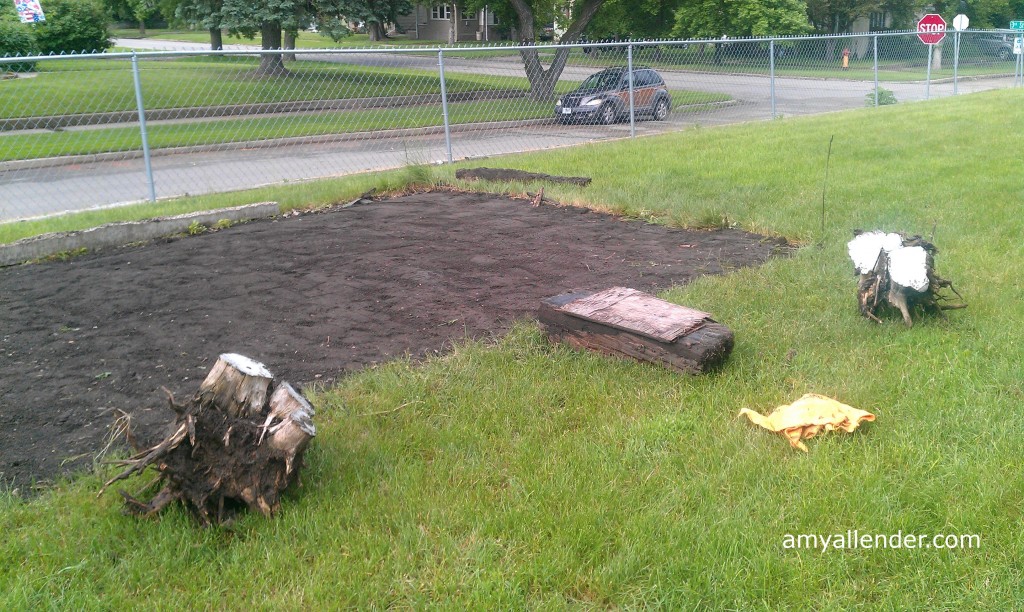
Next came the most challenging part of this whole process: making the ground level. This was hard for a few reasons. One being that there were two stumps and a chunk of rail road lumber in the dirt where the patio would be. I had decided on a 10×15′ patio space, so I needed to level the ground where the shed had stood as well as the surrounding area.
I looked at renting tools to remove stumps. {I’m too cheap.} And tutorials on burning them out. {Too impatient…I was itching like a kid with poison ivy to start laying bricks.} Eventually though, I decided to just dig. If I couldn’t get them out…well…then I’d have to resort to different measures. So I dug down around each stump. It was pretty easy going because the stumps were a big rotten underneath. When I hit a root that my shovel couldn’t cut, I took an axe to it. This took a bit of time…and boy were they heavy to pull out, but out they came.
To get the rest of the area leveled, I began shoveling the elevated dirt from the shed’s foundation to lower areas. In places where grass would be covered I dug it up and transferred it to that dead dirt patch you saw in the previous image. There is no secret to this. Just one shovel at a time. I packed the dirt down with a home-rigged tamp and checked for level until it was pretty much even.
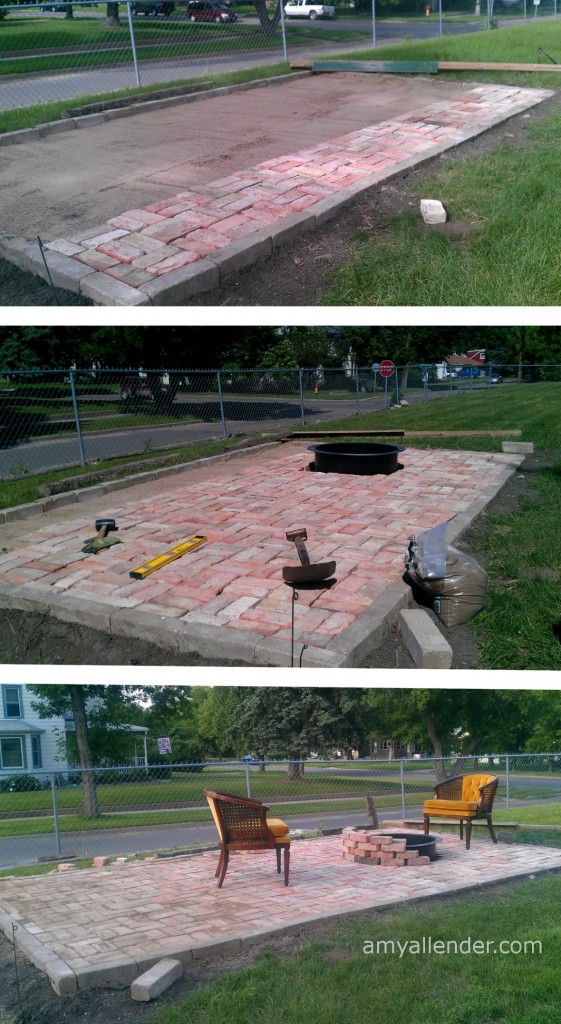
Now I had to make a big trip to Menard’s. I picked up edgers to contain the patio floor {that’s those long gray stones around…well…the edge}, play sand {the cheap kind you’d use in a sand box}, and a steel fire ring {nothing too fancy since it would be covered by brick anyway.}
First set your edge blocks. This is a bit hard and time consuming. They need to be set in the dirt a few inches to be firmly held in place. And they need to be level.
Now…let me take a moment to talk about level on a patio. You do not want things to be exactly level. Yep, you read that right. To allow water to run off, set your stones on a slight {very slight} slope.
So put your edgers in one at a time. Check for level after each one. Use a square on your corners to make sure they are 90 degrees. This friends, I did not do. And boy was it a mistake. If you come to my house you’ll notice a weird side of my patio. That’s because it’s not perfectly square. Bummer. So check for level and square. It’s worth it.
Once your perimeter is in place rip open those bags of sand. The area of my patio is about 150 ft sq. I used 30 bags of sand at 50 lbs each. You need a bed of sand at least an inch deep. So pour it in. Then level that out. I used a little contraption my dad showed me how to make. You can see it in the first image above.
Take a long level length of wood. {I used a 4×4 post I dug out.} Lay that across your patio space, resting on the edgers. Attach a second, skinnier piece to its side. Attach it so that it hangs down to the point you want the bottom of your pavers or bricks to rest. In my case, I used 2.5″ bricks, so my board {the green one above} hung 2.5″ down from the edgers. With your long post resting on the edgers, drag it across your area {best if you invite a friend to help}. No you have level sand. Make sense? I hope so.
Once the sand has been leveled out, you can start laying your stone. Again, always check for level.
I used a quick set mortar to hold the bricks in place around the fire.
After all your bricks are in place get a few more bags of sand. {I used 2.5 50 lb bags.} Dump some sand out and start sweeping it into the cracks. Do this over several days as the sand settles.
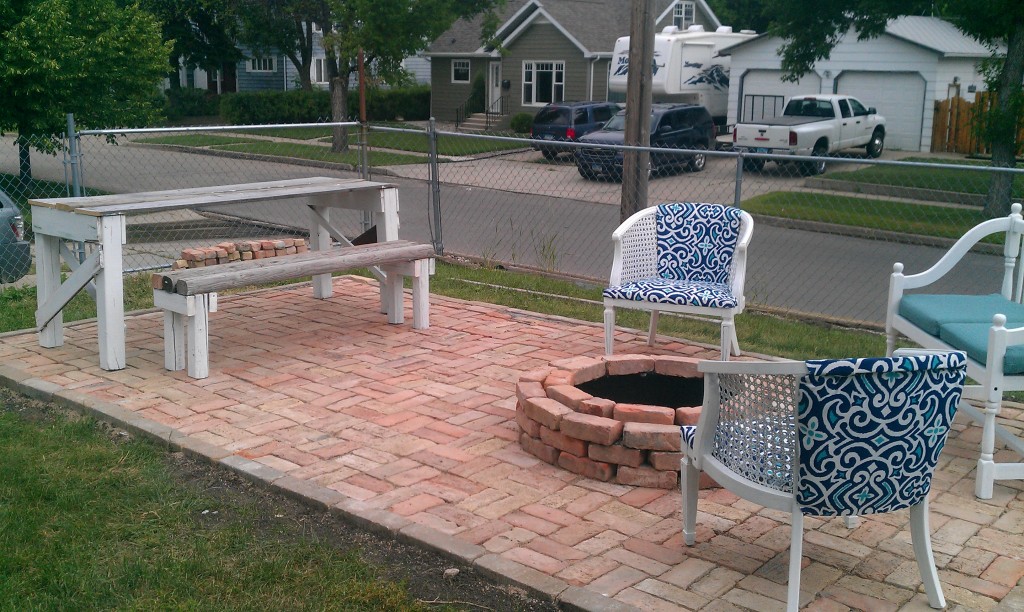
Then furnish your new space. As I told you in previous posts…the pair of chairs was a Salvation Army find for $30 total. I recovered them. The bench was pulled from a local variety shop in town. The cushions were a summer clearance item from Target.
It looked good…but I craved more. It needed light! I have no trees around the patio to hang them from…so I came up with this alternative.
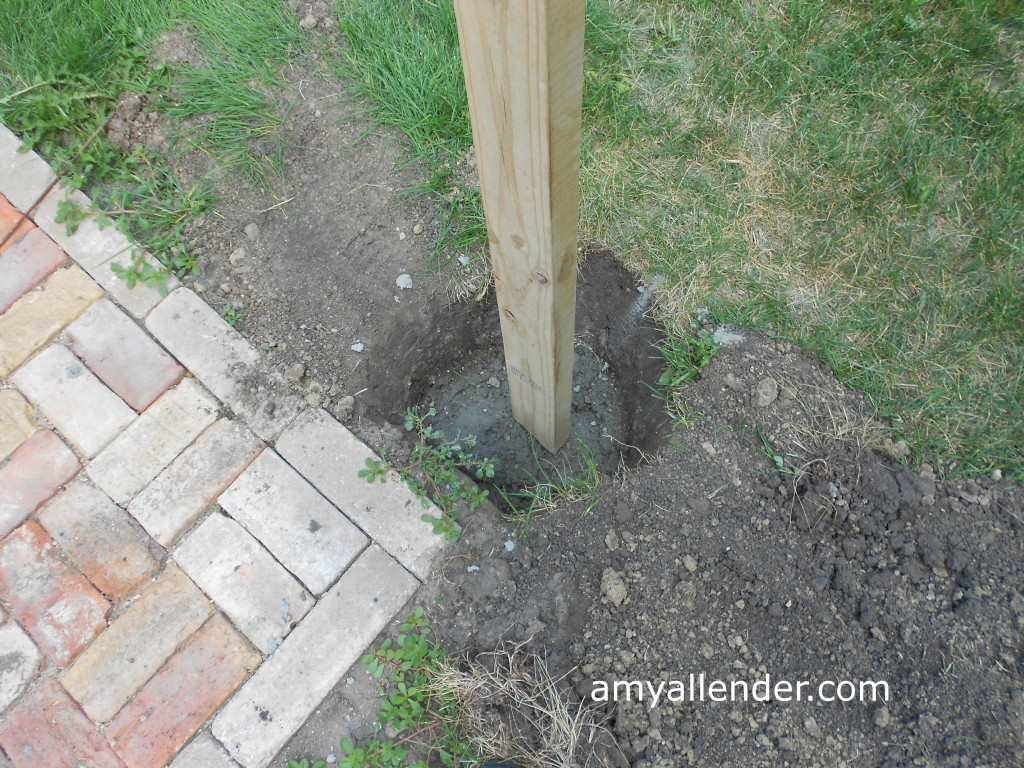
Back to Menard’s. This time for new 2×4’s. I bought 4 12′ posts and 2 10′ posts. At each corner of the patio I dug down three feet. Yes, that’s deep. Then I cemented the four tall posts in with Quickrete. Check for level!!
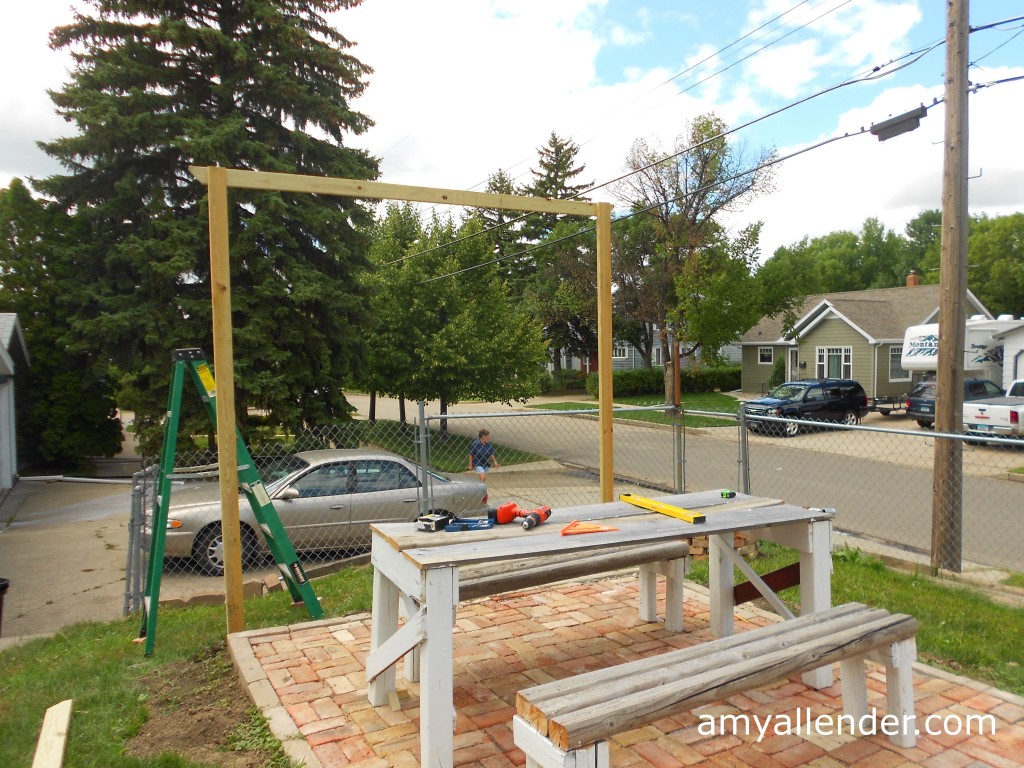
Grab a friend for this next part. Once the concrete has dried completely, you can hang the upper lintel. I did it alone…but I really don’t know how I manages it. Screw them in place with deck screws.
I used 5 strands of 20′ patio lights from Target to create a canopy of light above the patio. I ran each strand between the posts around nails that I put in the top of each lintel. After wrapping the cord around I hammered the nail head down slightly to hold the cord in place.
Then I moved all the furniture back in and boom…patio, roasted.
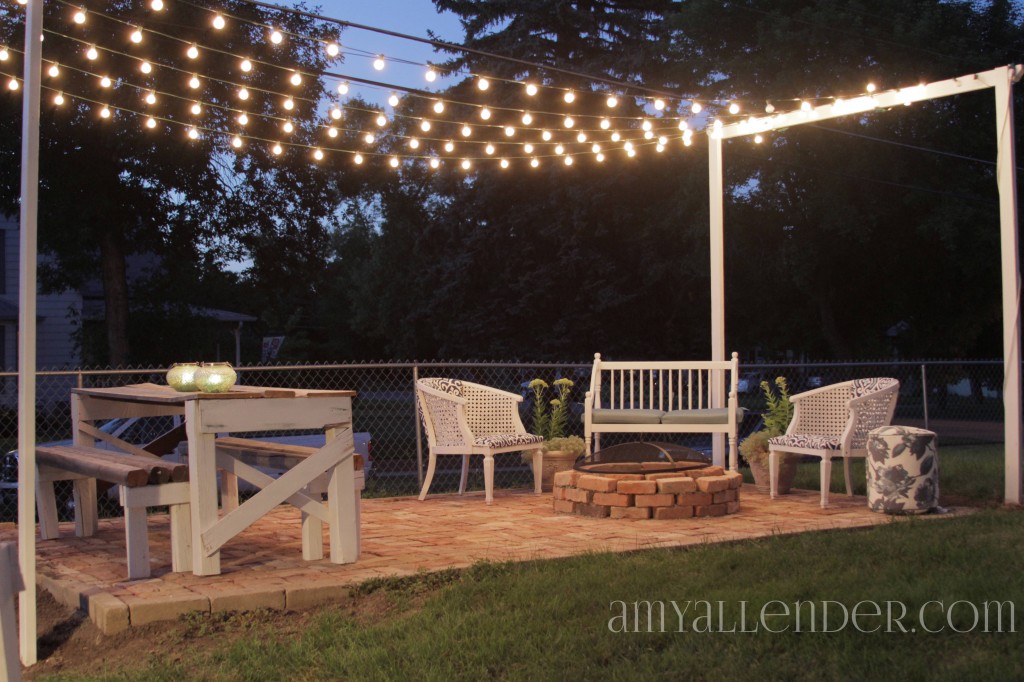
Other things on my shopping list:
A grate to cover the fire pit…that’s code here in PraCan.
An adorable ottoman…super sale from Target for only $12.00
Plants for planters recovered from the yard
A white extension cord to power those precious lights {Target}
Two mercury glass lanterns from Menards
Two citronella candles to ward off the state bird of North Dakota {mosquitoes}
Did I miss anything? If you have questions that I didn’t cover…let me know! I’d love to hear from you. And yes, I did this. Me. A girl. With no husband in sight. I’m terrible at math. And only moderately strong. If I can, you can.
Amy
by Amy | Jul 31, 2013 | Blog, The Art of Projects, the house
A month or so I told you about my Mele Kalikimaka moment. If you have no idea what that means…read the post here. When I started with the patio I really wasn’t sure how it would all come together. But it’s done now, and I think it turned out pretty nice. At very least, I think we can all agree that it’s an improvement from the rusty shed that I started with.
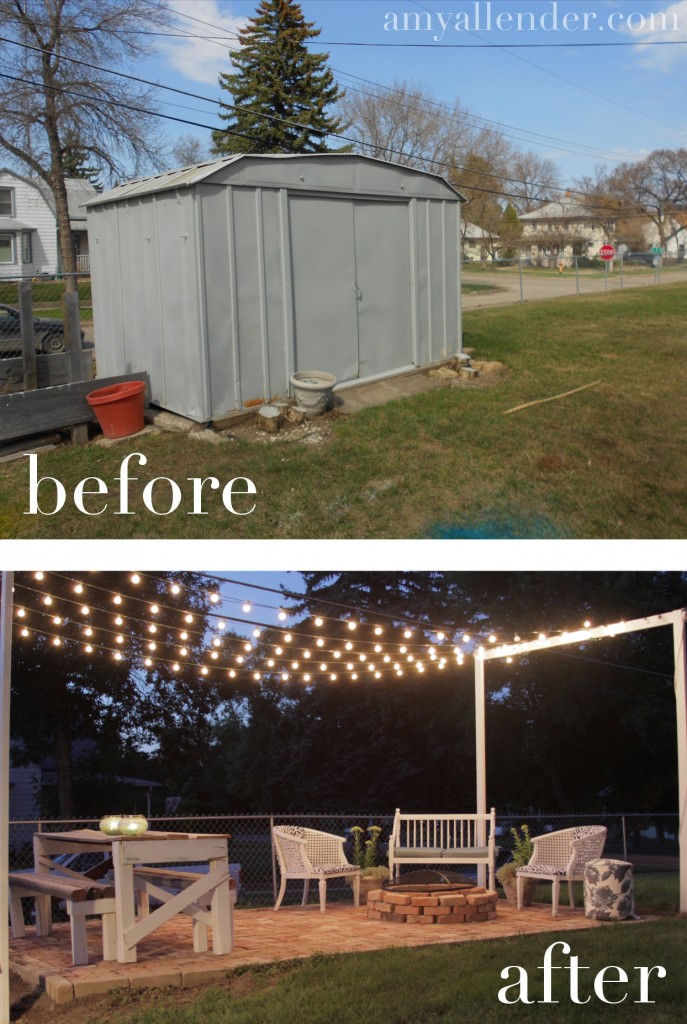
You like?
I do.
I’m still missing a little grass around the edges, but in the big scheme of things it’s not such a big deal. And the craziest thing about it is I did it all by myself. Well…that’s not entirely true. I had some help hauling bricks. And a bit of help leveling the soil. And moving furniture. But it’s been a one man show for the most part.

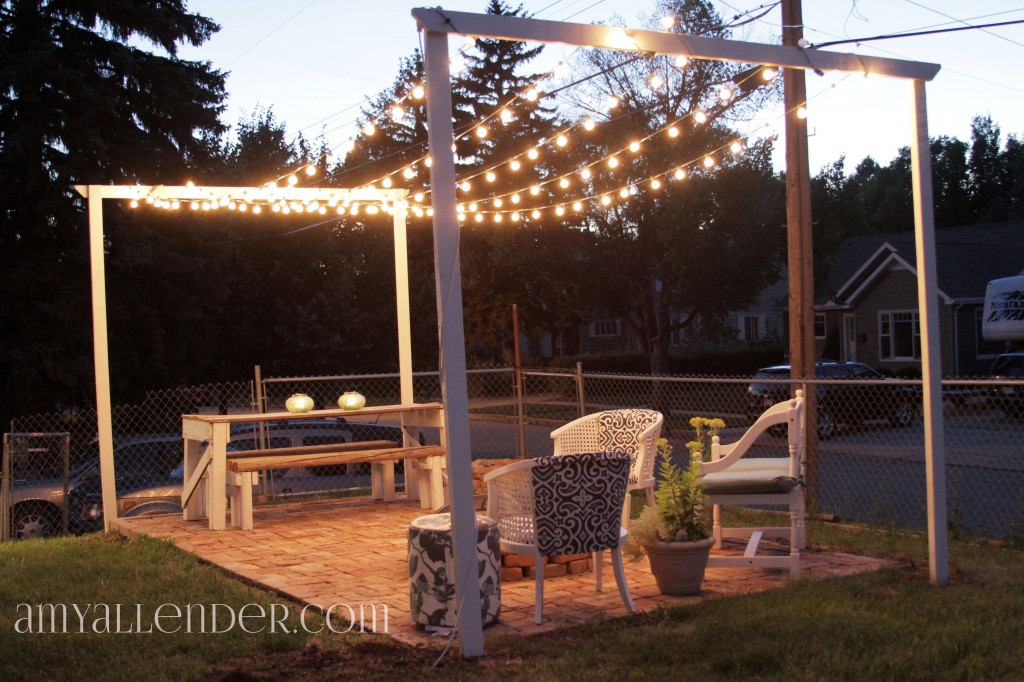
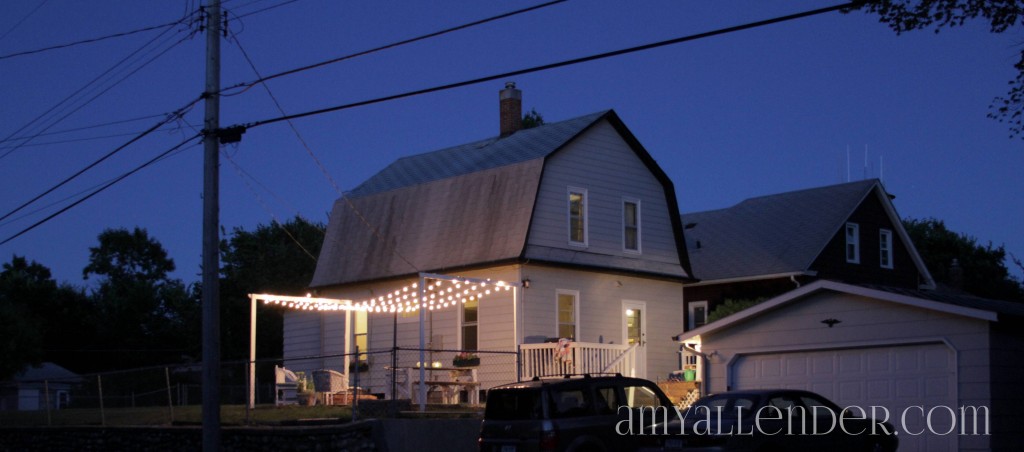
It’s twinkly. It’s warm, cozy, inviting. It looks like summer. I’m really happy. Now who wants to come over and hang out?
Tomorrow I’ll give you all the tips and tricks I learned along the way.
Amy
by Amy | Jul 30, 2013 | Blog, The Art of Projects, the house
I wish I took more self portraits. That way I could show you just how ridiculous the things going on at my house really look. But alas…I’m much too busy with my projects and hurting myself…and doing things in weird, awkward, one-man-show type ways to stop and pose for a selfie. Maybe I’ll work on that in the future.
So, you’ll never believe this, but…the patio is done! Yep. Done. As in finished. As in I’m hosting my very first big party on the patio on Saturday. You’ll have to wait until tomorrow to see some photos though. I put the finishing touches on it this past weekend. While doing so, I got to thinking about what the neighbors must think.
You see, Derek and I moved into our house just about a year ago, but up until recently–while he’s been gone– we didn’t know any of the neighbors. My sole interaction with one of them was just long enough for Henry {yes, that’s his real name and he is married to a Betty–adorable, I know!!} to tell me not to shovel my snow over the property line. So I didn’t. And I minded my own business. And I went about my business. Then something happened. I think I sort of morphed into that “crazy person” down the street. I started unleashing fury on my project list and in turn, created a bit of a spectacle.
At first I only noticed some looks from folks driving by. Then walkers turned into gawkers. Then the neighbors started asking questions. I get pretty shy and awkward when approached sometimes. I don’t mean to, but it happens. For as many projects as I’ve done, I still get kind of self-conscious about my abilities. Especially while Derek is away. When people see me working and stop to chat about it, I always figure they know more than me {which they probably do} and think I’m a fool because I’m going about things the wrong way {which may or may not be correct.} So when the neighbors started coming around to ask what I was up to I got nervous. We own the corner lot, so everyone can judge see my antics.
Overall, to my relief the response has been overwhelmingly positive. Now I not only know my neighbors, but consider them friends. Even Henry and Betty…who have proven to be gems. I’ve even met some people who live in the surrounding blocks. They’ve stopped by the fence to say “hi” and ask where I get all my nonstop energy.
At the very least I think I’ve been a pretty good and cheap source of entertainment. Especially since several of my undertakings have really been two person jobs that I’ve jimmie-rigged to be solo acts.
Tonight I thought I’d take a brief moment to look back some of this summer’s finest moments that could have been seen through the windows of the houses next door.

1. Before the weather really turned I was busy working on the bedroom. That meant many, many days a mysterious neighbor girl hauling roll after roll of carpet out of the house. And several garbage days that looked like this:
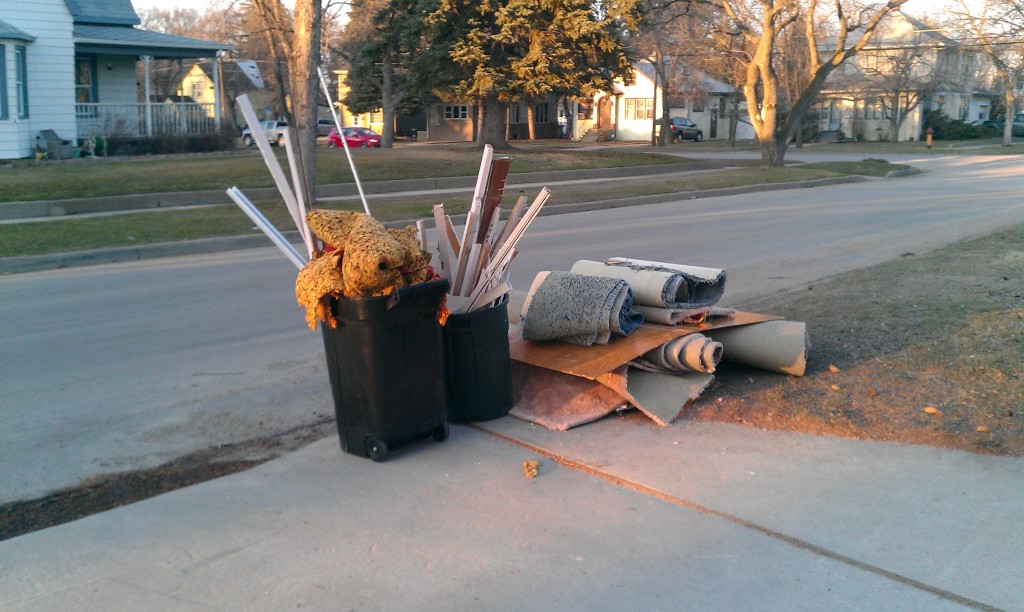
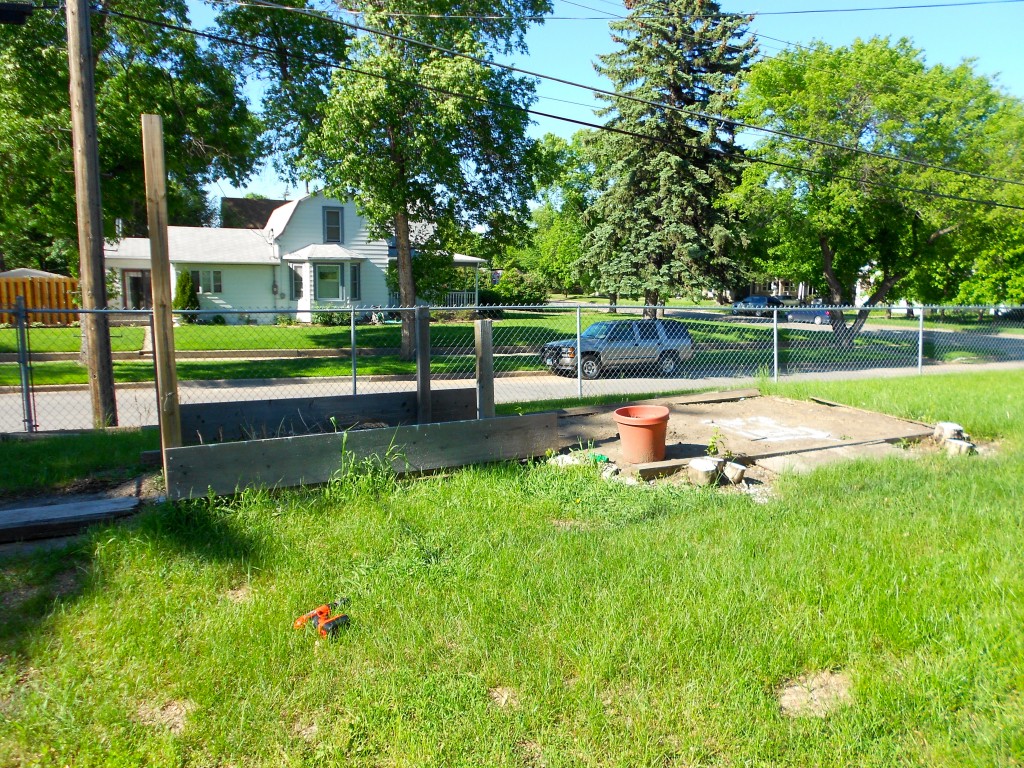
2. First of all, the process of moving everything from our ugly, rusty shed to the garage. Then a stranger coming and dissembling the shed to take it away. {Oh, and let’s not forget the spray painting projects that were done in the yard. You can see remnants in the photo below.}

3. I spent an afternoon putting all of my body weight and energy into wiggling 4×4’s loose and pulling them up out of the ground from the area around the shed. Yeah, that stuff down there.
4. I have only had one vehicle parked in the garage all summer because the other half has constantly been devoted to project space. When the garage has been opened passerbys have been able to see chairs being rehabbed, pallet benches in the making, fence posts turning into window boxes, planters being filled and crap wood being turned into a table.
5. While we are talking about the garage…there’s a good chance a few people have spotted me using my car as a ladder to reach high items in there. Someone saw my hand and feet prints in the saw dust that had accumulated on it and asked if someone had been standing on my car. Yes, weird…it was me.
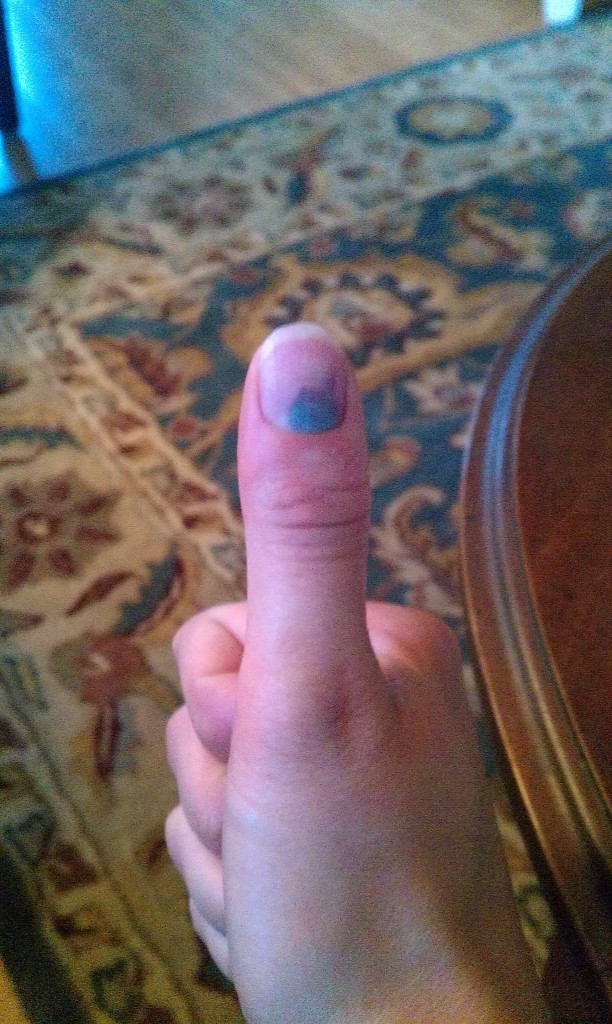
6. Several may have heard me udder some form of gibberish profanity when I dropped a patio edger on my thumb. It feels better, but looks a bit worse.
7. And let’s not forget load after load of bricks for the patio.
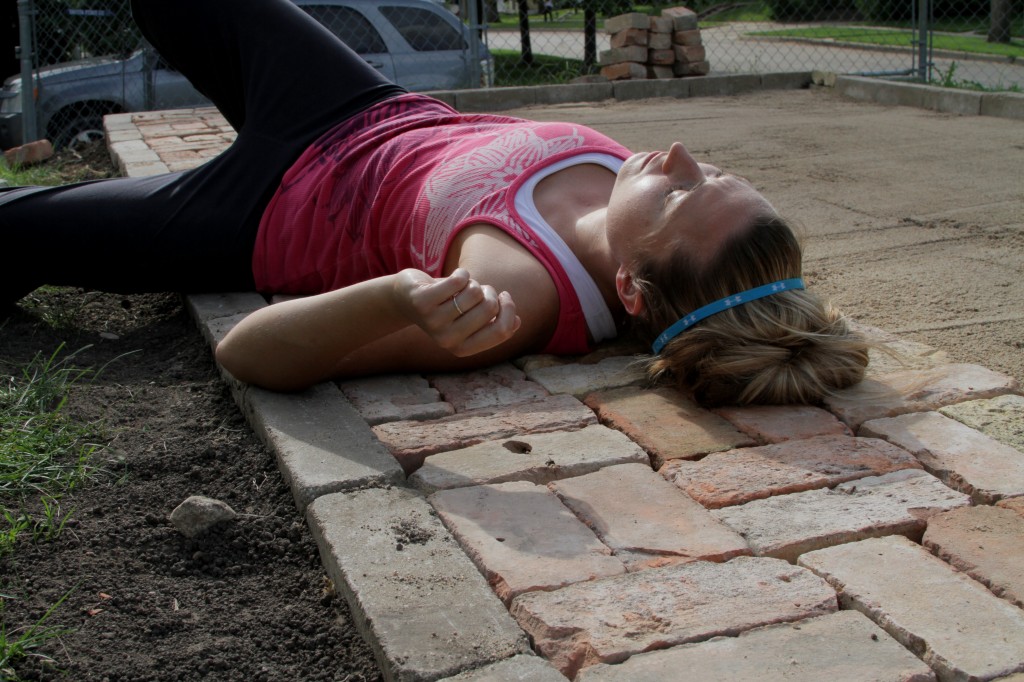
8. Speaking of the patio…I’m sure watching me dig and level the ground was a treat. I dug up three 5-gallon buckets worth of landscape rock from where the shed used to stand. Let me tell you this. Hauling those away was not a graceful looking task. I’m strong, but not that strong.
9. One day I didn’t have time to leave the house to do my personal training at the gym, so I had my client come to my house. We got some weird looks for doing lunges, weird kicks and sprints across my yard.
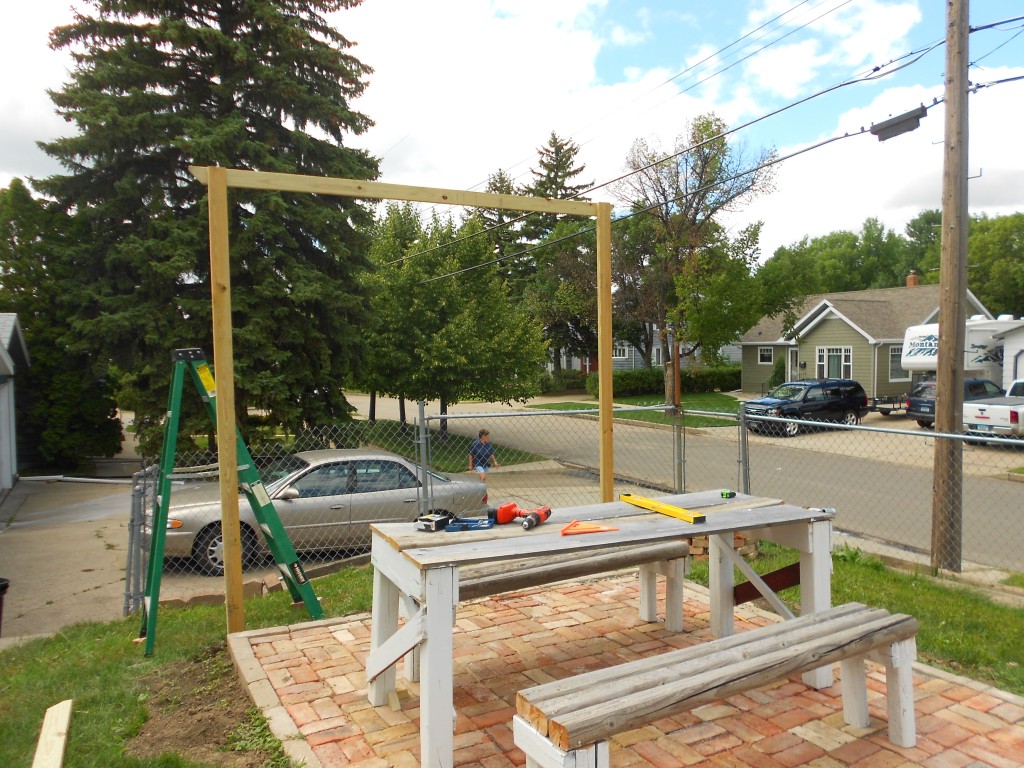
10. Maybe the most awkward, entertaining thing I’ve done all summer has been finishing the patio {let’s be honest, it’s an outdoor room} project. I wanted to hang a canopy of lights so I built a post and lintil structure on either end of the patio. Simple enough…but getting the lintil up alone was quite a challenge. Let’s just say there was a ladder, a prop, a second ladder, some words not fit for children and a lot of luck involved.
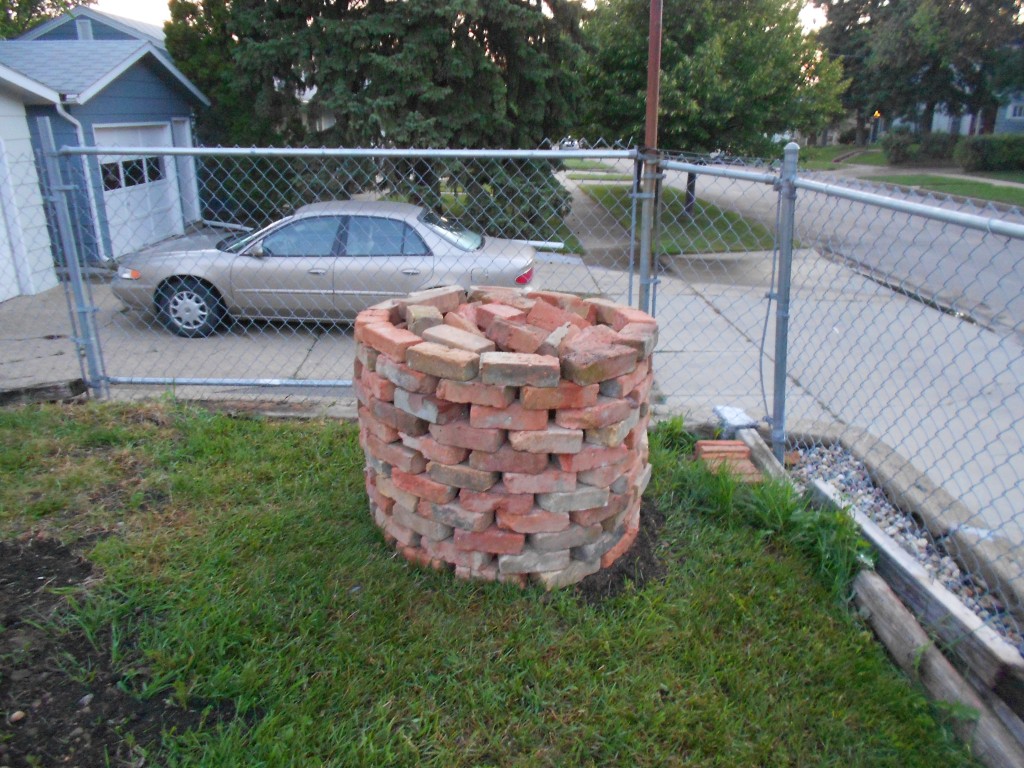
11. Yesterday I spent an hour sledge hammering a bunch of concrete I found after the shed came down. I felt like Thor.
12. Summer is coming to a close up here in PraCan…and so is my outdoor project list. But I’ve got one more big one up my sleeve. What is it? Who knows? I’ve had a lot of questions and I’ve explained it to many. My response is the same for all my undertakings: if something goes terribly, horribly wrong, I’ll just rip it out…sledge hammer it…or chain saw it down and pretend it never happened. So…any guesses?
Amy


