by Amy | Jul 11, 2013 | Blog, The Art of Projects, the house
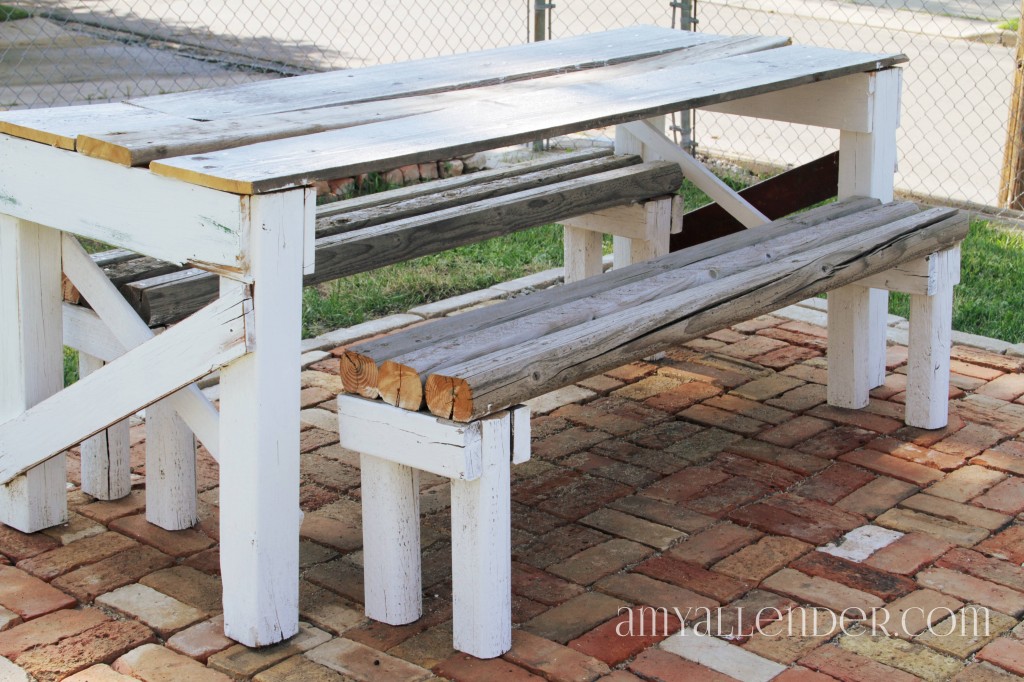
Today I’ll show you how I {yes, me…all by myself} built this table and benches for my patio. Are you impressed, or what?!
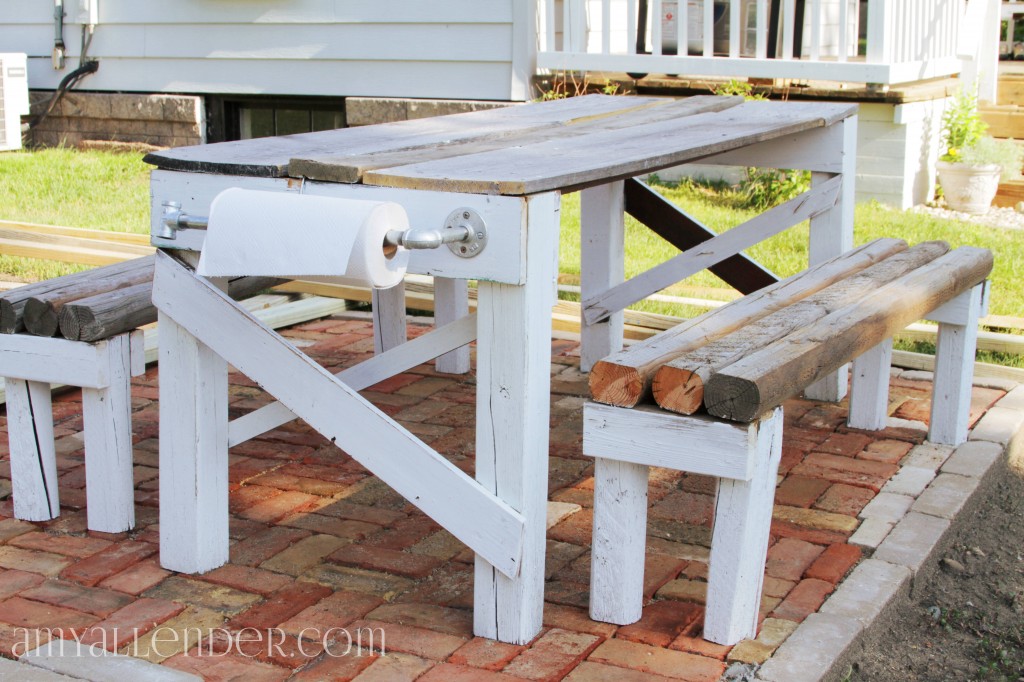
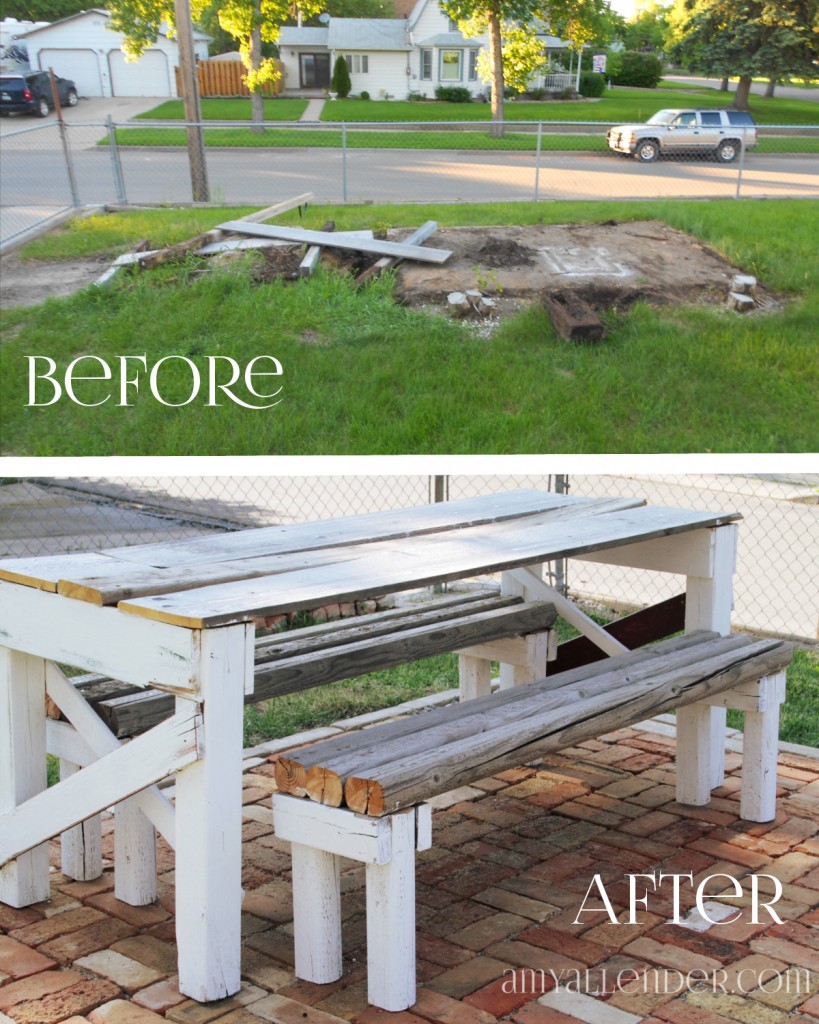
I have to say, this is one of my greatest before and afters. After my shed came down from the space that I wanted to lay the patio, I was left with a bit of a mess. Wood from the previous home-owner’s garden frame was left hanging around…then, as I leveled the ground I discovered quite a few landscape timbers lying in the dirt around the space that the shed used to stand on. I knew I wanted a place to sit and eat outside, but even the simplest table and bench combo was going to set me back several hundred dollars.
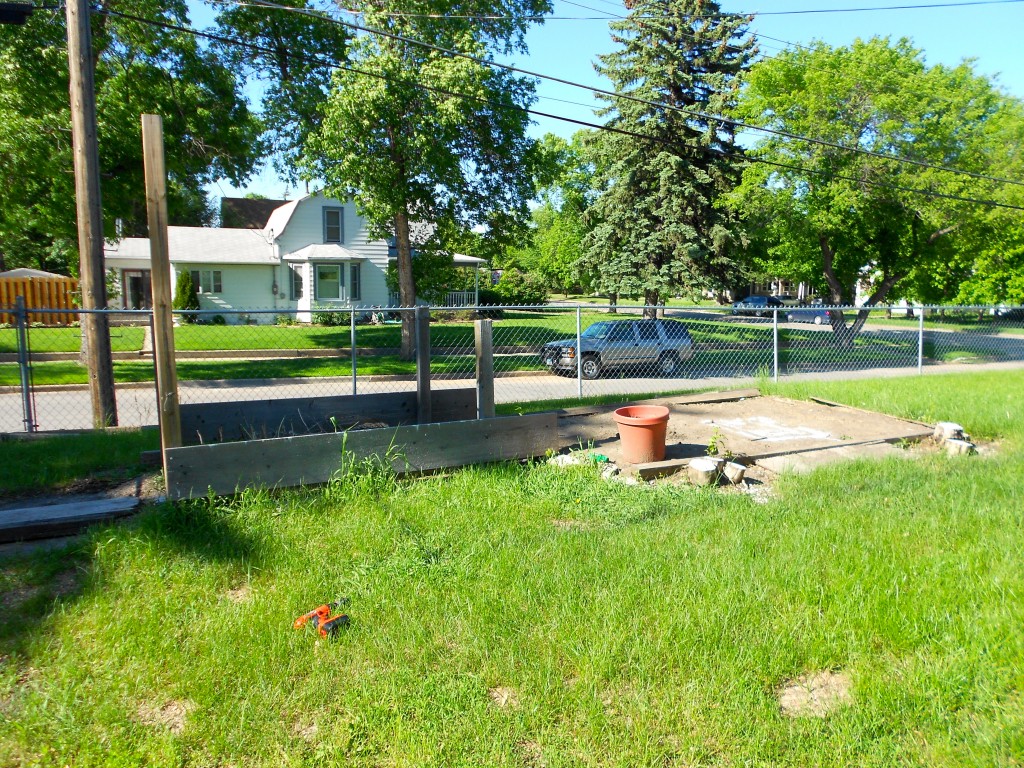
Not happening.
So I got creative, collected the resources I had on hand and got a little gutsy…and I made this happen.
The inspiration for this project really hit me when I visited the Vintage Fair here in Minot a few weeks ago. I had been all over and racking my brain trying to figure out a way to get a table for my new patio without breaking the bank. I had kind of hoped to find something I could use at the Vintage Fair…but no luck. Instead I came across a table that was PERFECT in every way, except for the fact that it wasn’t for sale. Bummer. This is it:
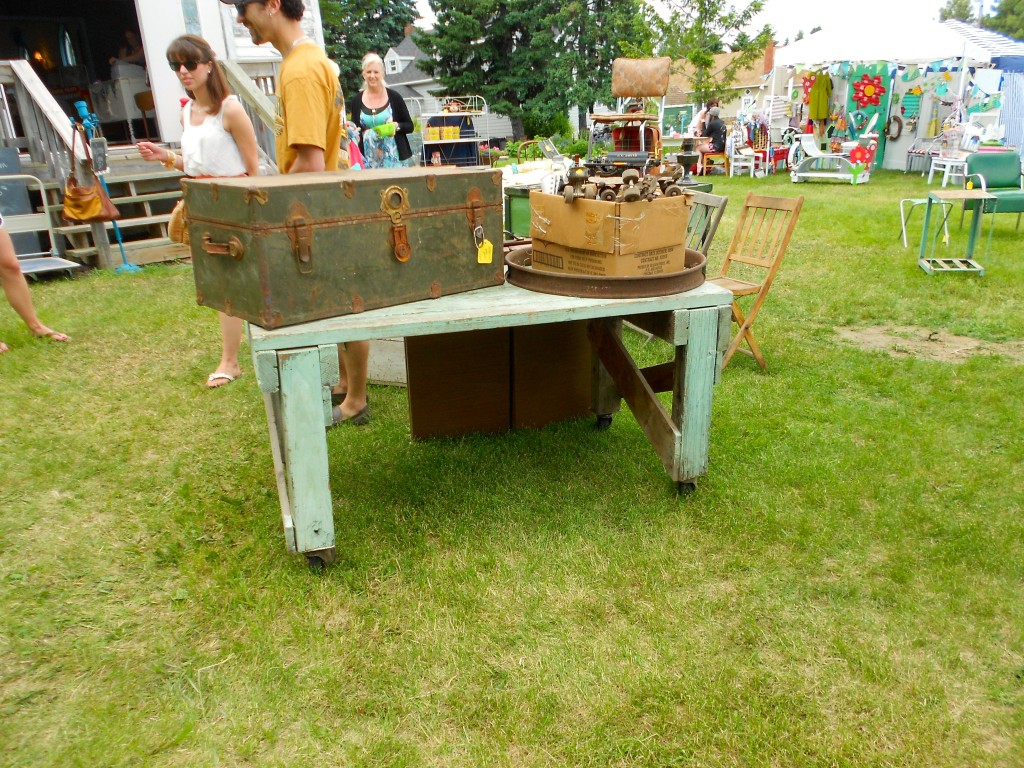
It was apparent that at one time, this table had been made with scrap lumber. Even though I couldn’t go home with it, it sparked an idea. Like a big cartoon thought bubble, my mind was filled with the memory of all that crap wood I pulled out of the yard. Bingo.
I was a little worried, because I’ve never been much of a carpenter. The closest I’ve come is following Jesus…and a couple woodworking projects with my dad when I was a kid. {But let’s face it…I was mostly an innocent bystander for the majority of those shop projects.} But I armed myself with lots of photos of this table, from every angle I could get…and I went home to replicate.
Here goes nothing.
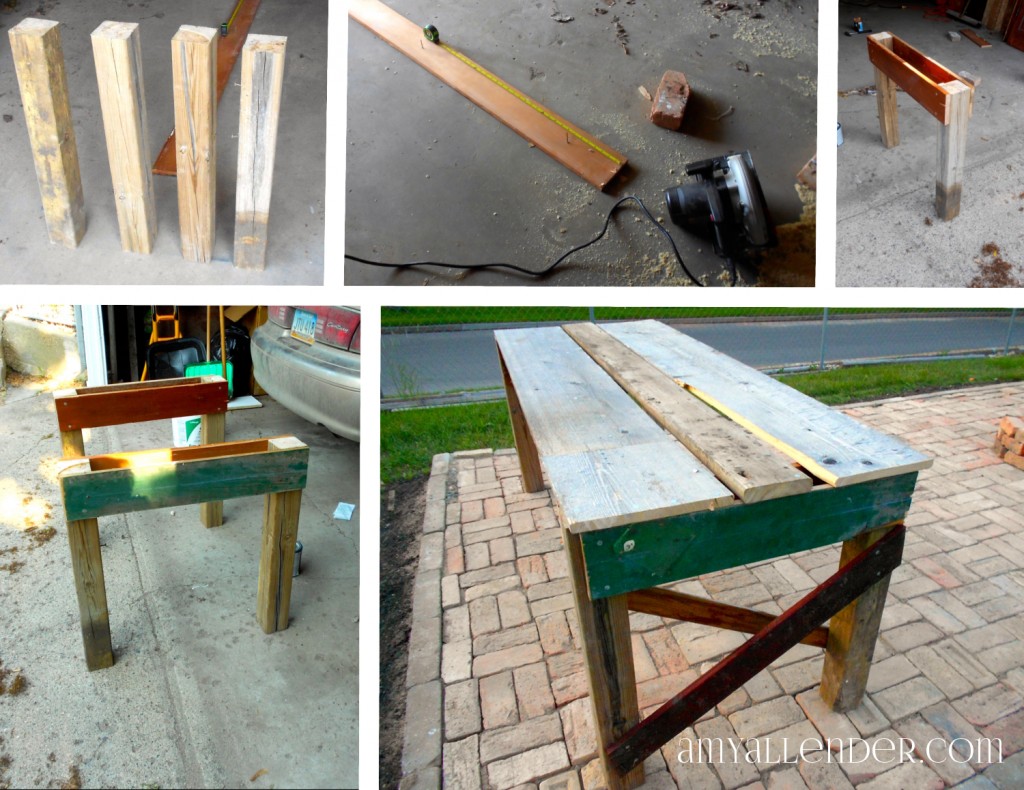
1. First I did a little Googling to figure out how tall a table usually stands. Most plans say 30-31″. I cut up this tall 4×4 to four 30″ lengths.
2. Next I did a little more Googling to find the typical width of a table. I wanted mine on the slender side to conserve space, so I decided on 28″. I cut four pieces to 28″. These will hold the legs in place. For this part I actually used a couple spare baseboards from the bedroom redo.
3. Nail those suckers in place. Make sure the top of your 28″ piece is flush with the legs and that the legs are square. Nail one brace to each side of the 4×4 legs.
4. Repeat that process for the second pair of legs.
5. To lend additional support you’ll need to come up with four more pieces to attach in an X to the legs. I also thing this looks super cute. I found some old fence posts{?} behind the garage. So I used those. You want one end to rest right under the brace. To make measuring easier I laid my leg piece right on top of the piece I wanted to use for the X. Then I drew a line and made my cut. Attach one to each side of your legs.
6. Next decide how long you want your table to be. For my space 6′ was just about perfect. Stand your table legs apart and lay some long planks across the top. I used the two sides from the “garden” and one leftover deck plank. When you’re happy with how it looks nail them in place. Use at least four nails per end, per board. {2 into each brace.}
For this project I used all nails. Partly because that’s what the table at the Fair was made with and I liked the rustic feel of seeing them. Partly because that’s what I had on hand.
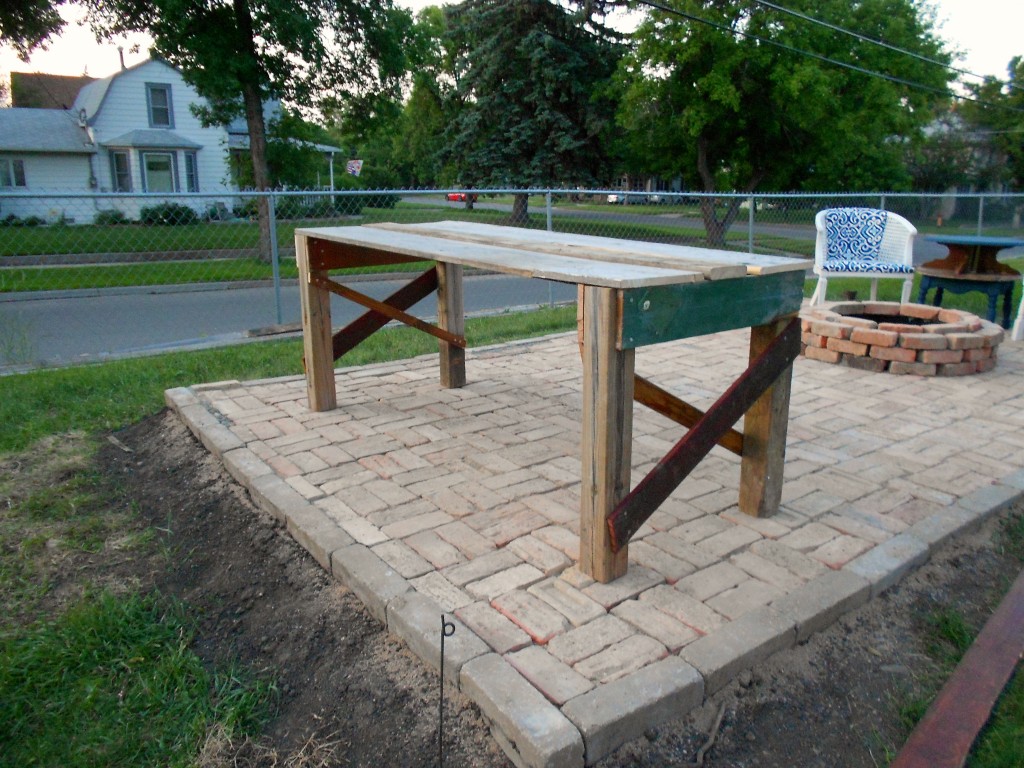
I so wanted to be happy with it just like that. All rustic and mis-matchy. But…you know me. Nothing is complete without a little white paint. I felt like it would really unify the table with the rest of the patio {ahem…my awesome chairs} if I painted it. I painted the legs and left the top alone. I love its weathered gray tones.
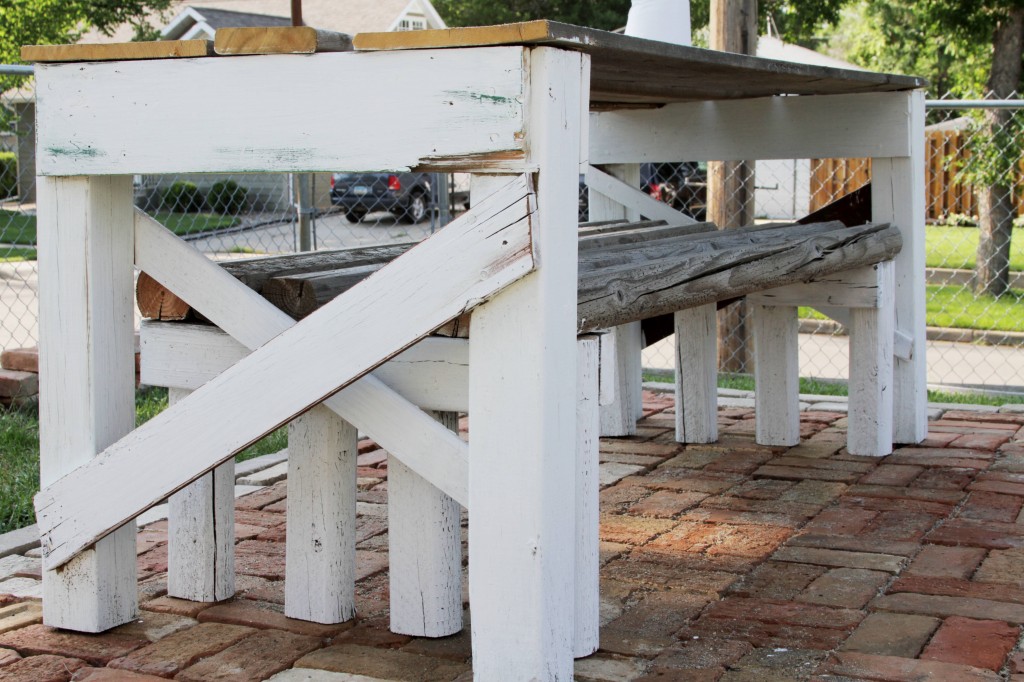
Now on to the benches. Those were so easy! They are like mini tables, so once you’ve done the big part these will be a breeze.
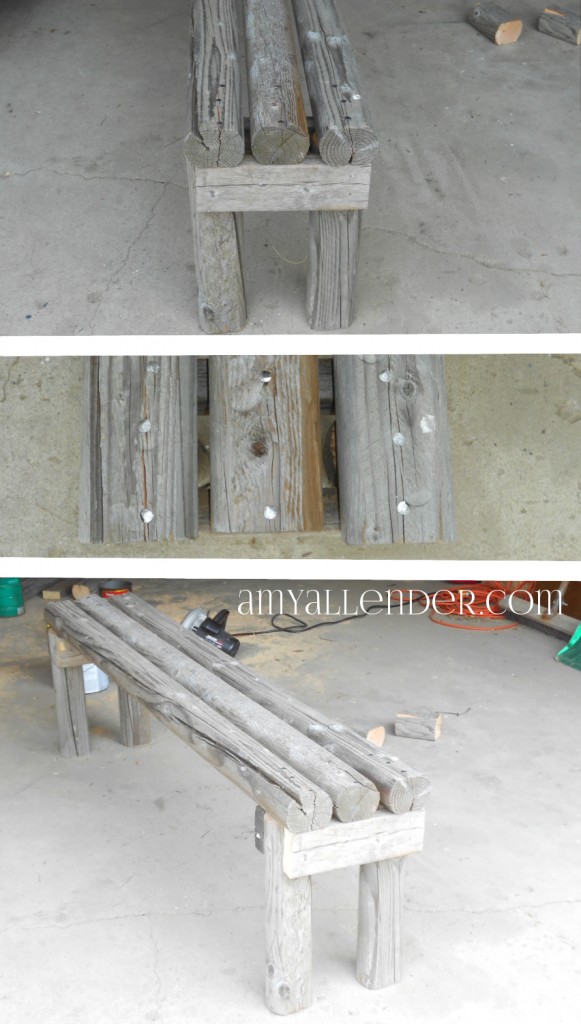
First build your legs. Google told me the bench should be about 18″ tall, so I had to do a little math. The landscape timbers are 3″ thick, so I cut my legs to be 15″ tall.
Next decide on your seat width. I made mine on the narrow side so I could store them under the table together. These are 10.5 inches wide. Cut your braces and attach them. One to each side of each set of lets.
Then nail your long timbers across the top. My benches are 54″ long. Again, so they could be stored under the table. Since these timbers are so thick I had to make a run to the hardware store for extra long nails. This was my only expense in the whole ordeal…$4.59. I’d say that’s a pretty good deal for a table and two benches. And as an added bonus I don’t have so much junk lumber laying around my yard.
Just like with the chairs yesterday, if you want this to last you’ll need to use products made for being outside. All this lumber is pressure treated or cedar {with the exception of those two baseboards} so I know it’ll hold up. The paint I used is more of that white deck stain from last summer’s Deck Redo.
And, for real…if I can make this, so can you.
Amy
by Amy | Jul 10, 2013 | Blog, The Art of Projects, the house
Let me start by telling you that…the patio is done! It’s been done for about a week…but things have been pretty busy around here so I haven’t had the time to sit down and really show it off to you the right way. I even had my very first dinner gathering on it on Sunday. Pretty darn exciting! It’s still missing the lighting, but besides that I’ll call it good. The lighting will just have to wait until I return from a visit home to Indiana next week. But more on that later.
If you have a patio or a deck…or are looking at putting one in you’ve probably noticed that, well, outdoor stuff is pretty pricey. I hate pricey. I like affordable, eclectic and thrifty. If there is one thing that the Allender clan is good at {but let’s be honest, we’re pretty savvy at lots of things} it’s coming up with solutions. We are brainstormers willing and able to see a creative use for a mundane item. So that’s exactly what I did. I got creative and thrifty when furnishing my new ODR {outdoor room, folks.} Today I’m thrilled to show you the first part of of my conversation area…take a look.
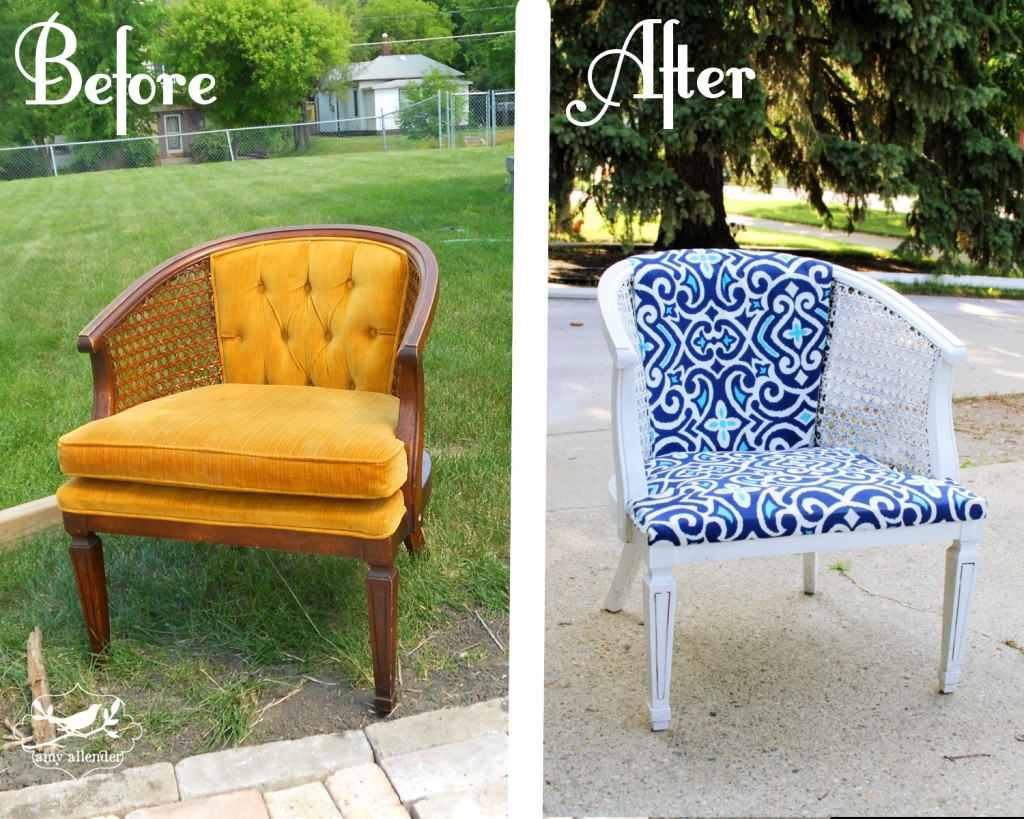
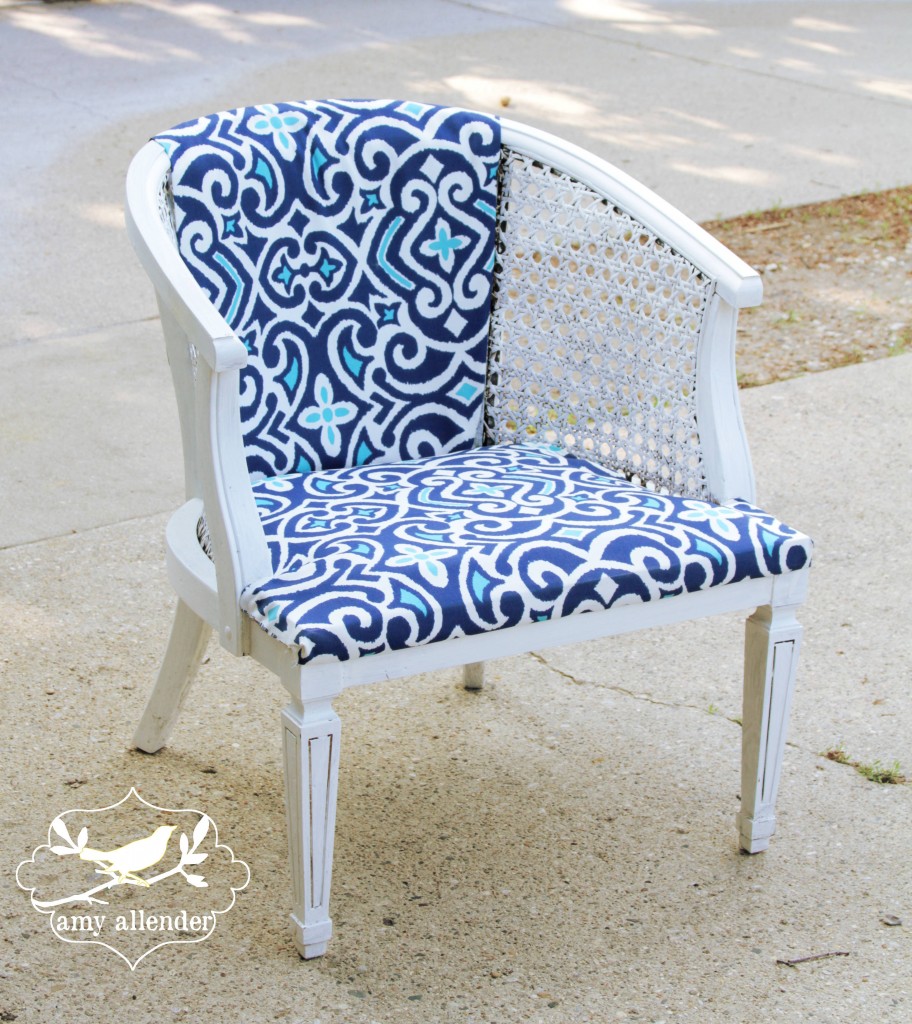
Big difference, right? I bought two of those yellow upholstered chairs at the Salvation Army Thrift Shop for $15 each. When I laid my eyes on them, I knew that if I put a weather resistant fabric and some white paint on there…they’d be perfect.
Here’s what I did. Really, it was so easy, I know you can do this. When I got these chairs they smelled super bad. Like mothballs and musty closets. When I proudly showed these gems to my friends in the garage, the first thing they noticed was not the cool lines or the potential. It was the smell.
So my first order of business was ridding them of anything that could capture the odor inside. I tossed the cushion and ripped off the fabric and all the padding underneath. Then I scuffed up the glossy finish on the exposed wood with some sand paper and added two coats of exterior grade paint. {Leftovers from last year’s deck redo.}
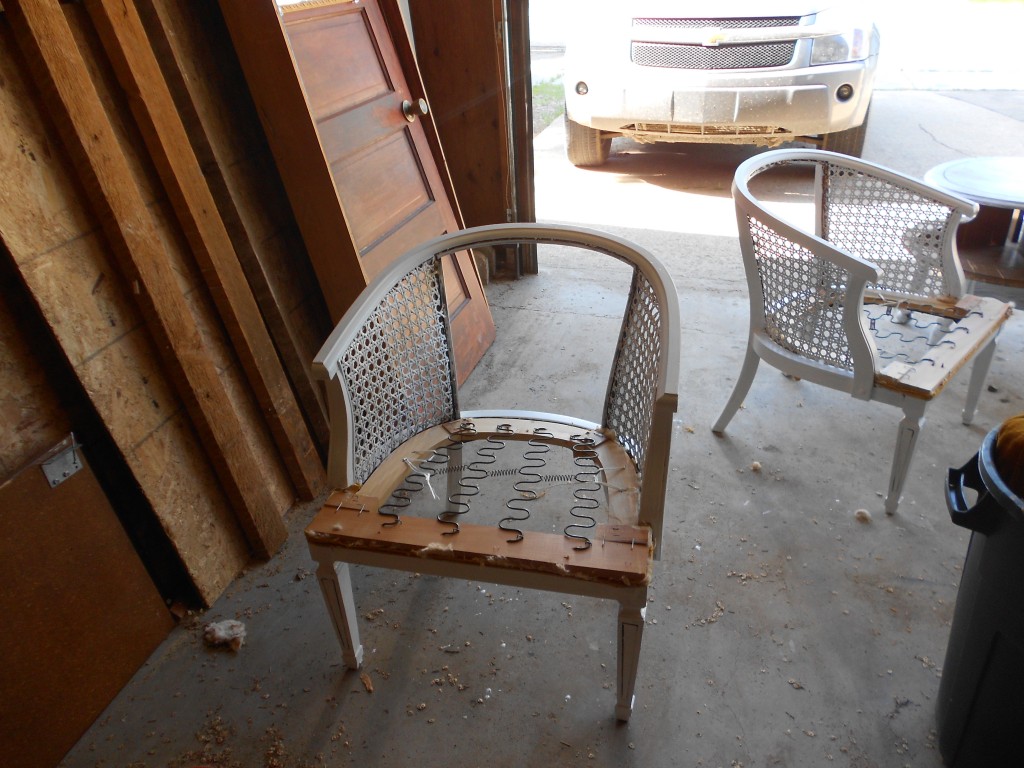
Once the paint was dry and all the stuffing was safely in the trash it was time for new cushioning and upholstery. I went down to my ever loyal JoAnn Fabrics. I picked up two yards of outdoor fabric and outdoor cushions. If you are making over a piece of furniture that you plan to keep outside, it is pertinent that you use things made for the open air…fabric, padding, paint, everything.
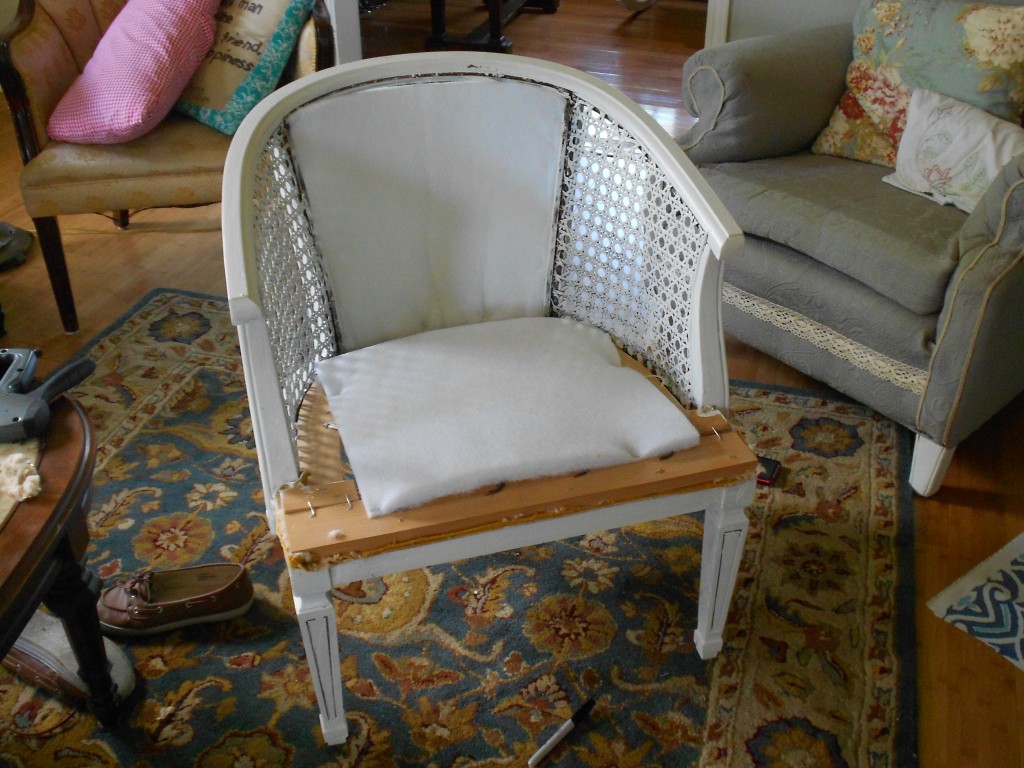
Now, the way I did the upholstery is a little janky. I put one cushion on the seat {as you can see one a size bigger might have been a better option, but this is still okay because it covers the springs.} The other cushion a put in the back of the chair. I took the staple gun to them to hold them in place. Then it was time for fabric.
I measured the size of the seat and added about 2″ to the whole perimeter. Then I did the same thing for the back of the chair. I whipped out my high-heat glue gun and started attaching it to the chair frame. Starting on the bottom {or back of the seat} I glued it in place, then pulled it tight in the opposite direction. You want it really good and taut. In the places that the seam shows, fold the fabric under to make a “finished” edge. As you go, trim off any excess that gets in your way.
Just to make things easier on myself, I wrapped the fabric all the way over the to of the chair and attached it to the back.
It’s not perfect by any stretch of the imagination, but it looks {and smells} lots better. And the total cost with all the supplies, came out to about $50 for the two chairs. And while these are weather resistant, I don’t recommend leaving them out in a downpour if you know it’s coming. Taking them in, or covering them with a plastic drop cloth will prolong their life.
Come back tomorrow and I’ll show you my new patio table. That I made. For FREE! Yep, free. Okay, if we are getting picky, it cost $4.59 for nails. Give a girl a break.
Amy
by Amy | Jun 27, 2013 | Blog, The Art of Projects, the house
So, I’ bet you are just dying to know how the patio is shaping up. Let me tell you. It’s great. I’m totally in love with it and cannot wait to have it done. But I’ll tell you this: There’s a reason last time I did this, it wasn’t alone. Patios are super heavy. Everything about them is hard and heavy. Digging, raking, carrying, dropping, loading, unloading, setting…On the upside, I’m getting a killer tan and my back and arms are looking fab.
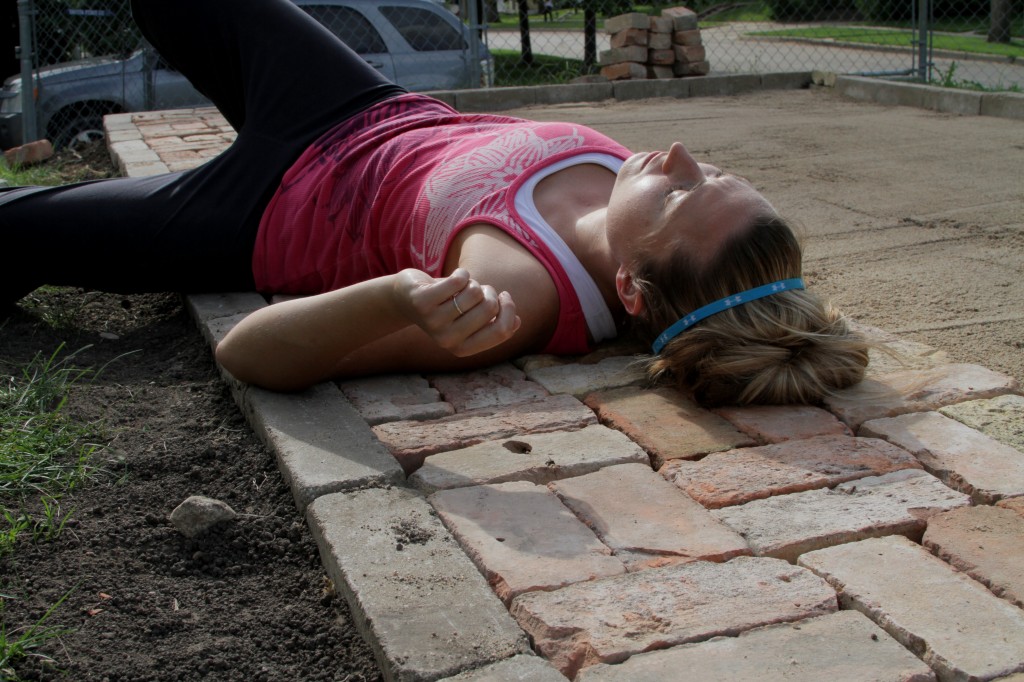
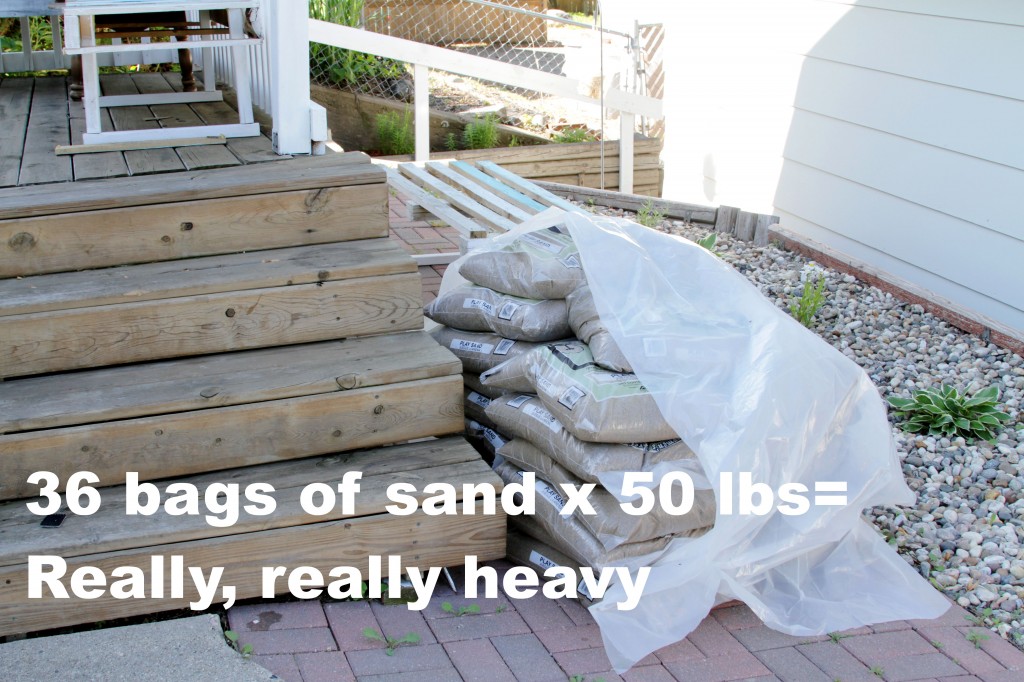
Here’s the progress I’ve made. For starters, I stripped out the area and spray painted a boarder on the ground. Then I leveled the dirt…approximately. Next was my first trip to Menard’s for this project for sand and edgers. The sand was so heavy I had to bring it home in two trips.
I brought all the edgers home in one trip and sloppily set them around the boarder.
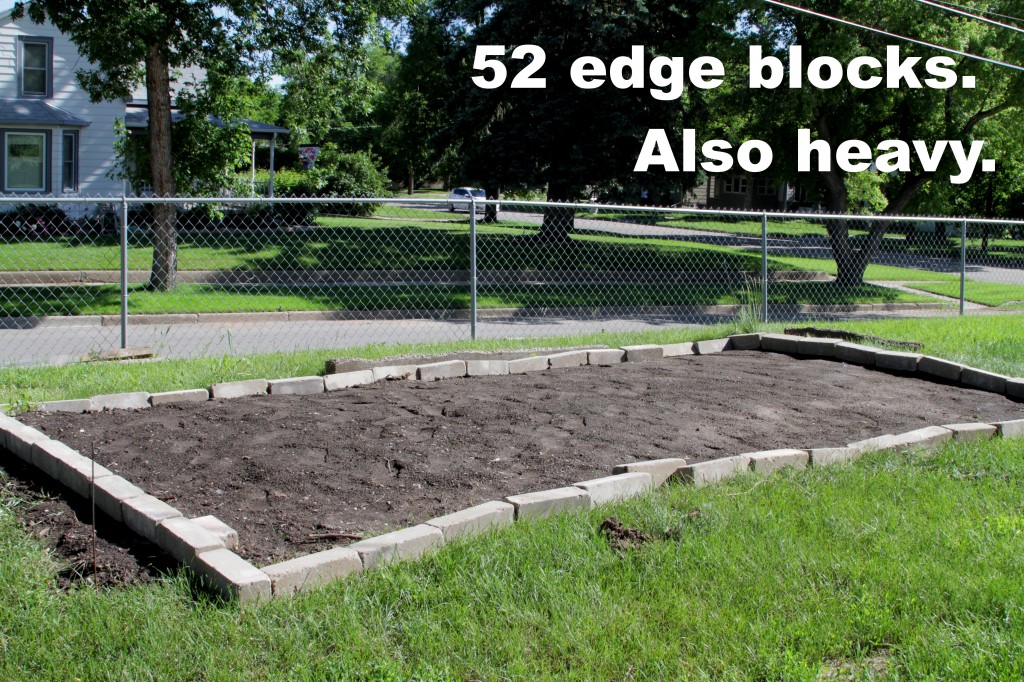
Next things got a little harder. {Like lifting all that wasn’t hard enough.} I set and leveled each edger. Once they were in place it was time to pour all that sand inside. You have to have some sand in there to lock your stones in place and give them a little cushion. Then I made a ghetto contraption to help me level out the sand {it’s that thing with the green board nailed to it.} It’s best to add a little red neck {literally, you should see my sun burn} to all your projects.
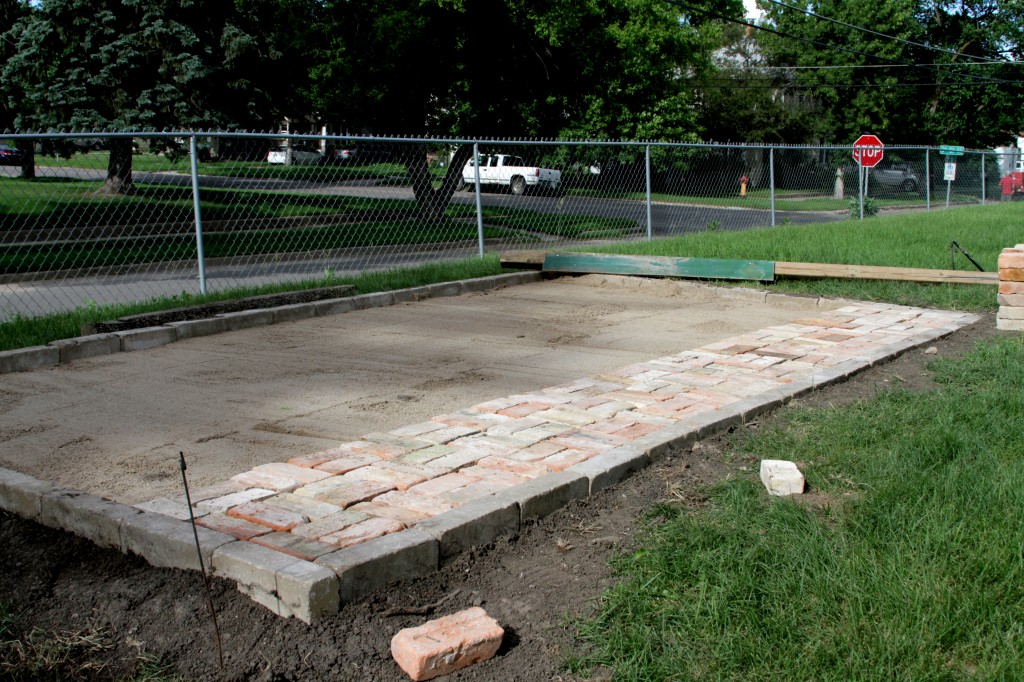
Then, it was time to bricks. Aren’t these gorgeous? They’re salvaged from a flood home in Minot. Which I think is pretty darn cool. Here’s the catch. I’m picking them up from said flood home and bringing them home myself. Doesn’t sound crazy yet, right? Just wait. You see, my car is a small SUV so it can only stand to carry a few hundred at a time. So I’ll be making several trips. On top of that, the bricks are just in a big pile, so I have to pick through and get the good ones…which is also a battle against mosquitoes. Oh yes, and my yard looks like this:
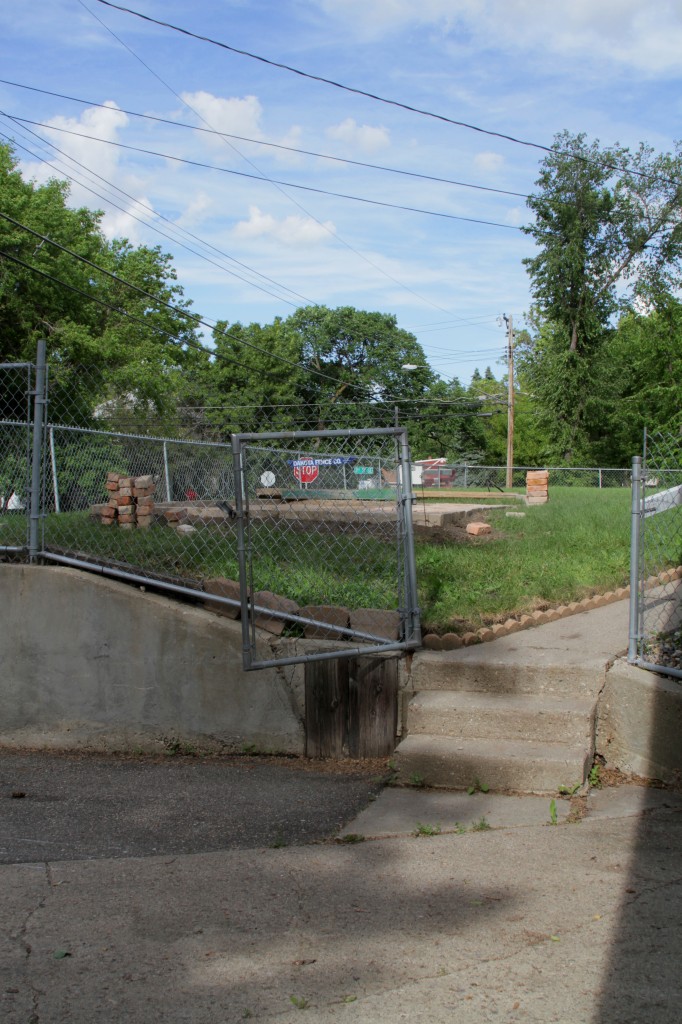
Park in the driveway, walk up those steps, then to the patio. It really blows. The upside is that once the bricks are up there they set in pretty easily. As I said, it’s just a whole lot of strenuous, manual labor. Oh well. I’ll just have to show you my arms later.
Oh yeah, and I’ll mention this too…I’m hoping the whole thing can be laid by next Wednesday so I can start adding furniture and finishes! That is, if I can haul all those bricks home. I just may have to bribe one of the high school boys from youth group to help me…we’ll see.
Amy
by Amy | Jun 25, 2013 | Blog, The Art of Projects, the house
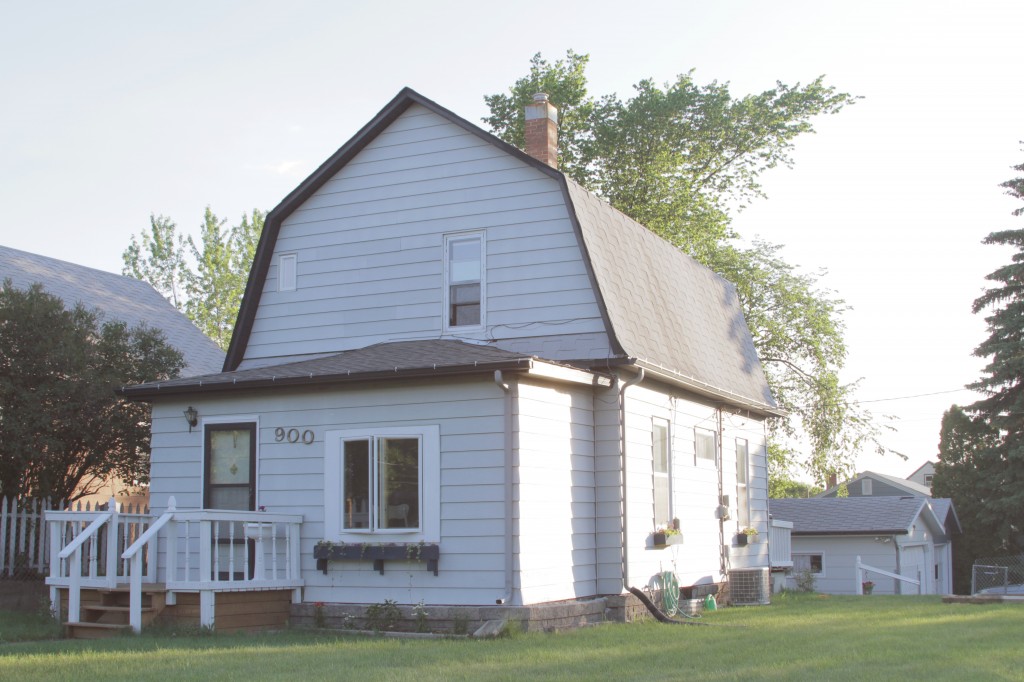
A few weeks ago I told you that I was going to try my hand at building some window boxes. I showed you a round up of good tutorials and inspiration. Now I’ve gone and done it…and I’m super please with how they turned out. Here’s an updated photo of the house. Getting cuter by the day!!
So…Let’s make a window box, shall we?
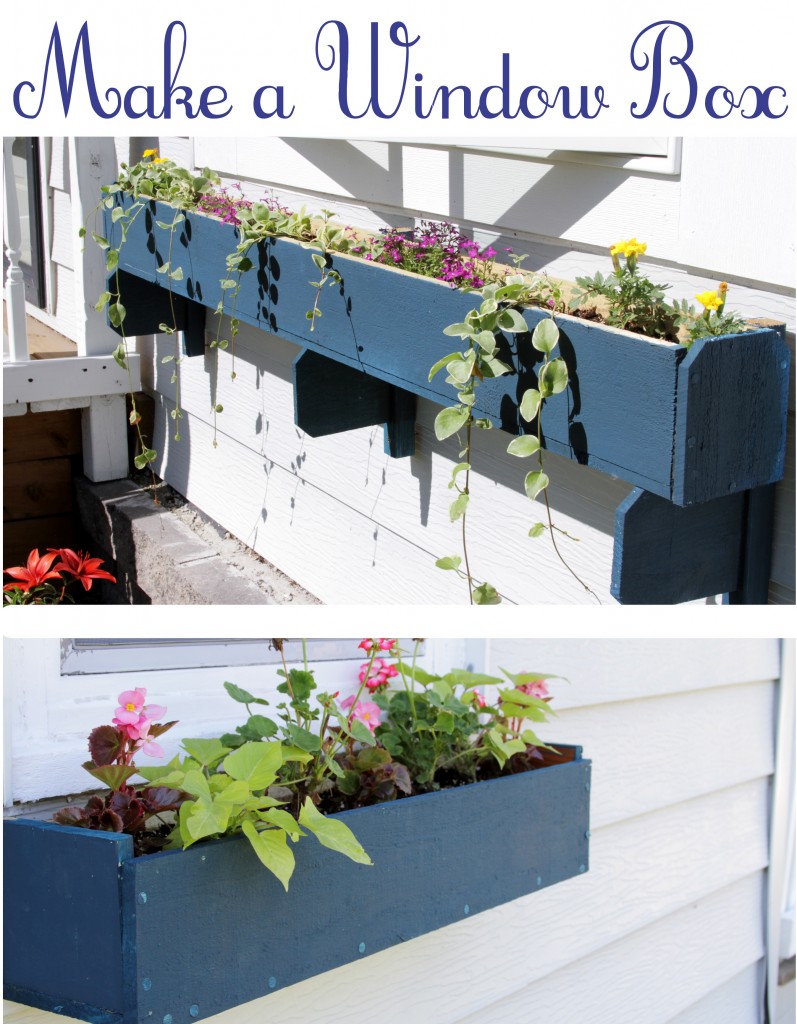
First of all, take a look at the finished product. I made two different versions. One with support brackets for my ultra big front window. The other without. The smaller version is only 23″ wide, so it really didn’t need extra support.
These were very easy to put together once I had the plan all laid out. {And trust me, I’m no carpenter.} They took about 30 minutes each {not including dry time}. I spent a total of $18 on supplies…which included the paint, screws and nails. Oh, and that was for all three boxes that I made. Pretty thrifty!
Here’s your shopping list:
Cedar fence posts
Wood glue
Primer
Exterior paint
1.5″ exterior grade nails
3″ decking screws
Here’s your tool list:
Circular or Table Saw
Drill
Drill bits
Hammer
Level
Here’s what you do:
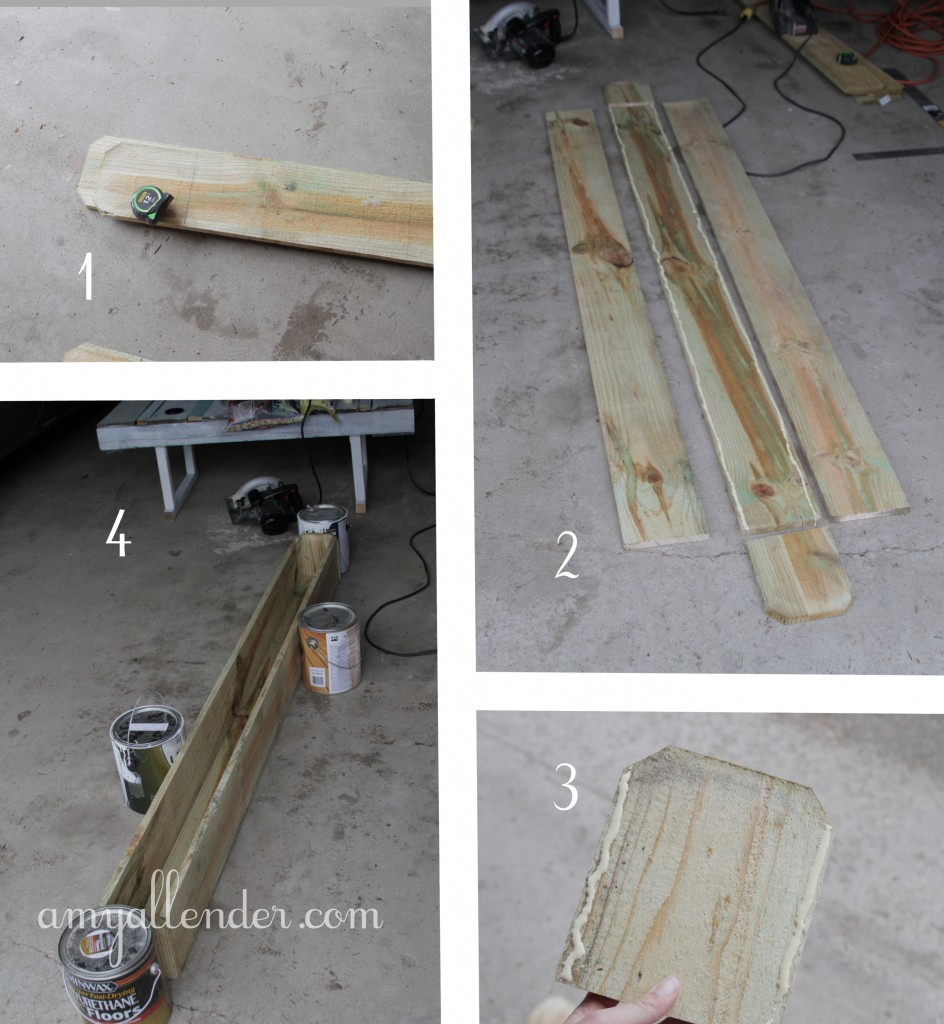
1. First, you’ll need to know how big your boxes need to be. Measure the width of your window. Then you can do the math {I know, I hate math too…but it’s just a little bit.} You’ll need three pieces as wide as your window, and two scraps for the ends. Measure it out of your fence posts and make your cuts.
2. This is what your box will look like. Here are the pieces all laid out. You’ll be placing your long side pieces on top of the bottom piece. The edges attach flush to the bottom board and the edge pieces.
3. Run a bead of wood glue along the long edges of the bottom board and the end pieces {as shown here.}
4. Put your box together. If you have a vice or something you can use that to clamp everything in place. If you are cheap and ghetto like me you can use anything lying around the garage to hold it in place and put a little pressure on it. Now just wait a while for your glue to set.
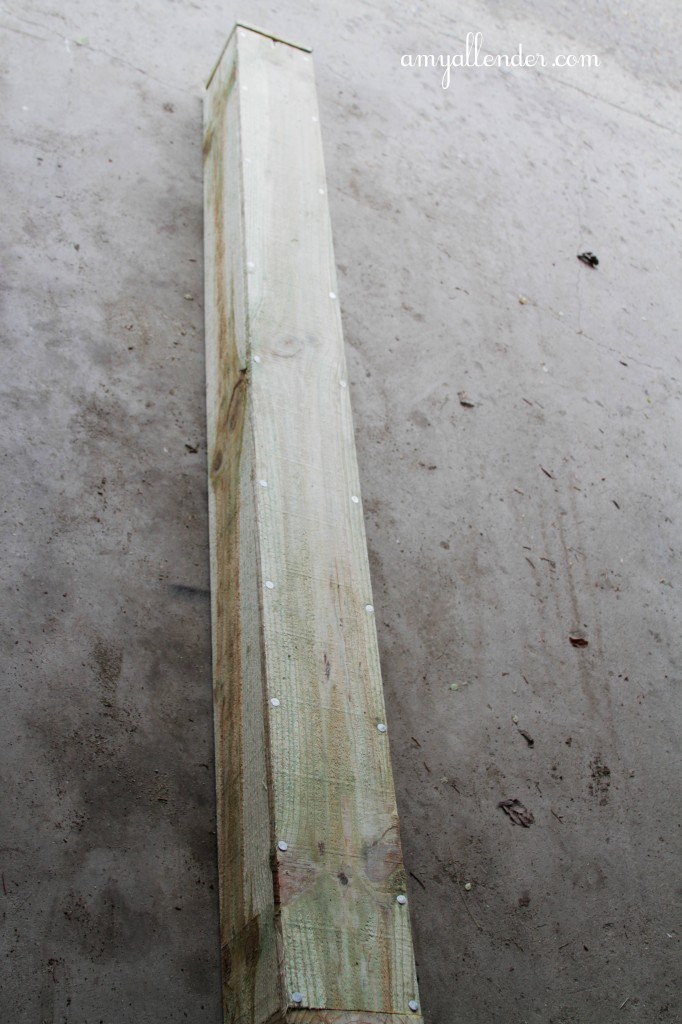
Once your glue is giving a bit of hole flip the whole operation upside down. Pound in some nails along the bottom edges. This is what really holds it together, so don’t be stingy. Every 4″ or so is a good bet. Then add nails to the end pieces too.
While your box is flipped use your thickest drill bit to punch some drainage holes in the bottom. Every 6″ at least. You don’t want rotten roots.
Good job. If you are building a small box, stop here and skip down to the mounting instructions. If yours is pretty long, you’ll need some brackets.
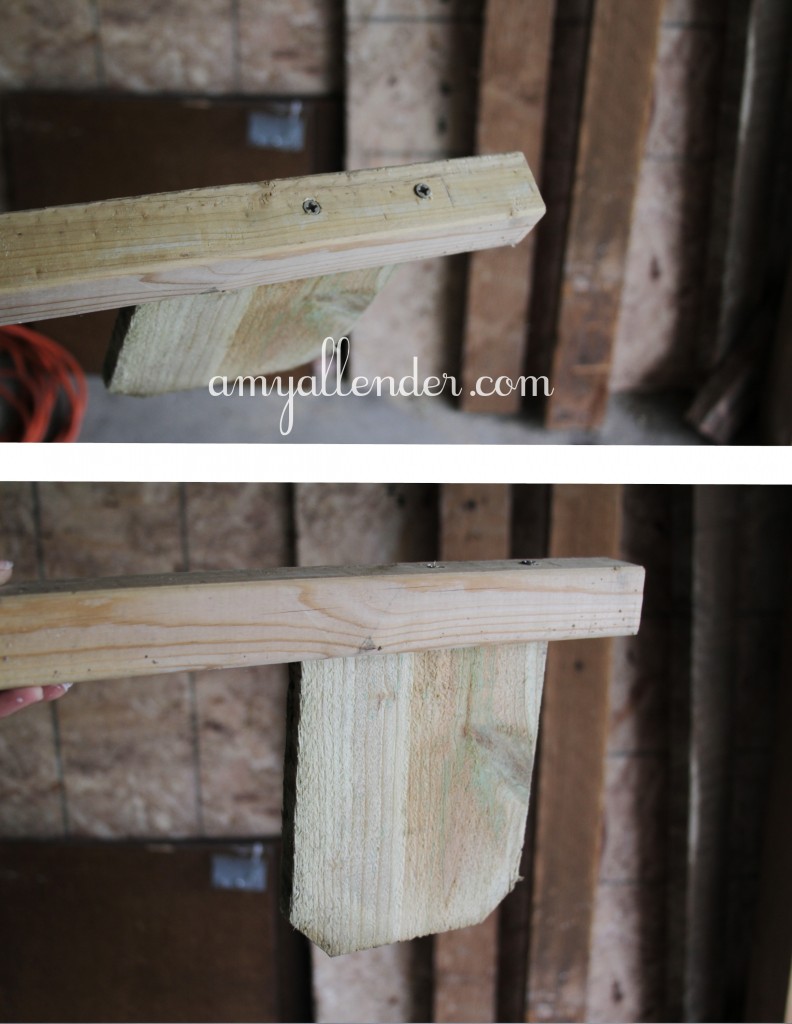
1. I used the scrap ends of my fence posts and some scrap deck rails for these. But you can use any long skinny piece.
2. Measure your longer piece first. You’ll want the end of your fence post to attach down far enough that the top of your box will be flush with the top of your bracket. I laid the bracket pieces on the floor and the box across the top of them. I got the tops flush. Then I just drew a line and cut them.
3. Attach the fence ends to your long piece with two screws. You’ll need to pre-drill.
{For my box I made three of these.} Prime and paint everything.
Now for the part that was most intimidating to me…Mounting.
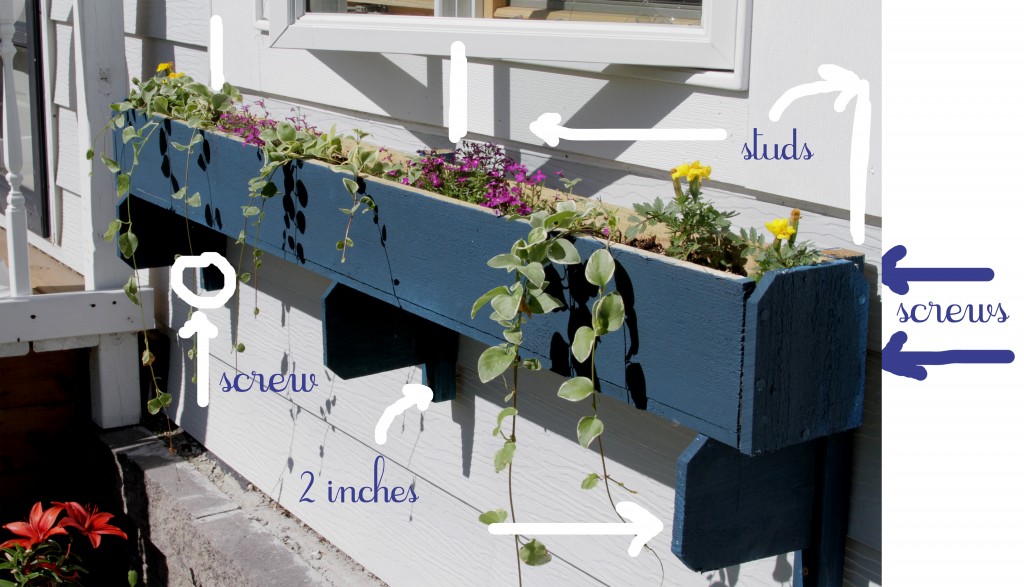
I made this special graphic for us. Let me dissect it.
First you’ll need to find some solid studs to drill into. There is a stud running down each side of a window. Usually one in the middle too.
Decide where the to of your box needs to be. For windows that open out {like this one} keep it 6-8″ below the window panes. For windows that open up you can mount the box right under the window trim. Measure down and mark the spot. Take one of your brackets and pre-drill a hole through near the top {about an inch or two down}. Then put a decking screw in to hold it in place. Repeat that on all three, using a level to make sure they are, well, level.
Now, drill a hole through the bottom of your bracket. Use your level to make sure they are straight. Put another decking screw in there.
Go get your box and place it across the brackets. Center it. Pre-drill and run a screw through the box into the bracket. The screws are long enough that they will run all the way into the house. Just press hard and it’ll go through your siding. If you have a brick house…you’ll need to ask someone else what to do, because I have no idea.
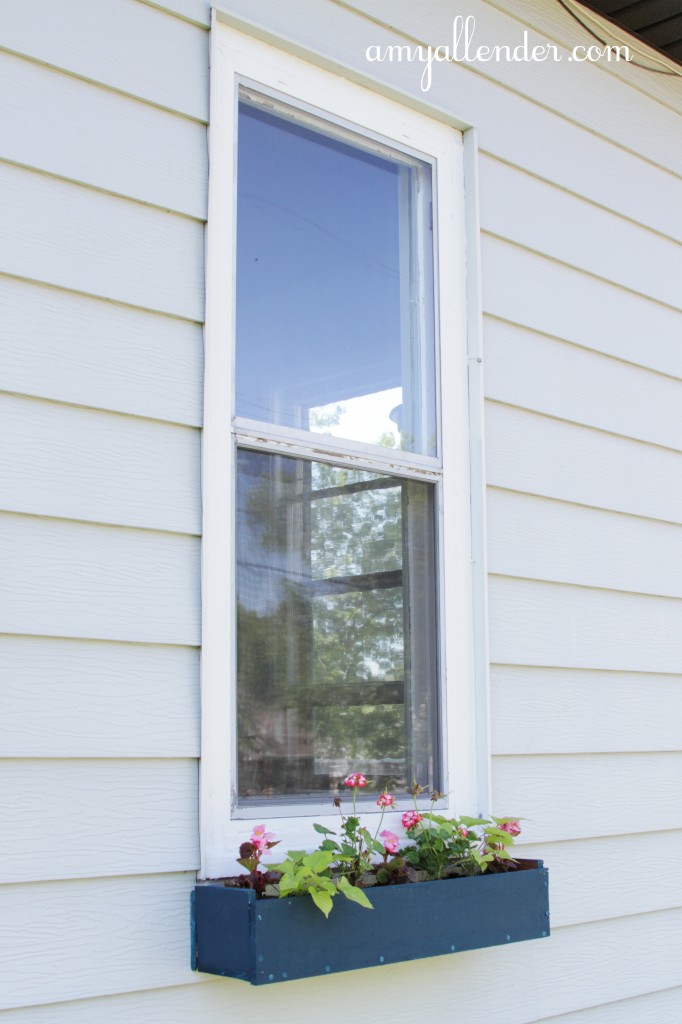
For the short boxes just screw the box into the house using 3″ screws. Make sure it’s level!
Once they are mounted, go ahead and fill and plant away. So cute!
Good work!
xo Amy
by Amy | Jun 20, 2013 | Blog, The Art of Projects, the house
You’ve seen “Christmas Vacation”, right? The one with Chevy Chase. Around my house it’s pretty much a holiday tradition to watch it at least once during the Christmas season.

In the movie Clark Griswold has a daydream about what he’ll do with his Christmas bonus. He looks out his frosty window and envisions his plain jane yard in an extravagant, ultra-improved way. It looks like this.

It’s a little blurry. This movie is from before the days of HD. And let’s not forget Cousin Eddie’s role in all of this.
This daydream plays out to the sweet sound of Bing Crosby singing his Christmas classic, “Mele Kalikimaka.”
I’ve been acting like Clark for months now. Staring out my window, longingly looking out at the snow/sleet/rain/mud covered yard. Anxiously waiting for the day when I could make my yard dreams come true.
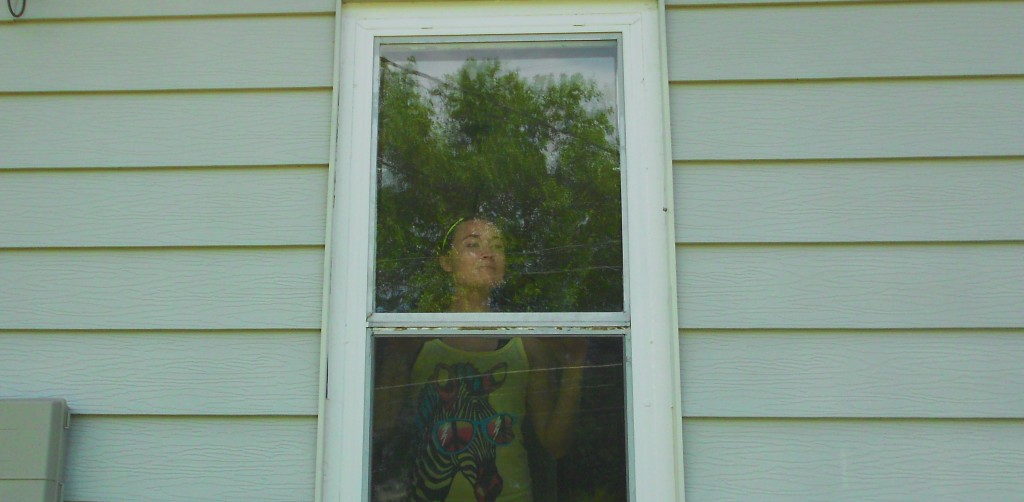
I looked out and saw this:
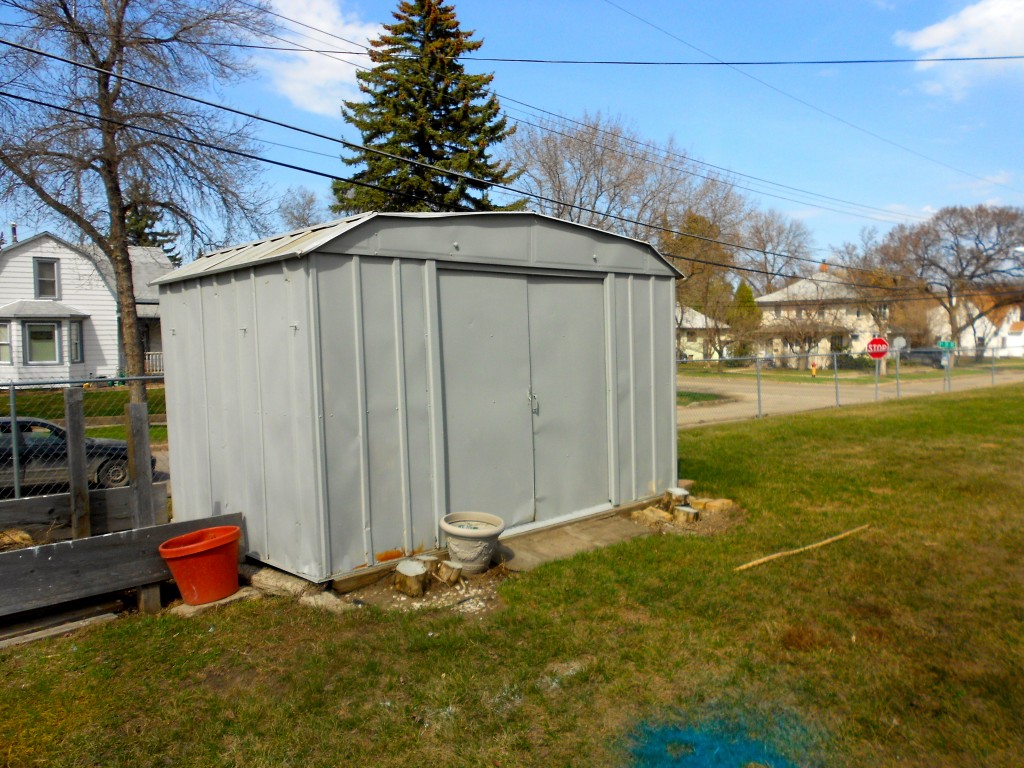
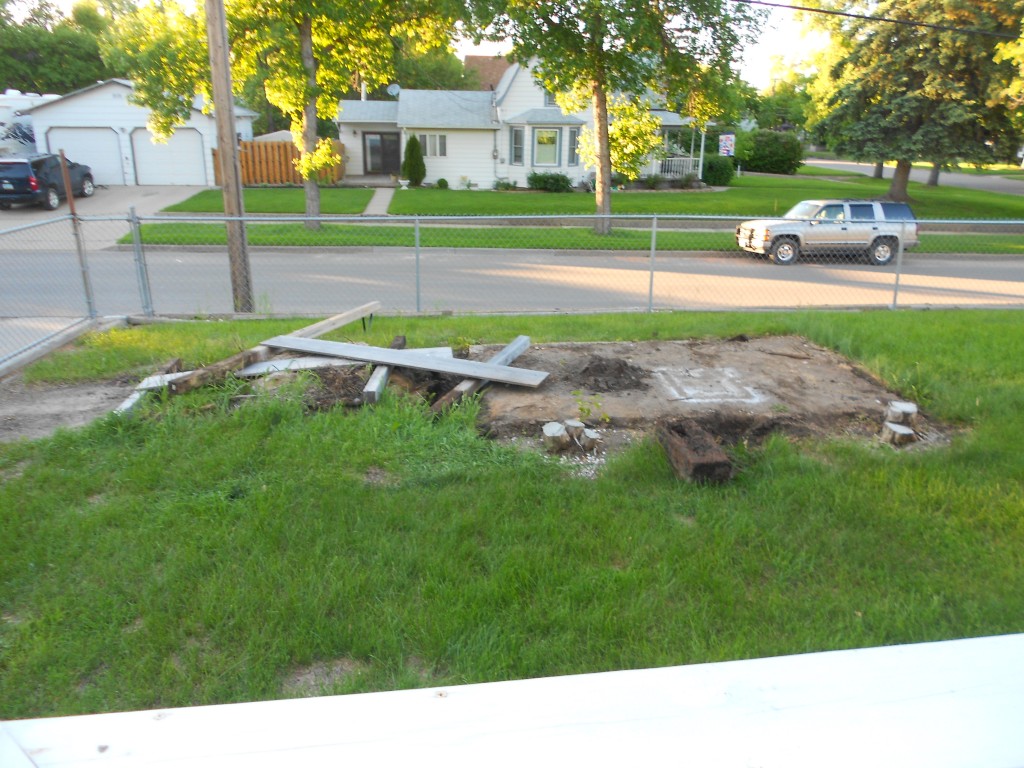
For the average person, yard dreams may include a little landscaping. Some grass covering the spot where that shed came down. Come on. You guys know me better than that. I”m Amy Allender, for crying out loud. I looked out at that…and saw something like this:
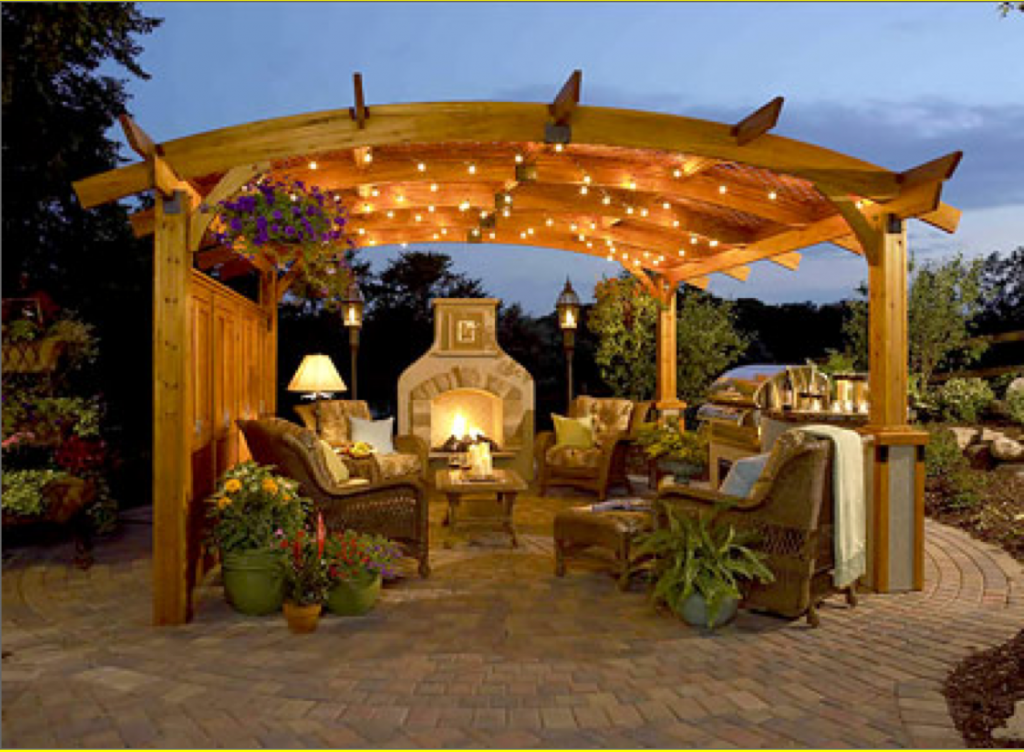
A girl can dream, right? {Image from here.}
So it’s not going to be this extravagant. Not in the least. But I am putting in a patio. You see, our house is not huge and I love having people over. The summers in North Dakota are so very, very nice I figure I could add extra room and “rooms” by adding them outdoors. {We have a very nice yard.} So I said “Adios” to that ugly, rusty shed…and “Hello” to my Mele Kalikimaka moment.
I broke ground today. More later on what you can practically and rationally expect from this project. {And of course how I’m getting it done.} But for tonight I leave you with my vision. And a challenge to have your own Mele Kalikimaka moment. Have you been staring out your window? Take the plunge, make that daydream into more than a subscription to the “Jelly of the Month” club.
Amy
PS…watch my “Outdoor Living” board on Pinterest. It’s about to explode!!
by Amy | Jun 18, 2013 | Blog, Crafts, The Art of Projects, the house
Did you know that I was formerly banned from hanging things on the walls of my house? Yes, me. The girl who can rip out a wall, tear up carpet, wire a light and texture dry wall. I can make over a room like the best on HGTV, but I was banned from putting nails in the walls. Sad, but true.
It started when I lived in Florida. I know some of you readers are friends from those days, so this story will probably ring a bell with you. Back in 2009 I was a newly wed, living in a new state and a cute rental house with my new husband. This was my first place outside of a college rental house I shared with my girlfriends down the street from our University’s village. Pretty big deal.
Like all newly wed girls I was pretty stoked over our wedding photos. I loved them and I wanted everyone who came into our house to know that we had had a wedding…and it was awesome. I wanted…a gallery wall.
I wish I had a photo of this undertaking. It was really something. Like most of my best work, I hit this project hard one evening when Derek wasn’t home. Unlike most of my best work…this was a pretty big fail.
I went in armed with a huge blank wall and a lot of photos and cute frames, but things really took a nasty turn. Here’s what went wrong:
1. My photos were TOO SMALL. At the time I had no concept of what size wall art should be. I printed a load of 4×6 and 5×7 photos {and just a couple 8×10’s} and expected them to look good strung up on my giant wall. What I ended up with was a messy looking display of things that you had to be right next to to view.
2. It was more vain than artistic. This gallery wall was dubbed by our friends {and ourselves} the “Wedding Wall.” Seriously, just photos of our wedding. Lots of them. It’s nice to have photos of yourself around, but a gallery wall is a home focal point. After a while I felt kind of weird about having so many pictures of us on display. I mean, we see ourselves all the time…A gallery wall should speak to who you are in a creative way, without becoming a shrine to you, you, you. **I’m not saying you shouldn’t include yourself on your wall. Just don’t overkill it like I did.**
3. This is the big one…I didn’t plan. I thought I could go in with a rough idea and come out with something Martha herself would envy. Wrong. The reality was I ended up hanging a frame, then hating it and moving it…and making another and another hole in the wall.
It was this second error that caused me to lose my hanging privileges. When it was time to move it looked like Al Capone himself had taken a tommy gun to our wall. There were so many, many holes. Derek and I had a pretty good laugh about that. Then he said I should probably run everything I wanted on the walls by him before any nails get hammered.
This ban was never officially lifted, but this summer Derek isn’t around and I really, really wanted another crack at the old gallery wall game. This time I was determined to do it right. It was like a Tosh.0 web-redemption. I got a second shot to do something trivial and meaningless right. And I’m happy to report that I succeeded. Here’s the secret:
PLANNING.
Go figure. One of my favorite high school teachers used to tell us that “Proper preparation prevents a poor performance.” {Bonus points to any Jimtown Jimmie that can name the author of that quote.} And boy was he right. I spent an evening looking at all my gallery options, then whittling it down to only the best. Once decided I traced the shape of everything I was going to hang on some cheap-o wrapping paper and played with my layout like so:
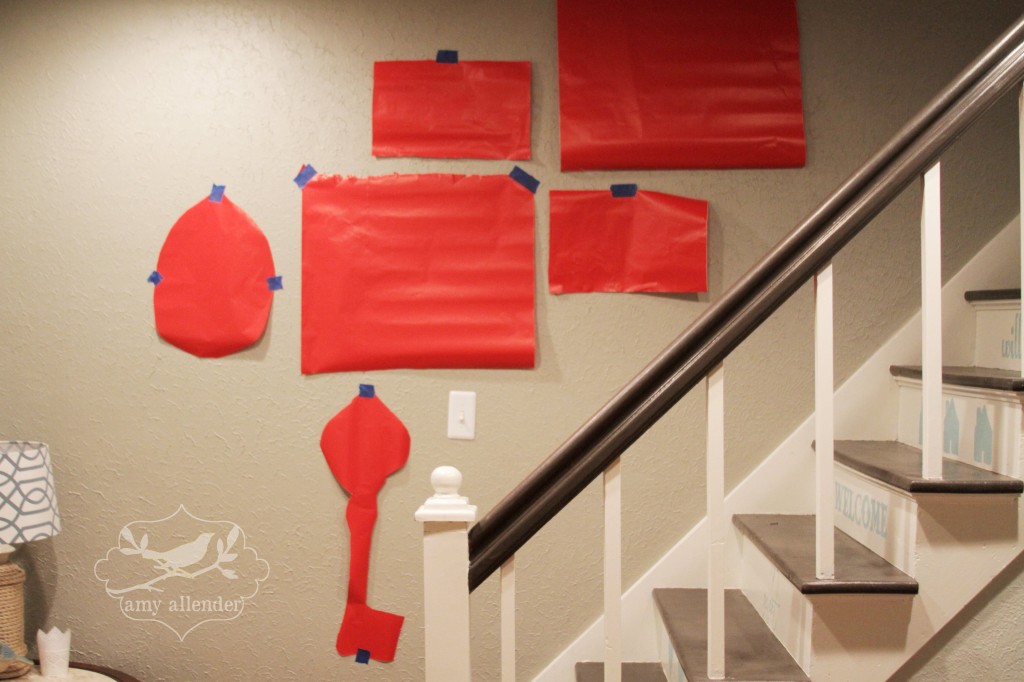
Once I was happy I carefully hammered a nail through the paper, took the paper off the wall and hung my frames.
I didn’t mis-nail once! I guess you could say I really “nailed” this one. Don’t even try to tell me that wasn’t a clever pun.
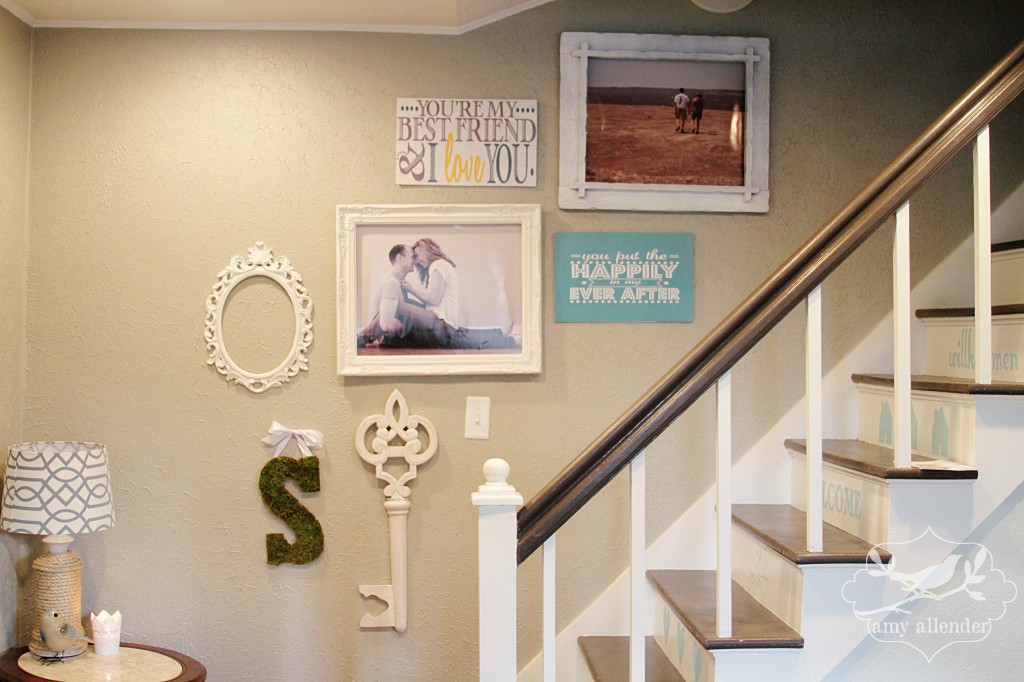
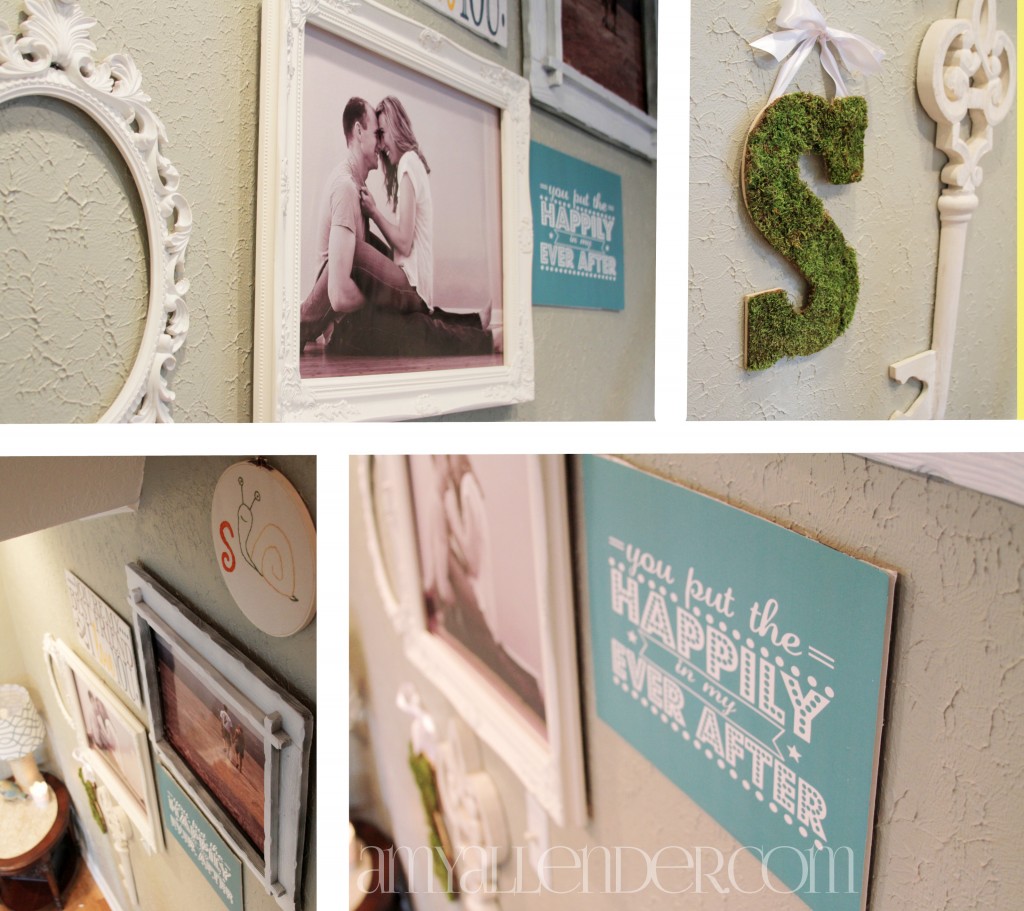
So here are my tips for being successful with your focal gallery wall.
1. Decide what you want to hang.
2. Keep a common theme. Go figure, my theme here is white…my favorite decorating color.
3. Be simple. Bigger and fewer is a good place to start. Lots of small frames can look crowded and cheap.
4. Be thrifty {that’s really a life tip.} I had my big prints made at Staples. They are printed on photo paper, then glued to foam core. Much cheaper than canvas prints and easy to switch out.
5. Put up things you love. While Derek is gone I love seeing a photo of us together on the wall. When he returns I may change it. Who knows. The other large print is of us hiking in Texas. Both remind me of happy times. I like happy. That empty oval will soon house a portrait of my cat. Don’t judge me.
6. Leave room to grow. You never know when you’ll want to add. Plan some space for future finds.
It feels so good to have my hanging privileges back!
Amy
by Amy | Jun 14, 2013 | Blog, The Art of Projects, the house
Hey all!
I have had such a fun, fun week. My family has been in town and we have been running all day seeing the North Dakota Practically Canada sights.
Highlights from our visit will be up here on the blog soon…but in the meantime, I want to give you a full project breakdown! Today we’ll be looking at my whole bedroom redo from start to finish. I’m going to give you all the details {even cost} on what I did to achieve this B&A.
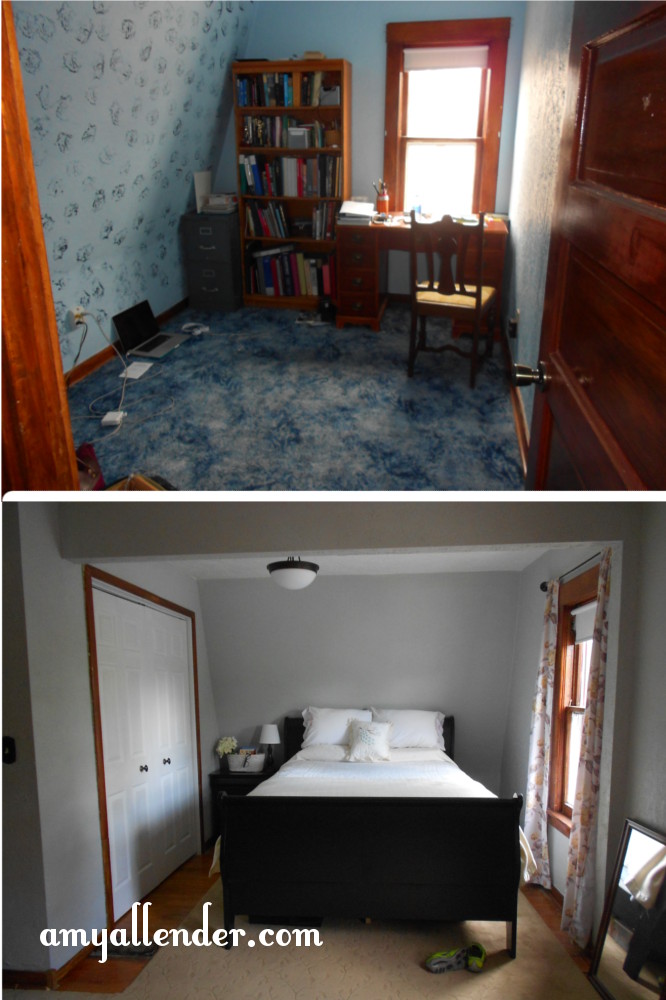
Okay, so I don’t know how projects work at your house…but around here I like to keep costs down. Even if that means it takes a little more time to finish and I do a good chunk of work myself. (more…)
by Amy | Jun 7, 2013 | Blog, The Art of Projects, the house
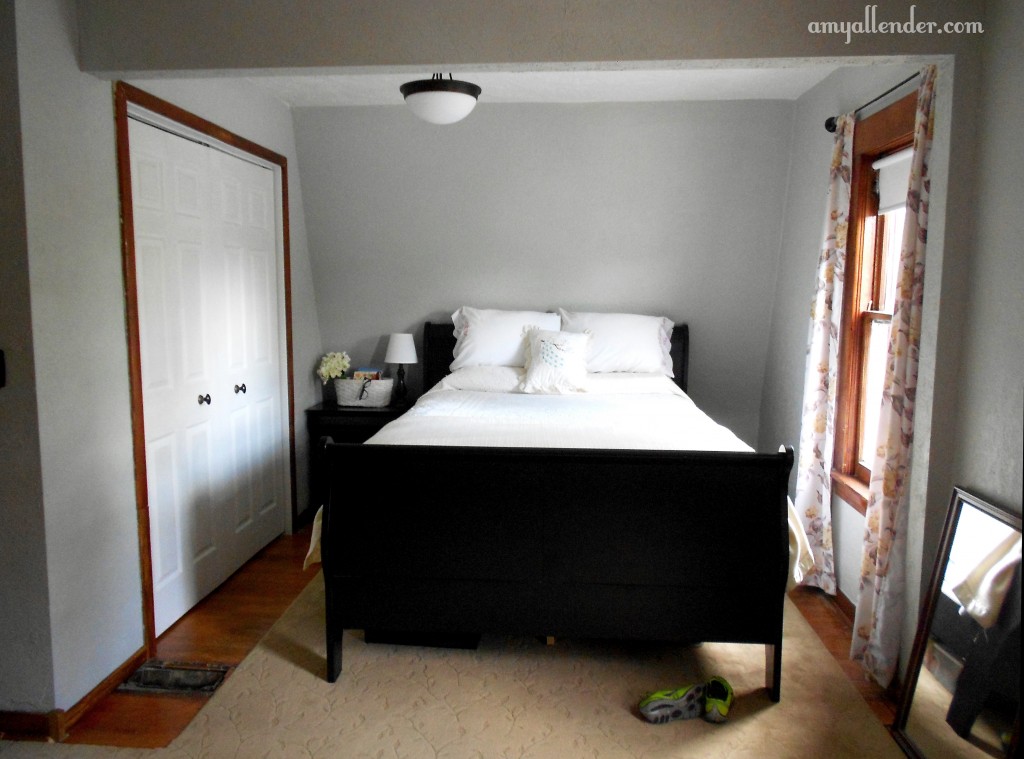
Can you believe this is my room? I can’t either. I also can’t believe it’s finished. {Minus one vent cover}. So take a look. Next week I’ll break down exactly how I did it.

Where the bed now sits where that cramped office used to be. Upgrade.
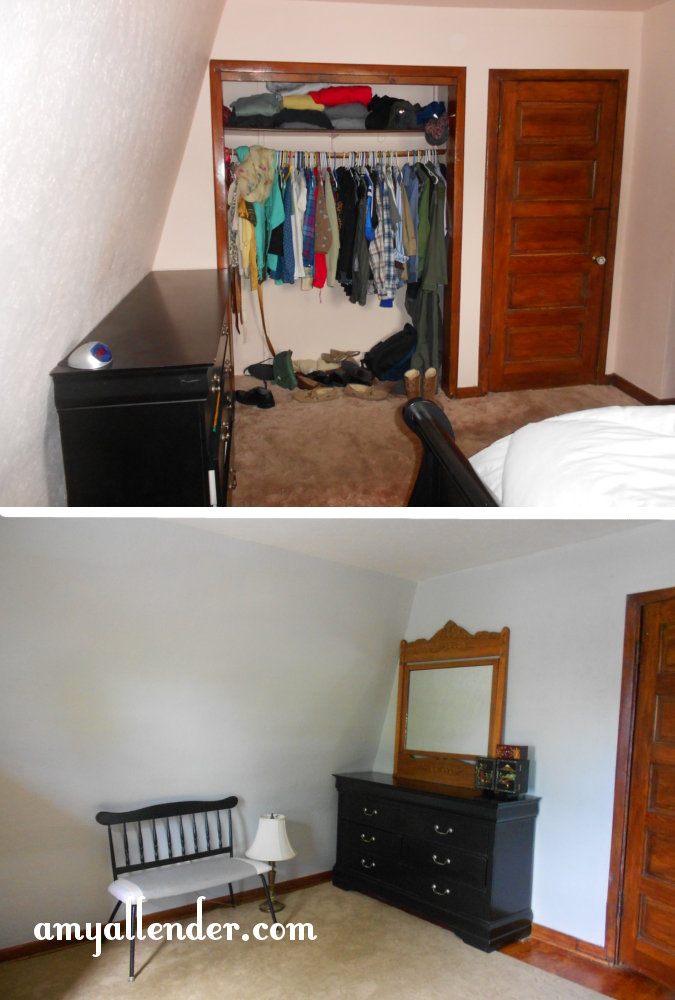
I walled off the old closet and now it’s a place for our dresser. {There is still a bit of electrical trouble, which is why that extra lamp is on the floor back there.} And take a good look at that old, unorganized closet…
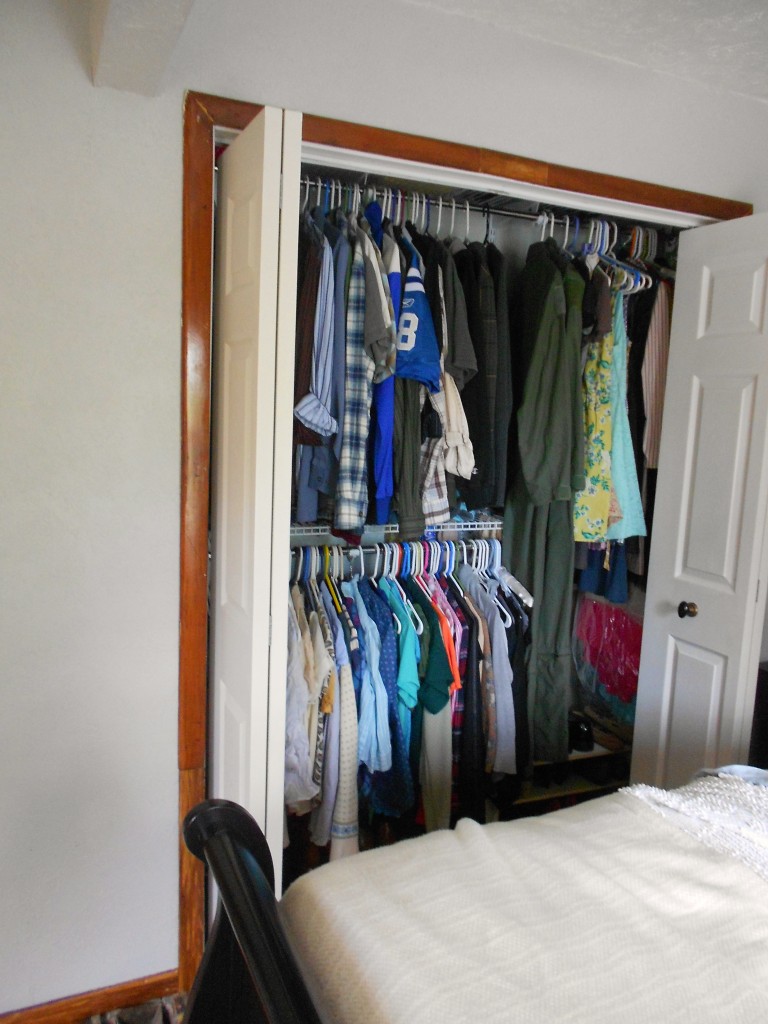
BAM! New and improved. I have more space than I’ve had in years!
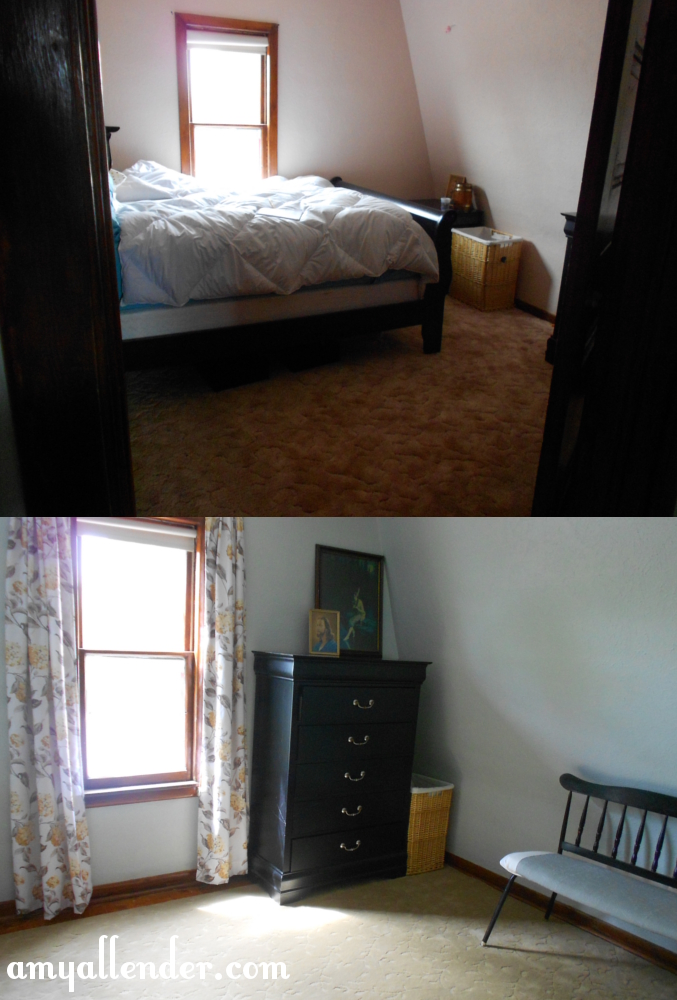
It’s hard to believe it’s the same space. The only problem now is that I don’t want to get up in the morning. Well, that was a problem before…but it has really escalated.
Have a great weekend.
xo Amy


