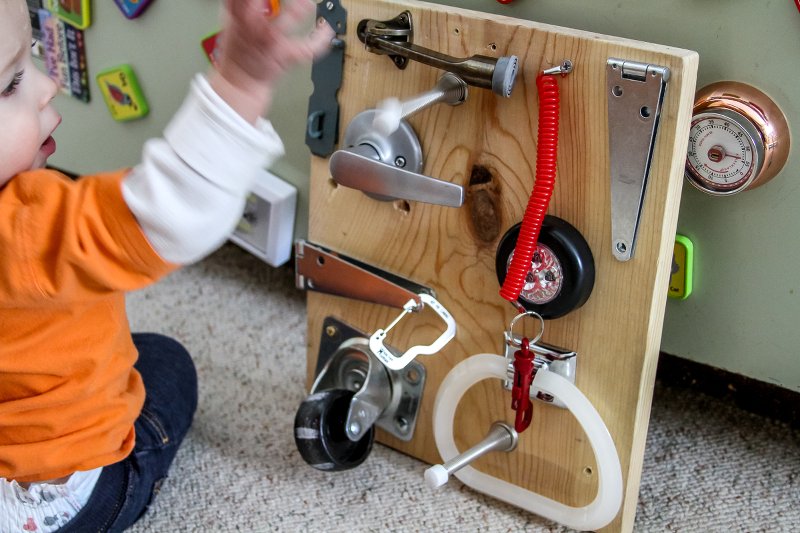
Today I’m excited to be sharing how to make a DIY busy board along with 50 busy board ideas!
I really like making toys for kids. Before Gideon was born I had a little more disposable time and was able to make some super cool things for the little in my life. Now, I’m a little more pressed for time, but I still really like making things for my guy to enjoy.
Hopefully in the near future I’ll sit down and make him something really fun and elaborate. But that hasn’t happened quite yet.
One of the most-used and most-loved homemade toys I’ve created for him has been his busy board. It’s really nothing too exciting to look at, but I’m sharing it here because it is ever-evolving (it has grown with him), cheap, fun to make, and super fast to put together.
I started this busy board for Gideon when he was about 4 months old. At that time we were working on tummy time. This was something he could look at and play with on the floor, or could be in front of him while propped up on the Boppy. He loved it then. He loves it now. And a friend’s 3-year-old was recently here and she exclaimed, “I want one of these for my birthday.” It’s truly a gem for all ages, and it’s easy to make and update!
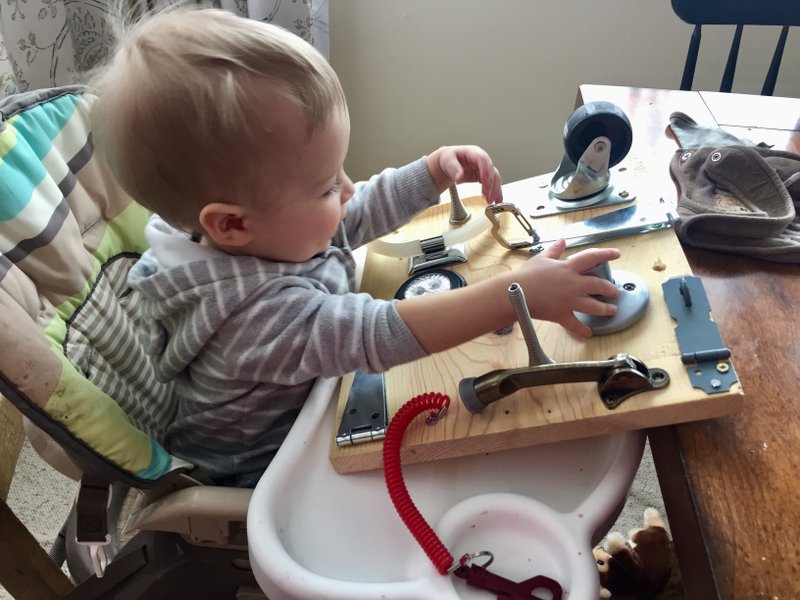
I often put the board on his high chair tray while I’m getting his meal prepped. This gives him something to do and buys me a couple extra minutes.
Build A DIY Busy Board
Here’s what you’ll need to create a busy board of your own.
- Scrap of wood
- Hardware knick knacks
That’s it! Honestly, you probably have everything you need already laying around the house.
I used a scrap of 1″ pine we had in the basement left over from our Master Bedroom Remodel. A quick sanding and wipe with a damp rag made it clean and clear of any splinters.
Then I gathered up mismatched hardware pieces and screwed them in. For the very first version of the board I attached several cabinet handles with interesting shapes, a piece of sandpaper, a chain, etc. Mostly just things to feel and see since his motor skills were very basic. Bang! Done.
Now, if you look at Pinterest you can easily become overwhelmed by elaborate busy boards. Those are great and super cute–but your baby isn’t going to care much about the boards aesthetics. At least, not when they are still learning to hold their head up, crawl, and walk.
Here is the most beautiful part of a very simple board like this: you can easily change and modify it as frequently as you like! Since it is just a scrap piece of wood, you can take things off and make new holes and have no regrets.
How To Update A DIY Busy Board
Here is my busy board “work flow.”
After a couple months your child will make it pretty obvious which items he is still loving and which items he is over. I remove items that have lost their luster and replace them with new things we’ve picked up at Menard’s or the Habitat ReStore. I try to reuse screw holes if I can. If not, I try to place the new item over the existing hole just to cover it up. If that doesn’t work, I simply give the old hole a quick sand to smooth out splinters and drill a new hole.
To give you an idea of how gradually I change the board, here is a photo prior to our most recent update. The board included a slide lock, stretchy key chain, strap hinges, a static door handle, press light, handle, caster, and u-bolt with a faucet line zip-tied to it. (It looks weird, but he really liked it.)

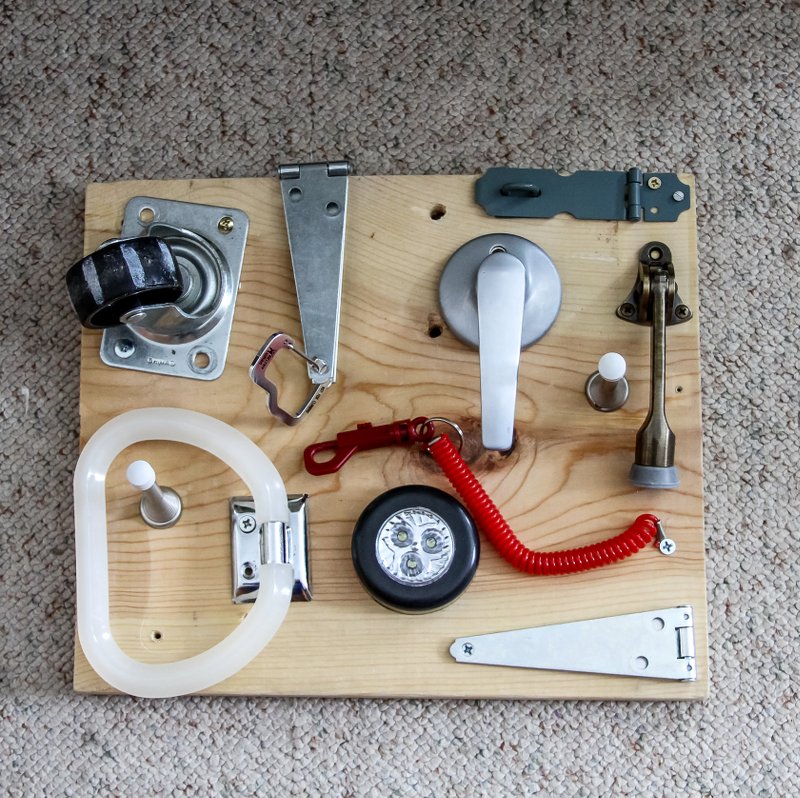
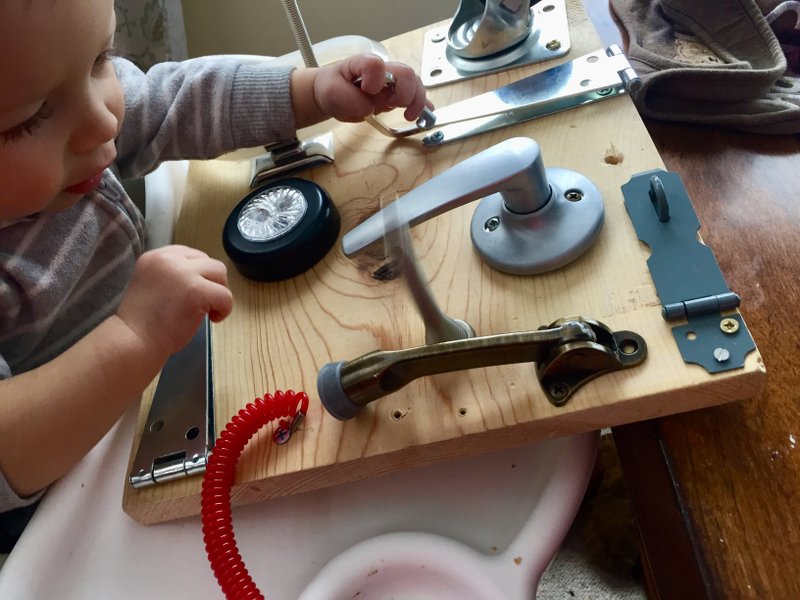
And here is our current board. I left the caster wheel, hinges, light and red key-chain. (That is one of his FAVORITES and has been on here since I first made the board.) I added a hinged lock, hinged door stop, towel ring and two door stop springs. (These are the new favorite…boiiinnnngggg!) I’ve got carabiners that I clip on to various parts of the board. In this photo it’s hooked onto one of the strap hinges.
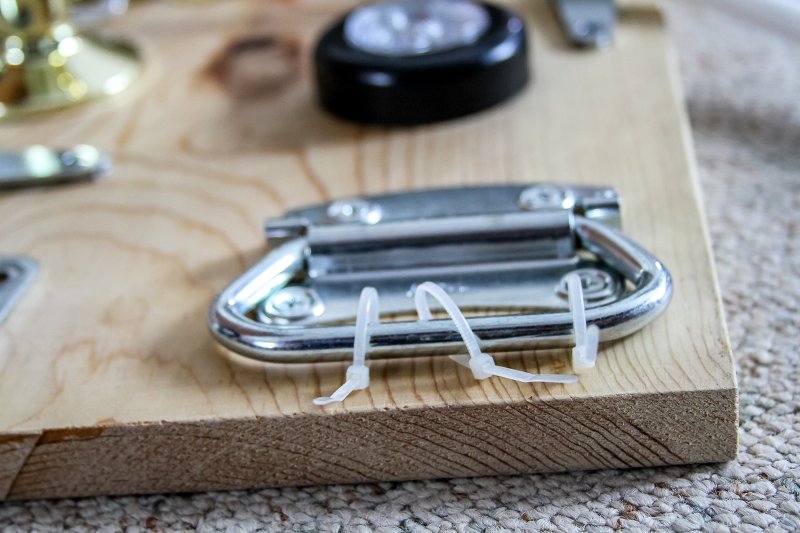
I’ve also found that adding zip-ties to existing hardware is a super quick way to add a little extra interest. Adding a few to this handle gave it more texture and things to spin.
It’s so fun and picking out new items is something I look forward to doing with Gideon. We wander the hardware aisles and I let him hold things and see what sparks his interest–then buy a few and add them. This is a great project for an overwhelmed mom…or would be a great gift for an overwhelmed mom!
50 Ideas For Your Busy Board
The possibilities are endless, but here is a big ol’ list of 50 ideas of simple things to put on your DIY busy board to get started. Keep in mind that not all items are appropriate for all ages and kids should always be supervised while playing with a board…just in case a small piece should come off.
- drawer handles
- hinged handles
- door knocker
- knobs of all shapes and sizes
- hose spigot knob
- static door knobs and handles
- turnable door knobs and handles
- door hinges
- cabinet hinges
- strap hinges
- piano hinges
- slide locks
- chain locks
- combination locks of all kinds
- lock with a key (I would attach the key with a string so it doesn’t get lost)
- coiled key chain (like mine above)
- retractable name tag
- sand paper or textured fabrics/ribbons
- closet push light
- battery operated light switches
- battery operated door bell
- toggle switches
- dimmer dials
- bike safety light
- chain
- pulley
- wheels or casters (I painted white stripes on mine to help Gideon see it move)
- latches of all kinds
- velcro
- toilet paper holder
- towel ring
- bungee cords (without the metal hook ends)
- U-bolts (these are fun to put extra pieces on, like nuts, washers, curtain rings, etc)
- mirror
- zippers
- use carabiners to attach measuring spoons, keys, bells, paintbrushes, etc
- sponges
- M-F pill box
- a land line phone
- reflectors
- pet collar
- belt buckle
- toys that squeak
- house numbers
- Gears
- silicone hot pads
- an old thermostat dial
- faucets and handles
- pieces of hose, water line or other flexible tubing
- small retractable tape measure
Happy making!

