DIY Play Kitchen & DIY Art Spaces
This week I’m show casing a super cute-cool-awesome playroom I designed {and executed with help from my dad} for my niece. If you missed the introductory post, you can see it here. Yesterday I showed you how we installed a loft to add additional floor surface into the tight space. You can see that post here.
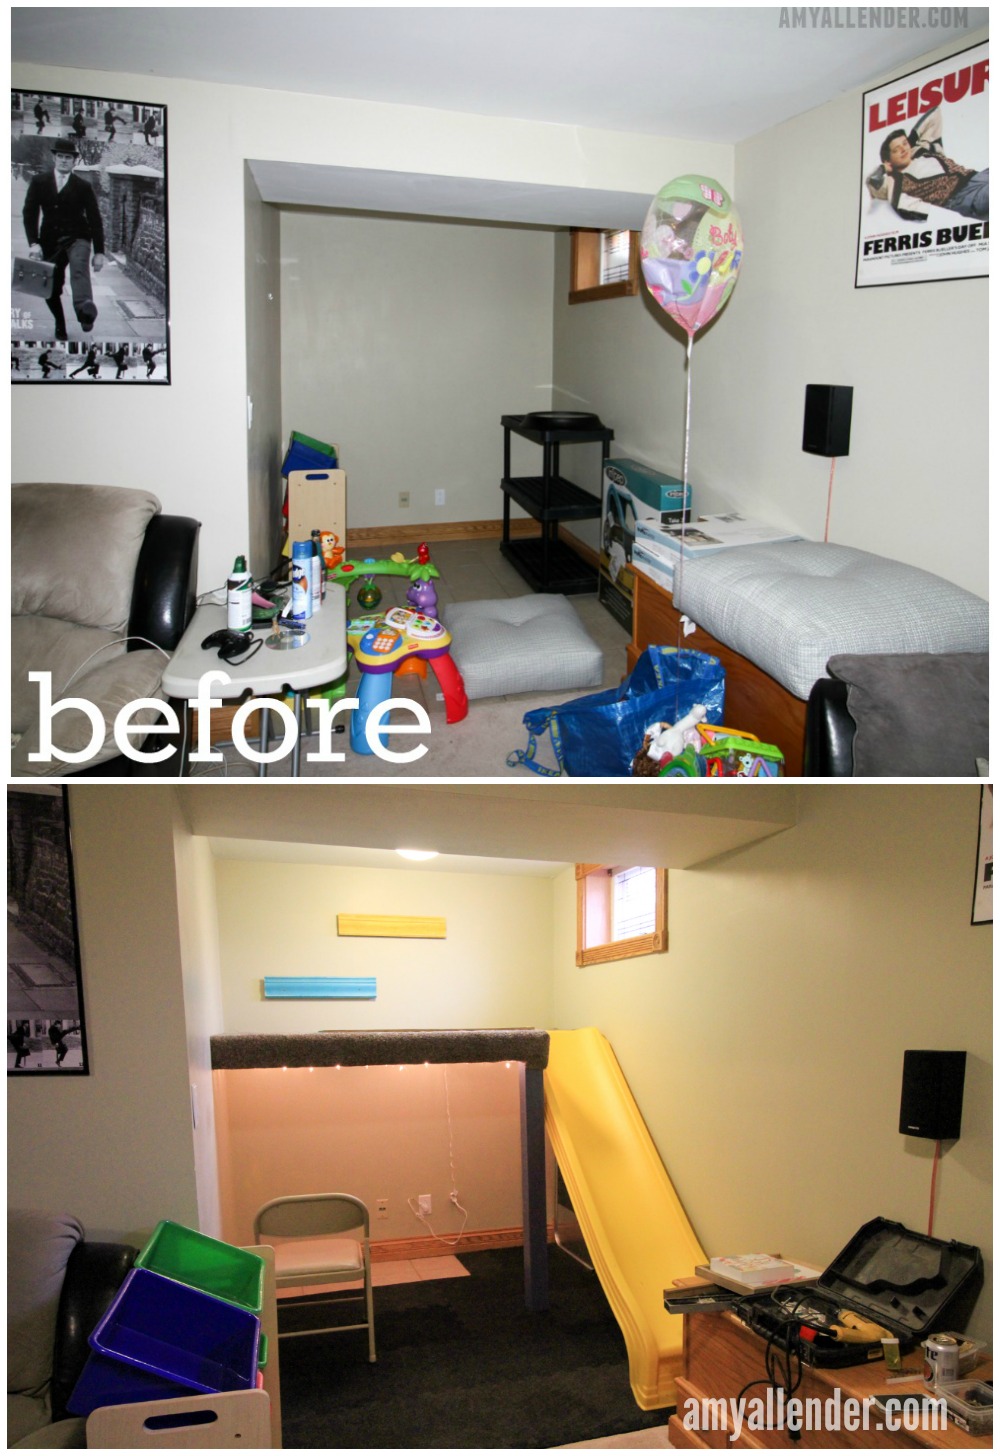
We left off here….Loft, slide, flooring, book rack and twinkle lights installed. Today I’ll show you how I upcycled an old entertainment center into a DIY play kitchen and created some creative space. {Aunt Amy is a big advocate of encouraging little ones to draw, paint and color.}
Now, onto the kitchen. Ellie loves to play cook, so I really wanted to give her a space to be a chef–and give my sister a place to store the quickly growing collection of play food she is amassing. Here’s the B&A.
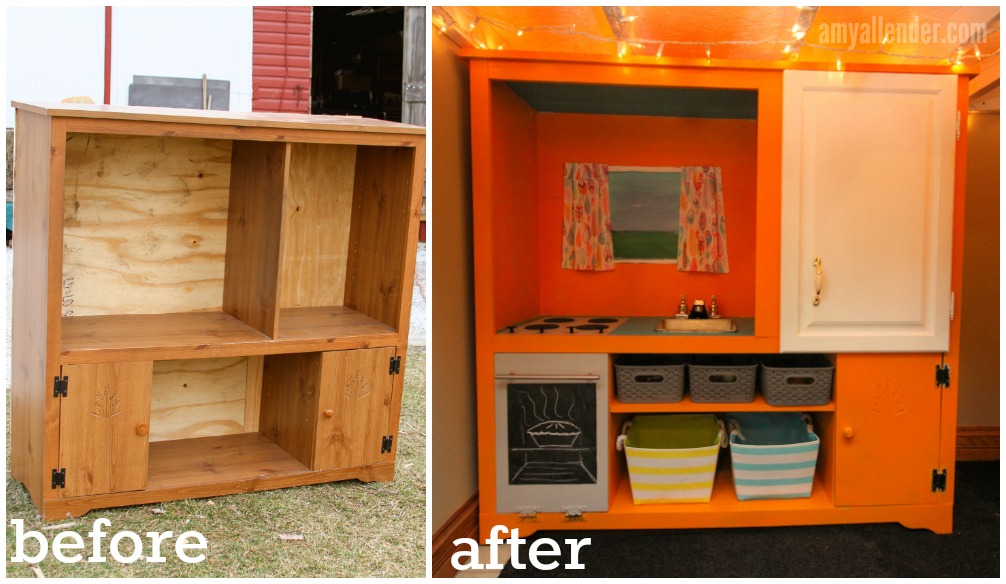
The beauty of this DIY play kitchen is that it can be made for next to nothing–and it’s super easy to execute. So even if you aren’t making a loft and a full play room–this is an easy piece to make for your home, or a friend. It’s sturdy and in also offers lots of storage space. I’m a big fan of pieces with doors and room for bins–better for corralling and hiding a mess. A lot of the process is pretty straight forward, but for the sake of an infographic…here’s a breakdown.
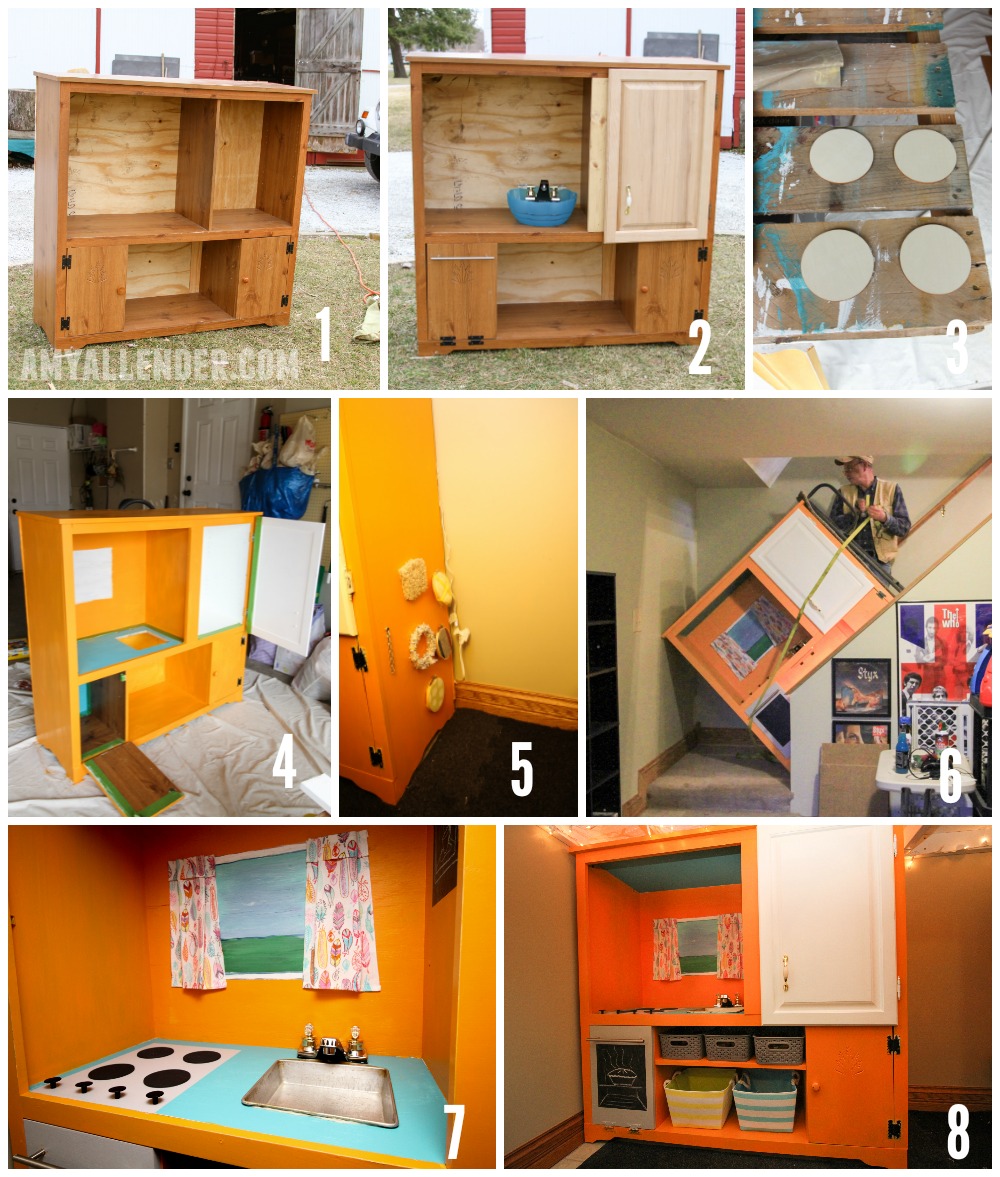
- I started with my parent’s old entertainment center. If you don’t happen to have one lying around, check out a thrift store…or better yet a Habitat ReStore {if you are lucky enough to have one in your community.} At the ReStore there were loads of them for about $15 each–probably since TV’s are no longer made in this shape….
2. A quick visit to the Habitat ReStore {or your local hardware store} gave me a cupboard door, a door handle, and “oven” handle. I attached the cabinet door to cover the shelves and added a scrap of wood to hide the gap left because the door wasn’t quite wide enough to cover the space. Next, I removed the hinges from the lower left cupboard and moved them to the bottom so this door would open like an oven. To finish the oven, I added a nice, long handle.
I also picked up a faucet to use with the sink. I planned to recess that blue bowl in to the “counter”, but it ended up being a little too deep.
3. A package of four, small wooden discs from Hobby Lobby were painted black and secured to the counter with wood glue to serve as “burners.”
4. Because the surface of the entertainment center was somewhat glossy I primed it with {my fave!!} Zinsser Bulls Eye 1-2-3. It’s made to cover over any surface and ready if for a top coat. In hind sight, I wish I would have spray painted this piece. I highly recommend doing that–at least on the outside–to cover brush strokes. It also would have been a bit cheaper than buying paint {the job was a little too big to use a sample sized container…but a quart left me a lot leftover.}
5. On the side of the entertainment center we made a small sensory wall. Since Ellie was only one when we did this project, I started with different textures held inside small embroidery hoops. As she gets older these can be swapped out and locks, chains and switches can be added. My inspiration came from this awesome DIY sensory wall.
6. Actually getting the kitchen into the basement was our biggest challenge. We pretty much lodged it in the stairway. That’s what we Allenders refer to as an oopsie poopsie. This left the happy homeowners with some slight drywall damage and me with a thrown back. But it was well worth it.
7. Dad helped me install the faucet…which is super fun because the handles actually turn. And we used a jigsaw to recess an old 8×8 baking pan for a sink. I really love that it looks like a stainless steel kitchen sink. The oven knobs are just cheap, black cabinet knobs. A window breaks up the orange on the back wall, and a piece of chalk board contact paper gives some “menu” space on the right wall.
8. I used more chalkboard contact paper to cover the front of the oven. Tip for future DIYers–I’d use chalk board paint instead. In the months since this project was completed, I’ve been told it hasn’t held up well. Some well placed bins make the deep shelves more useful for toy storage and organization.
Once the kitchen was done, it was time to add in creative spaces. This is another super simple project that can fit into any home. This is an oil pan {I found it in the automotive section of Wal-Mart}. I covered it with chalkboard contact paper for drawing space. I bought a few bins from Hobby Lobby to store chalk and magnetic shapes and letters, then attached magnets to the bins with hot glue to keep them in place. **Again–if I did this all over again, I’d use chalk board paint instead of the contact paper because Erin has said it’s not holding up well.
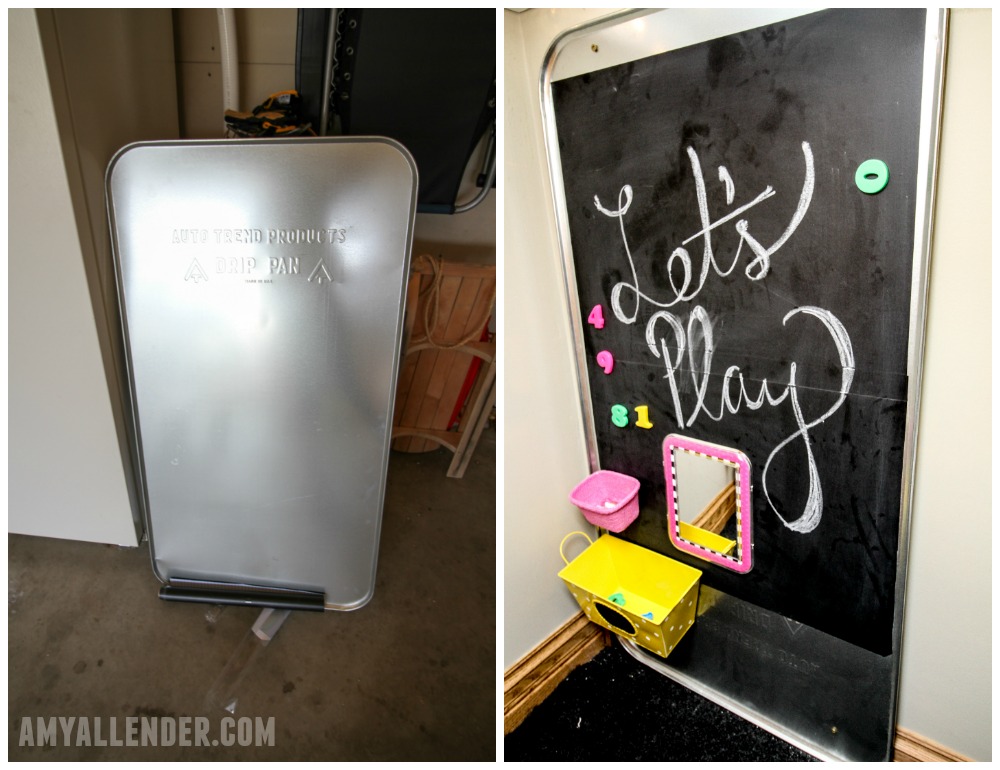
For those non-chalky times I also added a paper roll and some space for displaying future works of art.
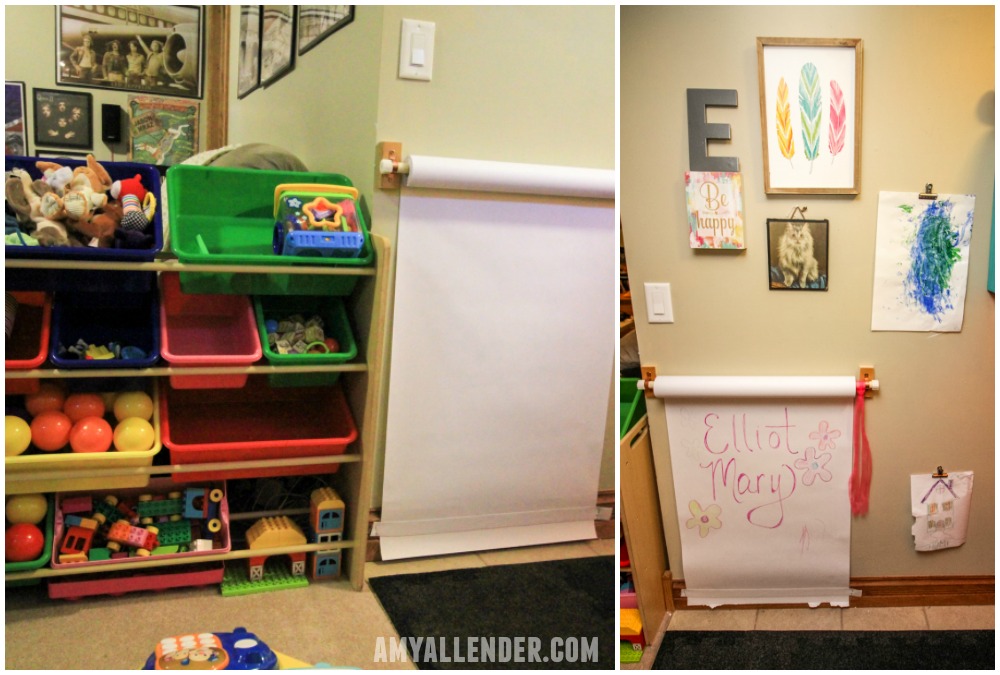
Dad put the paper rod up by running a rod through the center of a roll of paper and attaching that to the wall with pipe straps. To hold the bottom of the page in place and from curling, we stapled a wide piece of elastic to the baseboard.
Erin already had the toy bins you see in the right image above. This just happened to fit perfectly next to the arm of the couch. This does bring the playroom out a few feet past the nook we were building in, but I think it’s a nice way to section off this portion of the basement for playing. And it only required swapping an end table to the opposite end of the couch.
Okay–well, that’s pretty much all the pieces. Tomorrow I’ll show you how it all fits together–and some adorable photos of Ellie playing in her space. Come back for the big reveal!
xo
Amy

