Look. At. This. Look at it. Just look.
Sometimes when I’m really excited I repeat a phrase over and over. This is one of those moments.
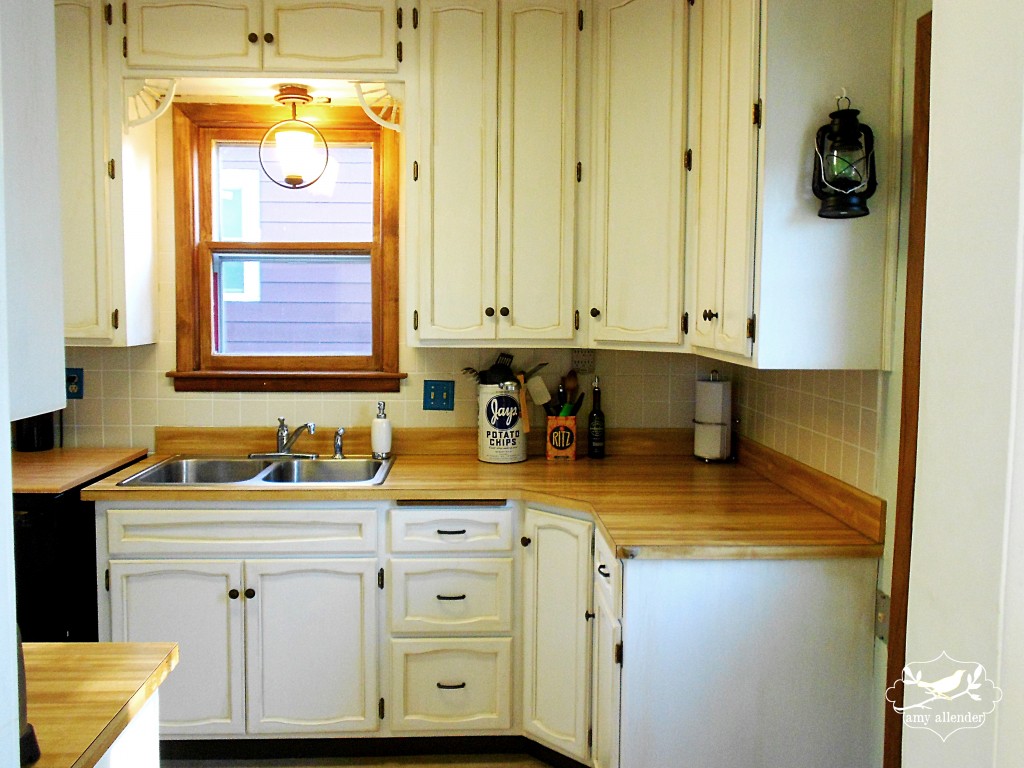
Kitchen project complete.
Here’s the thing. I know it’s going to sound conceited, but sometimes I amaze myself. The bedroom…that one amazed me. This one amazes me. I look at the B&A and I just can’t believe the improvement, I can’t believe that the “after” is something that came out of my hands. I think the most amazing thing about this particular makeover is that anyone {really anyone, even you} could make it happen.
But before we get to that, let’s look at a few more photos.
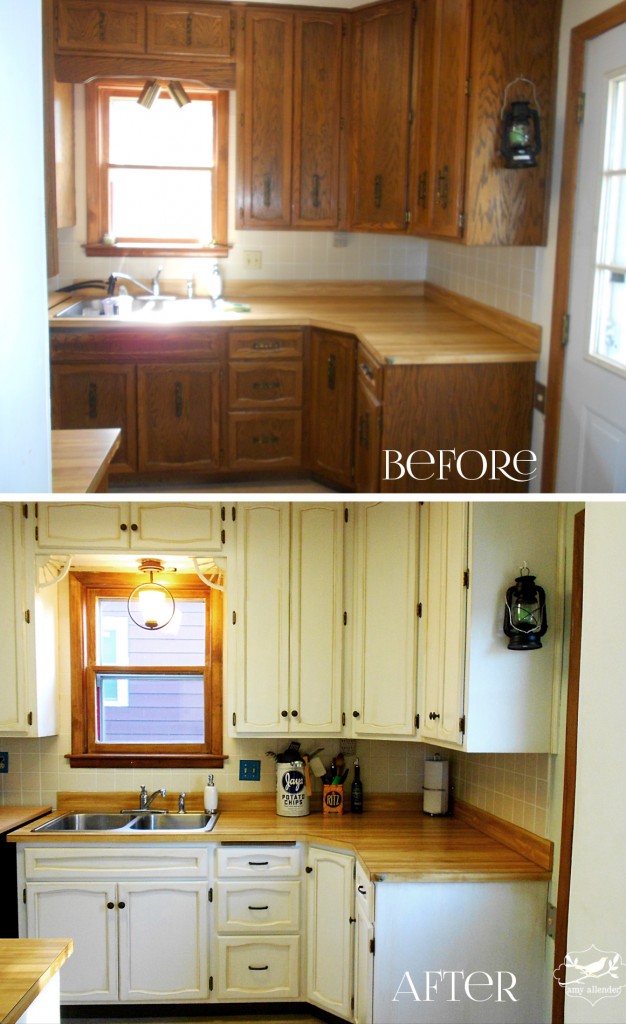
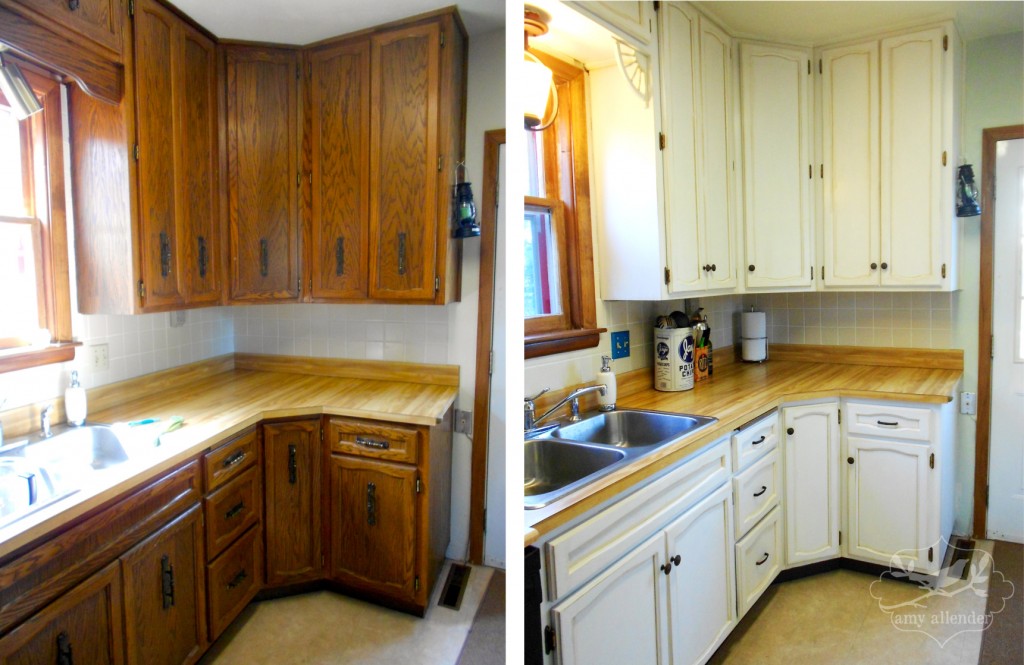
White is my favorite decor color. This whole week folks were asking me what color I was painting my cabinets. My response: “Have you met me? Take a guess.” White. It’s clean, it’s bright, it’s perfect for a teeny-tiny closet-of-a-kitchen. My parents are in town now and I think their response really summed it up. We walked into the house {the main door comes right into the kitchen} and they weren’t blown away by the transformation. I asked what was up…and my dad just replied, “It looks so great. This is how it should look. It looks like it’s always been this way. It looks so natural this way, it wasn’t even shocking.”
That’s exactly what I was going for. I don’t want to shock people, or cause people to ask, “Oh, did you redo those cabinets yourself?” Instead, I really want the house to look natural. How it should look. You know what I mean?
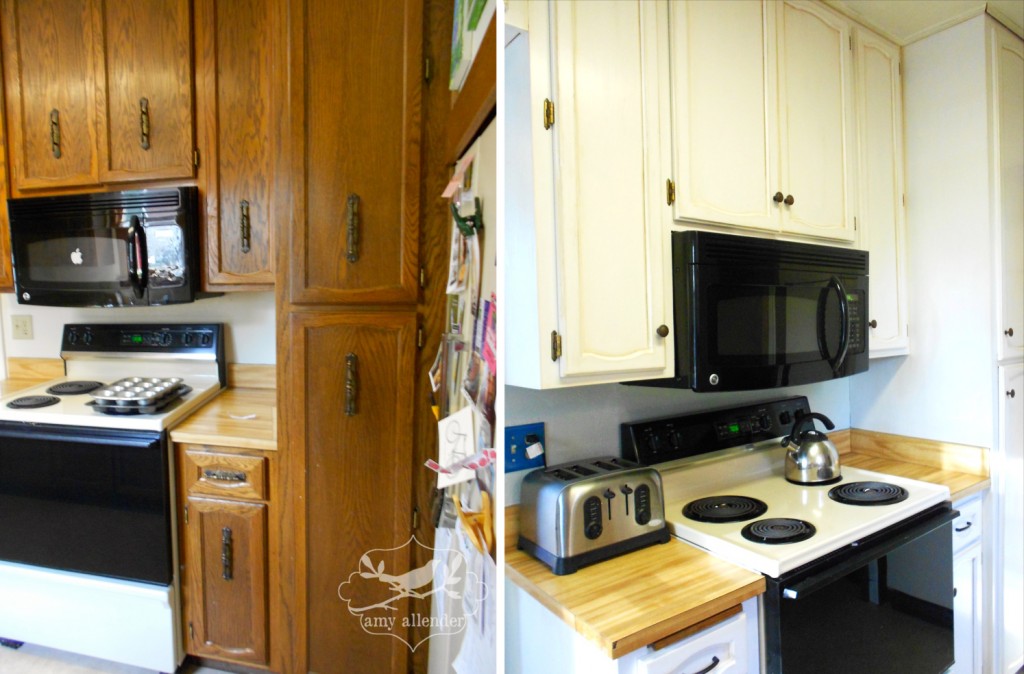
In addition to brightening up my space, I also wanted to modernize it a bit. So I took away some outdated elements.
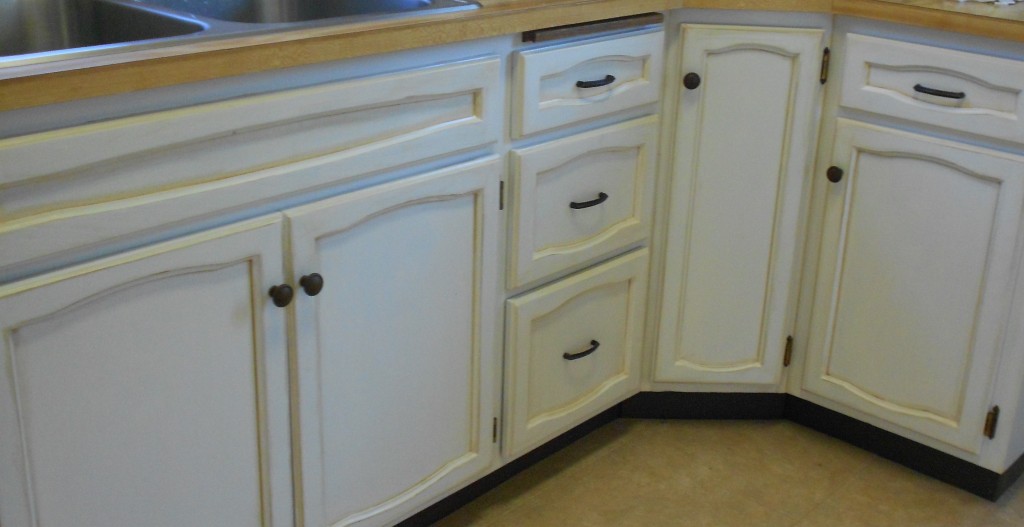
First, that ugly hardware. Those handles placed in the center of the cabinets were huge and very out of style. I changed over to a oiled bronze knob style. The finish matches the others in the house, and makes everything a little more cohesive. The style is timeless. They used knobs on cabinets in 1901, and we are still using them today. This look won’t go anywhere fast.
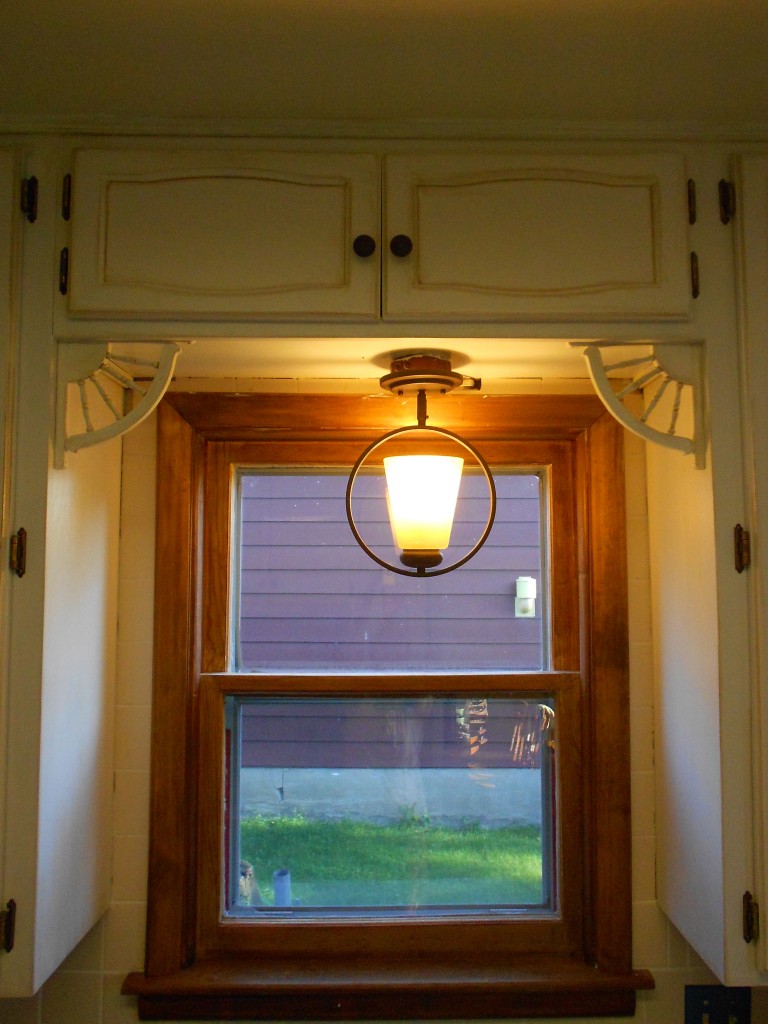
Next, I took away the beam that hung in front of the window. The only thing that was doing, was blocking some much needed light. You can see it in the before photos above. Good-bye.
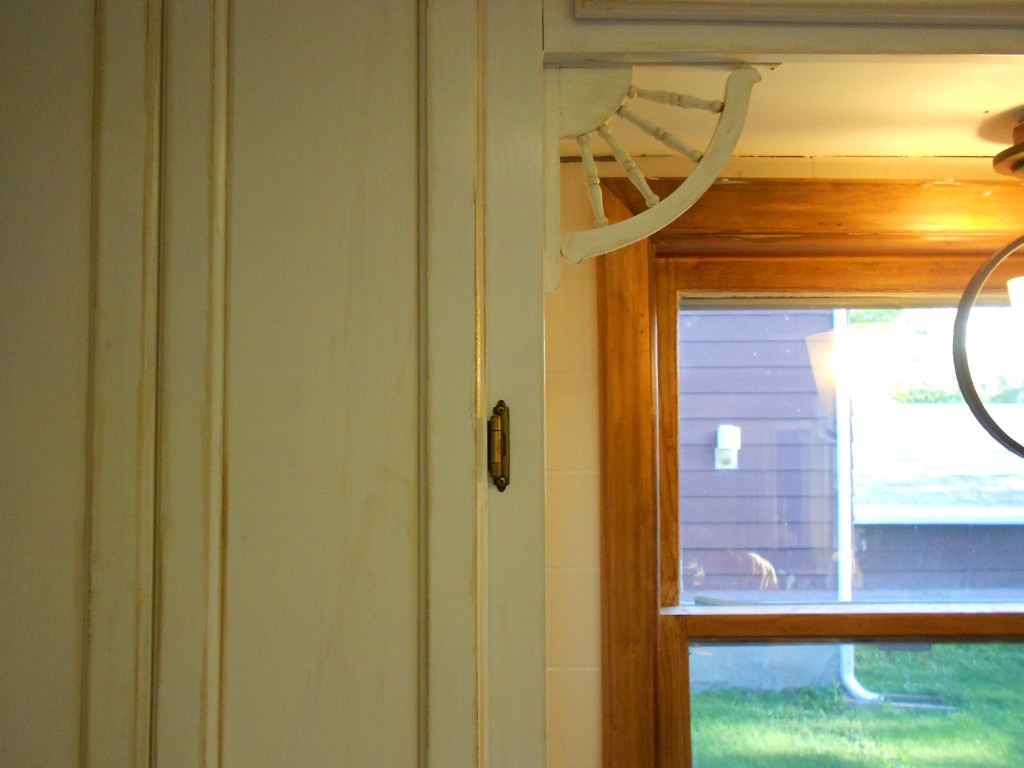
The previous homeowners did a not-so-great job of tiling the wall space around the window…so to disguise that, I needed something around the window. Instead of painting that beam and rehanging it, I picked up some ginger bread trim {a pack of 2 for $5.99}. I painted it and glazed it to match the cabinets then nailed it in place. Pretty cute.
The final outdated element I removed was the light fixture. It was gold and ugly. Quite frankly, it looked like it belonged in an office {an ugly office}. I found the fixture I hung at {where else} Menard’s, on sale for $27. It’s the same finish as the knobs. It’s unique, but not overly trendy.
Once the cabinets were white, it was obvious that I needed to update the wall color as well. It’s a subtle shift, but I painted the walls a soft blue-green that we used in the living room. It’s “filmy green” from Sherwin Williams. That didn’t cost a penny, because I had extra sitting in the basement.
Now, the full review. I don’t give out stars. But if I did…this cabinet transformation kit would receive a galaxy.
In case you missed the progress posts, I used a Cabinet Transformations kit from Rustoleum. If you want to look back here is starting day, deglossing process, painting, glazing, and finishing.
Here are the pros:
- Nearly everything you need is in the kit. Just add some brushes and latex gloves and you are set.
- It’s compact. I totally thought I’d need a second kit to complete my job…but I actually had leftovers. Enough left over that I’ll be refinishing a piece of furniture or my bathroom vanity in the near future.
- Affordability. It costs about $70.
- Custom results. My cabinets look professional and custom. Seriously, they look so good.
- Durability. The finish is so hard and scrubbable.
- It’s EASY! The steps are laid out very clearly in the instruction booklet as well as the DVD that comes with the kit. It’s a bit time consuming, but it takes very little technical skill. Also, it’s easy enough that you can do it alone…but friends make it more fun.
- Options. The kit comes in 16 light colors and even more dark colors. In addition it works on all kinds of surfaces: wood, veneer, etc.
Now, some cons:
- It’s time consuming. I mean, what do you expect when doing a project? It’s going to take some time to get good results, but if you aren’t into that thing, you’ll need to go a different route.
- The deglossing is hard. It’s hard work, your hands will be tired, your elbows will hurt, it might make a mess. But you’ve got to do it to get the paint to stick.
- Your kitchen will be torn apart for a while. Just accept it, you can’t do this in a day. A week? Yes. A day? No.
That’s all I can think of on the con side. I really loved this kit. If you are wanting to redo your cabinets….get this. Get it. Just get it already. {I’m excited again.} When I lived in Louisiana {at my last house} I painted the cabinets. The transformation was awesome…but at the end of the day, they looked like I’d painted them. These look professional, like custom cabinetry. I would put money on the fact that I will live in another house with ugly cabinets that need a transformation. I will never again attempt a redo without this kit from Rustoleum.
Oh, and if you are wondering…the color I used on my cabinets is “Linen.”
One more look.
Total for this make over:
Cabinet Transformation Kit: $70
Paint: $0
Brushes $20
New Light: $27
Hardware: $30 {the knobs are 100% rebated}
That’s less than $150 for a whole new kitchen. In my book, that’s pretty darn good.
Total time spent: 6 Days
I’ve got a few more things to tell you about this project. But it’s going to have to wait. I think you’ve had enough for one night.
Amy

