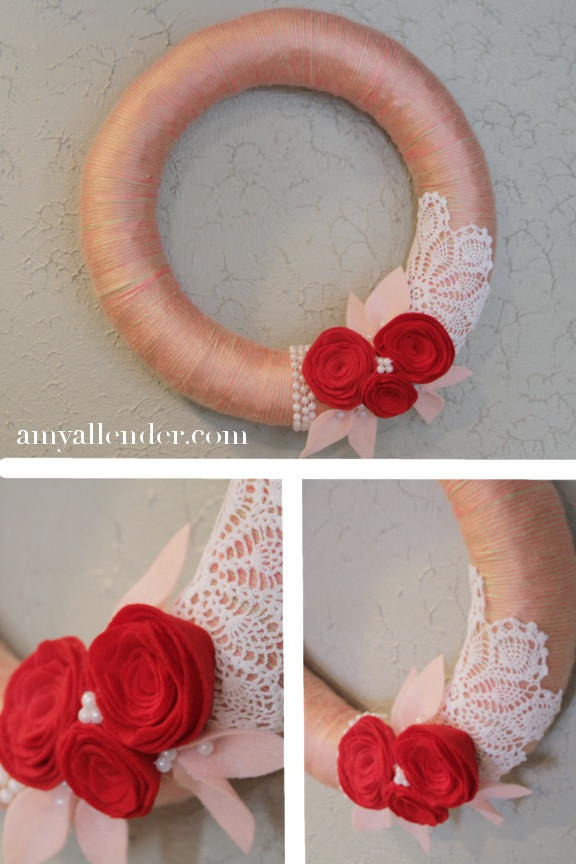
Pretty right?
This may be one of my favorite wreaths ever. I’m kind of a wreath junkie…so that’s kind of a big deal. It’s pink and romantic {a little late for V-Day} and just so gosh-darn pretty. I needed something to replace that awesome Pottery Barn knock off snowflake wreath from Christmas time. It’s really time I begin looking forward to a day with no snow and blooming flowers. This is a perfect fix.
I’ll tell you this: It was easy, but it wasn’t fast. Commit a few hours or a few nights of TV watching/multi-tasking and you too can be the proud owner of a wreath just like this. All for the low, low material cost of $9. Here’s what you’ll need:
A 14″ straw wreath form {you can use a foam one, but straw is cheaper}
Yarn in two colors that you like. I used pink and tan.
Felt. 2 sheets of red, one sheet of pink.
A doily.
One string of cheap-o beads.
Hot glue gun and glue.
Here’s what you do:
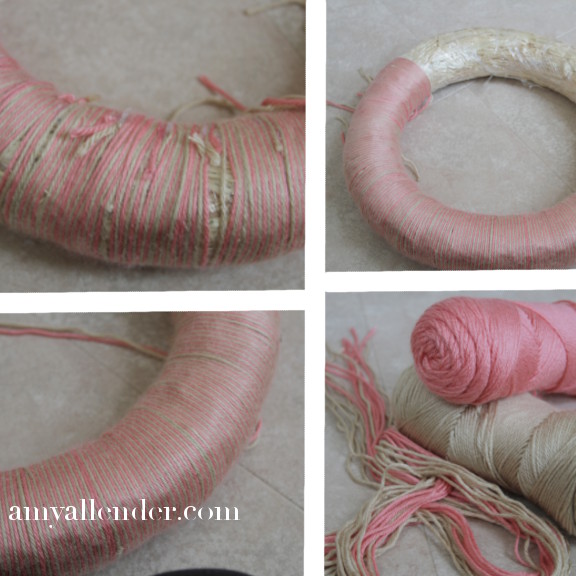
Step #1: Cut long lengths of yarn. I used 3-4′ pieces. Cut a bunch, each length will cover about 1″ of your wreath…so you’ll need quite a bit. All in all, I used about 1/3 of each of my skeins.
Step #2. Start wrapping. Line up two pieces of yarn so their ends are even {one of each color.} Put a dot of glue on the back side of your wreath and stick the yarn in. Then wrap the pieces around and around. Keep the stands side by side, making your rows tight together. When you come to the end of your strands use another dot of glue to secure them. Make sure you put all the glue on the same side, so you have a seamless front. {Top left image is of the backside of the wreath.} Keep wrapping until your whole wreath is covered. {Bottom left image shows the front side of the wreath.}
Step #3: Don’t lose your cool if there are a few bald spots on your wreath where you see the form peeking through. Once you’ve gone around the whole wreath go back and fix the empty spots. Gently push the rows of yarn off to one side or the other, opening the bald spot up a bit wider…and making the yarn rows nice and tight together. Then glue a pair of yarn strands to the back of the wreath and wrap until the form is fully covered.
Step #4: Clip off any loose ends from the back of the wreath.
Step #5: Make your felt flowers and embellish the wreath with flowers, a doily and beads.
Now…Let’s make those pretty flowers. It’s easy, I promise.
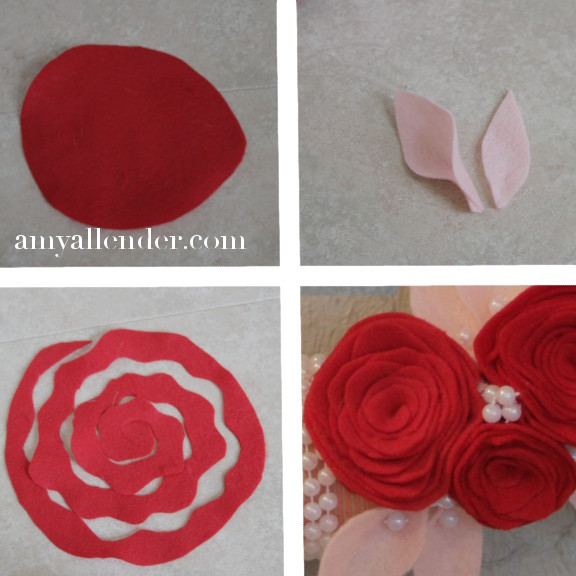
Step #1. Start by cutting a circle out of felt.
Step #2: {See bottom left photo.} Cut a wavy spiral into your circle.
Step #3: Start with the center of your spiral and begin loosely coiling the felt together into a rosette shape. Don’t coil too tightly, or you’ll just end up with a coil of felt…not a flower. Be patient, it may take a couple tries.
For felt leaves cut tear drop shapes from felt. Run a bead of hot glue about a quarter of the way up the center of the bottom of your leaf. Then pinch it together to give it some 3D form.
Add your doily to the wreath first, then use hot glue to attach your flowers and leaves. Snip individual beads off of the strand, then add them to any open space that looks like it needs “something.” Wrap the remaining length of the strand around the wreath. Secure with glue on the back of the wreath.
Finish it up by hanging it up with ribbon, or a “pop tab” glued to the back–for hooking it directly on a nail.
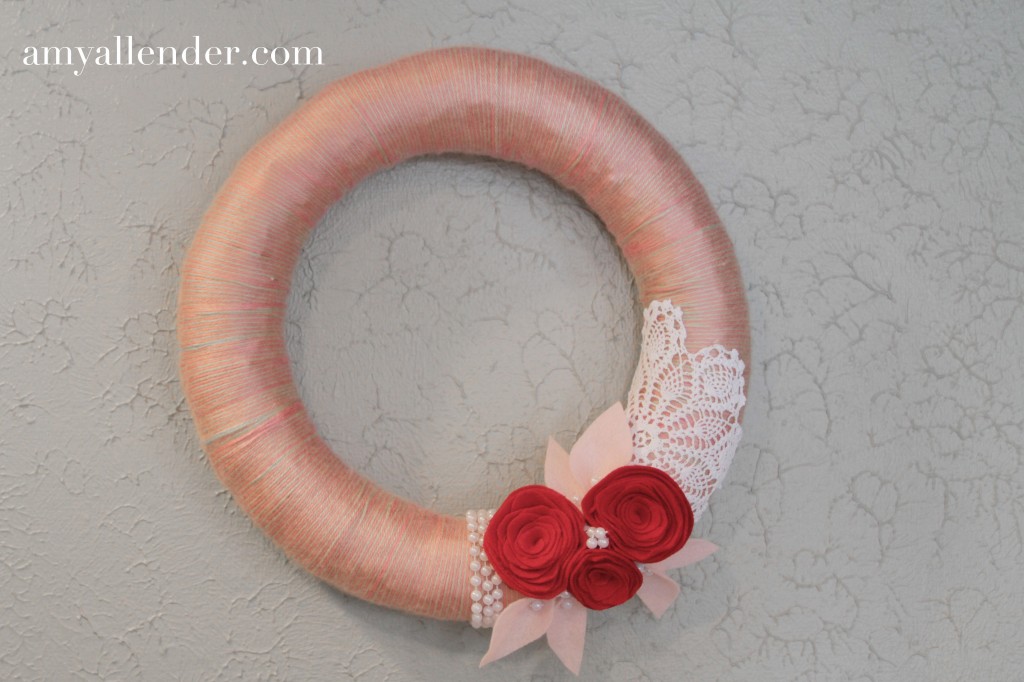
Let’s look one more time.
I just know you can do it. March makes me think pink for some reason. I’ll probably leave this gem up until May-ish. Happy crafting!
Amy


