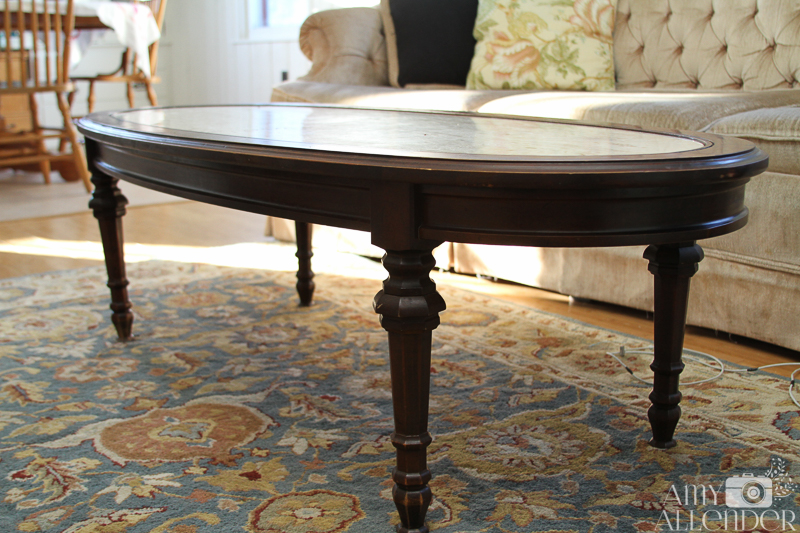
It’s been a few weeks since I told you I planned on refinishing antique tables I inherited from my grandparents. If you missed the “before” post, you can read it here. The original plan was to simply strip off the old finish {the shiny part}, that had been damaged by years of second-hand smoke exposure, multiple moves and age.
I started off by using the deglosser that came with the Rustoleum kit I used on the cabinets–when I redid the kitchen. I thought this might be enough to take off the old finish and allow me to put a new coat of glossy polyurethane on top.
The deglosser did it’s job. I was left with a mostly matte finish on the tables. This would have been perfect if I had planned to paint the tables. I have no doubt that paint would have adhered beautifully to the new, dull surface. However…there was still residual finish on the tables and there was still a good amount of damage left. {Doesn’t that sound weird? A good amount of damage?} Too much damage to proceed with a new top coat. I’d come this far…and I wanted to do it right…so {a little begrudgingly} I decided that the tables needed to be completely stripped before I could confidently add a new finish.
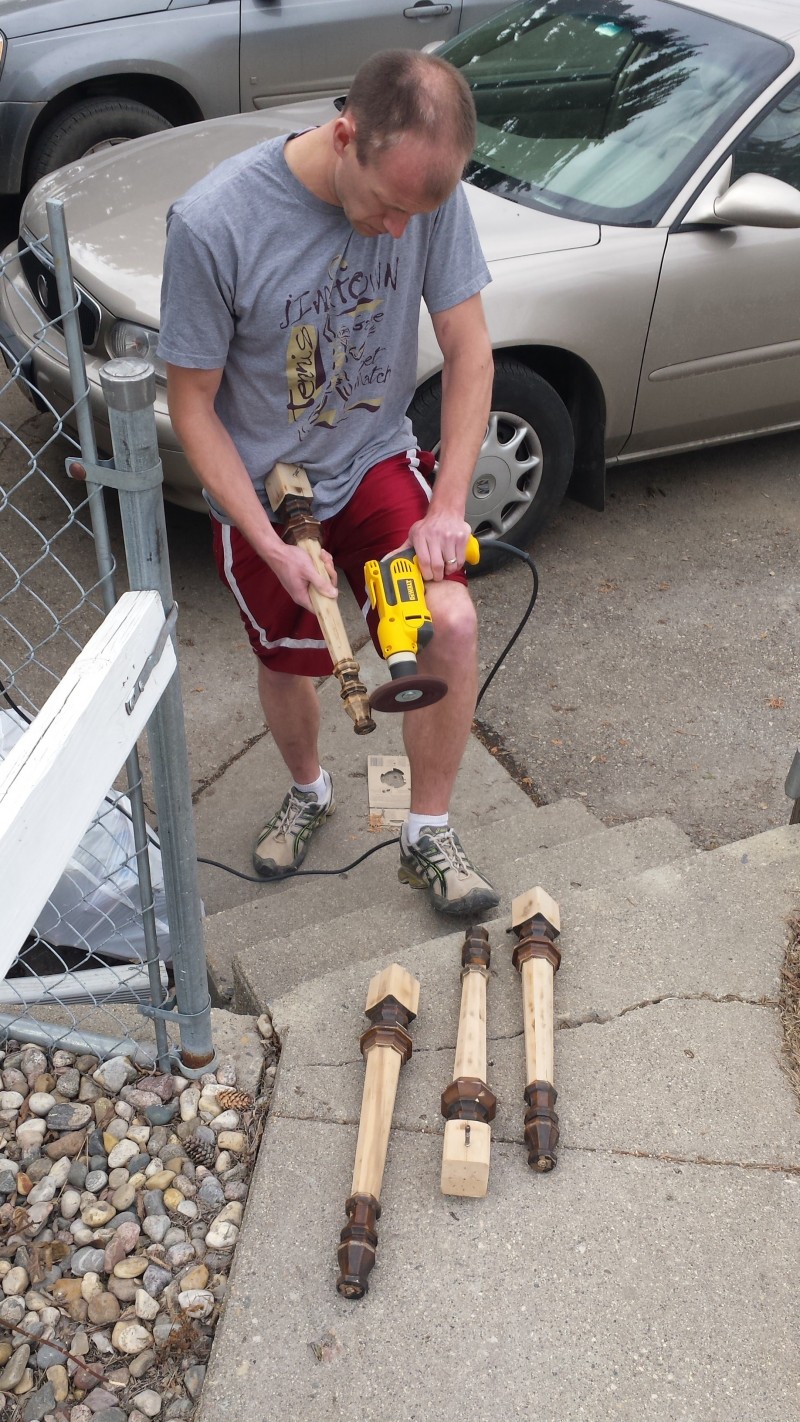
Completely stripping the old finish and stain required a few new tools {hooray!} I’m not the owner of this brand new orbital sander and a Dremel. Do any of you have a Dremel? Do you like it? It wasn’t nearly as handy as I had hoped. It’s like a power tool for Polly Pocket! So tiny!! But it did help a lot on some of the tricky curves. My biggest complaint is that I’ve been going through accessories like crazy. The pieces that work only last a short time. Okay, I’ll go into the exact pieces I used on another post. Long story short…I own a Dremel.
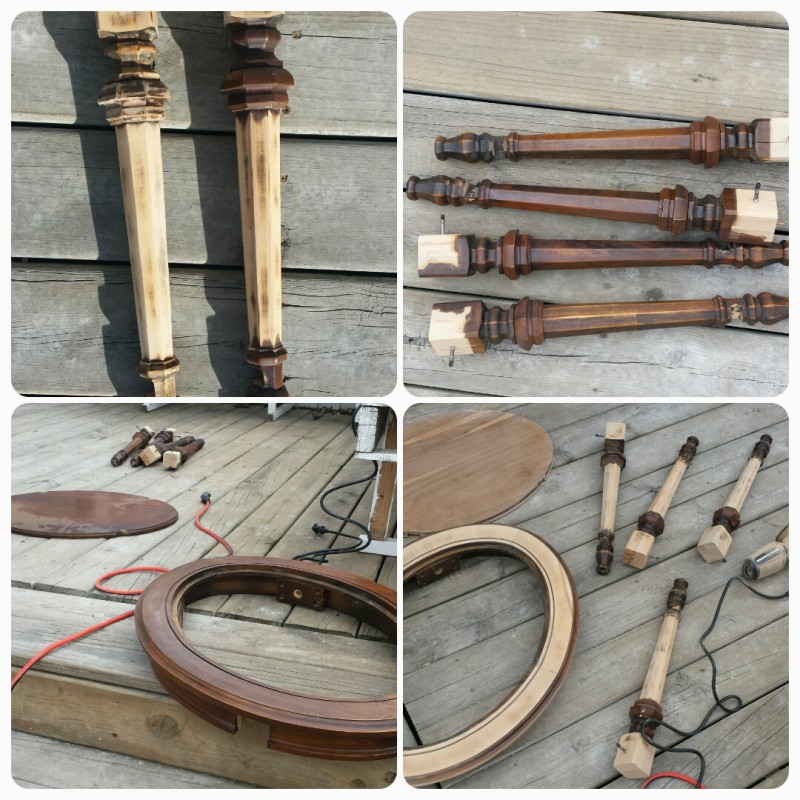
I used the orbital sander on all the flat surfaces and took it down to the bare wood. After losing my mind using just the Dremel on the table legs {and going through loads of tiny accessory sanders}, Derek went out and bought a paint stripper that attaches to the drill. It works wonders! This 3M product, lasted a long time, didn’t chew up the wood and worked efficiently.
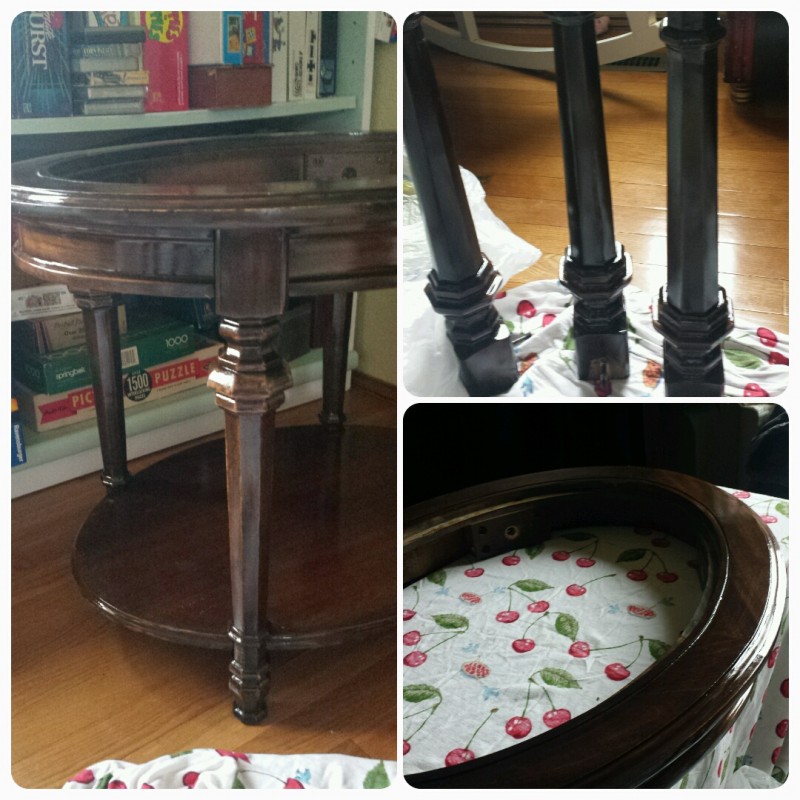
Once everything was naked it was time to stain. If you’ve been reading the blog for a while now, you might know that I’m a color-commitment-phobic. {That’s why I didn’t want to paint them.} I stood in the stain aisle for about 20 minutes…thinking. I walked out with the perfect color. Turns out it’s nearly identical to what I started with. That’s totally fine, I thought they were pretty–they just had a rotten finish on them. The real bummer is that to you, at home, you probably won’t be able to see much difference in the before and after. You’ll just have to take my word on it. The look much better.
I put three coats of oil based polyurethane–I chose Varathane–on each table. Since the weather turned chilly again and I’m still cat sitting {any my guests tend to be on the ornery side} we had to do some of the finishing in our tiny front room…the only space that can comfortably be blocked off from all furry footprints. I could just imagine a perfect glossy finish with cat hair and paw prints embedded in it. But, the crisis was avoided and the nearly-finished products are looking stellar–if not much different.
Once these are all done, we’ll be starting on the coffee table. It’s been a lot of work–lots more than I had imagined from the get-go–but I’ve learned a lot and this is by far the most professional furniture redo I’ve ever done. Color me pleased.


