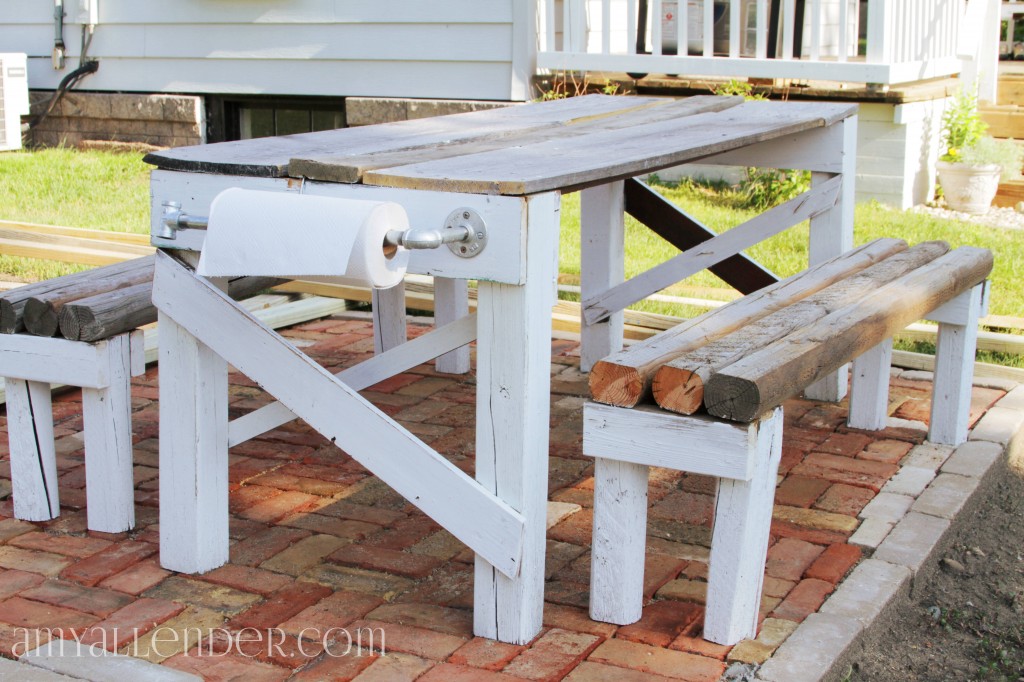
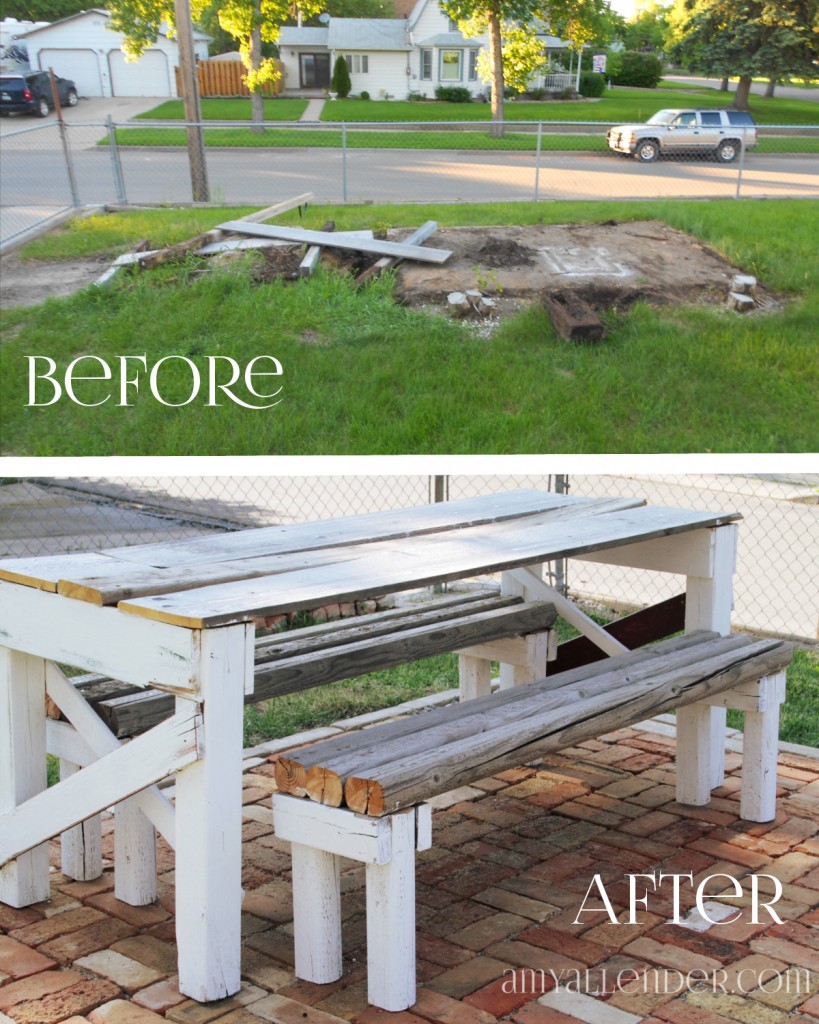
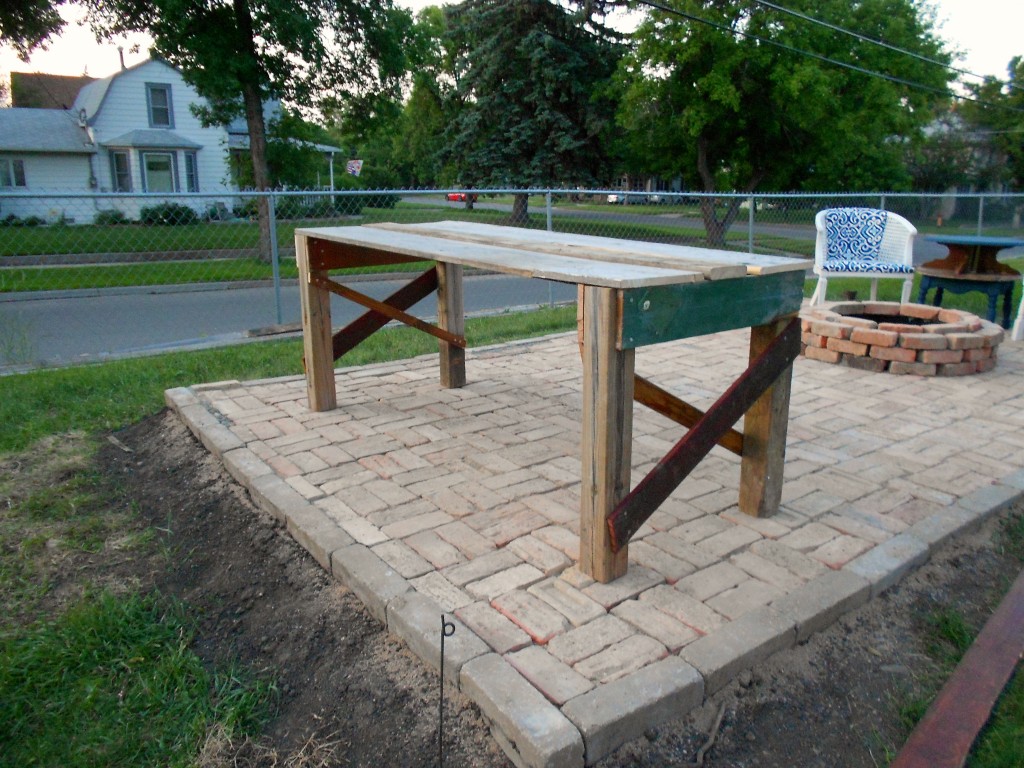
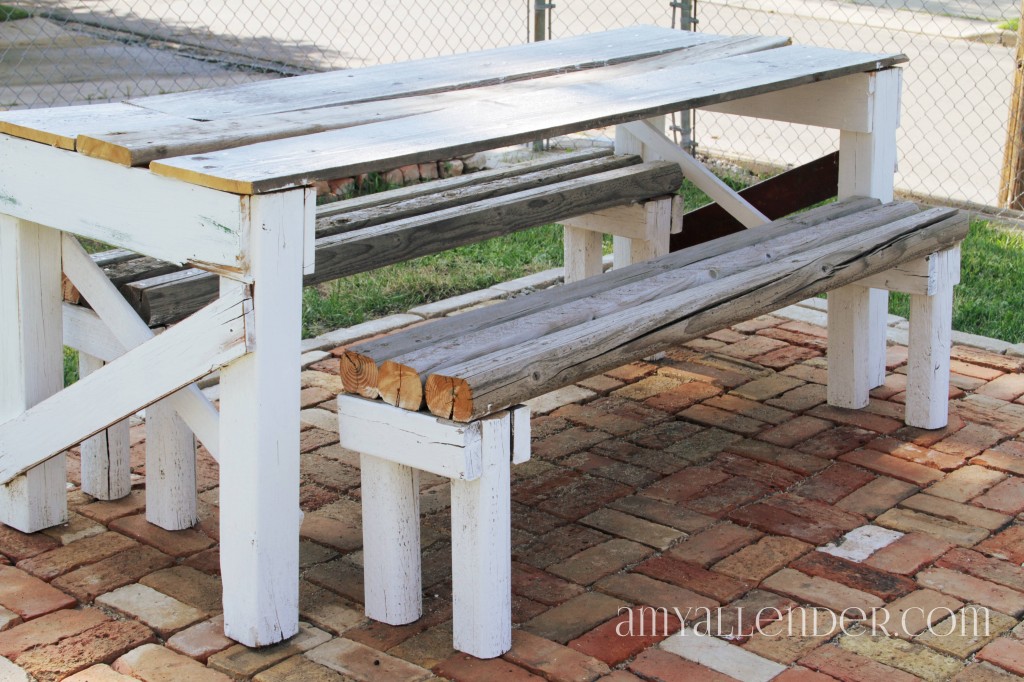
Today I’ll show you how I {yes, me…all by myself} built this table and benches for my patio. Are you impressed, or what?!
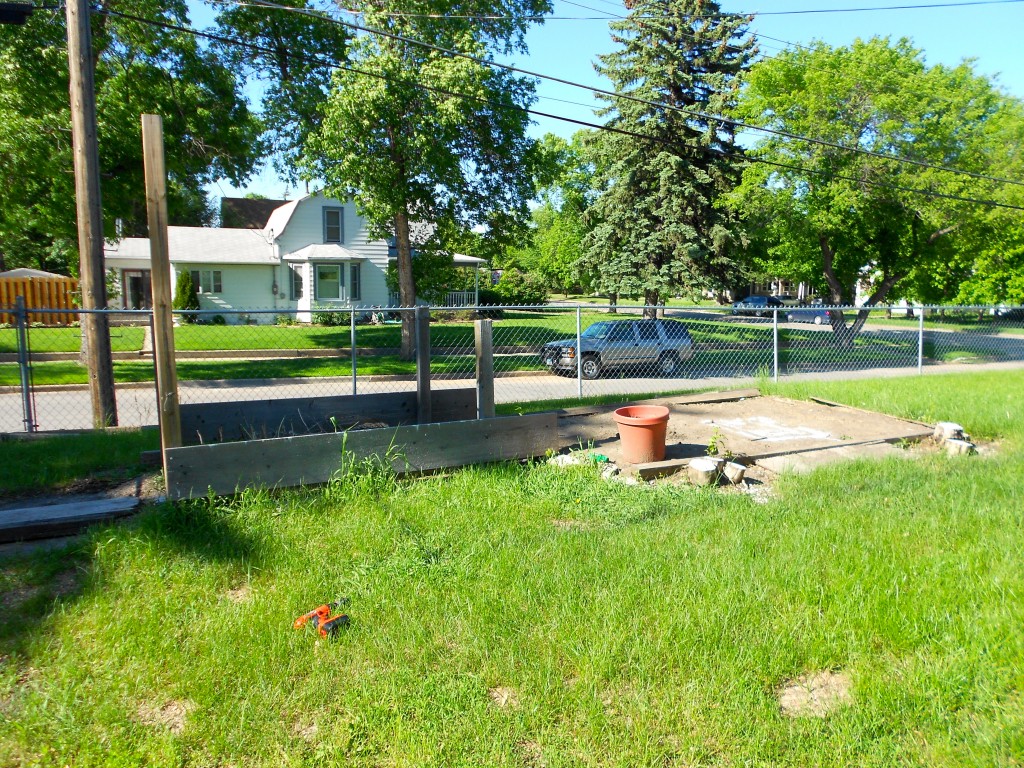
I have to say, this is one of my greatest before and afters. After my shed came down from the space that I wanted to lay the patio, I was left with a bit of a mess. Wood from the previous home-owner’s garden frame was left hanging around…then, as I leveled the ground I discovered quite a few landscape timbers lying in the dirt around the space that the shed used to stand on. I knew I wanted a place to sit and eat outside, but even the simplest table and bench combo was going to set me back several hundred dollars.
Not happening.
So I got creative, collected the resources I had on hand and got a little gutsy…and I made this happen.
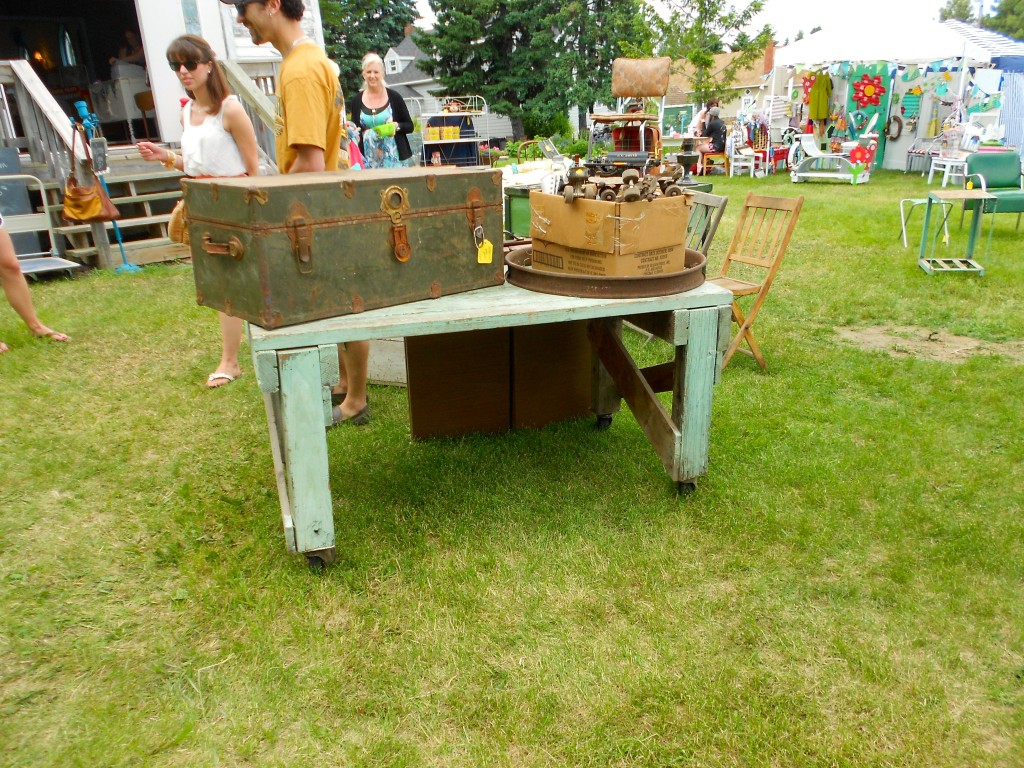
The inspiration for this project really hit me when I visited the Vintage Fair here in Minot a few weeks ago. I had been all over and racking my brain trying to figure out a way to get a table for my new patio without breaking the bank. I had kind of hoped to find something I could use at the Vintage Fair…but no luck. Instead I came across a table that was PERFECT in every way, except for the fact that it wasn’t for sale. Bummer. This is it:
It was apparent that at one time, this table had been made with scrap lumber. Even though I couldn’t go home with it, it sparked an idea. Like a big cartoon thought bubble, my mind was filled with the memory of all that crap wood I pulled out of the yard. Bingo.
I was a little worried, because I’ve never been much of a carpenter. The closest I’ve come is following Jesus…and a couple woodworking projects with my dad when I was a kid. {But let’s face it…I was mostly an innocent bystander for the majority of those shop projects.} But I armed myself with lots of photos of this table, from every angle I could get…and I went home to replicate.
Here goes nothing.
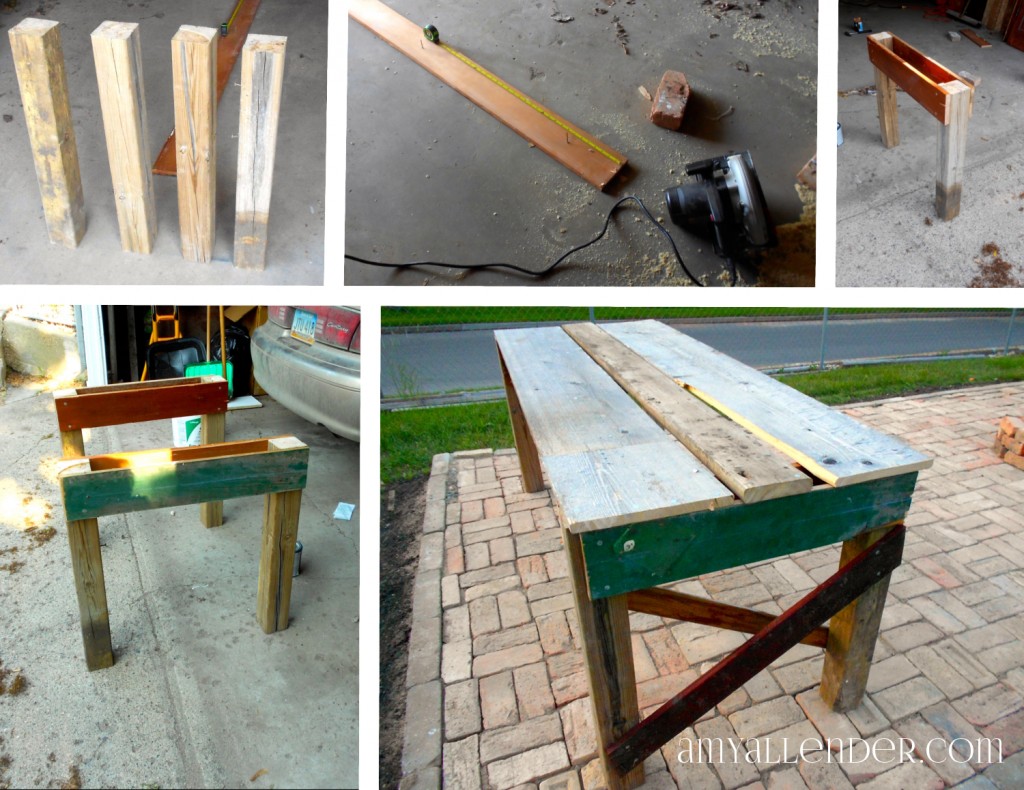
1. First I did a little Googling to figure out how tall a table usually stands. Most plans say 30-31″. I cut up this tall 4×4 to four 30″ lengths.
2. Next I did a little more Googling to find the typical width of a table. I wanted mine on the slender side to conserve space, so I decided on 28″. I cut four pieces to 28″. These will hold the legs in place. For this part I actually used a couple spare baseboards from the bedroom redo.
3. Nail those suckers in place. Make sure the top of your 28″ piece is flush with the legs and that the legs are square. Nail one brace to each side of the 4×4 legs.
4. Repeat that process for the second pair of legs.
5. To lend additional support you’ll need to come up with four more pieces to attach in an X to the legs. I also thing this looks super cute. I found some old fence posts{?} behind the garage. So I used those. You want one end to rest right under the brace. To make measuring easier I laid my leg piece right on top of the piece I wanted to use for the X. Then I drew a line and made my cut. Attach one to each side of your legs.
6. Next decide how long you want your table to be. For my space 6′ was just about perfect. Stand your table legs apart and lay some long planks across the top. I used the two sides from the “garden” and one leftover deck plank. When you’re happy with how it looks nail them in place. Use at least four nails per end, per board. {2 into each brace.}
For this project I used all nails. Partly because that’s what the table at the Fair was made with and I liked the rustic feel of seeing them. Partly because that’s what I had on hand.
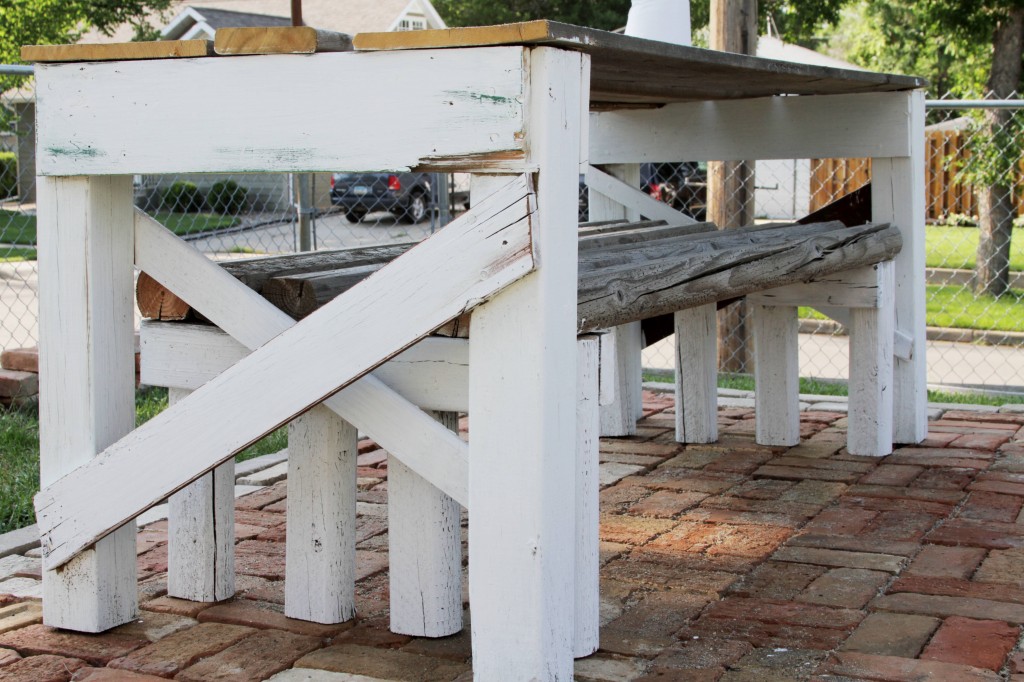
I so wanted to be happy with it just like that. All rustic and mis-matchy. But…you know me. Nothing is complete without a little white paint. I felt like it would really unify the table with the rest of the patio {ahem…my awesome chairs} if I painted it. I painted the legs and left the top alone. I love its weathered gray tones.
Now on to the benches. Those were so easy! They are like mini tables, so once you’ve done the big part these will be a breeze.
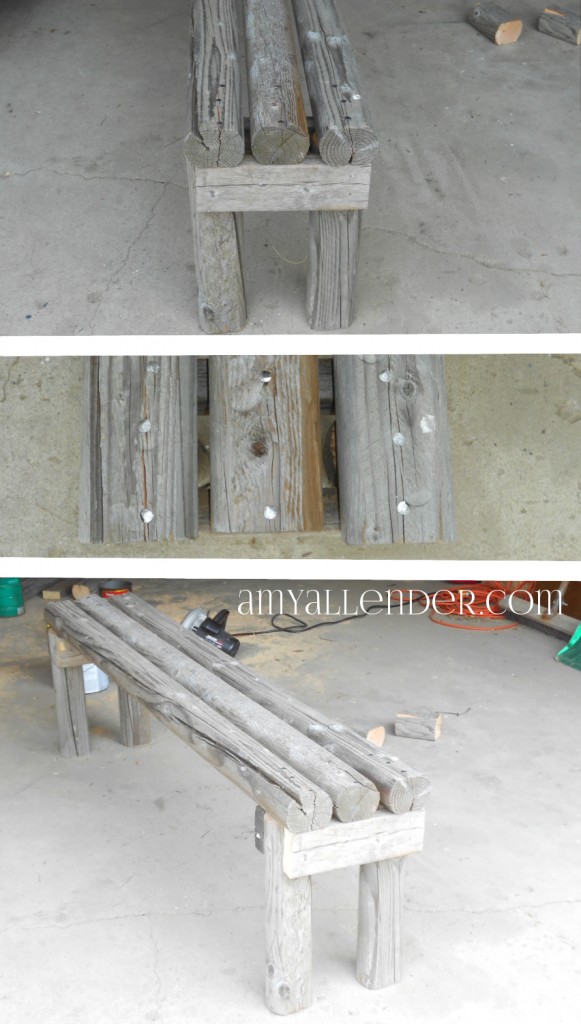
First build your legs. Google told me the bench should be about 18″ tall, so I had to do a little math. The landscape timbers are 3″ thick, so I cut my legs to be 15″ tall.
Next decide on your seat width. I made mine on the narrow side so I could store them under the table together. These are 10.5 inches wide. Cut your braces and attach them. One to each side of each set of lets.
Then nail your long timbers across the top. My benches are 54″ long. Again, so they could be stored under the table. Since these timbers are so thick I had to make a run to the hardware store for extra long nails. This was my only expense in the whole ordeal…$4.59. I’d say that’s a pretty good deal for a table and two benches. And as an added bonus I don’t have so much junk lumber laying around my yard.
Just like with the chairs yesterday, if you want this to last you’ll need to use products made for being outside. All this lumber is pressure treated or cedar {with the exception of those two baseboards} so I know it’ll hold up. The paint I used is more of that white deck stain from last summer’s Deck Redo.
And, for real…if I can make this, so can you.
Amy

