I’ve had lots of people inquiring about how my chair is coming. Honestly? Really good.
It’s been stripped down and restuffed. Now I’ll show you how to do it. This part is easy…as long as you are patient and take good notes.
Today we’ll look at the five easy steps it takes to get that fabric off and get the cushy padding on.
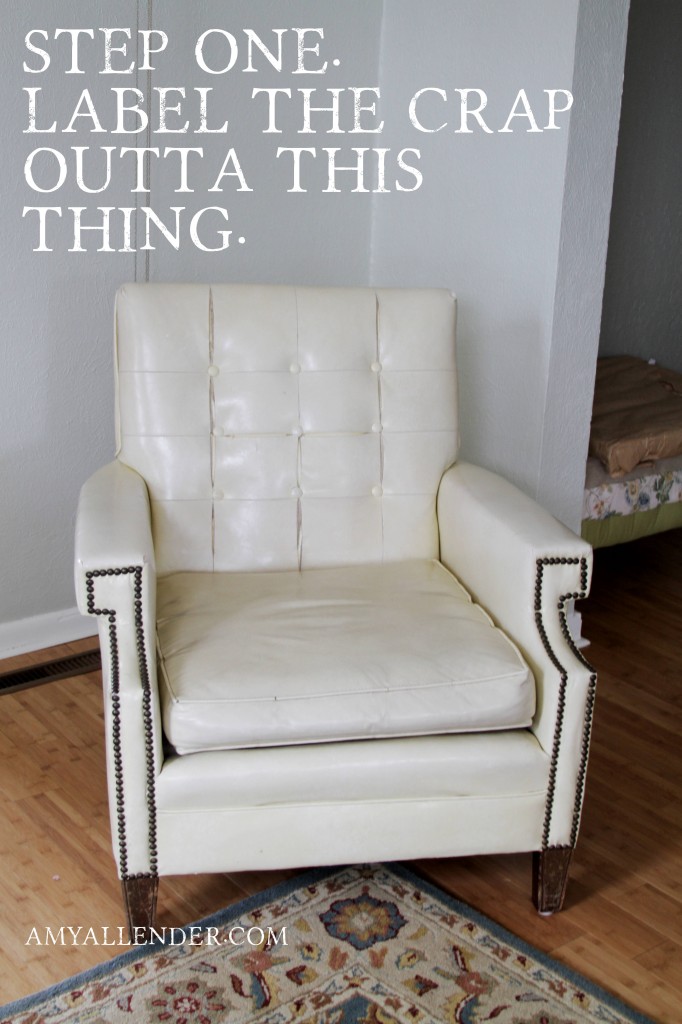
That’s right. The first tool you’ll need is a Sharpie. You’ll be taking the fabric all off, so don’t be shy. Write all over your piece. Everywhere you see a seam: label. Make notes. Note what side is up, where decorative brads are, etc.
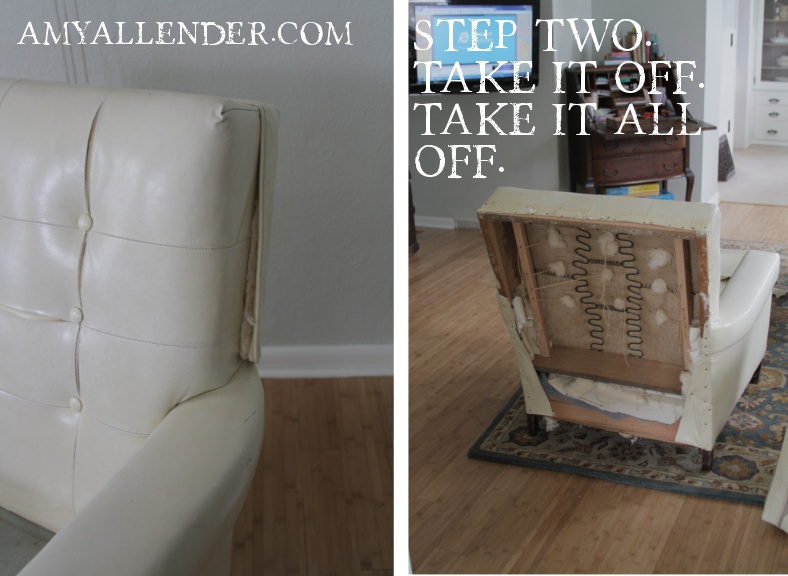
Once your piece is fully labeled it’s time to remove. Start by finding a seam. Upholstery has very little sewing involved. Most seams will be held together by staples or nails. As you can see, my chair was already falling apart, so it was a good place to begin.
Keep that Sharpie handy, though. As you remove each piece, number it. Then when it is time to cut new fabric and reassemble, you’ll put them back on in reverse order. On chairs the back is usually one of the last pieces on, so it will be one of the first to come off.
Take care as you remove. You’ll want each piece fully intact, with as little tearing as possible. The best way to pattern for your unique piece of furniture is by patterning after the fabric that comes off.
Tip: I used a small chisel for prying off stubborn upholstery tacks.
Tip: Remove as many tacks and nails as possible…this will make it easier to add new tacks later.
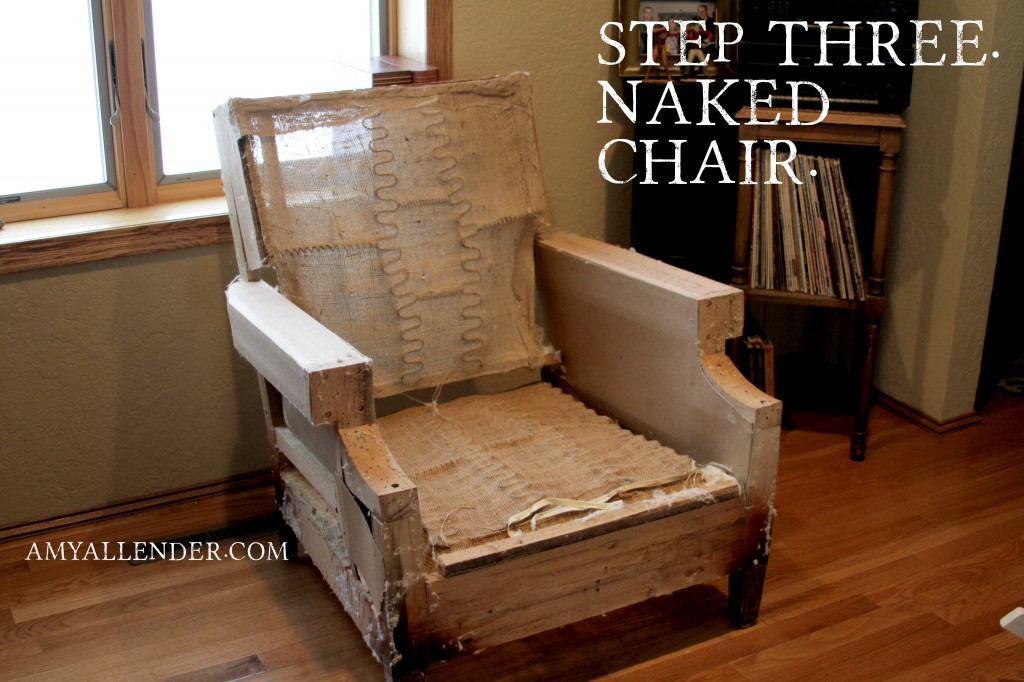
Step three is easy. You’ll have a naked chair. {A friend recently told me if I ever open a brewery it should be called the Naked Chair after seeing this guy…funny, right?
Take a look at your piece’s bones. Shake it. Is it rickety? Are there loose nails? Did you get all the upholstery nails out that you possibly could? Should you repaint the legs? Are the springs good?
If your furniture seems shady in any way, now is the time to fix it.
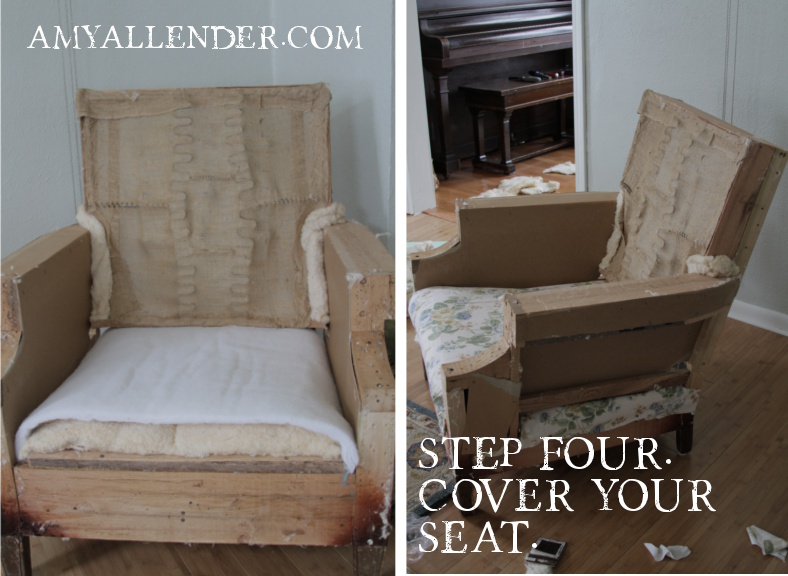
Now we start to make this baby comfy. I used two types of padding: cotton mat and 1″ foam upholstery batting. The fabric covering the thin layer of padding over the springs was last to come off, so it is the first thing to address.
I put the cotton over the burlap covering the springs, then a layer of foam {left image.} Tuck it into the sides. Then I covered that with fabric. I used the nasty, super-worn original fabric as a template for the new covering. Although this fabric is cute, it will be hidden under the seat cushion…still a pleasant surprise when you search the cushions for Waffle Cone Wednesday change.
Start by nailing the fabric to the front edge. {You can also use a good stapler.} If you are using nails, make sure you invest in a package of upholstery tacks. They are specifically made for holding this kind of stuff in place. After the front is secure, go to the back. Pull the fabric as taut as possible and nail down.
Repeat the process on the sides.
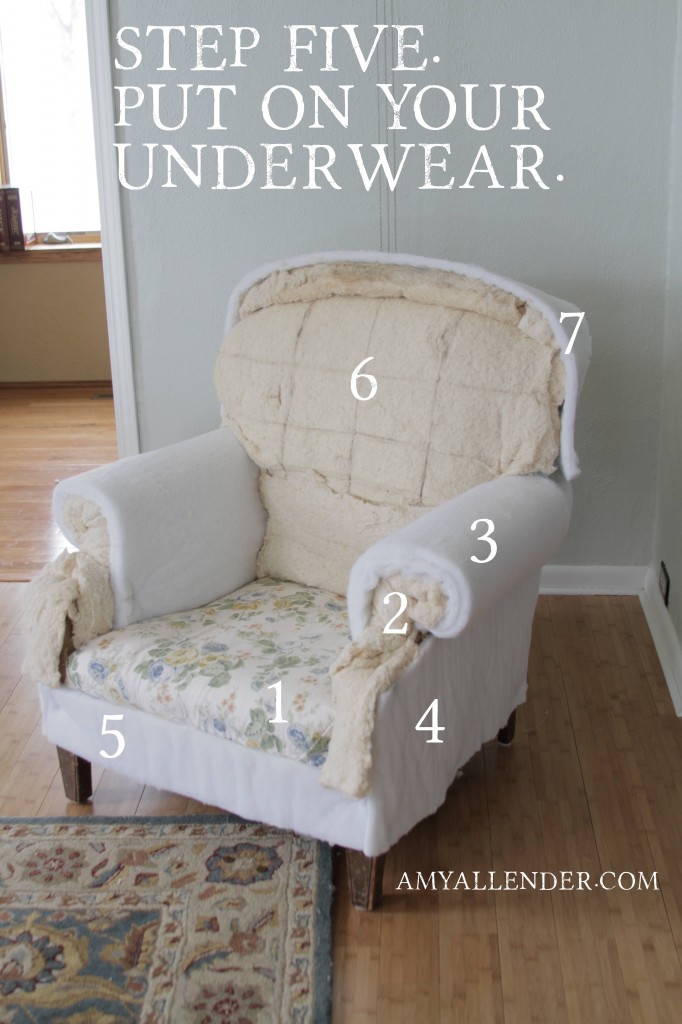
Okay, just like getting dressed…you need to put on underwear before you get dressed up. That’s what the padding does for the chair.
I conveniently numbered the order of the pieces I put in place. Seat was first. After that, put a thin layer over the front of the arm rests. Rule of thumb: Make the parts you lean on/sit on the softest.
#3, cover the arms. I doubled my 1″ foam for this part. Then cover the exterior side panels. Then the front.
Some of the padding may get too thick for using upholstery tacks. In that case, just use small, thin nails. For parts that have thin padding, use tacks. Either way, you’ll want to use enough tacks to keep things firmly in place. No one likes a shifty arm rest.
When it came to the chair back I really wanted to add some pad. I cut a piece of 2.5″ high density foam to cover the chair back, then a layer of cotton mat on top of that.
Last is padding to soften the edges of the top of the chair. I left the back totally open, since I’ll need to access it to add buttons later.
And there you have it! One stripped and repadded chair. Hopefully it’ll be totally done next week and I’ll have a B&A to show off.
Amy

