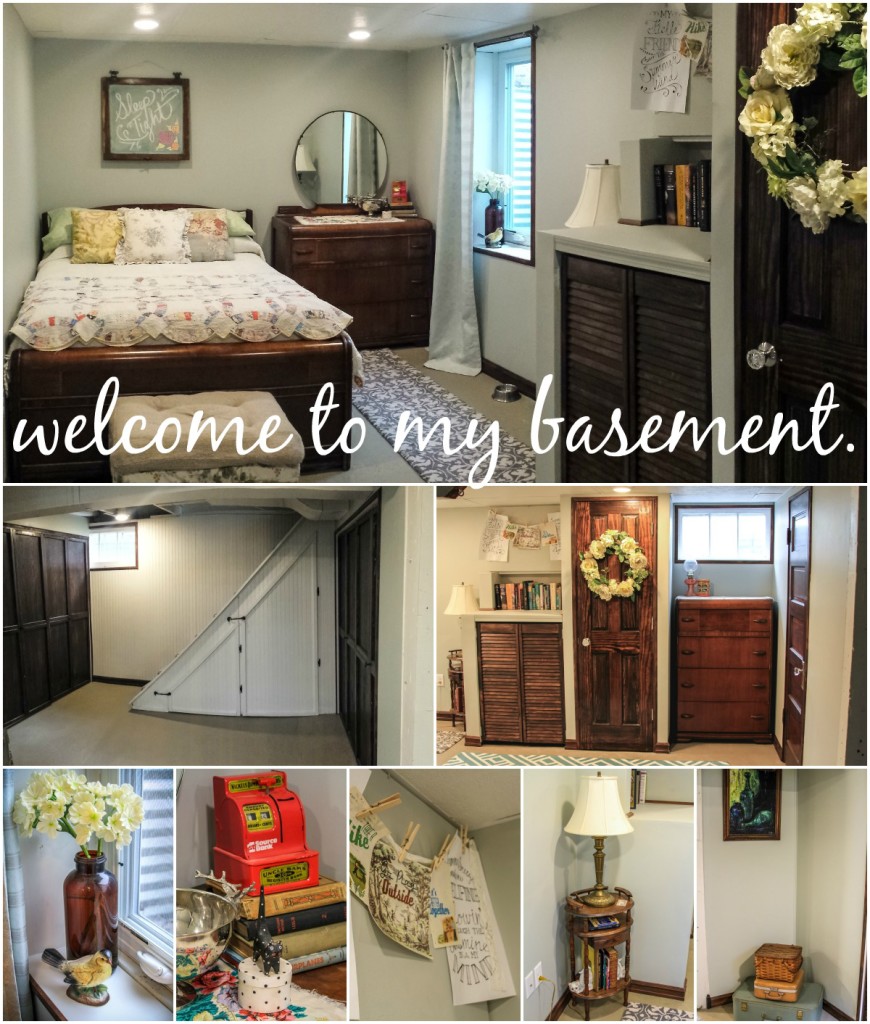
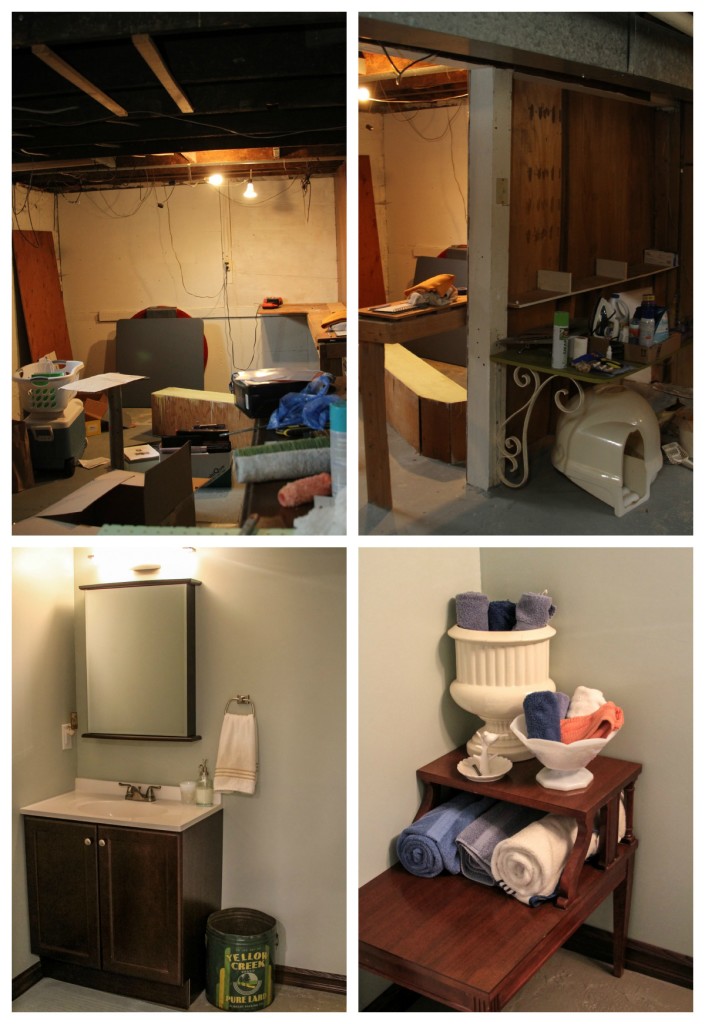
Well, well, well, well, well. The day has finally arrived. The basement has officially been finished since July {wowzers that’s quite a while…} and I’m finally posting the B&A here on the blog. For a long time I testified that the master bedroom redo has been my favorite project…or maybe the patio…but I think those just got trumped.
Maybe it’s that those other projects were done by myself–and for once Derek and I actually had a chance to tackle a project together. Maybe it’s the HUGE payout in the B&A images….the glory of having a second bathroom, the brilliantly bright can lights, killer storage, or just how darn cute it is. I may never know the reason, but this is my favorite project to date.
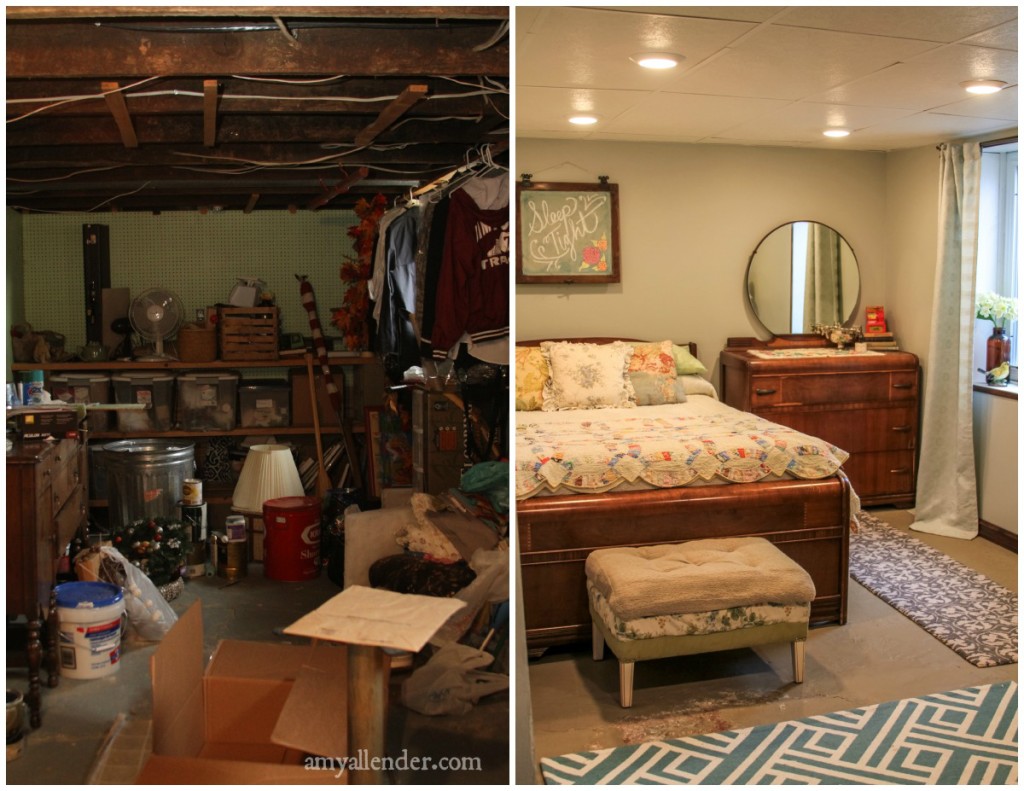
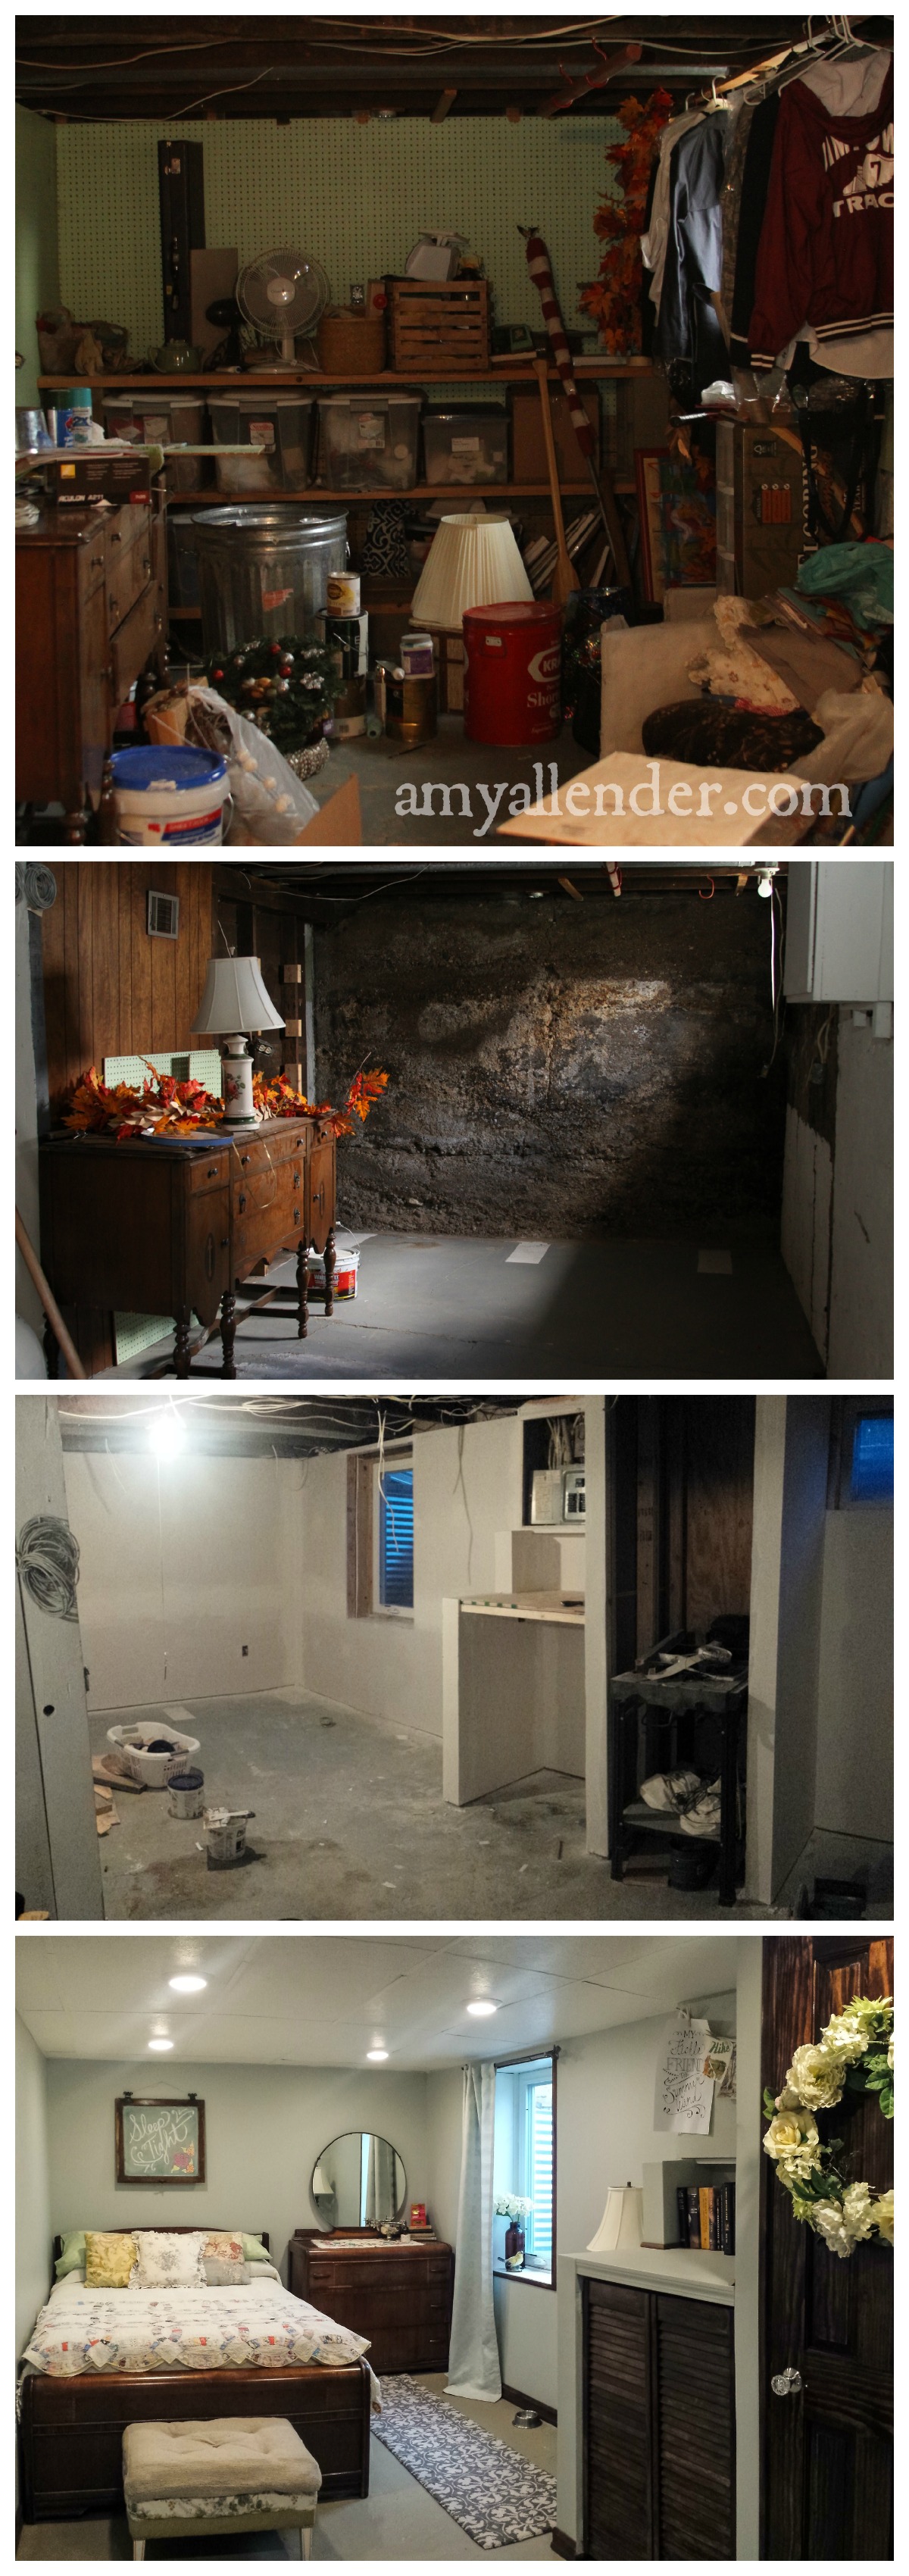
As lots of you know–we started from scratch. A totally unfinished, cement-walled, damp basement. We had things to store and they weren’t stored well. Instead the lowest level of our home was a cluttered mess of seasonal goodies that we could barely get to when we needed them. So, just to warn you all–the before photos are really a mess. Honestly, I’m a clean person. Really. I am. Please don’t judge the book that is me, by the cover that is the way our basement looked.
I’m serious. If you are going to judge me…look away right now.
Stop scrolling.
Okay, fine. You can look. You can all look. Just never bring up how cluttered it was when we talk face to face.
The now finished basement is open and mostly dedicated to being a guest quarters. It also houses a storage space, laundry nook and second bathroom. Here’s a B&A of the bedroom. {And the most amazing thin is…all that stuff on the left is still with us–well most of it–it’s just organized, restored and accessible now.}
Now watch it morph.
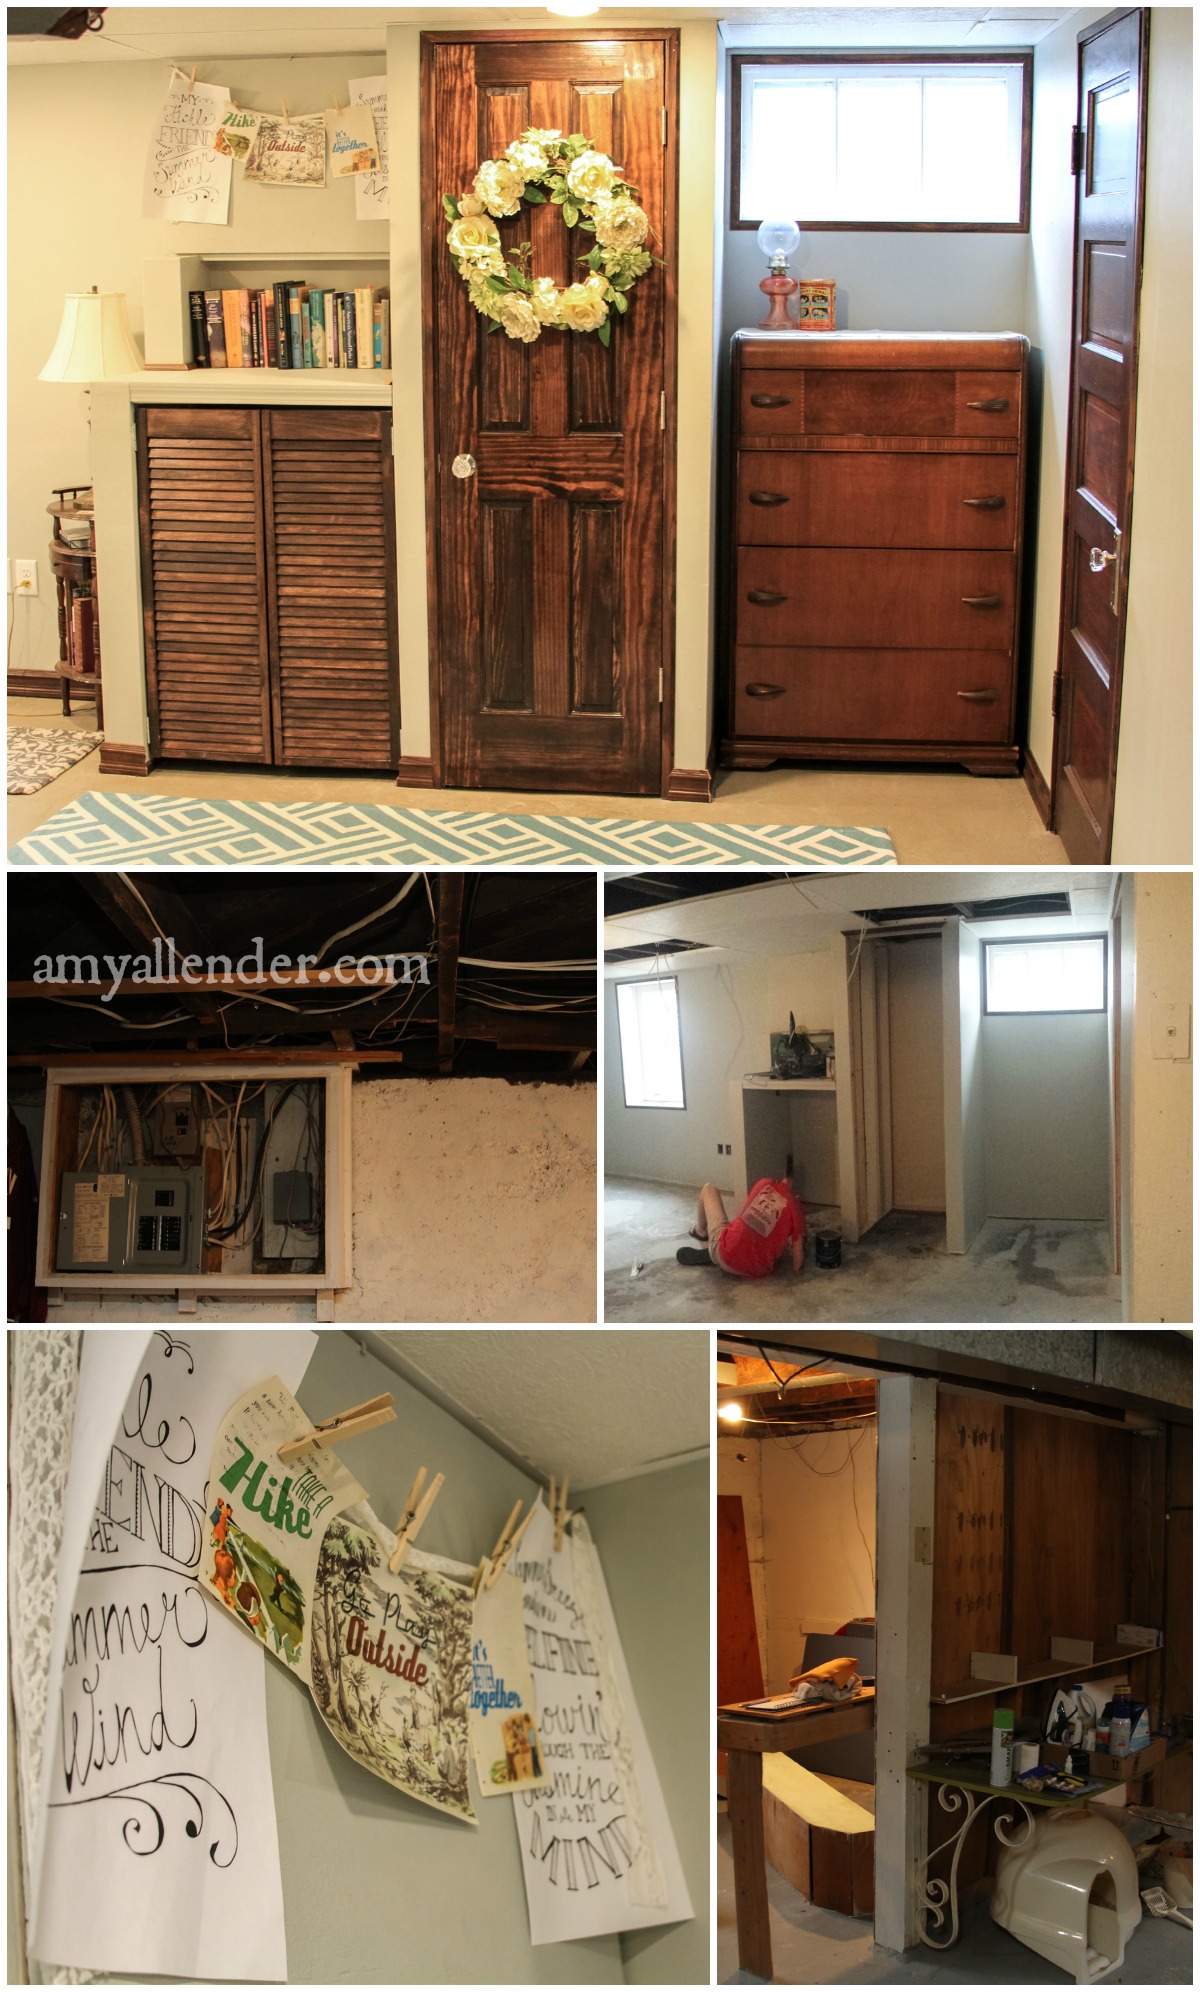
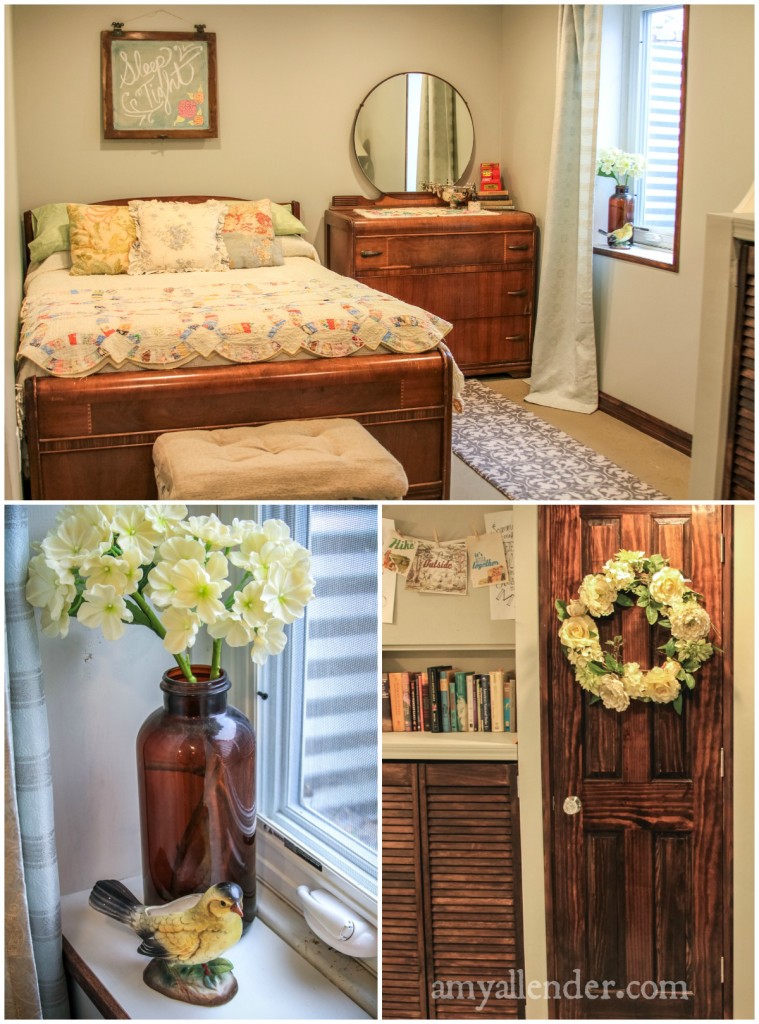
The closet situation was a little tricky since codes indicate that you aren’t allowed to put a fuse box in the back of the closet. But–I think it turned out really nice. We have a skinnier closet, but we gained some open shelving.
Just to give you a run down…the short closet on the left opens up to keep linens, shoes, etc. There’s also an outlet in there, so you can place a TV on the shelf facing the bed, and hide the cords. The skinny clothing closet has two rods and one shelf. The space where the dresser is could easily keep a desk or office nook. The door on the right leads to the bathroom…which you saw earlier this week. The bathroom door was salvaged from the upstairs redo.
I should have done a better job documenting the bathroom…but alas, I did not. But here is a pretty good look at the totally unfinished space where the basement now stands.
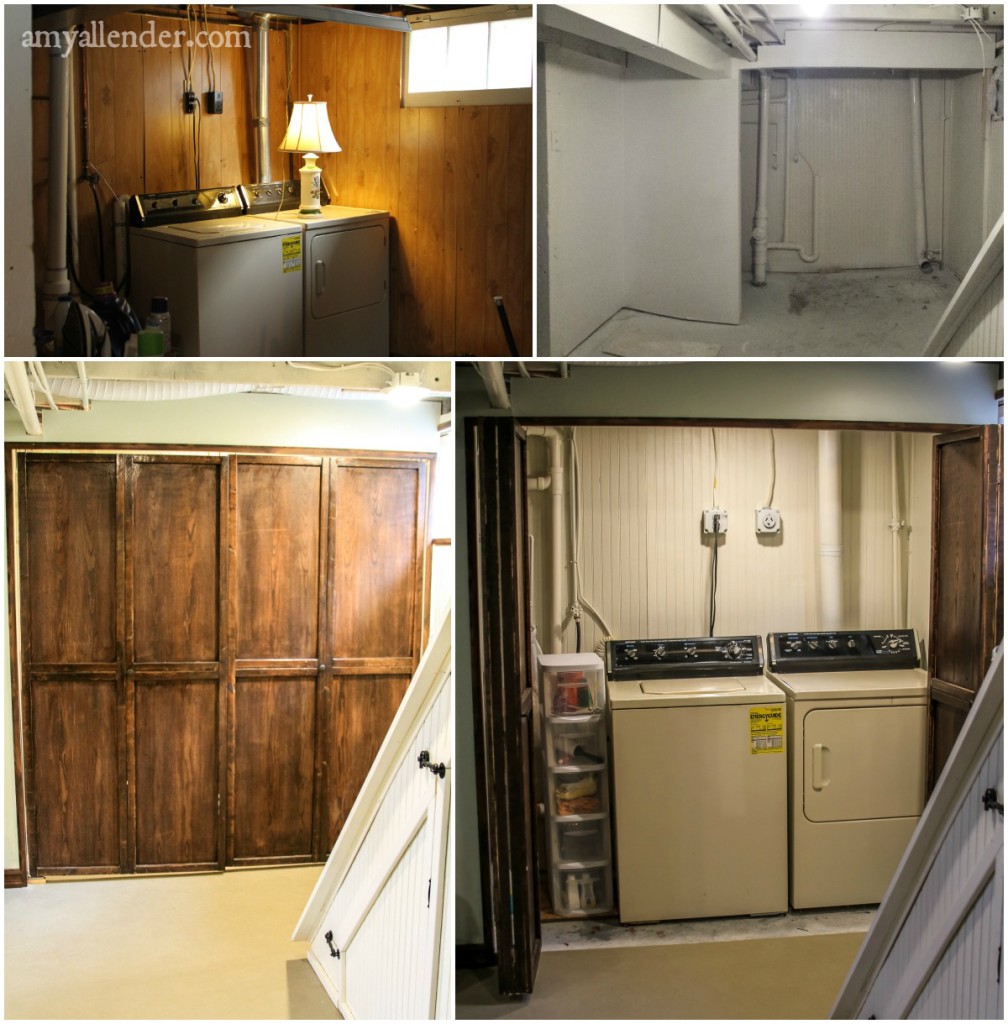
Our laundry hook up is right at the base of the stairs. Before the redo, wood paneling hid crumbing cement walls and just looked tacky. With the whole basement finished, I wanted to be sure we could hide the washer and dryer–so guests weren’t looking at something that reminded them of chores when they visit the great city of Minot, ND–renown for being a relaxation hub…
The doors we used were a major steal. They are stock doors that I stained and fancied up with trim and nice knobs.
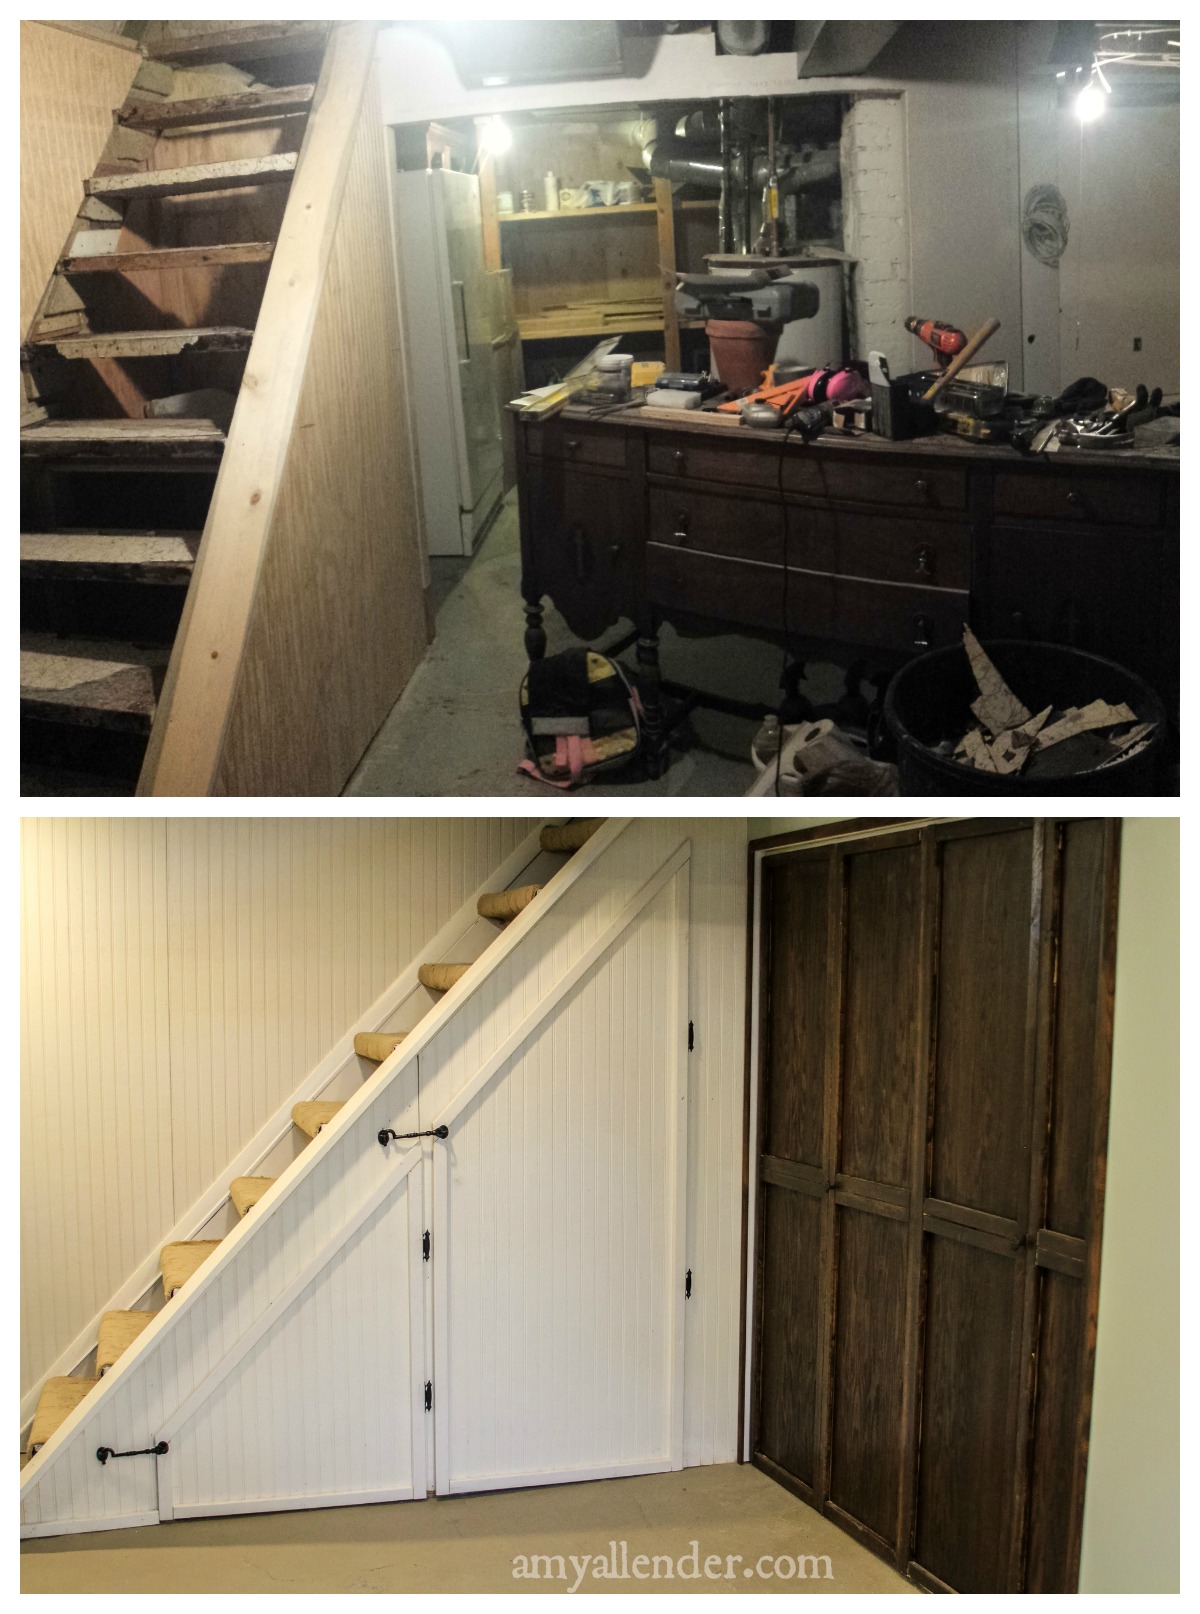
The stairs were our biggest challenge. They are old and not square and were covered in layers of carpet, linoleum and vinyl. All of these things were held in place by about nine thousand staples, screws, and nails of all sizes.
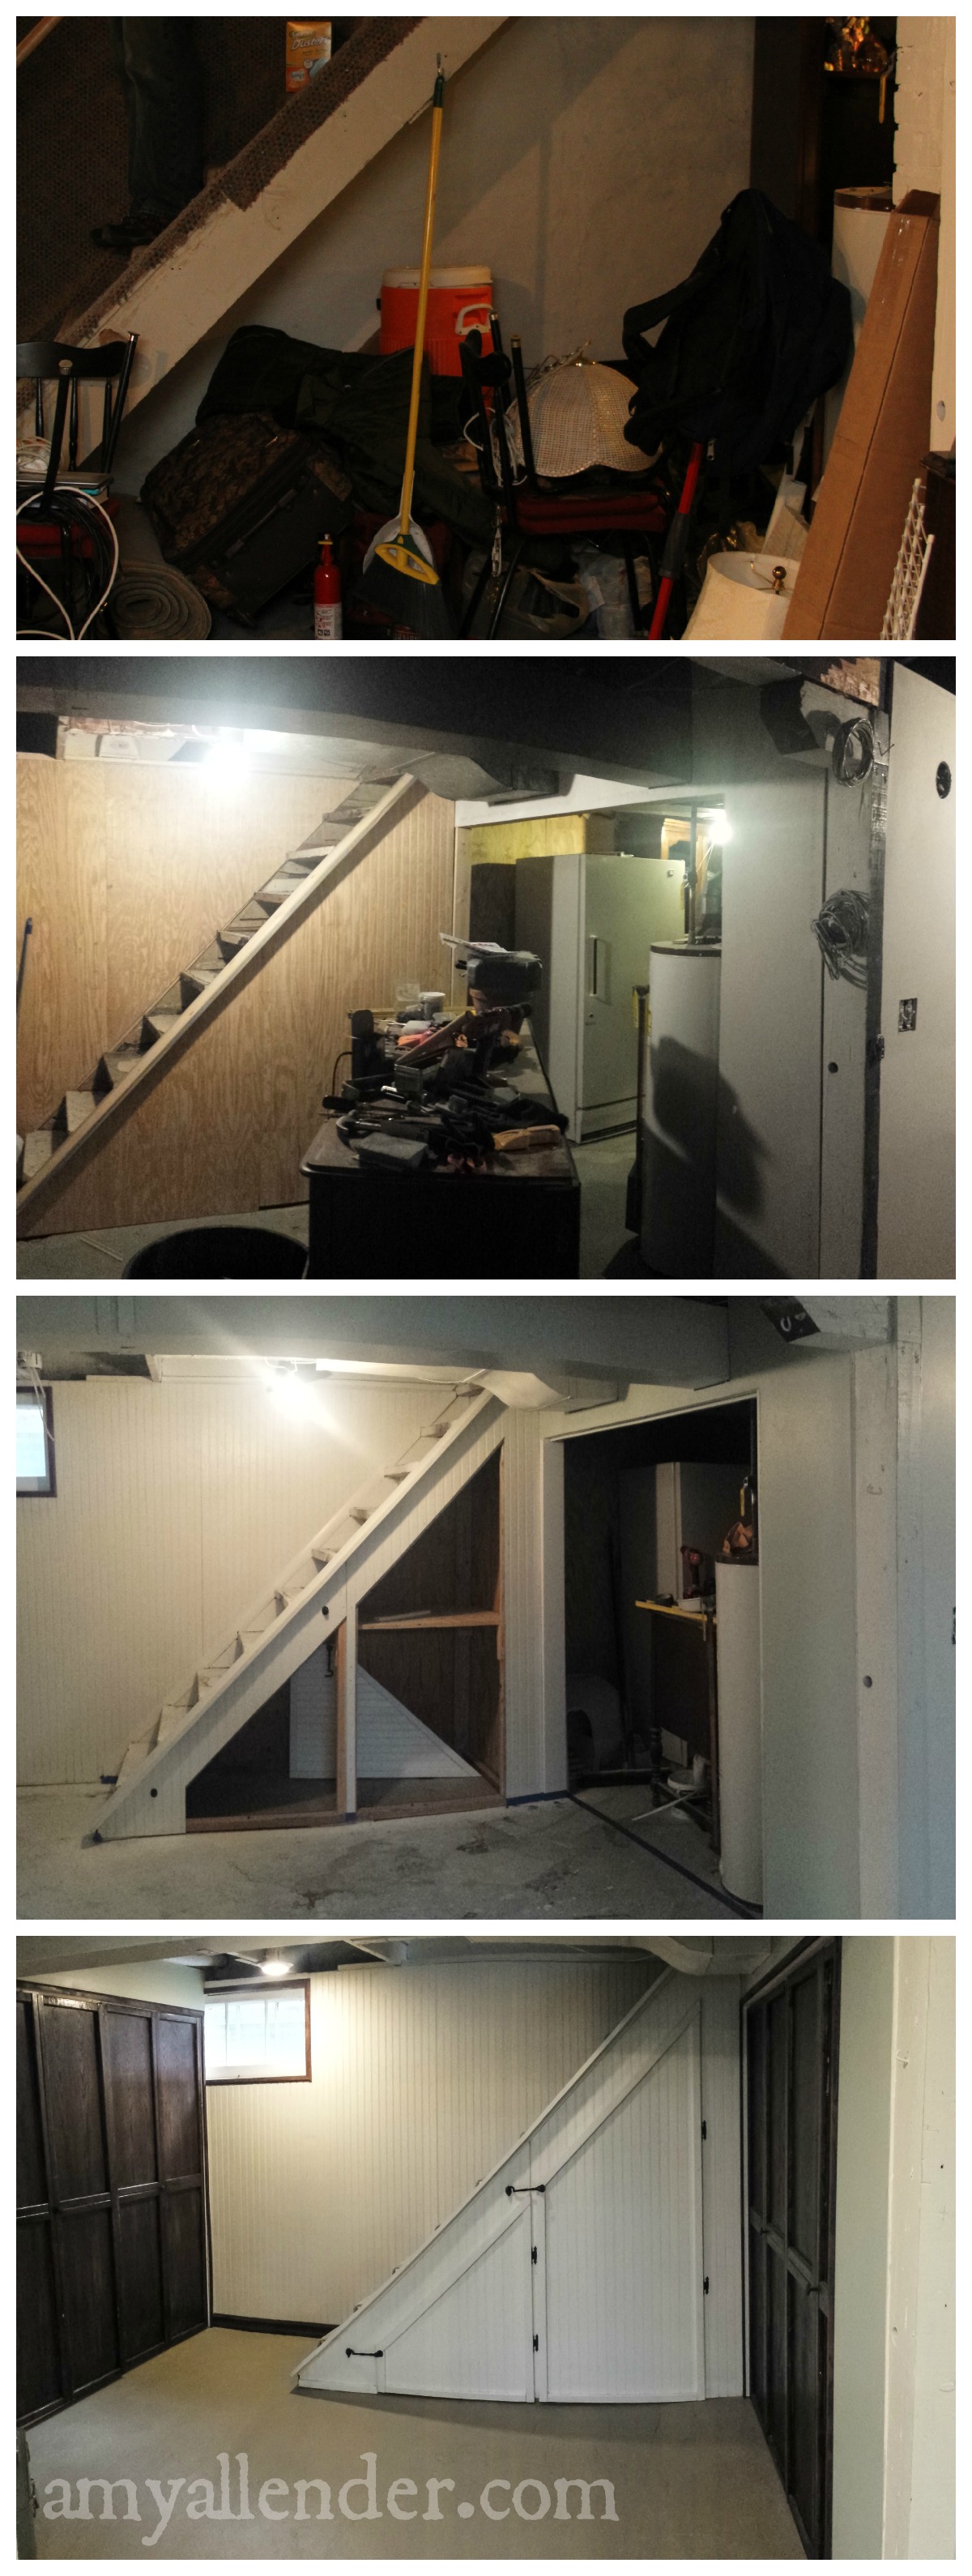 We added some nice storage with shelving under the stairs. The doorway in the right on the photo above leads to a “less finished” storage area. Our freezer, some extra furniture and seasonal decor lives back there now. Derek made some awesome shelving that easily organize those big RubberMaid tubs–and makes it easy for me to get them out without help. You can see the shelves below. I’ll have to show you that area in another post.
We were a little concerned that this new, freshly finished space wouldn’t flow well with the rest of the house…which is on the old, thrifty and eclectic side. But if there’s one thing I’m good at, it’s granny-ing up a space. I didn’t buy a single thing do decorate with. Instead I joyously got items that previously had no place in the house and stuck them downstairs. I steered clear of using any decor that was new, and just shopped the shelves in the other rooms of our home.
I layered the bed with vintage coverlets, pinned up some of my artwork that didn’t sell at a craft fair, and brought out my weird array of books to display. An old lard tin is the bathroom trash bin, a planter holds towels, and an end table that once belonged to Derek’s grandmother keeps the bathroom organized.
I love this space. Dearly. Thanks to all of you who came over and helped frame walls, hammer nails, or install ceiling tile. And thanks to all of you who have been asking to see the end result. It’s a pleasure to share the end result with you.
Happy Friday!

