When we moved up to Practically Canada we had a few home options in mind. Derek moved up before me, so he visited properties and acted as our eyes and ears and gut instinct. I did the searched online and sent him addresses to check, names to call, places to scout. We knew we wanted another fixer-upper, and we found this place. So we bought it and moved in.
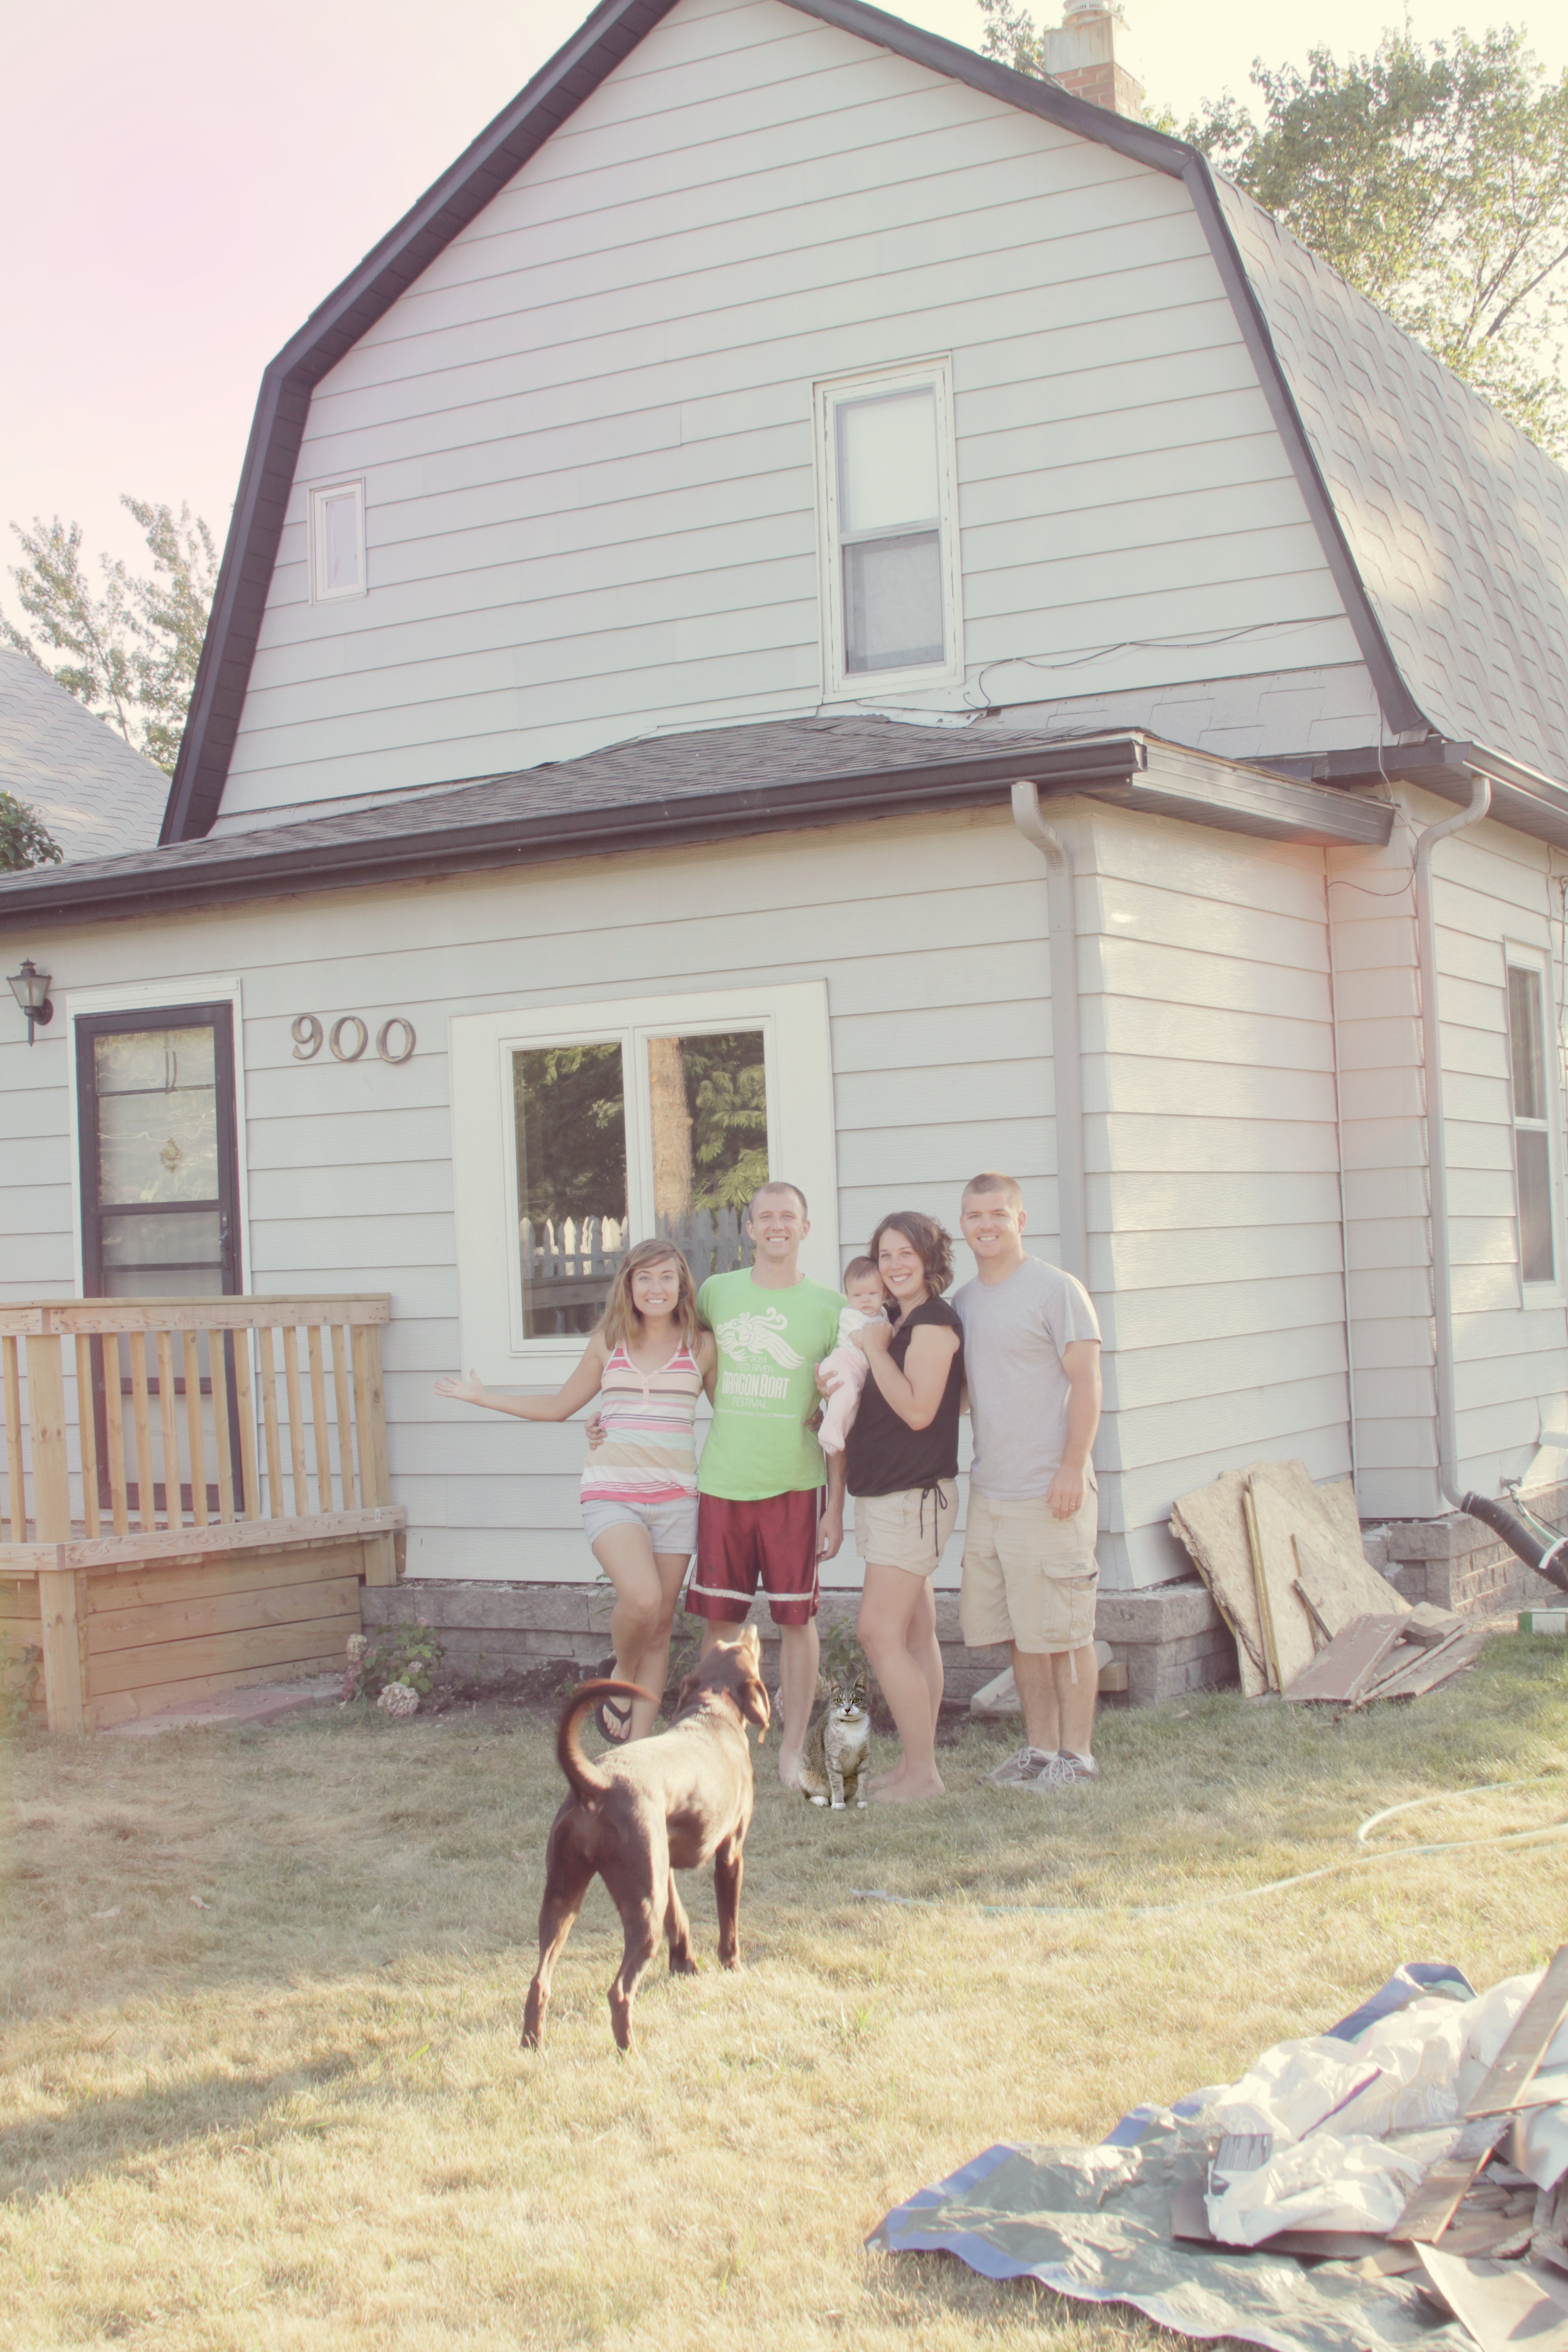
It had a lot of good features, no wall paper to remove, it was out of the flood plane and was settled in a nice, safe neighborhood. Sure, it only had one bathroom, offered only 1150 square feet of finished living space and needed a lot of updating…but all that aside, it had an ace in the pocket that we couldn’t ignore: a full, unfinished basement. {Click here for all of our house’s before photos.}

So we started small with painting. Then we moved on to other things that made the main floor look presentable. Last summer, I renovated the second floor and did a lot of work in the yard. Which means we are finally ready {and have money saved} to start on the basement. The big goal here is to add a couple hundred more feet of living space, which will include a second bathroom…yay!
While the beginning stages of this giant undertaking are not my idea of fun, I know it has to be done to get down to the parts that I actually enjoy. First thing that needed to happen: clear out everything.
Gross. I mean, there’s a reason I left all that stuff stored in the basement. It’s like, I like that stuff, and I don’t want to get rid of it, but I don’t want in the part of my house that people see all the time, and I like, need some it of, but I don’t want to take the time to go through all of it, and I just hate looking though boxes, and couldn’t we be watching an episode of Dateline right now? You know what I mean?
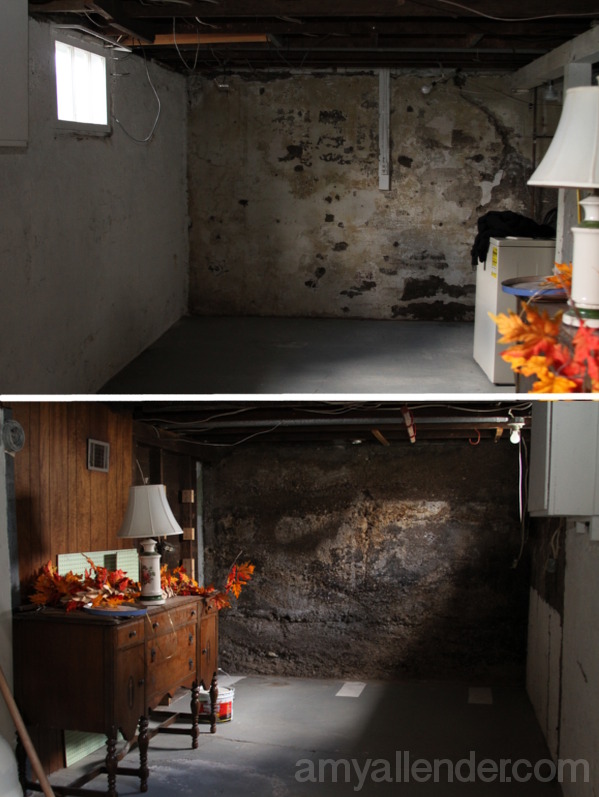
But it had to happen. So slowly we’ve gone through everything in the basement. And like any good “start of a project” post, I’ve got oodles of before photos to record this occasion. Before you start judging the hot mess that you see before your very eyes, let me explain. I took these when we had started sorting through and clearing things out. All good organizers know that the mess will usually look worse before it looks better. So, yeah.
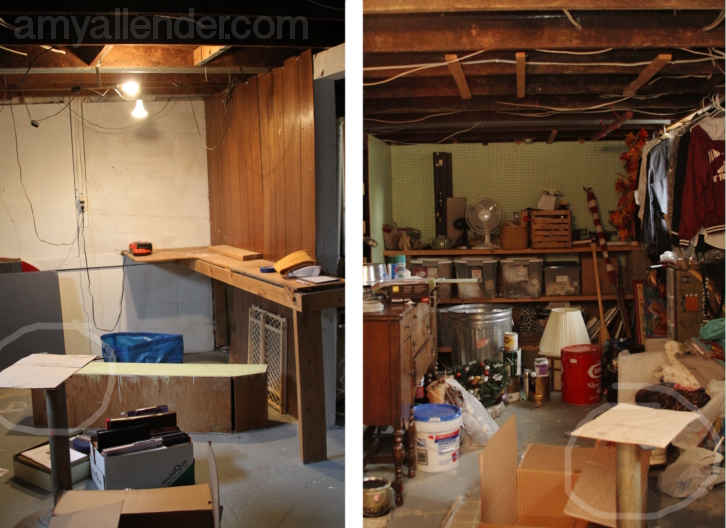
To give you an idea of size…I circled an object that appears in both photos above. It’s the same half of the basement, just from two different sides.
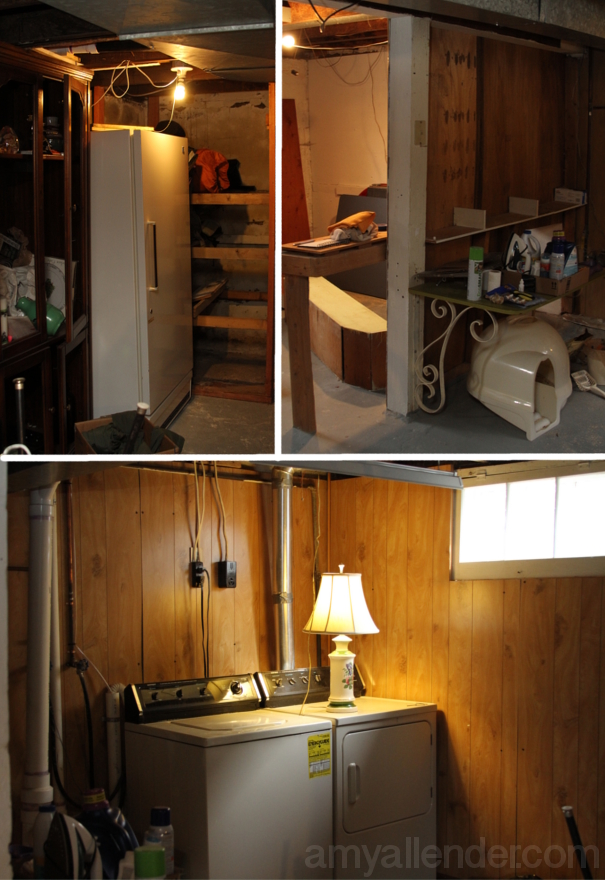
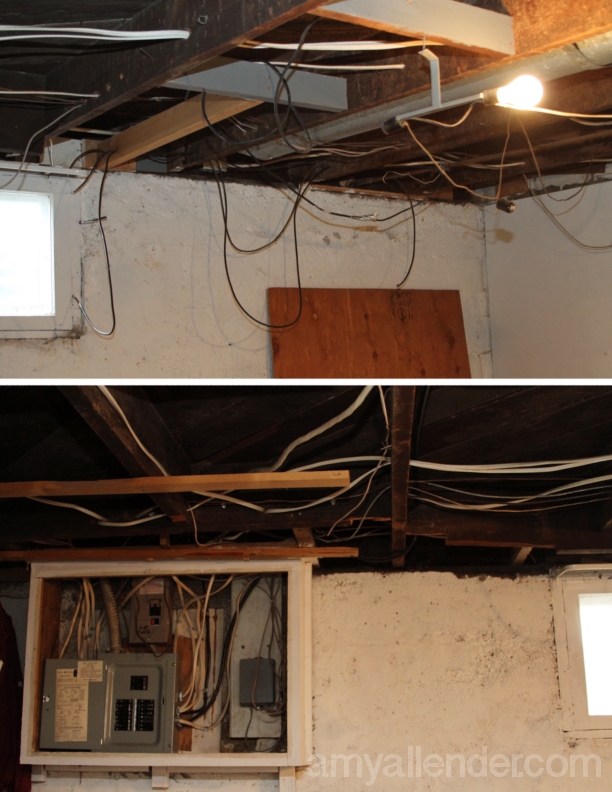
The basement is pretty small. But there are a lot of weird things down there. Let’s see…we’ve got faux wood paneling on the walls, some other wood nailed right into the cement on other walls, a make shift closet that Panda chose to use as a litter box for a while last summer {that was a nasty surprise to find}, a couple weird work benches that have been attached with a combination of nails/screws/bolts {yes, bolts}, not to mention the most precarious electrical work I’ve ever seen. All that stuff had to come out too.
We started sorting through our things about a month ago. At that point I hadn’t gotten any results back about my back from an MRI or anything like that. I held to the philosophy that if I hadn’t been shown proof that there was something really wrong, I could work through the pain, no big deal. Well…turns out the MRI did show some nasty news and I’ve since been ordered to refrain from all lifting, twisting, and lots of stair climbing. So while Derek has been doing the fun part of the job, ie: tearing out walls, ripping down paneling, and being awesome–I’ve been upstairs finding new NPR apps to download and working on some computery projects. {Being useless is so lame.}
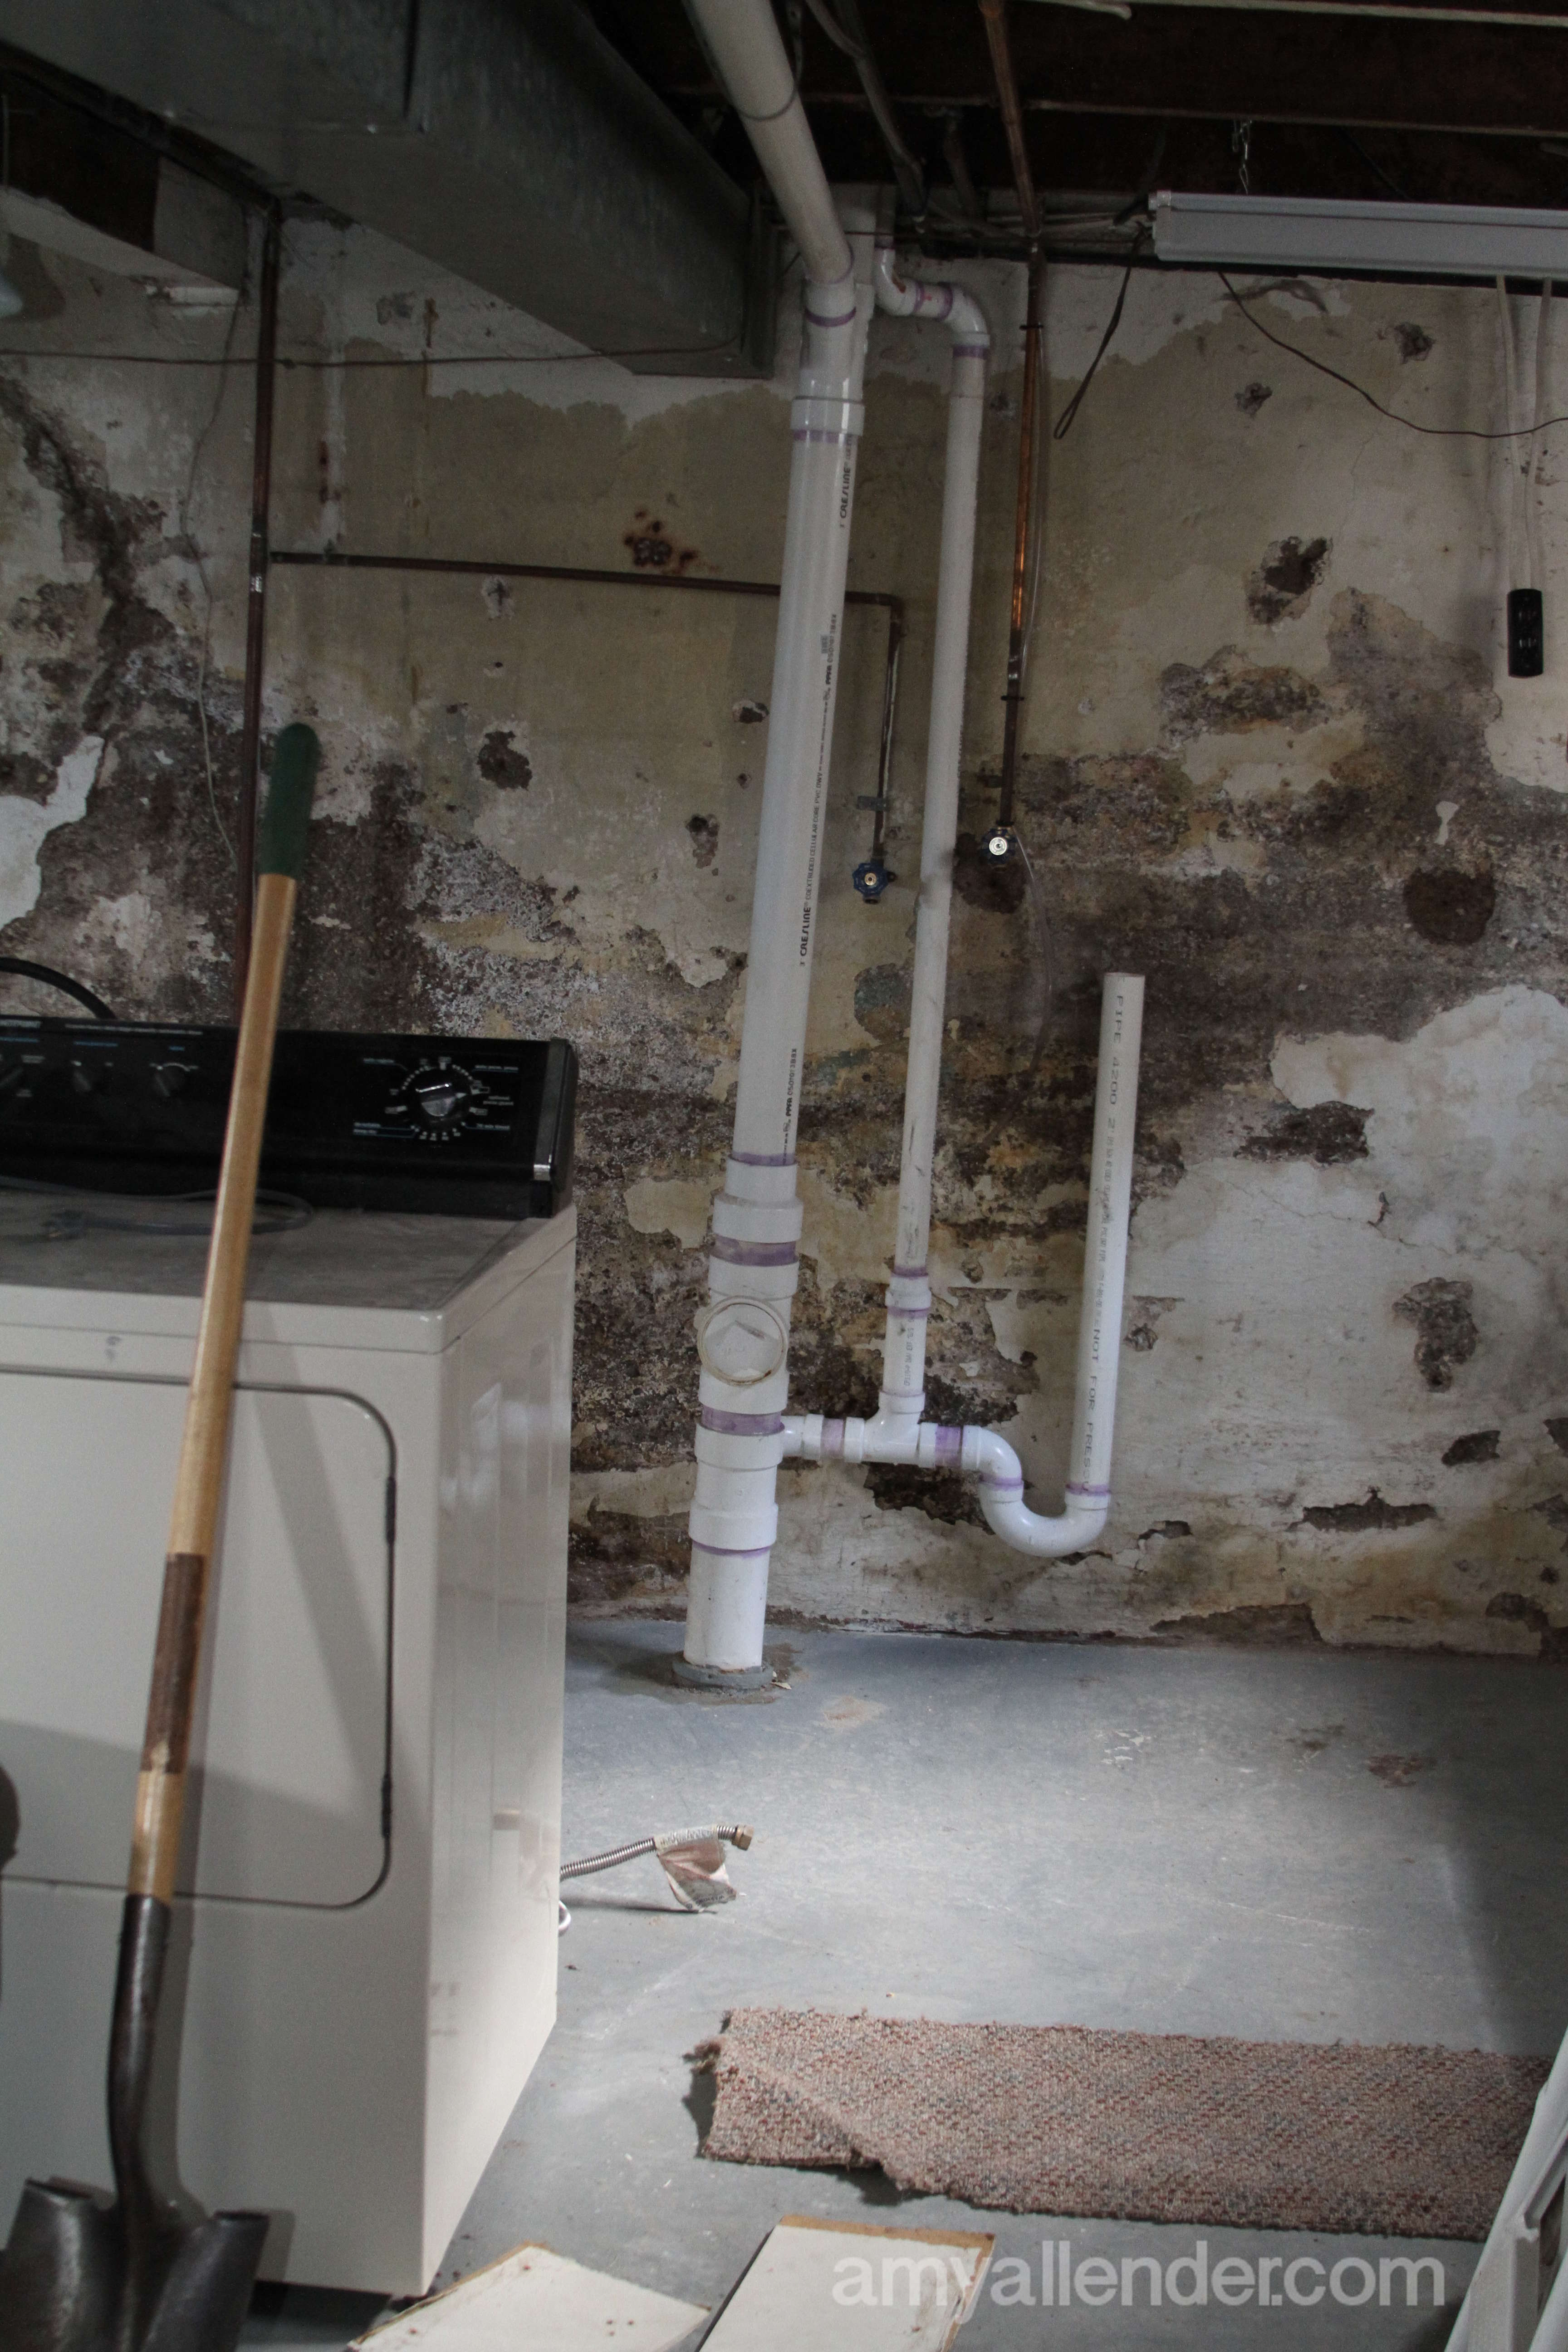
We’ve contracted a company to do waterproof the space. That’s something we don’t know how to do ourselves, and it seems like a better investment to let someone else do it, who will guarantee their work. In order for them to come get the job done everything has to be off of the walls. As you can see, what we found behind the weird paneling was not the prettiest thing in the world. Damp, cruddy, yuck walls.
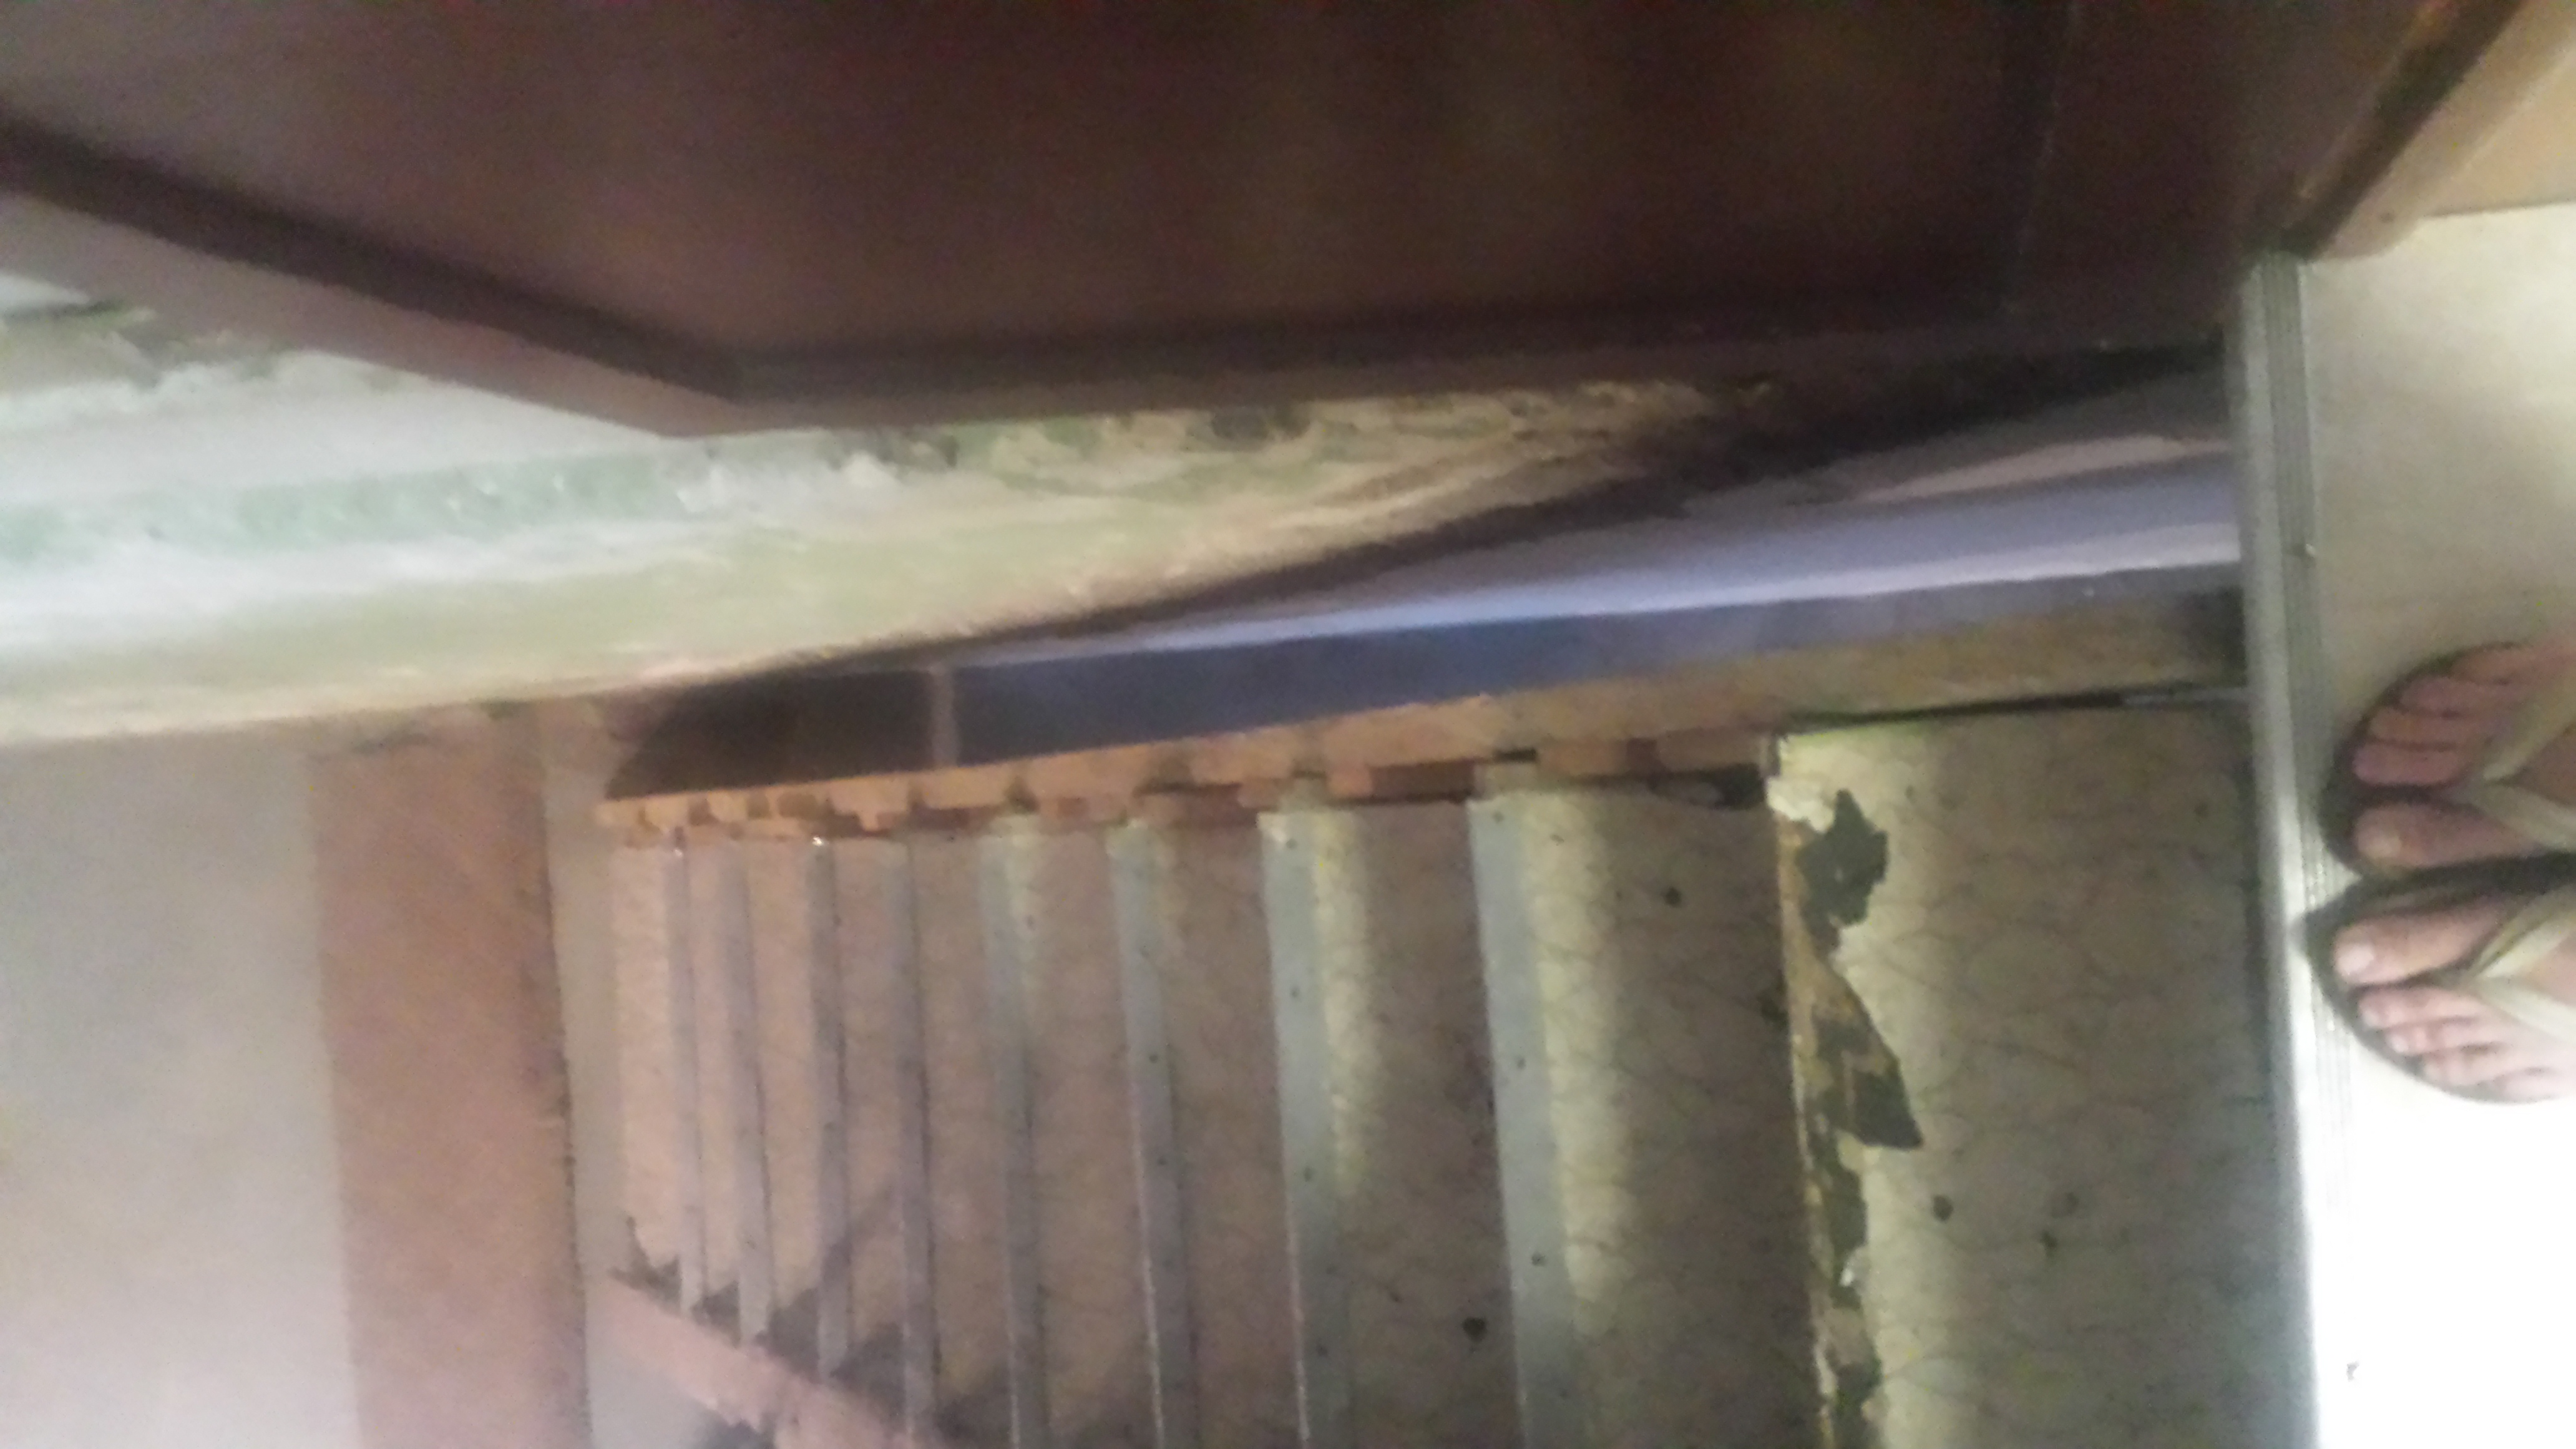
Even the stairs had to be taken away from the wall. That proved to be the hardest part of the prep stage. Our stairs run right down the side of the foundation, but the pros told us they’d have to be moved. So Derek set to it. Naturally, he found a few ancient layers of linoleum under the carpet. But he also found the most jimmie-rigged staircase I’ve ever known to exist. Tiny pieces of wood all nailed together, stacked on top of each other, all to fill in a small gap. Tiny nails barely holding anything in place. Long screws holding a scrap of carpet in place.
All these pieces of wood were stacked on top of each other in this little gap.
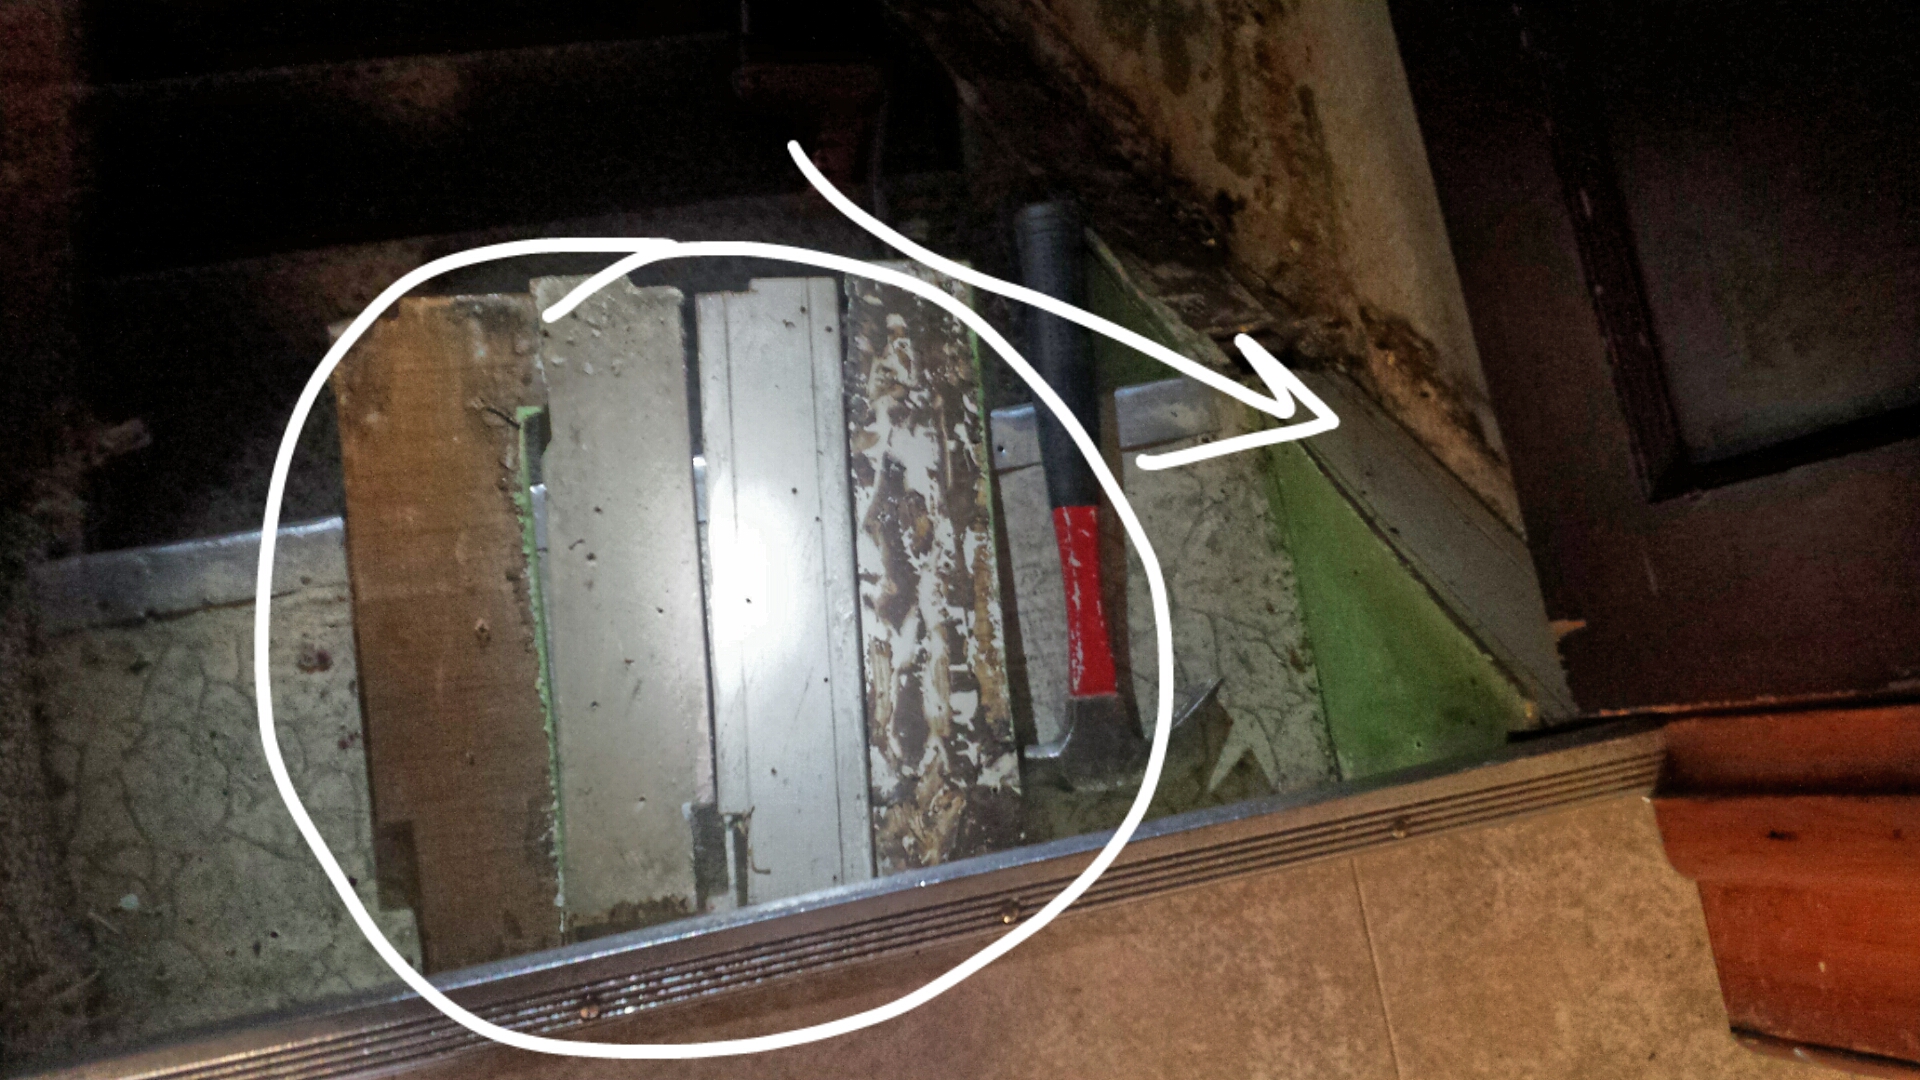
Really, it boiled down to two 3″ nails toe-nailed into the rafter at the top of the stair case.
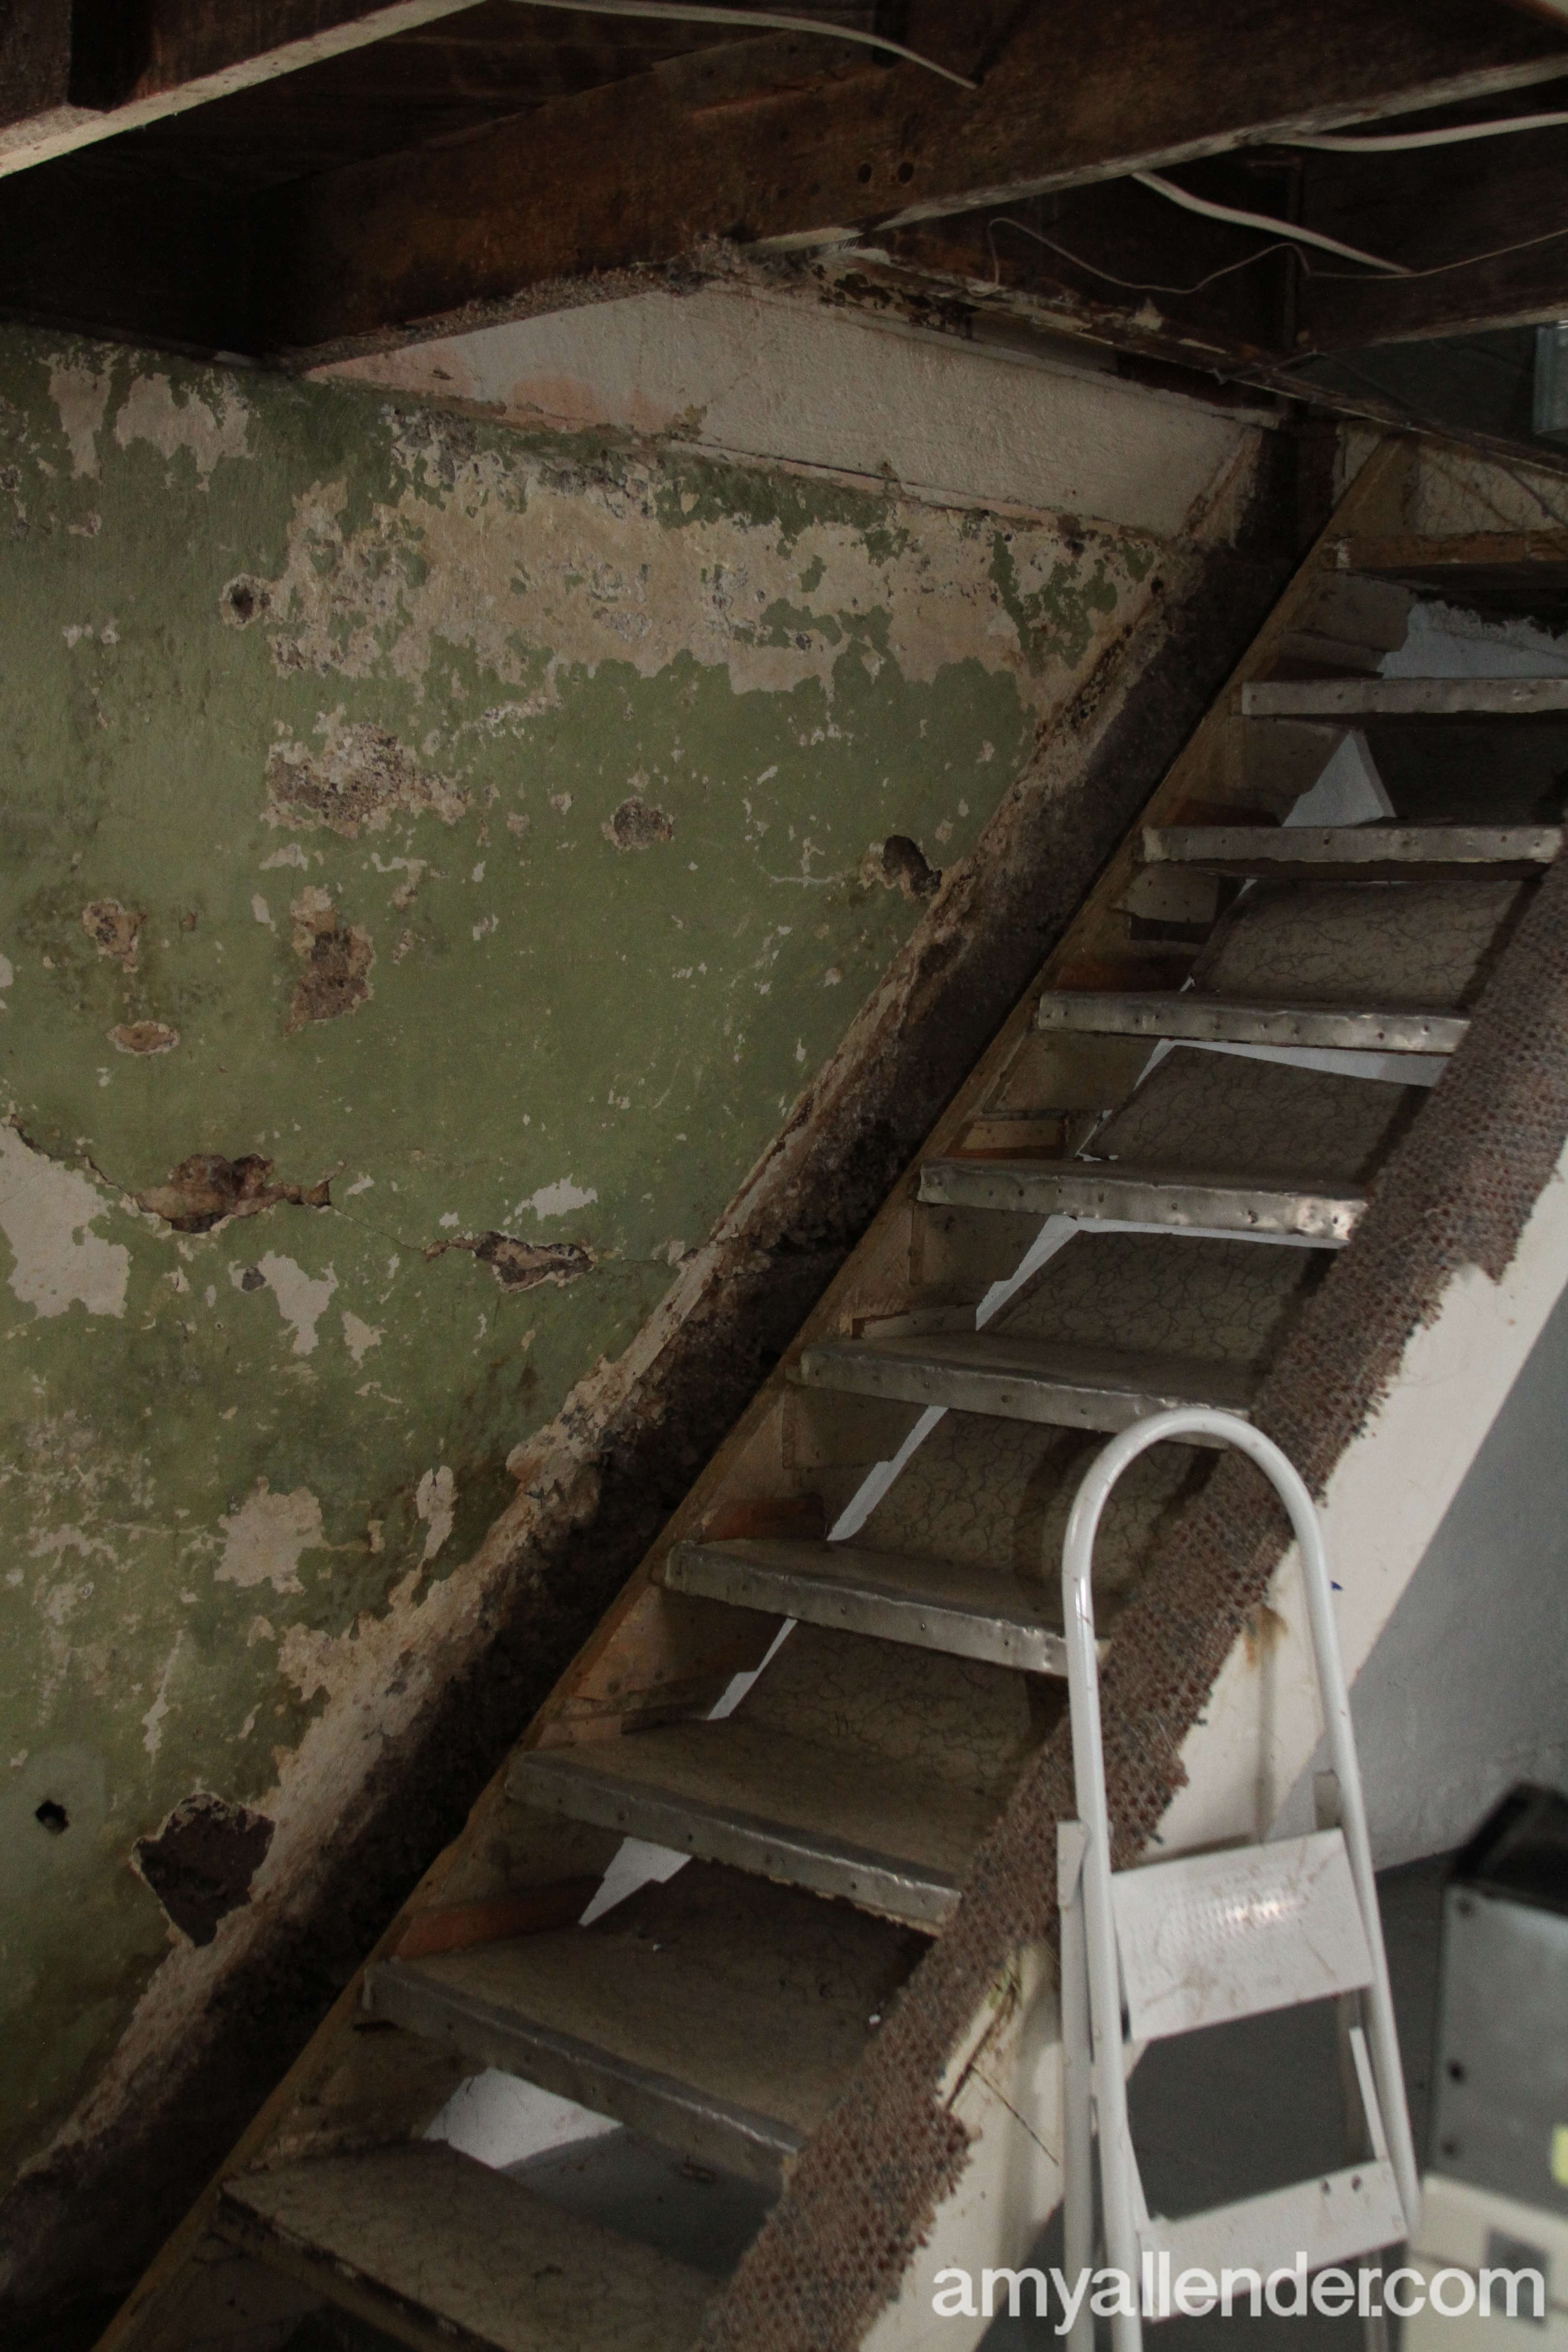
Like I have told you before, Derek is awesome. So of course he got the stairs moved.
But it came at a price.
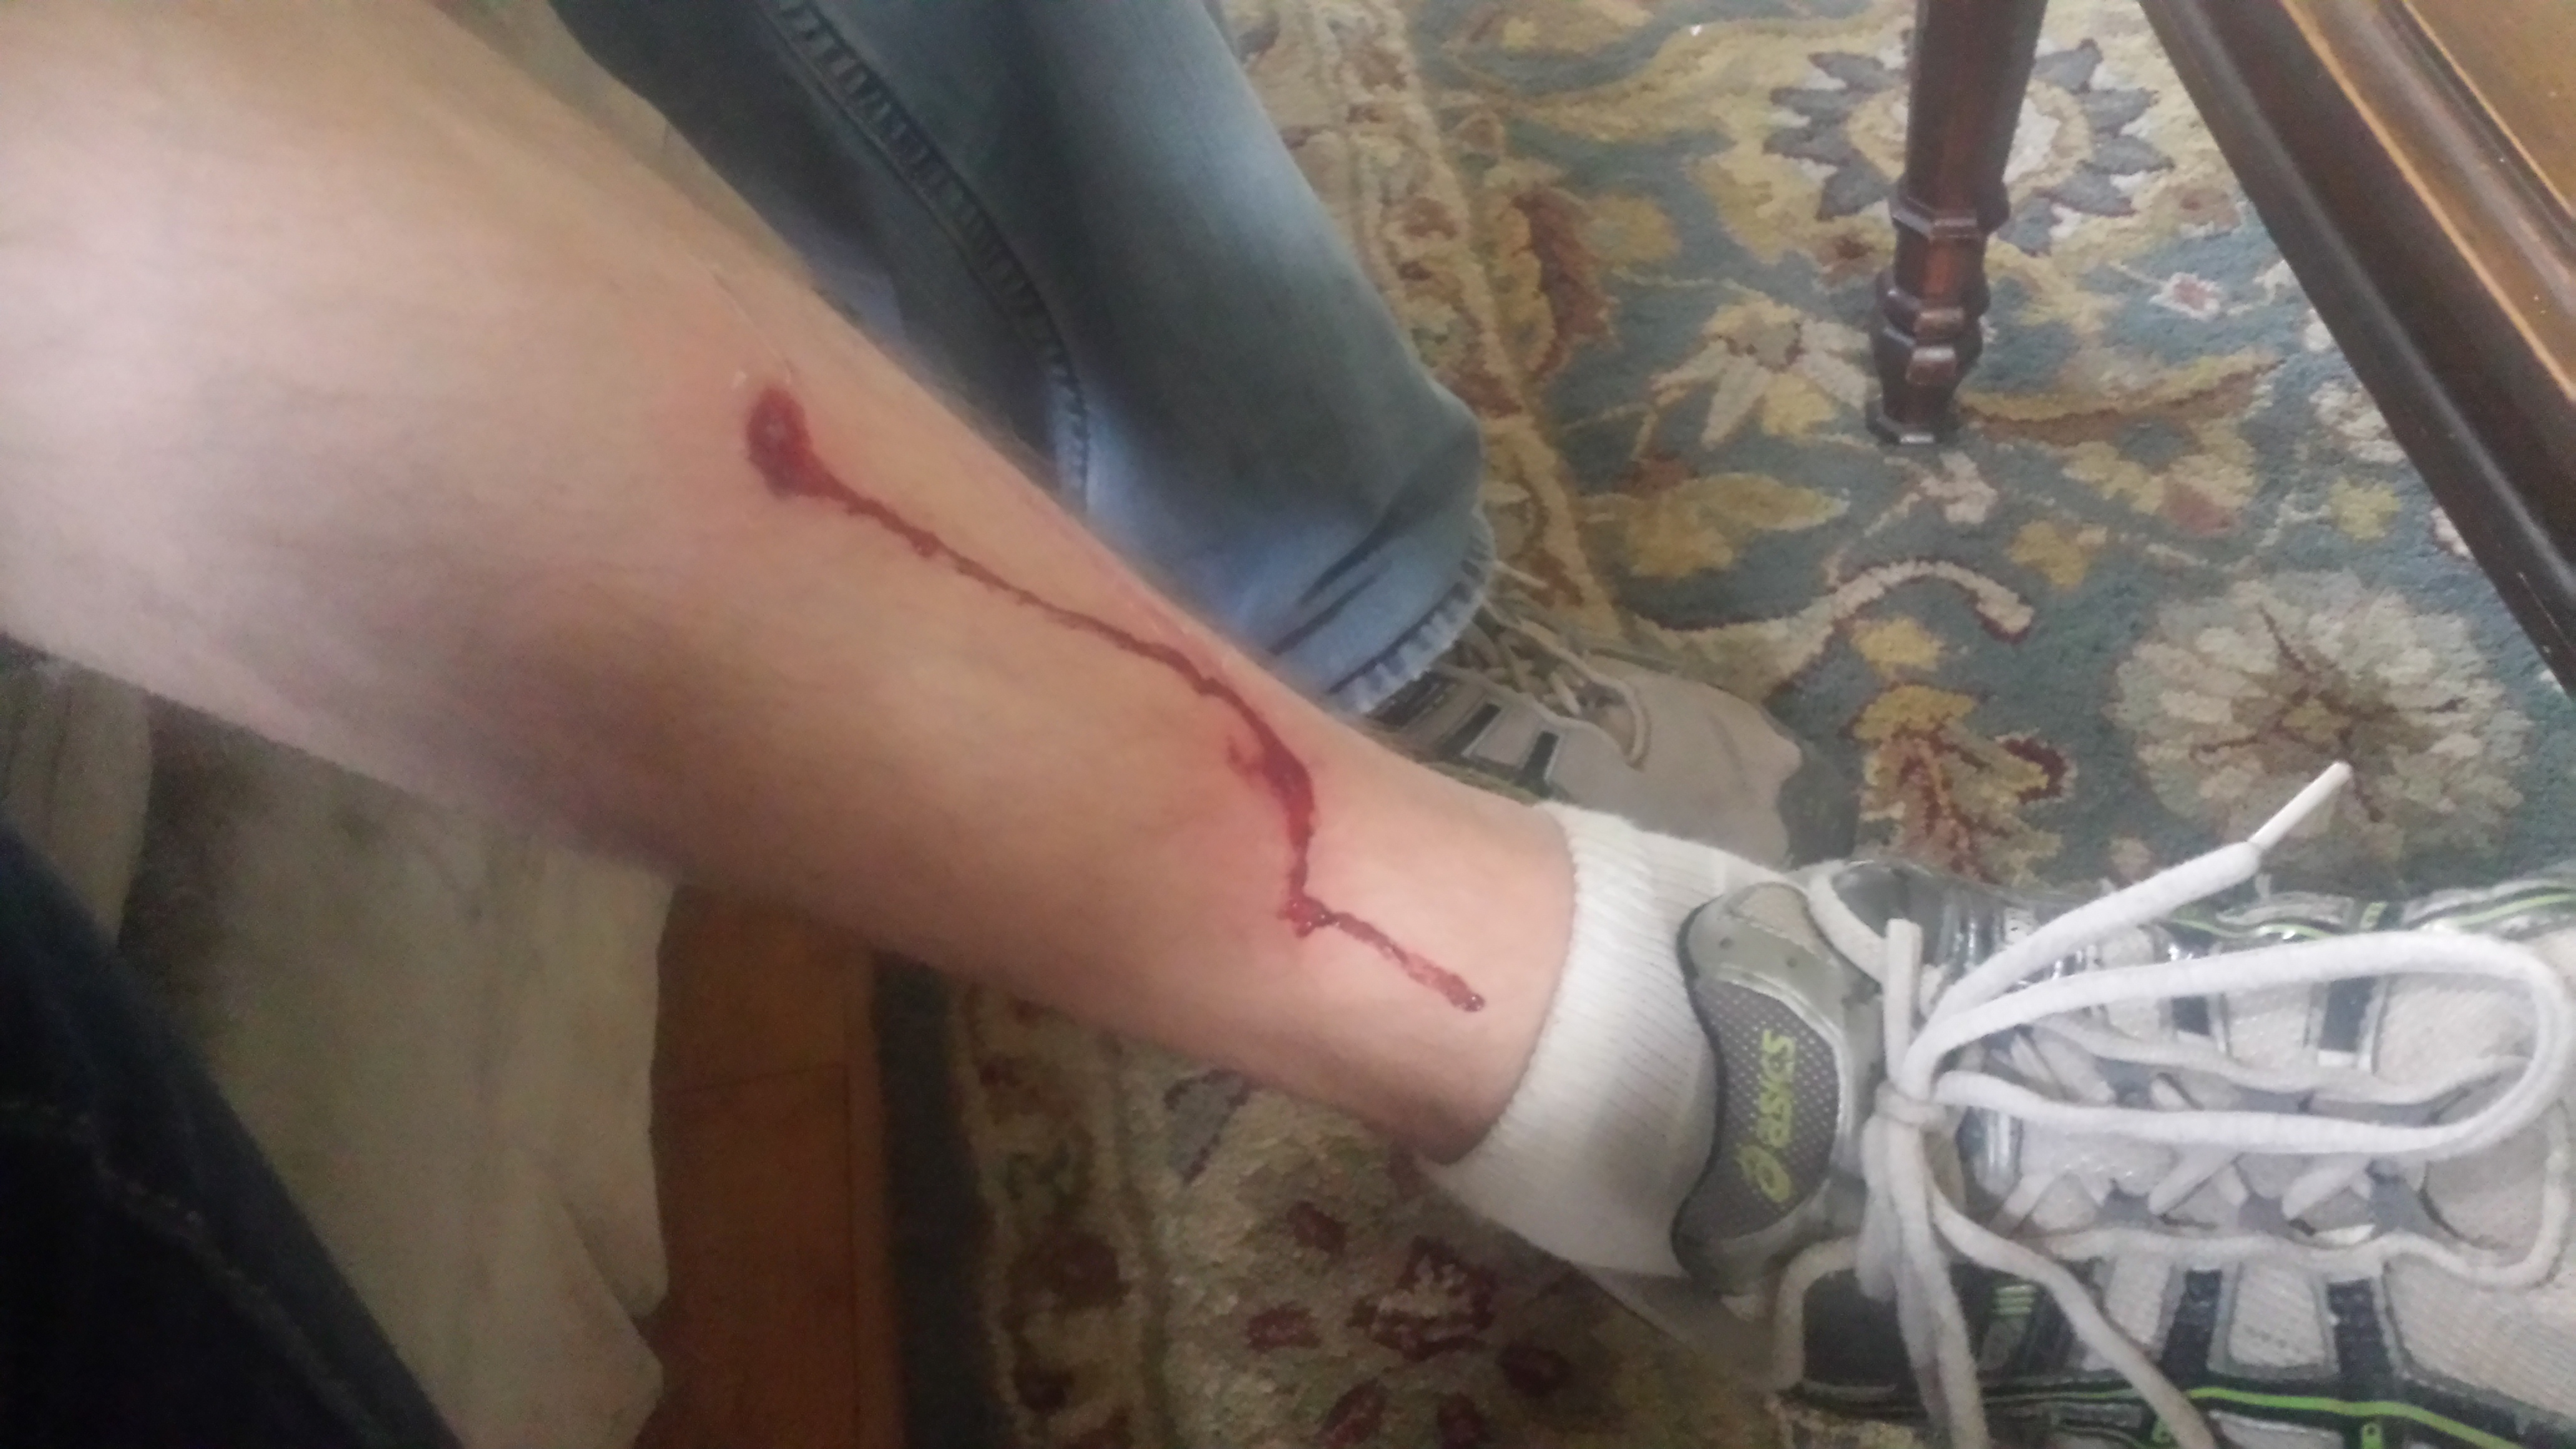
The first casualty. Every good project comes with one. Like this.
I heard a crash and came running to the basement doorway, only to skid to a halt, just shy of stepping off of the kitchen floor and down onto the basement foundation. The stairs weren’t there. They had fallen down…apparently with Derek on top. Yikes. He walked it off. No stitches, really he’s okay. The stairs have since been secured more safely–out just a few inches from the wall. I’m sure this is just the first of many odd stories to come from this very large endeavor…
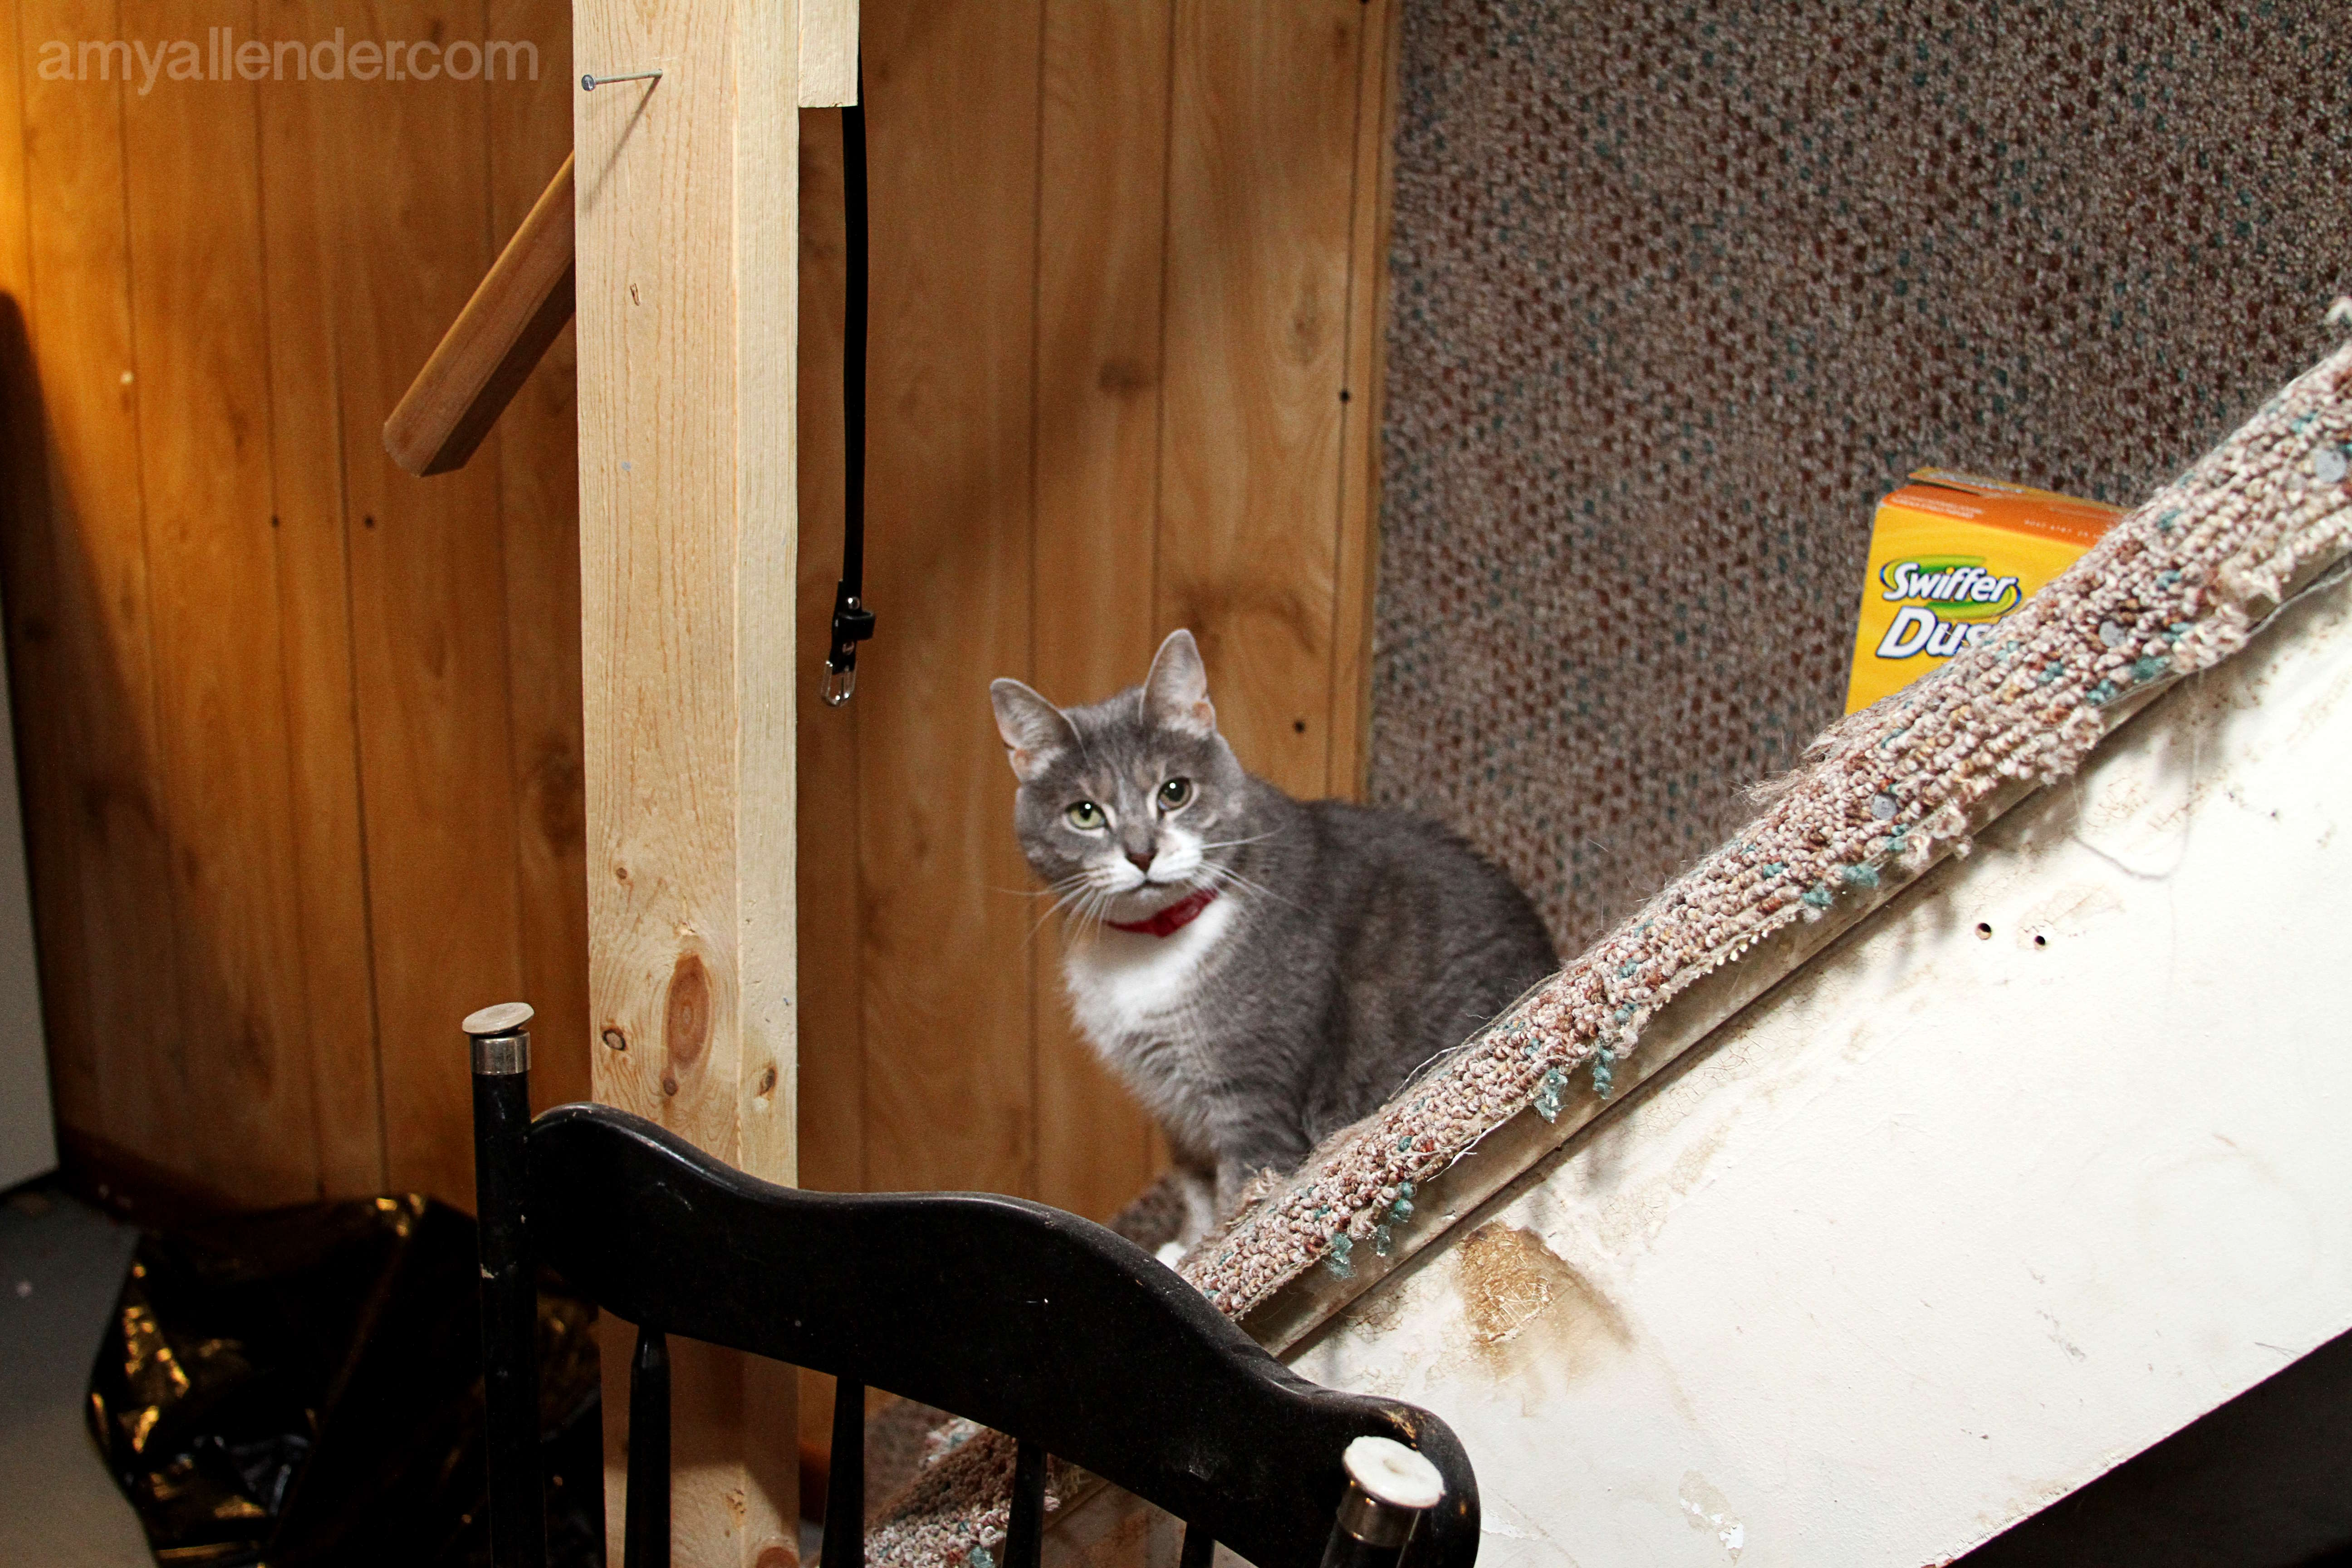
Wish us luck. Especially Panda. All this construction noise is very scarey for her.
xo
Amy


